yolov5创建数据集并训练目标检测模型
数据集收集
使用labelimg进行数据标注
下面展示一些 内联代码片。
pip install labelimg
labelimg
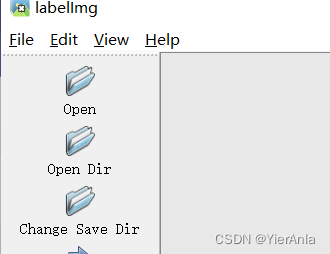
第一步点击 点击打开文件,选择要标注的图像目录,之后点击改变保存目录,选择标注的标签保存位置
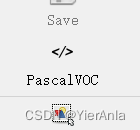
之后选择标签的格式,取决于训练时模型读取数据的方式
建议在 View 里 打开自动保存
| 快捷键 | |
|---|---|
| A | 上一张图片 |
| D | 下一张图片 |
| W | 快速框选 |
数据集格式
以yolov5为例
-
datasets
-
-
train
- images
- labels
-
-
test
- images
- labels
-
-
valid
- images
- labels
建议数据集划分为 train: test: valid = 7: 2: 1
训练模型
下载并配置yolov5环境
需要在pytorch gpu版本下进行
git clone https://github.com/ultralytics/yolov5
cd yolov5
pip install -r requirements.txt  # 下载所需包
放置数据集
将数据集放在 yolo5 目录下即可,之后配饰 .yaml 文件
train: ../train/images
val: ../valid/images
test: ../test/images

nc: 你的数据种类数
names: ['类别1的名称', '类别2的名称', '类别3的名称']
命名为 data.yaml, 放在 yolo5\数据集目录 下
训练模型
打开train.py, 设置以下四个参数
def parse_opt(known=False):
    parser = argparse.ArgumentParser()
    parser.add_argument('--weights', type=str, default=ROOT / 'yolov5s.pt', help='initial weights path')
    parser.add_argument('--data', type=str, default=ROOT / 'datasets/data.yaml', help='dataset.yaml path')
    parser.add_argument('--batch-size', type=int, default=32, help='total batch size for all GPUs, -1 for autobatch')
    parser.add_argument('--epochs', type=int, default=20, help='total training epochs')
–data 为数据集路径, 使用data.yaml 文件
–batch-size 为每个训练批次的图片数, 提高该数值会增加训练速度,同时也会带来更高的内存占用
–epochs 训练次数
模型默认使用yolov5s.pt, 各个预训练模型参数如下
| Model | size (pixels) |
mAPval 0.5:0.95 |
mAPval 0.5 |
Speed CPU b1 (ms) |
Speed V100 b1 (ms) |
Speed V100 b32 (ms) |
params (M) |
FLOPs @640 (B) |
|---|---|---|---|---|---|---|---|---|
| YOLOv5n | 640 | 28.0 | 45.7 | 45 | 6.3 | 0.6 | 1.9 | 4.5 |
| YOLOv5s | 640 | 37.4 | 56.8 | 98 | 6.4 | 0.9 | 7.2 | 16.5 |
| YOLOv5m | 640 | 45.4 | 64.1 | 224 | 8.2 | 1.7 | 21.2 | 49.0 |
| YOLOv5l | 640 | 49.0 | 67.3 | 430 | 10.1 | 2.7 | 46.5 | 109.1 |
| YOLOv5x | 640 | 50.7 | 68.9 | 766 | 12.1 | 4.8 | 86.7 | 205.7 |
| YOLOv5n6 | 1280 | 36.0 | 54.4 | 153 | 8.1 | 2.1 | 3.2 | 4.6 |
| YOLOv5s6 | 1280 | 44.8 | 63.7 | 385 | 8.2 | 3.6 | 12.6 | 16.8 |
| YOLOv5m6 | 1280 | 51.3 | 69.3 | 887 | 11.1 | 6.8 | 35.7 | 50.0 |
| YOLOv5l6 | 1280 | 53.7 | 71.3 | 1784 | 15.8 | 10.5 | 76.8 | 111.4 |
| YOLOv5x6 + [TTA][TTA] |
1280 1536 |
55.0 55.8 |
72.7 72.7 |
3136 - |
26.2 - |
19.4 - |
140.7 - |
209.8 - |
之后运行 train.py 训练模型
使用模型
pytorch.hub
import torch

# Model
model = torch.hub.load('ultralytics/yolov5', 'yolov5s')

# Images
img = 'https://ultralytics.com/images/zidane.jpg'numpy, list

# Inference
results = model(img)

# Results
results.print()
非hub模型的使用, 单张图片检测
from models.common import DetectMultiBackend
from utils.dataloaders import LoadImages
from utils.general import Profile, check_img_size, non_max_suppression, scale_boxes
from utils.torch_utils import select_device
from utils.plots import Annotator, colors
import cv2

import torch


def dtect_img(model, img_path, save_path, size=640):

    imgsz = (640, 640)
    bs = 1  # batch_size
    conf_thres = 0.25
    iou_thres = 0.45
    max_det = 1000
    classes = None
    agnostic_nms = True

    stride, names, pt = model.stride, model.names, model.pt
    imgsz = check_img_size(imgsz, s=stride)  # check image size


    dataset = LoadImages(img_path, img_size=imgsz, stride=stride, auto=pt)

    model.warmup(imgsz=(1 if pt or model.triton else bs, 3, *imgsz))  # warmup
    seen, windows, dt = 0, [], (Profile(), Profile(), Profile())

    # 数据读取
    for path, im, im0s, vid_cap, s in dataset:
        with dt[0]:
            im = torch.from_numpy(im).to(model.device)
            im = im.half() if model.fp16 else im.float()  # uint8 to fp16/32
            im /= 255  # 0 - 255 to 0.0 - 1.0
            if len(im.shape) == 3:
                im = im[None]  # expand for batch dim

        # Inference
        with dt[1]:
            pred = model(im)
        # NMS
        with dt[2]:
            pred = non_max_suppression(pred, conf_thres, iou_thres, classes, agnostic_nms, max_det=max_det)

        det = pred[0]
        annotator = Annotator(im0s, line_width=3, example=str(names))
        if len(det):
            # 图像标注区域等比缩放
            det[:, :4] = scale_boxes(im.shape[2:], det[:, :4], im0s.shape).round()

            for c in det[:, 5].unique():
                n = (det[:, 5] == c).sum()  # detections per class
                s += f"{

      n} {

      names[int(c)]}{

      's' * (n > 1)}, "  # add to string

            # 打印检测结果
            *xyxy, conf, cls = det.tolist()[0]
            name = names[int(c)]
            conf = f'{

      float(conf):.2f}'
            print(xyxy, "可信度:", conf, name)

            # 图像标注
            label = name + " " + conf
            annotator.box_label(xyxy, label, color=colors(c, True))

            # 保存图片
            img = annotator.result()

    return img

if __name__ == '__main__':
     model_path = '' # 模型路径
     img_path = '' # 检测图片路径
     save_path = '' # 保存路径

     device = ''
     device = select_device(device)

     model_detect = DetectMultiBackend(model_path, device=device)
     img = dtect_img(model_detect, model_path, save_path=)