1、需求:不使用自带的头部导航,自定义,多个页面使用
2、首先写头部组件
新建
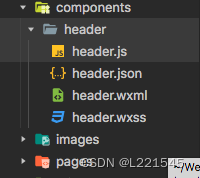
header.wxml
<view class="common_header "><slot name="content"></slot>
 <image src="../../images/turn.png" class="turn" bindtap="back" />
    </view>
    <view>{

    {

    title}} 这是test</view>   //title为传入页面的变量
header.js
 Component({


  /**
   * 组件的属性列表
   */
  options: {


    multipleSlots: true
  },
  properties: {


    title: {


      type: String,
      value: '' // 属性初始值
    }

  },

  /**
   * 组件的初始数据
   */
  data: {


  },

  /**
   * 组件的方法列表
   */
  methods: {


    back(){


      wx.navigateBack({


          delta: 1
        });
  },
  }
})
header.wxss
.common_header{


  width: 100%;
  height: 88rpx;
  padding-top: 88rpx;
  font-size: 34rpx;
  color: #1A1A1A;
  background: white;
  text-align: center;
  line-height: 88rpx;
  font-weight: bold;
  position: relative;
  border: 1rpx solid #F4F6F8;
}
.turn {


  position: absolute;
  top: 115rpx;
  left: 40rpx;
  width: 32rpx;
  height: 32rpx;
}
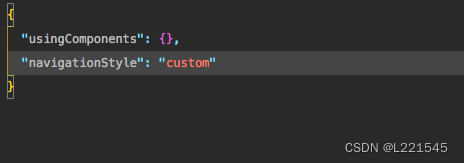
3、app.json注册该组件
 "usingComponents": {


    "my-test":"/components/header/header"
  },
4、引入该导航的页面
<my-test title="{

    {title}}"> <view slot="content" >标题</view></my-test>
json文件
js文件设置变量值
 data: {


    title:"1"
  },
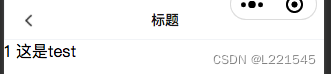
5、效果图