时代在进步,yolo在进步,我还在踏步,v8我浅搞了一下detect和pose,记录一下,我还是要吐槽一下,为啥子这个模型就放在了这个文件深处,如图。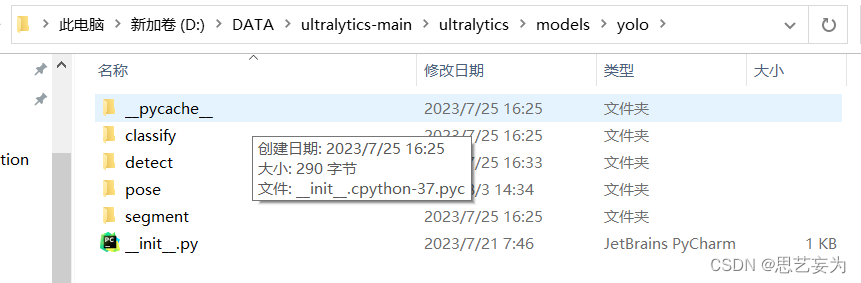
以下教程只应用于直接应用yolov8,不修改。我之前搞v7的环境,直接
pip install ultralytics
1. detect
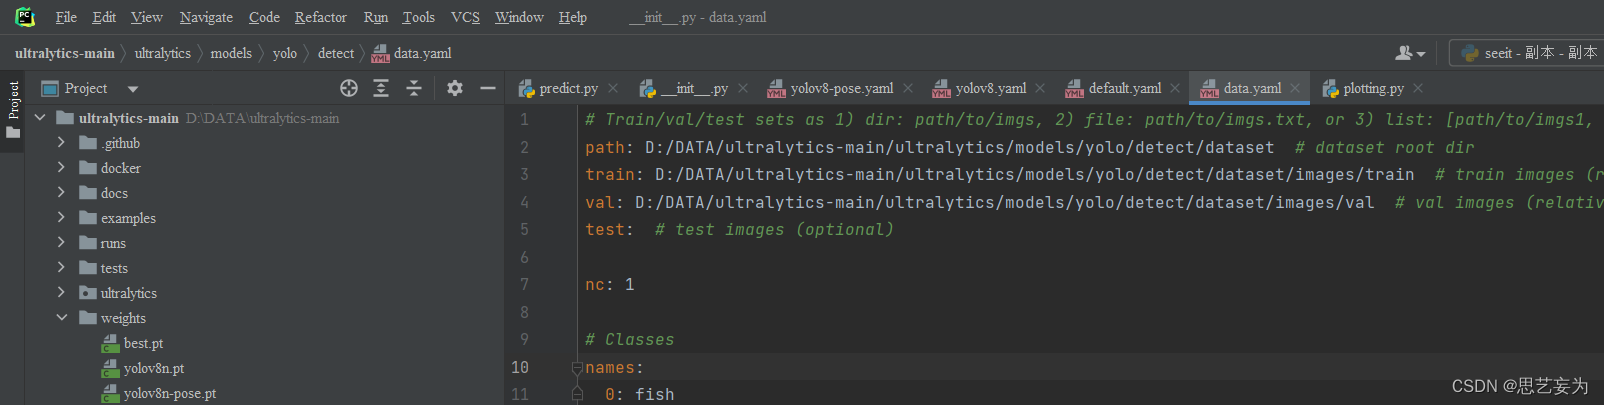
在detect文件夹下新建一个dataset放图片(jpg)和yolo格式的标签(txt)训练集和测试集直接分好,再新建一个data.yaml,如图,放你自己的路径,类别。
放一个检测框的json转yolo的代码,改类别和文件夹路径
import os
import json
import numpy as np
# 类和索引
CLASSES=["fish"]
def convert(size,box):
    '''''
    input:
    size:(width,height);
    box:(x1,x2,y1,y2)
    output:
    (x,y,w,h)
    '''
    dw=1./size[0]
    dh=1./size[1]
    x=(box[0]+box[1])/2.0
    y=(box[2]+box[3])/2.0
    w=box[1]-box[0]
    h=box[3]-box[2]
    x=x*dw
    w=w*dw
    y=y*dh
    h=h*dh
    return (x,y,w,h)
# json -> txt
def json2txt(path_json,path_txt):
    # print(path_json,"r")
    with open(path_json,"r") as path_json:
        jsonx=json.load(path_json)
        width=int(jsonx["imageWidth"])      # 原图的宽
        height=int(jsonx["imageHeight"])    # 原图的高
        with open(path_txt,"w+") as ftxt:
            # 遍历每一个bbox对象
            for shape in jsonx["shapes"]:
                obj_cls=str(shape["label"])     # 获取类别
                cls_id=CLASSES.index(obj_cls)   # 获取类别索引
                points=np.array(shape["points"])    # 获取(x1,y1,x2,y2)
                x1=int(points[0][0])
                y1=int(points[0][1])
                x2=int(points[1][0])
                y2=int(points[1][1])
                # (左上角,右下角) -> (中心点,宽高) 归一化
                bb=convert((width,height),(x1,x2,y1,y2))
                ftxt.write(str(cls_id)+" "+" ".join([str(a) for a in bb])+"\n")
if __name__=="__main__":
    # json文件夹
    dir_json="C:\\Users\\ASUS\\Desktop\\111\\"
    # txt文件夹
    dir_txt="C:\\Users\\ASUS\\Desktop\\222\\"
    if not os.path.exists(dir_txt):
        os.makedirs(dir_txt)
    # 得到所有json文件
    list_json=os.listdir(dir_json)
    # 遍历每一个json文件,转成txt文件
    for cnt,json_name in enumerate(list_json):
        print("cnt=%d,name=%s"%(cnt,json_name))

        path_txt=dir_txt+json_name.replace(".json",".txt")

        path_json = dir_json + json_name

        print("path_json\t",path_json)
        print("path_txt\t",path_txt)
        # (x1,y1,x2,y2)->(x,y,w,h)
        json2txt(path_json,path_txt)
准备好了,直接terminal里输入就行,但是如果想改点啥比如说希望预测的时候不输出的类别,就输出框,他就改不了,因为这个ultra这个包都给整好了,封装的忒严重,想在这个模型上进行改进就得给他卸了,然后再搞。
#训练的代码
yolo task=detect mode=train model=yolov8s.yaml data=D:/DATA/ultralytics-main/ultralytics/models/yolo/detect/data.yaml epochs=200 batch=128

# 预测的代码
yolo task=detect mode=predict model=D:/DATA/ultralytics-main/weights/best.pt source=D:/DATA/ultralytics-main/ultralytics/models/yolo/detect/dataset/images/val  device=cpu
2. pose
pose的数据集跟之前的有一点区别,首先标注关键点时,要先使用矩形框(rectangle)框出目标,然后在这个矩形框里面打关键点,必须保证每一张照片当中点的数量是相同的,就是说1234得对应上,每个点按顺序进行标注,总数需要是一样多的。3可以被遮挡,但是也得标,然后把这个点变成不可见就可以了。最终得到了 .json 文件,然后我们需要将其转化为 .txt 文件,2代表可见,0代表不可见。转的代码在下面,我用是好使的。
然后跟上面差不多的命令就可以了。
# 关键点检测json转txt
import os
import json
import shutil
import time

import numpy as np
from tqdm import tqdm

Dataset_root = 'C:/Users/ASUS/Desktop/strong121/labels/'  # 转化的json文件地址
# 框的类别
bbox_class =["fish"]

# 关键点的类别,有多少类就写多少
keypoint_class = ['1', '2', '3','4', '5', '6', '7', '8', '9', '10', '11', '12',
                  '13', '14', '15', '16', '17', '18', '19', '20', '21', '22', '23',
                  '24', '25', '26', '27', '28', '29', '30', '31', '32', '33', '34',
                  '35', '36', '37', '38', '39', '40', '41', '42', '43', '44']

os.chdir(Dataset_root)


def process_single_json(labelme_path, save_folder='C:/Users/ASUS/Desktop/no/'):
    with open(labelme_path, 'r', encoding='utf-8') as f:
        labelme = json.load(f)

    img_width = labelme['imageWidth']  # 图像宽度
    img_height = labelme['imageHeight']  # 图像高度

    # 生成 YOLO 格式的 txt 文件
    suffix = labelme_path.split('.')[-2]
    yolo_txt_path = suffix + '.txt'

    with open(yolo_txt_path, 'w', encoding='utf-8') as f:

        for each_ann in labelme['shapes']:  # 遍历每个标注

            if each_ann['shape_type'] == 'rectangle':  # 每个框,在 txt 里写一行

                yolo_str = ''

                ## 框的信息
                # 框的类别 ID

                bbox_class_id = bbox_class.index(each_ann['label'])
                # print(bbox_class_id)

                yolo_str += '{} '.format(bbox_class_id)


                # 左上角和右下角的 XY 像素坐标
                bbox_top_left_x = int(min(each_ann['points'][0][0], each_ann['points'][1][0]))
                bbox_bottom_right_x = int(max(each_ann['points'][0][0], each_ann['points'][1][0]))
                bbox_top_left_y = int(min(each_ann['points'][0][1], each_ann['points'][1][1]))
                bbox_bottom_right_y = int(max(each_ann['points'][0][1], each_ann['points'][1][1]))
                # 框中心点的 XY 像素坐标
                bbox_center_x = int((bbox_top_left_x + bbox_bottom_right_x) / 2)
                bbox_center_y = int((bbox_top_left_y + bbox_bottom_right_y) / 2)
                # 框宽度
                bbox_width = bbox_bottom_right_x - bbox_top_left_x
                # 框高度
                bbox_height = bbox_bottom_right_y - bbox_top_left_y
                # 框中心点归一化坐标
                bbox_center_x_norm = bbox_center_x / img_width
                bbox_center_y_norm = bbox_center_y / img_height
                # 框归一化宽度
                bbox_width_norm = bbox_width / img_width
                # 框归一化高度
                bbox_height_norm = bbox_height / img_height

                yolo_str += '{:.5f} {:.5f} {:.5f} {:.5f} '.format(bbox_center_x_norm, bbox_center_y_norm,
                                                                  bbox_width_norm, bbox_height_norm)
                # print(yolo_str)
                # print("**********************")
                # time.sleep(90000)
                ## 找到该框中所有关键点,存在字典 bbox_keypoints_dict 中
                bbox_keypoints_dict = {}
                for each_ann in labelme['shapes']:  # 遍历所有标注
                    if each_ann['shape_type'] == 'point':  # 筛选出关键点标注
                        # 关键点XY坐标、类别
                        x = int(each_ann['points'][0][0])
                        y = int(each_ann['points'][0][1])
                        label = each_ann['label']
                        if (x > bbox_top_left_x) & (x < bbox_bottom_right_x) & (y < bbox_bottom_right_y) & (
                                y > bbox_top_left_y):  # 筛选出在该个体框中的关键点
                            bbox_keypoints_dict[label] = [x, y]

                ## 把关键点按顺序排好
                for each_class in keypoint_class:  # 遍历每一类关键点
                    if each_class in bbox_keypoints_dict:
                        keypoint_x_norm = bbox_keypoints_dict[each_class][0] / img_width
                        keypoint_y_norm = bbox_keypoints_dict[each_class][1] / img_height
                        yolo_str += '{:.5f} {:.5f} {} '.format(keypoint_x_norm, keypoint_y_norm,
                                                               2)  # 2-可见不遮挡 1-遮挡 0-没有点
                    else:  # 不存在的点,一律为0
                        yolo_str += '0 0 0 '
                # 写入 txt 文件中
                f.write(yolo_str + '\n')

    shutil.move(yolo_txt_path, save_folder)
    print('{} --> {} 转换完成'.format(labelme_path, yolo_txt_path))

save_folder = 'C:/Users/ASUS/Desktop/no'   #  转换后的训练集标注文件至目录
for labelme_path in os.listdir(Dataset_root):
    # try:
    process_single_json(Dataset_root + labelme_path, save_folder=save_folder)
    # except:
    #     print('******有误******', labelme_path)
print('YOLO格式的txt标注文件已保存至 ', save_folder)