目录
一:前言
上一篇写了4万字的长文终于讲完了yolov5的训练部分,这一节继续讲解yolov5的预测部分,最后并给上完整网盘代码
二:预测
读取配置参数,
parser = argparse.ArgumentParser()
    parser.add_argument('--weights', nargs='+', type=str, default='yolov5s.pt', help='model.pt path(s)')
    parser.add_argument('--source', type=str, default='inference/images', help='source')  # file/folder, 0 for webcam
    parser.add_argument('--output', type=str, default='inference/outputs', help='output folder')  # output folder
    parser.add_argument('--img-size', type=int, default=640, help='inference size (pixels)')
    parser.add_argument('--conf-thres', type=float, default=0.4, help='object confidence threshold')
    parser.add_argument('--iou-thres', type=float, default=0.5, help='IOU threshold for NMS')
    parser.add_argument('--device', default='', help='cuda device, i.e. 0 or 0,1,2,3 or cpu')
    parser.add_argument('--view-img', action='store_true', help='display results')
    parser.add_argument('--save-txt', action='store_true', help='save results to *.txt')
    parser.add_argument('--classes', nargs='+', type=int, help='filter by class: --class 0, or --class 0 2 3')
    parser.add_argument('--agnostic-nms', action='store_true', help='class-agnostic NMS')
    parser.add_argument('--augment', action='store_true', help='augmented inference')
    parser.add_argument('--update', action='store_true', help='update all models')
    opt = parser.parse_args()
    print(opt)

    # 模型推理和测试阶段,关闭梯度计算以降低内存消耗并加快运算速度。
    with torch.no_grad():
        ## 通过设置不同的opt.weights,可以选择要更新的模型。默认是default='yolov5s.pt
        if opt.update:
            for opt.weights in ['yolov5s.pt', 'yolov5m.pt', 'yolov5l.pt', 'yolov5x.pt']:
                detect()
                strip_optimizer(opt.weights)
        else:
            detect()
初始化文件目录文件夹,定义视频流或图片格式
def detect(save_img=False):
    out, source, weights, view_img, save_txt, imgsz = \
        opt.output, opt.source, opt.weights, opt.view_img, opt.save_txt, opt.img_size

    # 判断输入的视频源是否以".txt"结尾在文本文件中,可以包含视频文件的路径列表
    # source.isnumeric()判断输入的视频源是否为纯数字(是则打开了摄像头),用于表示摄像头索引
    # '(rtsp://', 'rtmp://', 'http://') 适用于从网络摄像头、流媒体服务器或在线视频平台获取视频流。
    webcam = source.isnumeric() or source.startswith(('rtsp://', 'rtmp://', 'http://')) or source.endswith('.txt')

    # Initialize
    set_logging()
    device = select_device(opt.device)
    # 获取今天的日期
    today = date.today()
    date_str = today.strftime("%Y-%m-%d")  # 格式化日期为字符串,例如:2023-06-06

    folder_path = r'C:\python\code\tangyudi\yolo\YOLO5\YOLO5\yolov5-master\inference\outputs'
    out = os.path.join(folder_path, date_str)  # 构建完整的输出文件夹路径

    if not os.path.exists(out):  # 如果文件夹不存在
        os.makedirs(out)  # 创建以日期为名称的文件夹

    # half precision only supported on CUDA 半精度只用在cuda上
    half = device.type != 'cpu'
加载模型
检查图片的shape是否符合s=model.stride.max() max也就是32的倍数
获取图片路径权重路径
判断是否是只有单个类别检测(一般都是两个以上)
 # Load model
    model = attempt_load(weights, map_location=device)  # load FP32 model
    # 根据640*640与模型的步长计算是否满足倍数的关系,model.stride.max()查看模型的最大步长
    imgsz = check_img_size(imgsz, s=model.stride.max())  # check img_size
    if half:
        # model.half()  # to FP16
        model.float()  # 转换为FP32

    # Second-stage classifier()
    classify = False
    if classify:
        modelc = load_classifier(name='resnet101', n=2)  # initialize
        modelc.load_state_dict(torch.load('weights/resnet101.pt', map_location=device)['model'])  # load weights
        modelc.to(device).eval()
判断是检测图片还是视频
用来加载./data/inference需要检测的文件,并且生成dataset数据集
# Set Dataloader
    vid_path, vid_writer = None, None
    if webcam:
        view_img = True
        cudnn.benchmark = True  # set True to speed up constant image size inference PyTorch会自动寻找最佳的卷积算法,以提高性能
        dataset = LoadStreams(source, img_size=imgsz)
    else:
        save_img = True
        #读取文件夹下的所有要检测的图片或者视频
        dataset = LoadImages(source, img_size=imgsz)
加载类别名字,生成一张空白图片热身gpu
img = torch.zeros((1, 3, imgsz, imgsz), device=device)
 # 获取类别的名字
    names = model.module.names if hasattr(model, 'module') else model.names

    # 这样做的目的可能是为了在可视化过程中为不同的类别分配随机颜色,以便在结果展示中区分不同的目标或类别。
    colors = [[random.randint(0, 255) for _ in range(3)] for _ in range(len(names))]
    # Run inference
    t0 = time.time()

    # warmup: 生成一张空白图片,进行forward,热身准备活动,确保GPU能抛跑起来
    img = torch.zeros((1, 3, imgsz, imgsz), device=device)
设置GPU,单精度
首先读取数据集,每次for循环都会执行一次LoadStreams的 __next__ 函数,一次读一张图片,
因为传入的是原始图片,但是模型需要640*640(只要32倍的都行),所以需要letterbox来resize尺寸,再次需要转换成RGB,深度学习需要RGB,
opencv是BGR。利用img[:, :, ::-1]转成RGB
拿到640*640(或者其他的32倍的即可)后,img /= 255.0 进行归一化,然后变成四维的:img.unsqueeze(0并且升维img.unsqueeze(0)
#img是填充后的, im0s是copy img的,下面还原图片
    for path, img, im0s, vid_cap in dataset:  # 每次for循环都会执行一次LoadStreams的__next__函数,一次读一张图片
        img = torch.from_numpy(img).to(device)
        if path != list('0'):
            if is_mp4_file(path):
                view_img = True

        # 使用更低精度的数据类型可能是有益的。例如,在资源受限的设备上进行推理时,使用较低的精度可以降低计算和存储开销,
        # 并提高推理性能。其中,半精度(half precision)浮点数(float16)是一种常用的低精度数据类型。
        # 需要注意的是,半精度浮点数具有较低的精度,可能会引入一定的数值误差。因此,在应用中需要权衡精度和性能之间的平衡,根据具体任务的要求来选择适当的数据类型和转换方式。
        # img = img.half() if half else img.float()  # uint8 to fp16/32
        img = img.float() if half else img.float()  # uint8 to fp16/32
        img /= 255.0  # 0 - 255 to 归一化0.0 - 1.0
        if img.ndimension() == 3:
            # 通常将批次维度作为额外的维度,即将图片张量的维度扩展为 (1, C, H, W) 或 (1, H, W, C),其中 1 表示批次大小为 1。
            img = img.unsqueeze(0)

        # Inference
        t1 = time_synchronized()
将处理好的图片扔进训练好的model,前向传播
pred = model(img, augment=opt.augment)[0] ,得到torch.Size([1, 20160, 85])结果
利用nms进行筛选出具有最高置信度的目标,并剔除与其重叠度较高的其他预测框。
得到结果,例如:[413.75000, 242.37500, 496.25000, 521.50000, 0.87988, 0.00000] 0.87988是置信度,0.00000是类别
# 通过fuse()方法融合模型的卷积和BN层,最后调用eval()方法将模型设置为评估模式。
        # 模型语句生成好了model.append(torch.load(w, map_location=map_location)['model'].float().fuse().eval()),设置了评估模式了
        #所有的推理预测就相乘含有的映射就行了,每种类别都有一种放射函数,都是先进性前向传播,然后得到输出结果。就这么简单。想想最简单的卷积softmax就好,每次
        #不过这里预测出来的是相对于特征图的大小,后面需要对结果进行恢复就行
        pred = model(img, augment=opt.augment)[0]  # torch.Size([1, 20160, 85])#20160是预测框的个数
        # print('检测结果:',pred.shape)
        # time (inference + NMS)=t2 - t1
        # Apply NMS
        # [413.75000, 242.37500, 496.25000, 521.50000,   0.87988,   0.00000]  0.87988是置信度,0.00000是类别
        pred = non_max_suppression(pred, opt.conf_thres, opt.iou_thres, classes=opt.classes, agnostic=opt.agnostic_nms)

        t2 = time_synchronized()

        # 目的是在需要进行目标分类的情况下,对目标检测的结果进行进一步的分类操作,以获取更详细的目标类别信息。
        if classify:
            pred = apply_classifier(pred, modelc, img, im0s)
生成路径来保存 一些图片,视频,txt文件等等
得到结果后:接下来处理输出结果的一些操作:生成路径来保存 一些图片,视频,txt文件等等,打印输出结果信息
开始处理获得的预测结果:读取pre预测的结果:for i, det in enumerate(pred):
还原到原图大小再画框::det[:, :4] = scale_coords(img.shape[2:], det[:, :4], im0.shape).round()
将预测框还原到原图:预测的大小是tensor([[373.67227, 31.81139, 575.06097, 368.02759],
[ 58.22650, 110.43533, 501.29523, 368.21964],
[211.84209, 226.76434, 258.34622, 372.01465]], device='cuda:0')
还原回原图后的大小(使用了round()取整):tensor([[ 747., 40., 1150., 712.],
[ 116., 197., 1003., 712.],
[ 424., 430., 517., 720.]], device='cuda:0')
然后取出类别索引 for c in det[:, -1].unique(): ,这个索引是标注的时候的类别号,然后计算所有预测值里面预测到这个索引的个数: n = (det[:, -1] == c).sum(),顺便打印
# Process detections
        for i, det in enumerate(pred):  # detections per image
            if webcam:  # batch_size >= 1
                p, s, im0 = path[i], '%g: ' % i, im0s[i].copy()
            else:
                p, s, im0 = path, '', im0s
            # 保存图片的路径
            save_path = str(Path(out) / Path(p).name)
            txt_path = str(Path(out) / Path(p).stem) + (
                '_%g' % dataset.frame if dataset.mode == 'video' else '')  # 默认不保存txt文件
            s += '%gx%g ' % img.shape[2:]  # print string   #print除了路径,还有shape的输出
            gn = torch.tensor(im0.shape)[[1, 0, 1, 0]]  # normalization gain whwh #保存txt文件需要用到

            # 将预测框画出来
            if det is not None and len(det):
                # Rescale boxes from img_size to im0 size 还原到原图大小再画框
                det[:, :4] = scale_coords(img.shape[2:], det[:, :4], im0.shape).round()

                # det[:, -1].unique() 返回唯一的类别索引, tensor([0., 0., 0., 5., 0.], device='cuda:0') 先返回了0,计算0的总数,然后计算5的总数
                for c in det[:, -1].unique():
                    n = (det[:, -1] == c).sum()  # detections per class
                    s += '%g %ss, ' % (
                    n, names[int(c)])  # add to string i=0:'640x512 4 persons, ' i=1:'640x512 4 persons, 1 buss, '

                # Write results
                for *xyxy, conf, cls in reversed(det):
                    if save_txt:  # Write to file
                        xywh = (xyxy2xywh(torch.tensor(xyxy).view(1, 4)) / gn).view(-1).tolist()  # normalized xywh
                        with open(txt_path + '.txt', 'a') as f:
                            f.write(('%g ' * 5 + '\n') % (cls, *xywh))  # label format

                    if save_img or view_img:  # Add bbox to image
                        label = '%s %.2f' % (names[int(cls)], conf)
                        plot_one_box(xyxy, im0, label=label, color=colors[int(cls)], line_thickness=3)
判断:当前这一轮要预测的文件里面是视频还是图片
将xyxy,置信度conf,类别名字names[int(cls)],全部传给plot绘制预测图片后
接下来开始判断,当前这一轮要预测的文件里面是视频还是图片
# Print time (inference + NMS)
            print('%sDone. (%.3fs)' % (s, t2 - t1))

            # Stream results

            frames += 1
            elapsed_time = time.time() - start_time
            fps = frames / elapsed_time
            cv2.putText(im0, "FPS: %.2f" % fps, (10, 30), cv2.FONT_HERSHEY_SIMPLEX, 1, (0, 0, 255), 2, cv2.LINE_AA)

            if view_img:
                cv2.namedWindow(p, cv2.WINDOW_NORMAL)  # 创建一个窗口
                cv2.resizeWindow(p, 800, 600)  # 调整窗口大小
                cv2.imshow(p, im0)
                # if cv2.waitKey(1) == ord('q'):  # q to quit

                if cv2.waitKey(1) == ord(' '):  # q to quit
                    raise StopIteration

            # Save results (image with detections)
            # 先把判断要不要保存save_img,然后再判断是图片还是video
            if save_img:#不是摄像头来源的话就为ture
                if dataset.mode == 'images':
                    cv2.imwrite(save_path, im0)
                else:
                    if vid_path != save_path:  # new video
                        vid_path = save_path
                        if isinstance(vid_writer, cv2.VideoWriter):
                            vid_writer.release()  # release previous video writer

                        fourcc = 'mp4v'  # output video codec
                        fps = vid_cap.get(cv2.CAP_PROP_FPS)
                        w = int(vid_cap.get(cv2.CAP_PROP_FRAME_WIDTH))#这些值用于定义输出视频的宽度和高度,
                        h = int(vid_cap.get(cv2.CAP_PROP_FRAME_HEIGHT))
                        vid_writer = cv2.VideoWriter(save_path, cv2.VideoWriter_fourcc(*fourcc), fps, (w, h))
                    #一帧一帧的读,一张一张的保存图片
                    vid_writer.write(im0)

    if save_txt or save_img:
        print('Results saved to %s' % Path(out))

    print('Done. (%.3fs)' % (time.time() - t0))
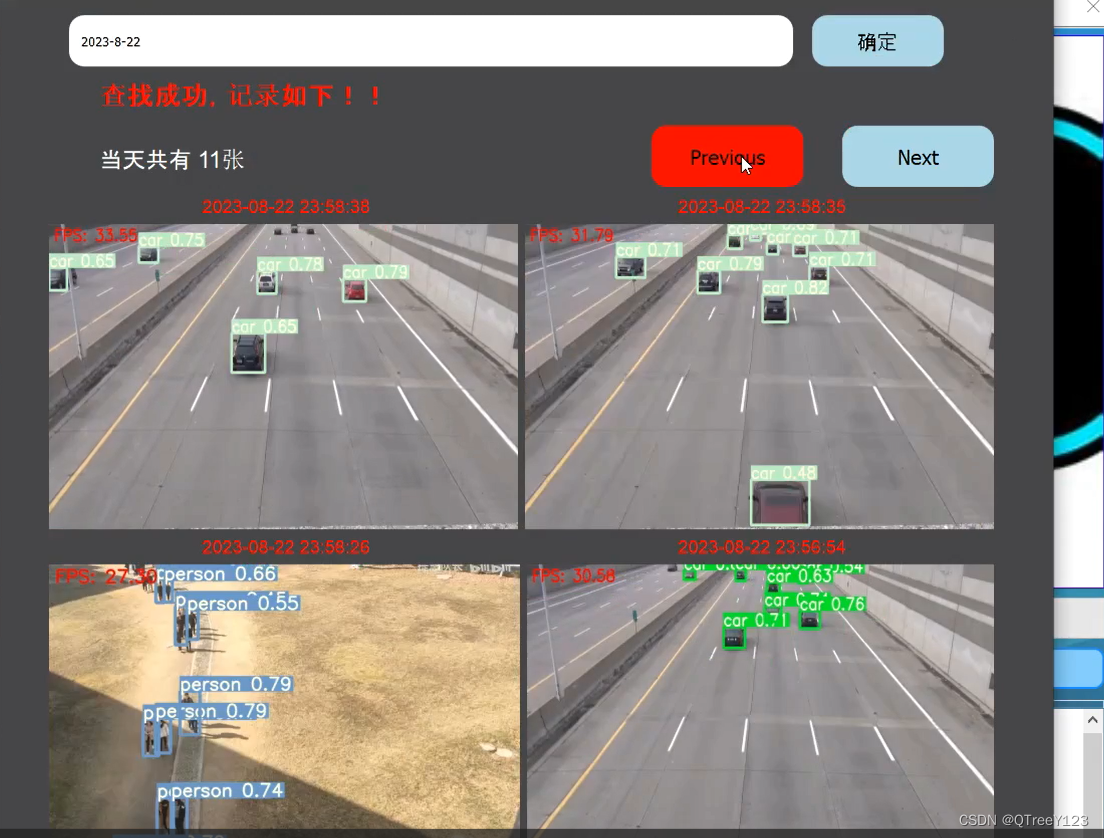
效果演示:


历史记录
完整代码+UI界面
视频,笔记和代码,以及注释都已经上传网盘,放在主页置顶文章