前言:
本机需要安装 node.js node安装与配置
打包项目时需要启用插件 Pixel Streaming
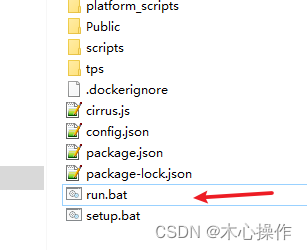
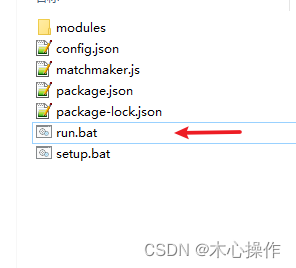
一、打包项目后进入 Samples\PixelStreaming\WebServers\SignallingWebServer 目录
1、在目录下新建 文本文档 添加以下内容,然后改名与后缀为 setup.bat
:: Copyright Epic Games, Inc. All Rights Reserved.
pushd %~dp0

npm install

popd
2、同上创建一个 run.bat 添加以下内容
:: Copyright Epic Games, Inc. All Rights Reserved.
@echo off

pushd %~dp0

call setup.bat

title Cirrus

::Run node server
::If running with frontend web server and accessing outside of localhost pass in --publicIp=<ip_of_machine>
node cirrus %*

popd
pause
3、修改 config.json 文件,把 localhost 修改为公网ip(本地部署不用修改),HttpPort 修改为外网访问的端口(默认是80)
{
	"UseFrontend": false,
	"UseMatchmaker": false,
	"UseHTTPS": false,
	"UseAuthentication": false,
	"LogToFile": true,
	"LogVerbose": true,
	"HomepageFile": "/Public/player.html",
	"AdditionalRoutes": {},
	"EnableWebserver": true,
	"MatchmakerAddress": "",
	"MatchmakerPort": "9999",
	"PublicIp": "localhost",
	"HttpPort": 88,
	"HttpsPort": 443,
	"StreamerPort": 8888,
	"SFUPort": 8889,
	"peerConnectionOptions": "{ \"iceServers\": [{\"urls\": [\"stun:localhost:19302\",\"turn:localhost:19303\"], \"username\": \"PixelStreamingUser\", \"credential\": \"Another TURN in the road\"}] }"
}
4、双击运行 run.bat 启动服务
5、出现以下界面代表服务启动成功(窗口不要关)

二、启动项目(返回项目根目录)
1、创建项目启动文件快捷方式(win10可以选择文件后按住 alt 与鼠标左键拖动即可快速创建)
2、创建快捷方式后,右键快捷方式选择属性,在目标后面,加上空格,再加上下面代码保存
-AudioMixer -PixelStreamingIP=localhost -PixelStreamingPort=88883、打开创建的快捷方式运行项目(项目不能最小化,否则像素流不出去)在浏览器输入上面设置好的ip与端口(本地测试)

三、公网访问
服务器需要开放 19302 与 19303 端口
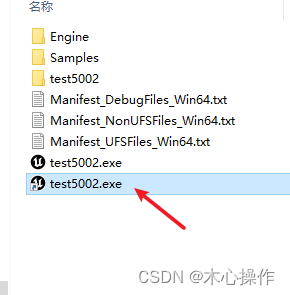
需要获取ue4.26打包出来 release 文件夹
ue4.26后的版本已去掉了此文件,此文件里面是两个协议 turn 与 stun,用来公网NAT穿透
1、随便导出一个4.26的测试项目(需要启用插件 Pixel Streaming),在导出的项目搜索 release 文件夹,可以复制出来单独使用

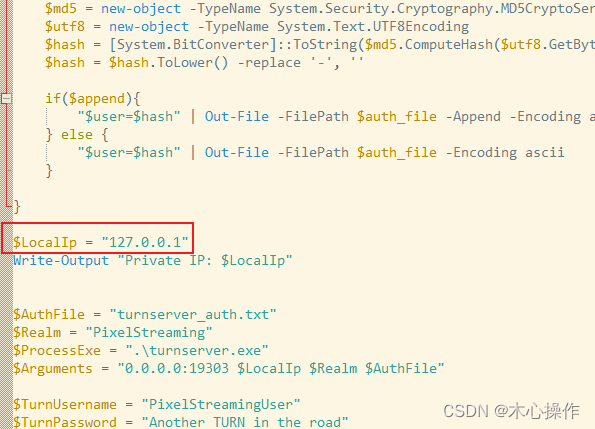
2、修改 release 文件夹里面的 Start_AWS_TURNServer.ps1 文件,把 $LocalIp 后面修改为127.0.0.1
3、分别启动 Start_AWS_TURNServer.bat 与 Start_STUNServer.bat(启动后窗口不要关)

四、公网预览项目
在浏览器输入前面填的公网ip与端口即可访问
注意事项:
1、以上所有打开的命令窗口与项目运行窗口都不能关闭(3个命令窗口1个项目运行窗口)
2、如需后台运行项目,可以在上面的快捷方式加上之前的代码后接着加上空格与下面代码
3、如需关闭后台运行项目,需要去任务管理器结束
-RenderOffScreen五、可选功能(Matchmaker分发访问)此步骤与前面分开
服务器运行多个项目,通过访问一个Matchmaker地址,自动分发空闲的项目(有点类似服务器的负载均衡)
1、进入 Samples\PixelStreaming\WebServers\Matchmaker 目录,修改 config.json 文件的HttpPort 端口(不可与之前的信令服务器端口冲突)
{
	"HttpPort": 90,
	"UseHTTPS": false,
	"MatchmakerPort": 9999,
	"LogToFile": true
}
2、运行 run.bat 文件 (运行后窗口不要关)
3、复制一份之前的信令服务文件夹

4、分别修改里面的 config.json 文件,以下示例(主要修改UseMatchmaker、HttpPort、StreamerPort、SFUPort这四个值),localhost 修改为公网ip
第一个config.json
{
	"UseFrontend": false,
	"UseMatchmaker": true,
	"UseHTTPS": false,
	"UseAuthentication": false,
	"LogToFile": true,
	"LogVerbose": true,
	"HomepageFile": "/Public/player.html",
	"AdditionalRoutes": {},
	"EnableWebserver": true,
	"MatchmakerAddress": "",
	"MatchmakerPort": "9999",
	"PublicIp": "localhost",
	"HttpPort": 81,
	"HttpsPort": 443,
	"StreamerPort": 8001,
	"SFUPort": 8801,
	"peerConnectionOptions": "{ \"iceServers\": [{\"urls\": [\"stun:localhost:19302\",\"turn:localhost:19303\"], \"username\": \"PixelStreamingUser\", \"credential\": \"Another TURN in the road\"}] }"
}
第二个config.json
{
	"UseFrontend": false,
	"UseMatchmaker": true,
	"UseHTTPS": false,
	"UseAuthentication": false,
	"LogToFile": true,
	"LogVerbose": true,
	"HomepageFile": "/Public/player.html",
	"AdditionalRoutes": {},
	"EnableWebserver": true,
	"MatchmakerAddress": "",
	"MatchmakerPort": "9999",
	"PublicIp": "localhost",
	"HttpPort": 82,
	"HttpsPort": 443,
	"StreamerPort": 8002,
	"SFUPort": 8802,
	"peerConnectionOptions": "{ \"iceServers\": [{\"urls\": [\"stun:localhost:19302\",\"turn:localhost:19303\"], \"username\": \"PixelStreamingUser\", \"credential\": \"Another TURN in the road\"}] }"
}
5、运行多个项目(也可以同一个项目复制多个快捷方式,运行是单独的)

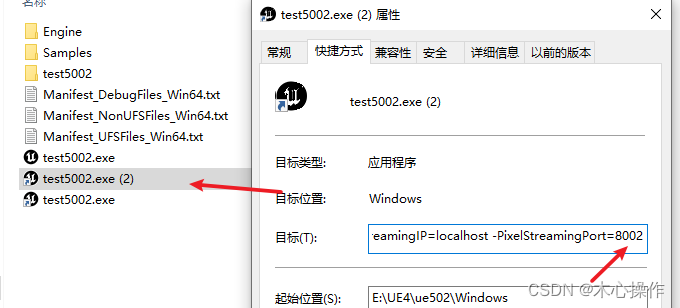
6、分别右键在属性的目标后面加上以下代码(同上记得先加空格)
// 快捷方式1
-AudioMixer -PixelStreamingIP=localhost -PixelStreamingPort=8001

// 快捷方式2
-AudioMixer -PixelStreamingIP=localhost -PixelStreamingPort=8002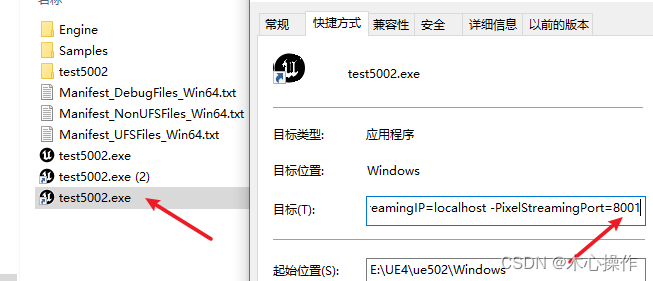
7、分别运行前面的两个信令服务与这个两个快捷方式,执行后访问前面信令服务 config.json 里面设置的公网ip与 Matchmaker 里面 config.json 设置的端口,即可自动分发