实现图片上传、排序、删除、预览等功能的需求,以及编辑时的回显
vuedraggable实现拖拽功能的可参考:拖拽预览功能实现
1. 首先展示实现功能的效果。

2. 编辑时图片的回显

3.功能实现
3.1 要实现图片的拖拽功能首先需要安装vuedraggable库
npm install vuedraggable --save
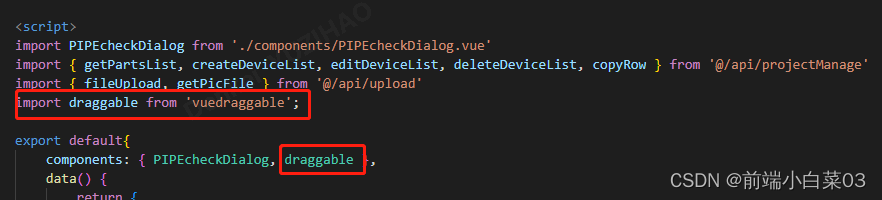
3.2 在组件中导入组件,并进行注册
import draggable from 'vuedraggable';
3.3 使用element ui的el-upload组件,结合vuedraggable实现图片的上传与排序功能,内的代码如下:
 <el-form-item label="上传图片:">
      <ul class="image-upload">
        <draggable v-model="imageListArr" @update="dataDragEnd">  //拖拽排序
          <transition-group>                                      //过渡动画
            <li v-for="(item, index) of imageListArr" :key="item.imgUrl">
              <img v-if="item.imgUrl" style="width:100% ;height: 90px" :src="item.imgUrl">
              <div class="icon-container">
                <span v-if="item.imgUrl" @click="handleRemove(index)">  //删除上传的图片
                  <i class="el-icon-delete" style="margin-right:15px"></i>
                </span>
                <span v-if="item.imgUrl" class="el-upload-list__item-preview" @click="handlePreview(index)">          //预览上传的图片
                  <i class="el-icon-zoom-in"></i>
                </span>
              </div>
            </li>
          </transition-group>

        </draggable>
      </ul>
      //图片上传部分
      <el-upload ref="upload" accept=".jpeg, .png, .gif" action="#" :multiple="true" list-type="picture-card"
        :show-file-list="false" :on-change="handleChange" :auto-upload="false">
        <i class="el-icon-plus avatar-uploader-icon"></i>
      </el-upload>

      <!-- 图片回显预览 -->
      <el-dialog title="图片预览" :visible.sync="previewVisible" width="50%" append-to-body>
        <img :src="previewPath" alt="" style="width:100%;height:100%" />
      </el-dialog>
    </el-form-item>
打开编辑弹窗,获取包含图片的base64文件流,从后端获取的base64文件流数据结构为对象数组形式时,如:image:[{url:“xxxxx”},{url:“xxxxx”}],我们首先需要进行图片的回显,这部分代码实现如下:
 methods: {


   editProject(projectInfos) {

       //projectInfos为当前行信息
      this.dialogVisible = true; //打开弹窗
      this.title = "编辑零部件";
      this.tempPic = []
      //由于此处共享了信息,需要进行深拷贝
      let infos = JSON.parse(JSON.stringify(projectInfos))
      this.addProjectForm = infos;
      /**
       * 假如当前行infos数据结构为:
       * {
       * projectId: 1,
       * uploadTime: 'xxx',
       * images:[{url: 'http://xxx', name: 'xxx'}, {url: 'http://xxx', name: 'xxx'}]
       * }
       */
//后端获取的是url地址需要先将url地址转成base64
       /**
       * 假如当前行infos数据结构为:
       * {
       * projectId: 1,
       * uploadTime: 'xxx',
       * images:[{url: base64, name: 'xxx'}, {url: base64, name: 'xxx'}]//图片为base64
       * }
       */
      this.imageListArr = [] //清空图片列表,防止图片重复
      //将数据结构拼成回显时所需的格式
      if (infos.images && infos.images.length > 0) {


        infos.images.map((item, index) => {


          // 将 Base64 编码转换成 Blob 对象
          let byteString = window.atob(singlePic.split(',')[1]);
          let mimeString = singlePic.split(',')[0].split(':')[1].split(';')[0];
          let ab = new ArrayBuffer(byteString.length);
          let ia = new Uint8Array(ab);
          for (let i = 0; i < byteString.length; i++) {


            ia[i] = byteString.charCodeAt(i);
          }
          let blob = new Blob([ab], {

     type: mimeString });
          // 转换成文件对象(File)
          let file = new File([blob], `pic${

      index}.png`, {

     type: mimeString, lastModified: Date.now() });
          //将其转换成url
          let url = URL.createObjectURL(file);
          //将其转换成临时文件对象,fileList中的文件对象包含name、size、type、lastModified、lastModifiedDate、uid、url等属性
          let tempFile = {


            name: file.name,
            size: file.size,
            type: file.type,
            raw: file,
            lastModified: file.lastModified,
            lastModifiedDate: file.lastModifiedDate,
            uid: file.lastModified,
            url
          }
          this.imageListArr.push({


            raw: tempFile.raw, //由于后续提交表单时需要用到file对象,所以这里需要拼接获取
            imgUrl: tempFile.url,
            sortNum: index + 1  //添加序号为了图片排序
          })
        })
      }
      //过滤一下imgUrl为空的数据,防止出现空白图片,并按照sortNum排序,sortNum为1开始
      //(注:开发过程中发现,如果不过滤空白图片,会出现空白图片,原因不明)
      this.imageListArr = this.imageListArr.filter(item => {


        return item.imgUrl != ''
      });
      //按照sortNum排序
      this.imageListArr.sort((a, b) => {


        return a.sortNum - b.sortNum  //升序
      })
    },
    //拖拽图片
    dataDragEnd() {


      // 拖拽图片更换位置 并重新从1开始排序
      this.imageListArr.forEach((item, index) => {


        item.sortNum = index + 1
      })
      //过滤一下imgUrl为空的数据
      this.imageListArr = this.imageListArr.filter(item => {


        return item.imgUrl != ''
      });
    },
  }
上述代码实现了拖拽功能,接下来删除和预览图片代码如下:
//删除图片
    handleRemove(index) {


      this.imageListArr.splice(index, 1)
    },
    // 处理图片预览效果
    handlePreview(index) {


      this.previewPath = this.imageListArr[index].imgUrl
      this.previewVisible = true
    },
3.4 通过el-upload上传图片,首先对图片的类型和大小进行限制
//上传前对图片的大小和类型进行限制
    handleChange(file) {


      const isJPG = file.raw.type === 'image/jpeg';
      const isPNG = file.raw.type === 'image/png';
      const isGIF = file.raw.type === 'image/gif';
      if (!isJPG && !isPNG && !isGIF) {


        this.$message.error('上传图片只能是 JPG/PNG/GIF 格式!');
        return false;
      }
      const isLt2M = file.size / 1024 / 1024 < 2; // 上传图片大小限制2M
      if (!isLt2M) {


        this.$message.error('上传图片大小不能超过 2MB!');
        return false;
      }
      let url = URL.createObjectURL(file.raw);
      let obj = {


        raw: file.raw, //点击确定按钮,将图片上传给后端时后端需要的参数
        imgUrl: url
      }
      this.imageListArr.push(obj)
      //过滤一下imgUrl为空的数据
      this.imageListArr = this.imageListArr.filter(item => {


        return item.imgUrl != ''
      });
      //上传的图片和回显的图片进行重新排序
      this.imageListArr.map((item, index) =>
        item.sortNum = index + 1
      )
    },
3.5 点击确认按钮的时候将图片提交给服务器
//提交编辑的设备信息
    submitDeviceInfo() {


      let formData = new FormData(); //创建form对象,用于上传图片
      this.imageListArr.forEach((file) => {


        formData.append('files', file.raw); //添加图片信息的参数,所以3.4中拼接时添加了raw参数
      });
      //上传图片
      const header = {


        'Content-Type': 'multipart/form-data',
      }
      //提交时调用后端上传接口
      fileUpload(formData, header).then(response => {


        if (response.Code === 20000) {


          this.picUrl = response.Data.files
          //提交表单,创建或编辑设备信息,传入图片地址,后台进行保存,
          //返回成功后,关闭弹窗,刷新列表,重置表单
          this.$refs.projectForm.validate((valid) => {


            if (valid) {


              let params = {


                name: this.addProjectForm.name,
                serial_number: this.addProjectForm.serial_number,
                supplier: this.addProjectForm.supplier,
                memo: this.addProjectForm.memo,
                pic_addr: this.picUrl
              }
              editDeviceList(this.partId, params).then(response => {


                if (response.Code === 20000) {


                  this.handleClose()
                  this.getList()
                }
              }).catch(() => {

     })
            } else {


              this.$message.error('请输入必填项')
            }
          })
        }
      }).catch(() => {

     })
    },