承接我们上一节的示例代码,首先看下示例上节示例项目的目录结构
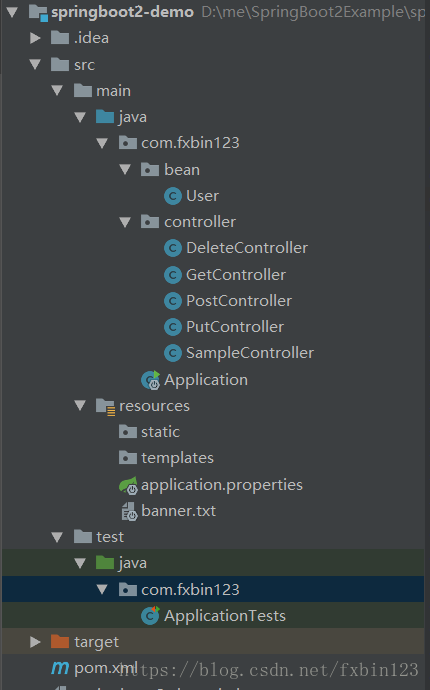
- src/main/java:主程序入口 Application,可以通过直接运行该类来 启动 Spring Boot应用
- src/main/resources:配置目录,该目录用来存放应用的一些配置信息,比如应用名、服务端口、数据库配置等。由于我们应用了Web模块,因此产生了 static目录与templates目录,前者用于存放静态资源,如图片、CSS、JavaScript等;后者用于存放Web页面的模板文件。
- src/test:单元测试目录,生成的 ApplicationTests 通过 JUnit4实现,可以直接用运行 Spring Boot应用的测试。
application.properties/application.yml 用于存放程序的各种依赖模块的配置信息,比如 服务端口,数据库连接配置等。。。
对于 静态文件的加载顺序,我们可以看官方文档的说明:
https://docs.spring.io/spring-boot/docs/current/reference/html/boot-features-developing-web-applications.html#boot-features-spring-mvc-static-content
By default, Spring Boot serves static content from a directory called /static
(or /public or /resources or /META-INF/resources) in the classpath or from the
root of the ServletContext.

 这里说的是   默认情况下,Spring Boot 的静态文件加载顺序是
  META/resources > resources > static > public  里面找是否存在相应的资源,
  如果有则直接返回。
接下来,我们用代码做一下测试,验证 Spring Boot 静态文件加载顺序
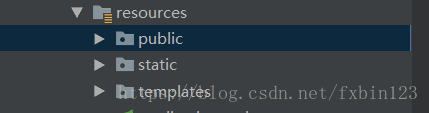
1. 在 src/main/resources 目录下创建 public, static,templates 文件夹
2. 新建静态文件 index.html, 示例代码如下:(在三个目录下分别创建,alert 查看 打印的单词信息)
<!DOCTYPE html>
<html lang="en">
<head>
    <meta charset="UTF-8">
    <title>Title</title>
    <script>
        window.onload = function (ev) {
            alert('public');
        }
    </script>
</head>
<body>

</body>
</html>- 启动程序, 访问 http://localhost:8080/index.html

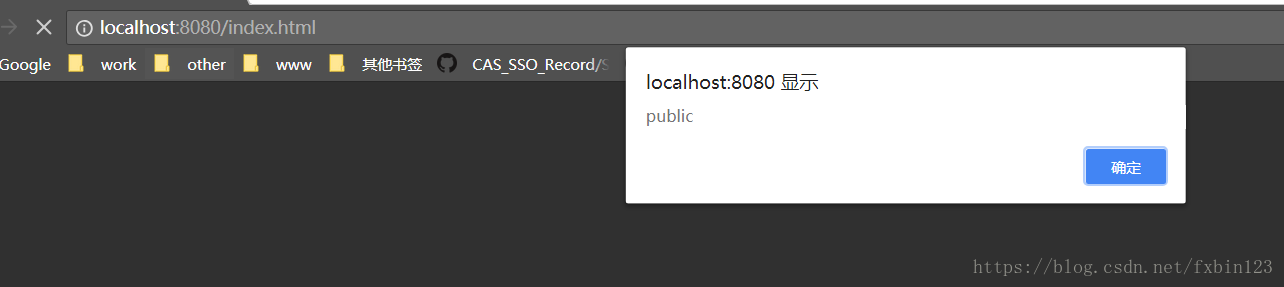
我们看到首先 打印的 是 static,删除 static 目录 重新启动 打印出了 public
这样就 我们就简单的验证了静态文件的加载顺序。。。