springboot2.x——thymeleaf引擎模板
java的引擎模板主要有:thymeleaf、freemarker、volecity等等,有兴趣的可以去了解另外两个模板,此处只说thymeleaf。(三者的优点与缺点:https://blog.csdn.net/ztchun/article/details/76407612)
thymeleaf是什么?
-
1.Thymeleaf 在有网络和无网络的环境下皆可运行,即它可以让美工在浏览器查看页面的静态效果,也可以让程序员在服务器查看带数据的动态页面效果。这是由于它支持 html 原型,然后在 html 标签里增加额外的属性来达到模板+数据的展示方式。浏览器解释 html 时会忽略未定义的标签属性,所以 thymeleaf 的模板可以静态地运行;当有数据返回到页面时,Thymeleaf 标签会动态地替换掉静态内容,使页面动态显示。
-
2.Thymeleaf 开箱即用的特性。它提供标准和spring标准两种方言,可以直接套用模板实现JSTL、 OGNL表达式效果,避免每天套模板、该jstl、改标签的困扰。同时开发人员也可以扩展和创建自定义的方言。
-
3.Thymeleaf 提供spring标准方言和一个与 SpringMVC 完美集成的可选模块,可以快速的实现表单绑定、属性编辑器、国际化等功能。
springboot为什么推荐使用thymeleaf?
- 提供了完美的springmvc支持
- thymeleaf既是原型又是页面,开发速度更快,符合springboot的理念。
pom.xml引入thymeleaf依赖:
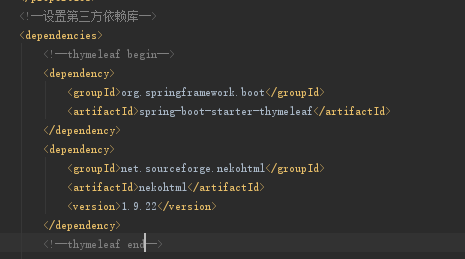
nekohtml依赖:非严格的Html严格
创建application.properties文件(此处,为了方便阅读,实际开发会使用yml文件)
yml语法需要注意一点:格式需要对齐,请勿使用tab键!!!!
spring:
  thymeleaf:
    cache: false # 开发时关闭缓存,不然没法看到实时页面
    mode: LEGACYHTML5 # 用非严格的 HTML
    encoding: UTF-8
    servlet:
      content-type: text/html

server:
  port: 9090 #更改tomcat端口
一个简单的测试用例:创建一个javaBean和对应的controller
User.java
 1 package com.baiye.springboothello.entity;
 2
 3 public class User {
 4     private Long id;
 5     private String userName;
 6     private int age;
 7
 8
 9     public User() {
10
11     }
12
13     public User(Long id, String userName, int age) {
14         this.id = id;
15         this.userName = userName;
16         this.age = age;
17     }
18
19     public Long getId() {
20         return id;
21     }
22
23     public void setId(Long id) {
24         this.id = id;
25     }
26
27     public String getUserName() {
28         return userName;
29     }
30
31     public void setUserName(String userName) {
32         this.userName = userName;
33     }
34
35     public int getAge() {
36         return age;
37     }
38
39     public void setAge(int age) {
40         this.age = age;
41     }
42 }
UserController.java
 1 package com.baiye.springboothello.controller;
 2
 3 import com.baiye.springboothello.entity.User;
 4 import org.springframework.stereotype.Controller;
 5 import org.springframework.ui.Model;
 6 import org.springframework.web.bind.annotation.RequestMapping;
 7 import org.springframework.web.bind.annotation.RequestMethod;
 8
 9 import java.util.ArrayList;
10 import java.util.List;
11
12 @Controller
13 public class UserController {
14     @RequestMapping(value = "/getUserInfo",method = RequestMethod.GET)
15     public String getUserInfo(Model model){
16         User user = new User(100L,"admin",18);
17         User user2 = new User(101L,"李四",19);
18         User user3 = new User(102L,"张三",20);
19         User user4 = new User(103L,"王五",21);
20         List<User> list = new ArrayList<>();
21         list.add(user2);
22         list.add(user3);
23         list.add(user4);
24         model.addAttribute("user",user);
25         model.addAttribute("list",list);
26         return "userInfo";
27     }
28 }
对于前端的文件:html、css、js等静态文件,springboot推荐存存放于resources目录下的static中,但是这里我们使用了thymeleaf引擎模板,因此html应该放在resources下另一个目录中——template下:
userInfo.html
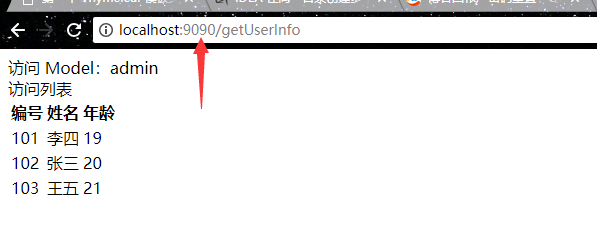
 1 <!DOCTYPE html SYSTEM "http://www.thymeleaf.org/dtd/xhtml1-strict-thymeleaf-spring4-4.dtd">
 2 <html xmlns="http://www.w3.org/1999/xhtml" xmlns:th="http://www.thymeleaf.org">
 3 <head>
 4     <meta charset="UTF-8">
 5     <title>Hello Thymeleaf</title>
 6 </head>
 7 <body>
 8 <div>
 9     <span>访问 Model:</span><span th:text="${user.userName}"></span>
10 </div>
11 <div>
12     <span>访问列表</span>
13     <table>
14         <thead>
15         <tr>
16             <th>编号</th>
17             <th>姓名</th>
18             <th>年龄</th>
19         </tr>
20         </thead>
21         <tbody>
22         <tr th:each="item : ${list}">
23             <td th:text="${item.id}"></td>
24             <td th:text="${item.userName}"></td>
25             <td th:text="${item.age}"></td>
26         </tr>
27         </tbody>
28     </table>
29 </div>
30 </body>
31 </html>
所有的引擎模板都需要引入,themeleaf不例外,请在头部引入:<html xmlns="http://www.w3.org/1999/xhtml" xmlns:th="http://www.thymeleaf.org">
themeleaf更多的标签学习:https://blog.csdn.net/u014042066/article/details/75614906
启动main函数,注意端口的改变,运行结果如下: