先搭建必要的开发工具和下载源码
https://blog.csdn.net/skyleemon/article/details/78360241
内核编译,使用的内核版本分支如下:
guang@guang-kylin:~/Develop/linux-stable$ git branch
* master
1 修改顶层目录下的makefile:
guang@guang-kylin:~/Develop/linux-stable$ vi Makefile
ARCH ?= $(SUBARCH)
CROSS_COMPILE ?= $(CONFIG_CROSS_COMPILE:”%”=%)
修改为:
ARCH ?= arm
CROSS_COMPILE ?= arm-linux-gnueabi-
2 配置对应的开发板,这里用的是vexpress-a9,如下:
make vexpress_defconfig
3 编译zImage,module以及dtb:
make zImage
make modules
make dtbs
zImage生成路径:
arch/arm/boot/zImage
modules生成路径:
drivers/video/backlight/*.ko
dtbs生成路径:
arch/arm/boot/dts/vexpress-v2p-ca9.dtb
4 qemu启动内核,看看效果,由于还未挂载根文件系统,所以VFS会有报错
guang@guang-kylin:~/Develop/linux-stable$ qemu-system-arm -M vexpress-a9 -m 512M -kernel arch/arm/boot/zImage -dtb arch/arm/boot/dts/vexpress-v2p-ca9.dtb -nographic -append “console=ttyAMA0”
/****************************************************************/
pulseaudio: set_sink_input_volume() failed
pulseaudio: Reason: Invalid argument
pulseaudio: set_sink_input_mute() failed
pulseaudio: Reason: Invalid argument
Booting Linux on physical CPU 0x0
Linux version 4.17.0+ (guang@guang-kylin) (gcc version 7.3.0 (Ubuntu/Linaro 7.3.0-16ubuntu3)) #1 SMP Mon Jun 11 05:05:41 CST 2018
……// 省略了很多打印信息
VFS: Cannot open root device “(null)” or unknown-block(0,0): error -6
Please append a correct “root=” boot option; here are the available partitions:
1f00 131072 mtdblock0
(driver?)
1f01 32768 mtdblock1
(driver?)
Kernel panic - not syncing: VFS: Unable to mount root fs on unknown-block(0,0)
CPU: 0 PID: 1 Comm: swapper/0 Not tainted 4.17.0+ #1
Hardware name: ARM-Versatile Express
[<8011074c>] (unwind_backtrace) from [<8010cd4c>] (show_stack+0x10/0x14)
[<8010cd4c>] (show_stack) from [<80694dd4>] (dump_stack+0x88/0x9c)
[<80694dd4>] (dump_stack) from [<8011ff6c>] (panic+0xf0/0x25c)
[<8011ff6c>] (panic) from [<80901588>] (mount_block_root+0x1ec/0x2d8)
[<80901588>] (mount_block_root) from [<809017b8>] (mount_root+0x144/0x160)
[<809017b8>] (mount_root) from [<80901924>] (prepare_namespace+0x150/0x198)
[<80901924>] (prepare_namespace) from [<80901174>] (kernel_init_freeable+0x340/0x350)
[<80901174>] (kernel_init_freeable) from [<806a91f8>] (kernel_init+0x8/0x114)
[<806a91f8>] (kernel_init) from [<801010e8>] (ret_from_fork+0x14/0x2c)
Exception stack(0x9f48ffb0 to 0x9f48fff8)
ffa0: 00000000 00000000 00000000 00000000
ffc0: 00000000 00000000 00000000 00000000 00000000 00000000 00000000 00000000
ffe0: 00000000 00000000 00000000 00000000 00000013 00000000
—[ end Kernel panic - not syncing: VFS: Unable to mount root fs on unknown-block(0,0) ]—
用kill杀死对应的qemu-system-arm进程,咱们开始制作根文件系统
/****************************************************************/
5 busybox制作根文件系统
5.1 修改Makefile,新的busybox的makefile下面的选项是空配置的,需要修改如下:
CROSS_COMPILE ?= arm-linux-gnueabi-
ARCH ?= arm
5.2 配置
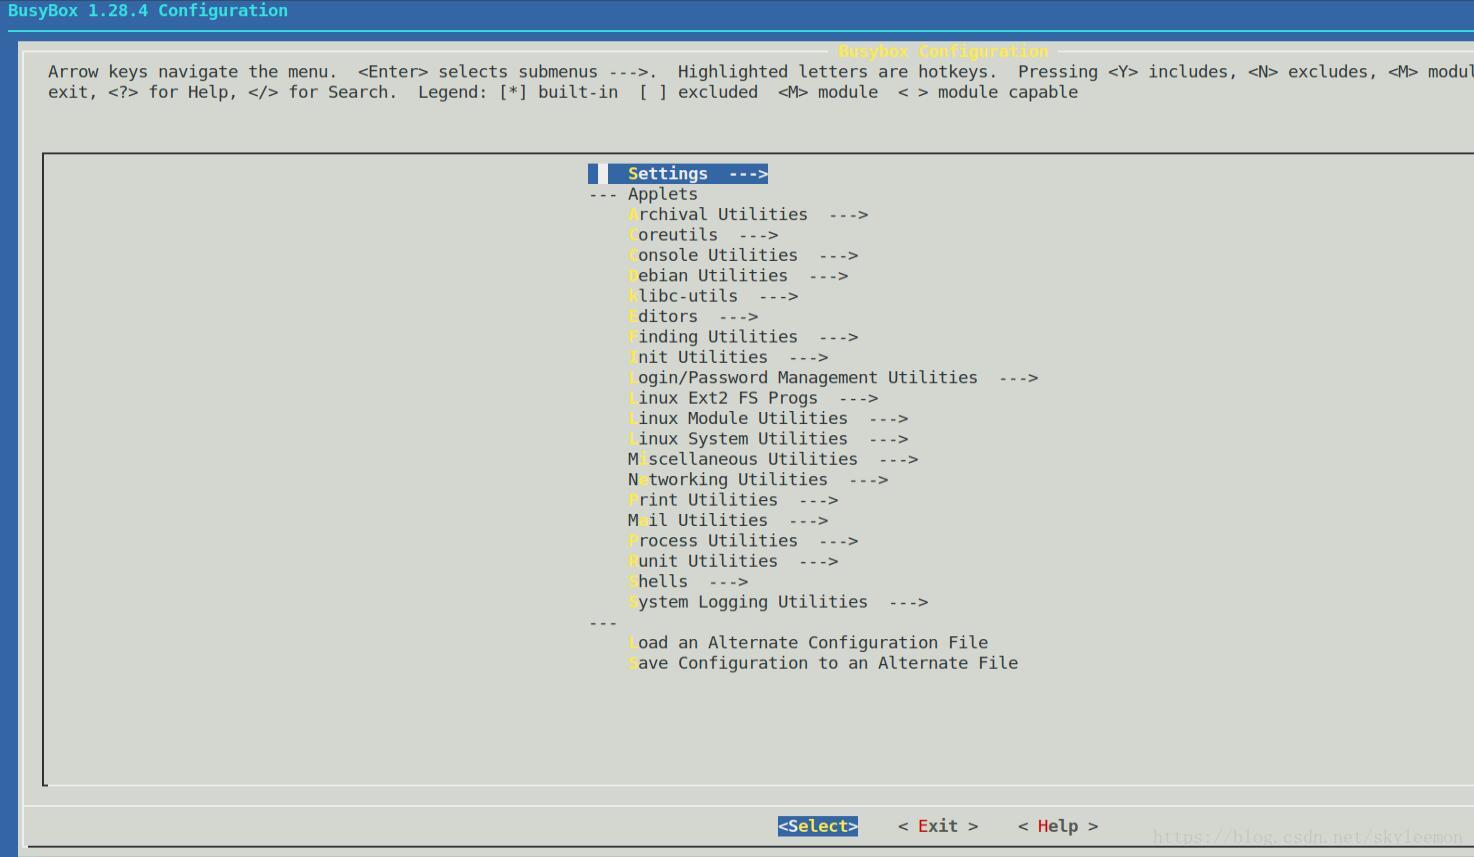
make defconfig或者make menuconfig
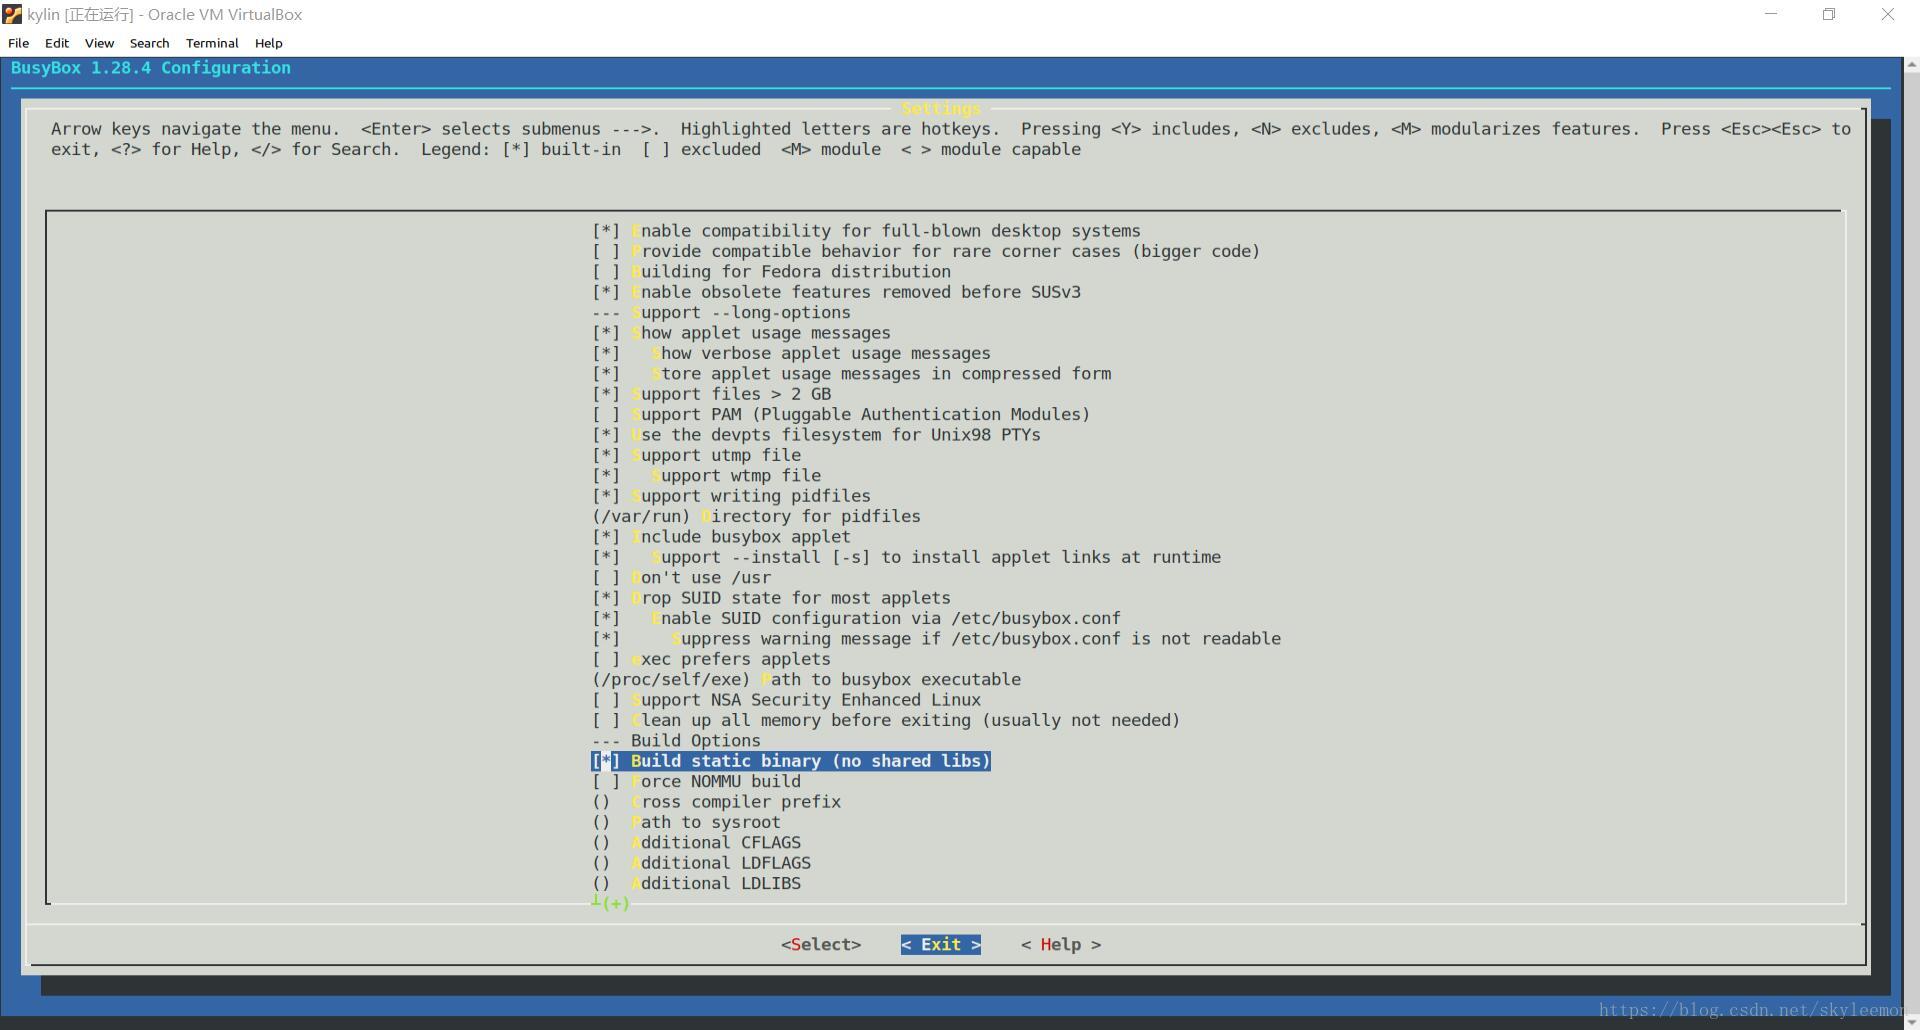
如果是menuconfig,下图选*:
Settings —>
— Build Options
[ ] Build static binary (no shared libs)
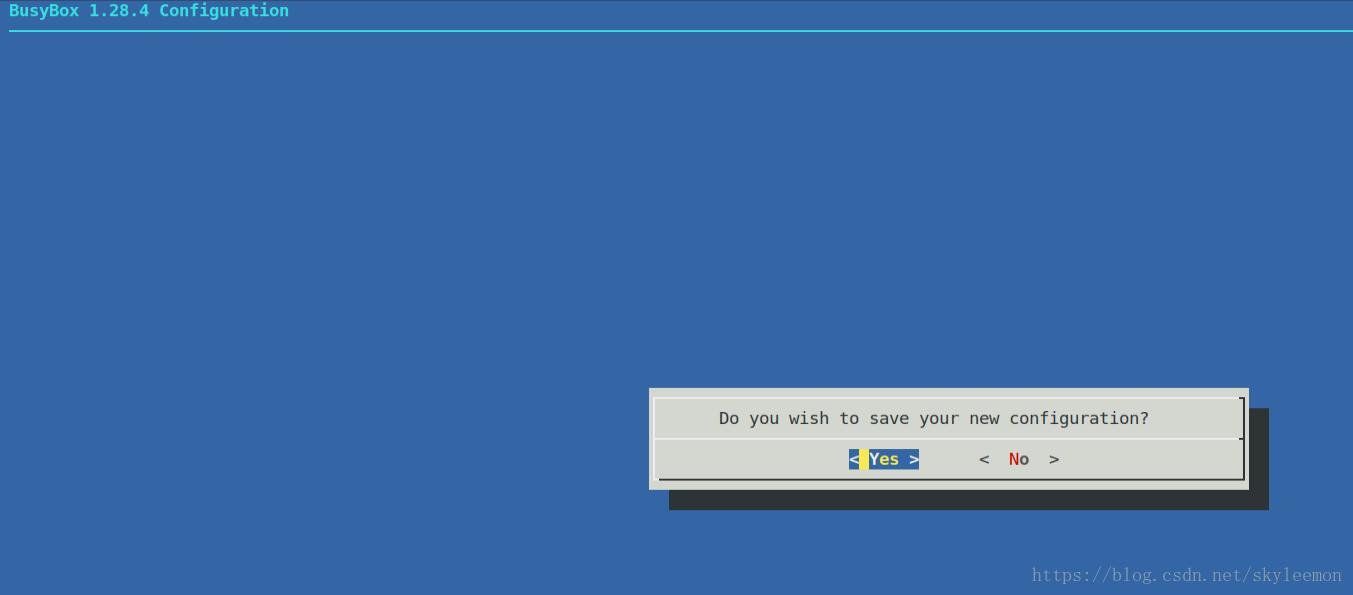

可以看到生成的.config文件
guang@guang-kylin:~/Develop/busybox$ ls -al .config
-rw-rw-r– 1 guang guang 27083 6月 11 12:34 .config
参考文档:
https://blog.csdn.net/qq_36788698/article/details/76647347
https://www.cnblogs.com/PengfeiSong/p/6443149.html
https://unix.stackexchange.com/questions/120198/how-to-fix-boot-into-initramfs-prompt-and-mount-cant-read-etc-fstab-no-su
5.3 编译 && 安装
make
make install
如下提示安装成功
*————————————————–
You will probably need to make your busybox binary
setuid root to ensure all configured applets will
work properly.
*————————————————–
生成的的_install文件如下,包含了各种shell命令:
guang@guang-kylin:~/Develop/busybox$ ls -al ./_install/
total 20
drwxrwxr-x 5 guang guang 4096 6月 11 12:49 .
drwxrwxr-x 38 guang guang 4096 6月 11 12:48 ..
drwxrwxr-x 2 guang guang 4096 6月 11 12:49 bin
lrwxrwxrwx 1 root root 11 6月 11 12:49 linuxrc -> bin/busybox
drwxrwxr-x 2 guang guang 4096 6月 11 12:49 sbin
drwxrwxr-x 4 guang guang 4096 6月 11 12:48 usr
5.4 制作根文件系统
5.4.1 新建根目录
guang@guang-kylin:~/Develop$ mkdir trainning
guang@guang-kylin:~/Develop$ cd trainning/
guang@guang-kylin:~/Develop/trainning$ mkdir rootfs
guang@guang-kylin:~/Develop/trainning$ cd rootfs/
5.4.2 新建库文件目录,完成库文件的拷贝
guang@guang-kylin:~/Develop/trainning/rootfs$ mkdir lib
guang@guang-kylin:~/Develop/trainning/rootfs$ ls
lib
guang@guang-kylin:~/Develop/trainning/rootfs$ cp -r ../../busybox/_install/* ./
guang@guang-kylin:~/Develop/trainning/rootfs$ ls
bin lib linuxrc sbin usr
文件系统运行在arm平台,因此还需要arm-linux-gnueabi的库
guang@guang-kylin:~/Develop/trainning/rootfs$ cp -p /usr/arm-linux-gnueabi/lib/* ./lib

5.4.3 创建设备文件
guang@guang-kylin:~/Develop/trainning/rootfs$ mkdir dev
guang@guang-kylin:~/Develop/trainning/rootfs$ ls
bin dev lib linuxrc sbin usr
创建4个串口设备
guang@guang-kylin:~/Develop/trainning/rootfs/dev$ sudo mknod -m 666 tty1 c 4 1
[sudo] password for guang:
guang@guang-kylin:~/Develop/trainning/rootfs/dev$ sudo mknod -m 666 tty2 c 4 2
guang@guang-kylin:~/Develop/trainning/rootfs/dev$ sudo mknod -m 666 tty3 c 4 3
guang@guang-kylin:~/Develop/trainning/rootfs/dev$ sudo mknod -m 666 tty4 c 4 4
创建控制台
guang@guang-kylin:~/Develop/trainning/rootfs/dev$ sudo mknod -m 666 console c 5 1
创建null
guang@guang-kylin:~/Develop/trainning/rootfs/dev$ sudo mknod -m 666 null c 1 3

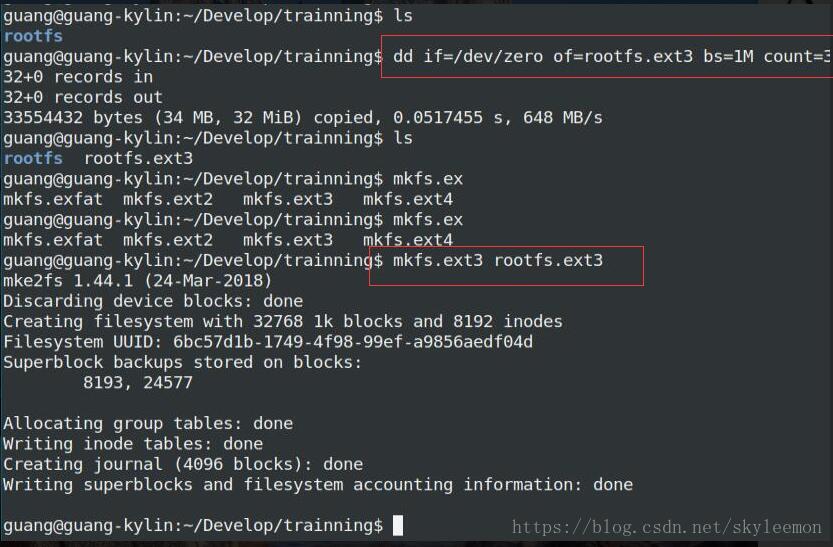
5.4.3 制作SD根文件系统镜像
生成虚拟sd卡并格式化为ext格式:
dd if=/dev/zero of=rootfs.ext3 bs=1M count=32
mkfs.ext3 rootfs.ext3
将虚拟sd卡挂载到/mnt,拷贝rootfs的所有文件到sd,卸载sd(块设备不能直接读写)
mount -t ext3 rootfs.ext3 /mnt/ -o loop
cp -r rootfs/* /mnt
umount /mnt

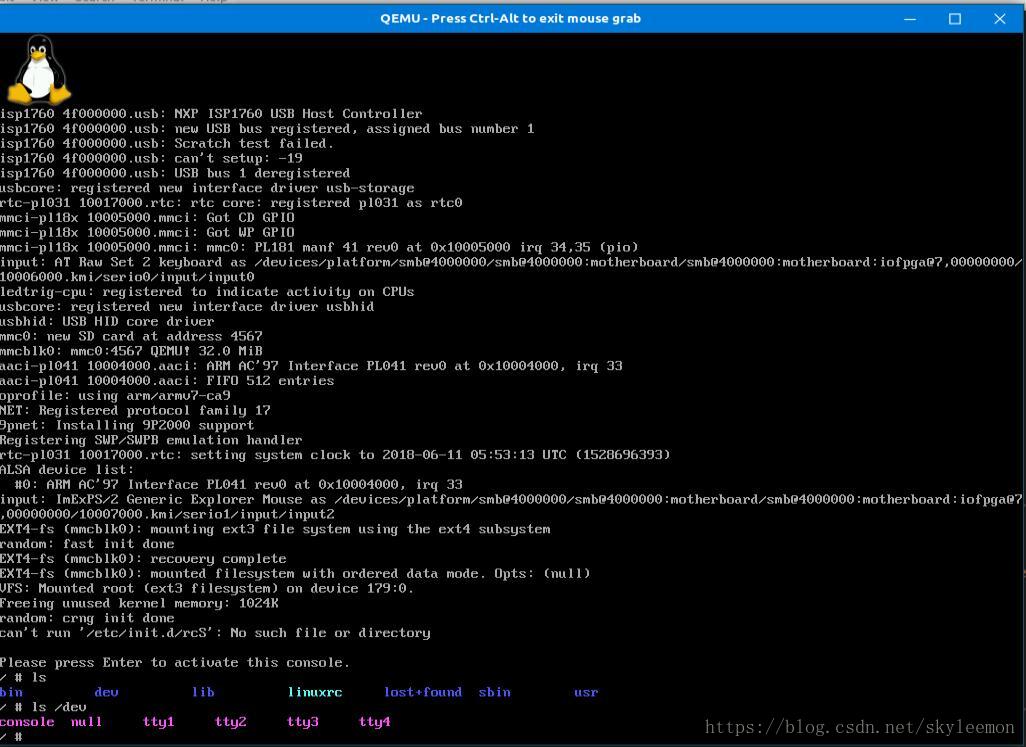
5.4.4 启动内核,挂载rootfs
guang@guang-kylin:~/Develop/trainning$ qemu-system-arm -M vexpress-a9 -m 512M -dtb ../linux-stable/arch/arm/boot/dts/vexpress-v2p-ca9.dtb -kernel ../linux-stable/arch/arm/boot/zImage -nographic -append “root=/dev/mmcblk0 rw console=ttyAMA0” -sd rootfs.ext3
不带lcd的启动效果:

带lcd的启动效果:
qemu-system-arm -M vexpress-a9 -m 512M -dtb ../linux-stable/arch/arm/boot/dts/vexpress-v2p-ca9.dtb -kernel ../linux-stable/arch/arm/boot/zImage -append “root=/dev/mmcblk0 rw console=tty0” -sd rootfs.ext3
5.4.5 一个简单的ko测试程序
报错解决:写一个makefile,自动包含头文件路径

// qemu.c:
#include <linux/init.h>
#include <linux/module.h>

static int __init qemu_init (void)
{
    printk (KERN_INFO"[Info]Hello! Enter QEMU.");
    return 0;
}
module_init (qemu_init);

static void __exit qemu_exit (void)
{
    printk (KERN_INFO"[Info]Hello! Exit QEMU.");
}
module_exit (qemu_exit);

MODULE_AUTHOR ("Guang-kylin");
MODULE_LICENSE ("GPL v2");
MODULE_DESCRIPTION ("A simple qume test module");
MODULE_ALIAS ("QEMU module");
// Makefile
KVERS = $(shell uname -r)
# Kernel modules
obj-m += qemu.o
#EXTRA_CFLAGS=-g -O0
build: kernel_modules
kernel_modules:
make -C /lib/modules/$(KVERS)/build M=$(CURDIR) modules
clean:
make -C /lib/modules/$(KVERS)/build M=$(CURDIR) cleanrootfs根文件系统下面创建一个test目录用来存放ko文件
拷贝rootfs的内容到rootfs.ext3虚拟SD中
mount -t ext3 rootfs.ext3 /mnt/ -o loop
cp -r rootfs/* /mnt
umount /mnt
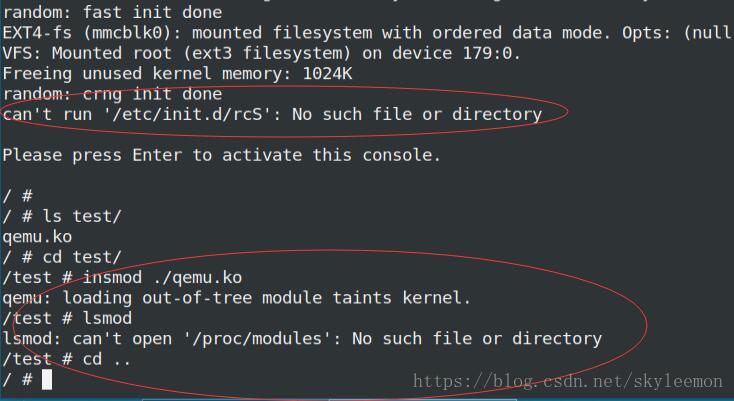
启动开发板,加载KO,报错
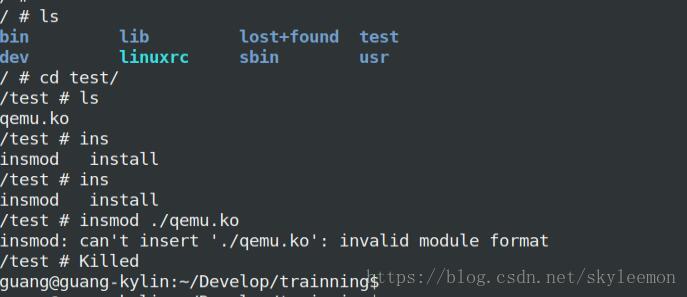
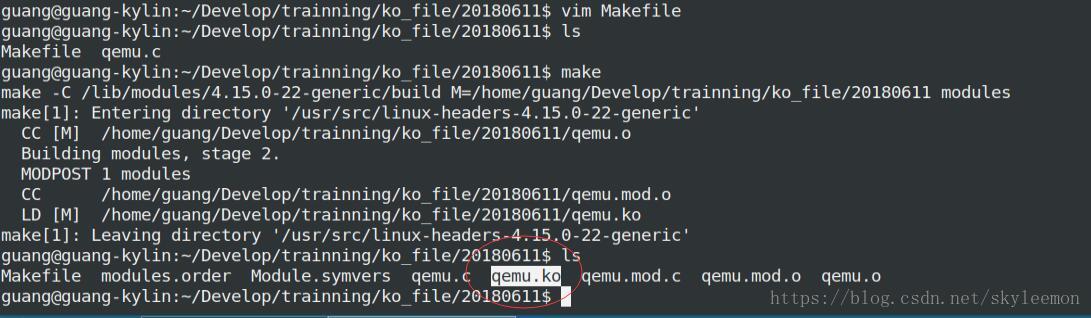
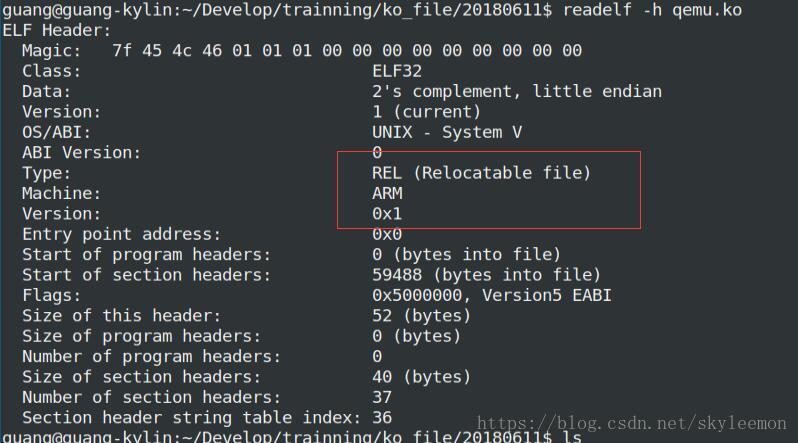
检查一下ko的类型,发现是x86的ko,Makefile还得再修改一下,ko必须是arm-linux-gnueabi交叉编译器生成的,和生成zImage的编译器版本一致

修改过后的Makefile:
KDIR=/home/guang/Develop/linux-stable #linux代码路径,没有详细研究依赖了那些文件,全部包含了
PWD=$(shell pwd)

# Kernel modules
obj-m += qemu.o
module-objs = qemu.o

ARCH=arm
CROSS_COMPILE=arm-linux-gnueabi-

CC := $(CROSS_COMPILE)gcc
LD := $(CROSS_COMPILE)ld

#EXTRA_CFLAGS=-g -O0

default:
    make -C $(KDIR) M=$(PWD) modules
clean:
    rm -f *.ko *.o *.mod.c *.symvers *.order
查看ko,拷贝rootfs的内容到rootfs.ext3,查看加载效果
把zImage和dtb文件都拷贝到同一个目录了,在当前目录敲命令行省事,也可以写成一个shell脚本,后面再搞

/*****/
qemu-system-arm -M vexpress-a9 -m 512M -dtb ./vexpress-v2p-ca9.dtb -kernel ./zImage -nographic -append “root=/dev/mmcblk0 rw console=ttyAMA0” -sd rootfs.ext3
/*****/
加载还是报错,rcS找不到,文件系统还没有制作完成,还得继续
5.4.6 创建etc,进一步完善根文件系统
guang@guang-ubuntu:~/Develop/trainning/rootfs$ mkdir etc
guang@guang-ubuntu:~/Develop/trainning/rootfs$ cd etc
创建inittab
::sysinit:/etc/init.d/rcS
#::respawn:-/bin/sh
#tty2::askfirst:-/bin/sh
#::ctrlaltdel:/bin/umount -a -r

console::askfirst:-/bin/sh
::ctrlaltdel:/sbin/reboot
::shutdown:/bin/umount -a -r
创建fstab
proc            /proc           proc    defaults                0       0
tmpfs           /tmp            tmpfs   defaults                0       0
sysfs           /sys            sysfs   defaults                0       0
tmpfs           /dev            tmpfs   defaults                0       0
var             /dev            tmpfs   defaults                0       0
ramfs           /dev            ramfs   defaults                0       0
创建profile
PS1='guang@arm-vexpress:\w # '
export PS1
创建init.d/rcS
#! /bin/sh
PATH=/sbin:/bin:/usr/sbin:/usr/bin
LD_LIBRARY_PATH=/lib
export PATH LD_LIBRARY_PATH

mount -a
mkdir -p /dev/pts
mount -t devpts devpts /dev/pts
mdev -s
mkdir -p /var/lock

echo "-----------------------------------"

echo " welcome to A9 vexpress board"

echo "-----------------------------------"
5.4.7 用最新的rootfs覆盖rootfs.ext3虚拟SD卡,启动开发板验证,效果如下,还有问题,待调试:
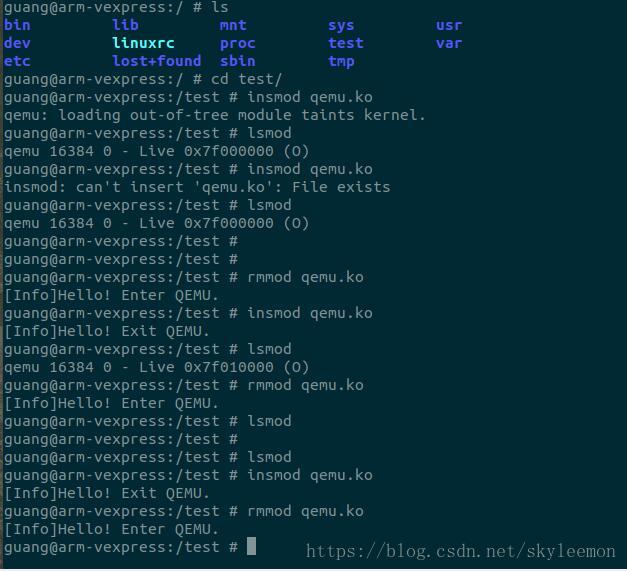
以上问题换了linux kernel得到解决,疑是内核污染的问题,版本4.17.0+
6 使用u-boot加载linux kernel
6.1 修改顶层Makefile,指定交叉编译器
CROSS_COMPILE ?= arm-linux-gnueabi-
6.2 修改顶层config.mk,指定ARM架构
ARCH := arm
6.3 配置开发板
make vexpress_ca9x4_defconfig
6.4 编译u-boot
make –j4
6.5 运行u-boot
qemu-system-arm -M vexpress-a9 -kernel u-boot -nographic -m 512M
6.5 配置QEMU的网络功能
采用桥接(bridge)的网络连接与Host通信
需要主机内核tun/tap模块支持(linux17.04以后的版本都支持了,不支持的老版本需要自己创建,我安装的ubuntu是18.04,故已经有了这个模块)

6.5.1 主机安装工具包:
apt install uml-utilities bridge-utils
6.5.2 创建tun设备文件:/dev/net/tun(如果没有)
6.5.3 修改/etc/network/interfaces文件,文件最后添加如下内容并保存,enp0s3字段是ifconfig查到的虚拟网卡的名称
auto enp0s3
auto br0
iface br0 inet dhcp
bridge_ports enp0s3
6.5.4 reboot,如下br0已经生成, ip是10.0.2.15:
guang@guang-ubuntu:~$ ifconfig
br0: flags=4163<UP,BROADCAST,RUNNING,MULTICAST>  mtu 1500
        inet 10.0.2.15  netmask 255.255.255.0  broadcast 10.0.2.255
        inet6 fe80::a00:27ff:fe6e:98c6  prefixlen 64  scopeid 0x20<link>
        ether 08:00:27:6e:98:c6  txqueuelen 1000  (Ethernet)
        RX packets 156  bytes 346295 (346.2 KB)
        RX errors 0  dropped 0  overruns 0  frame 0
        TX packets 229  bytes 27996 (27.9 KB)
        TX errors 0  dropped 0 overruns 0  carrier 0  collisions 0

enp0s3: flags=4163<UP,BROADCAST,RUNNING,MULTICAST>  mtu 1500
        ether 08:00:27:6e:98:c6  txqueuelen 1000  (Ethernet)
        RX packets 374  bytes 360251 (360.2 KB)
        RX errors 0  dropped 0  overruns 0  frame 0
        TX packets 229  bytes 28436 (28.4 KB)
        TX errors 0  dropped 0 overruns 0  carrier 0  collisions 0

lo: flags=73<UP,LOOPBACK,RUNNING>  mtu 65536
        inet 127.0.0.1  netmask 255.0.0.0
        inet6 ::1  prefixlen 128  scopeid 0x10<host>
        loop  txqueuelen 1000  (Local Loopback)
        RX packets 62  bytes 5127 (5.1 KB)
        RX errors 0  dropped 0  overruns 0  frame 0
        TX packets 62  bytes 5127 (5.1 KB)
        TX errors 0  dropped 0 overruns 0  carrier 0  collisions 0

guang@guang-ubuntu:~$
6.5.5 编译uImage
make LOADADDR=0x60003000 uImage -j4
6.5.6 主机TFTP工具安装
apt-get install tftp-hpa tftpd-hpa xinetd
6.5.7 修改配置文件:/etc/default/tftpd-hpa
# /etc/default/tftpd-hpa

TFTP_USERNAME="tftp"
TFTP_DIRECTORY="/home/guang/Develop/trainning/tftpboot"
TFTP_ADDRESS="0.0.0.0:69"
# TFTP_OPTIONS="--secure"
TFTP_OPTIONS="-l -c -s"
6.5.8 创建tftpboot目录
guang@guang-ubuntu:~/Develop/trainning$ mkdir tftpboot
guang@guang-ubuntu:~/Develop/trainning$ chmod +rwx tftpboot
guang@guang-ubuntu:~/Develop/trainning$ cd tftpboot/
guang@guang-ubuntu:~/Develop/trainning/tftpboot$ pwd
/home/guang/Develop/trainning/tftpboot
6.5.8 重启tftp服务
guang@guang-ubuntu:~/Develop/trainning$ sudo /etc/init.d/tftpd-hpa restart
[ ok ] Restarting tftpd-hpa (via systemctl): tftpd-hpa.service.
6.5.8 修改u-boot文件:include/configs/vexpress_common.h
/*config qemu' network<Add by guang 20180618>*/
#define CONFIG_BOOTCOMMAND \
        "tftp 0x60003000 uImage;tftp 0x60500000 vexpress-v2p-ca9.dtb; \
        setenv bootargs 'root=/dev/mmcblk0 console=tty0'; \
        bootm 0x60003000 - 0x60500000;"

#define CONFIG_IPADDR 10.0.2.14
#define CONFIG_NETMASK 255.255.255.0
#define CONFIG_SERVERIP 10.0.2.15