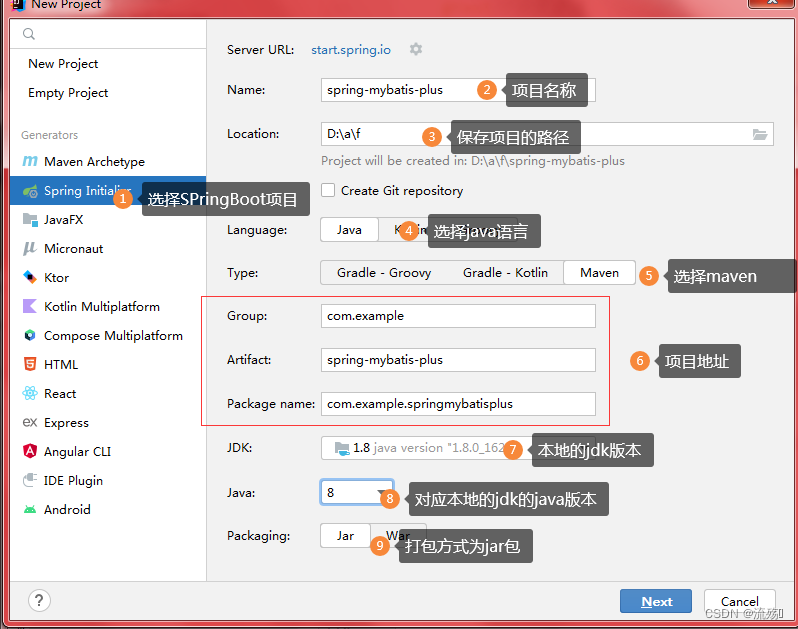
创建SPringBoot项目
1.选择创建项目
2.创建SPringBoot项目
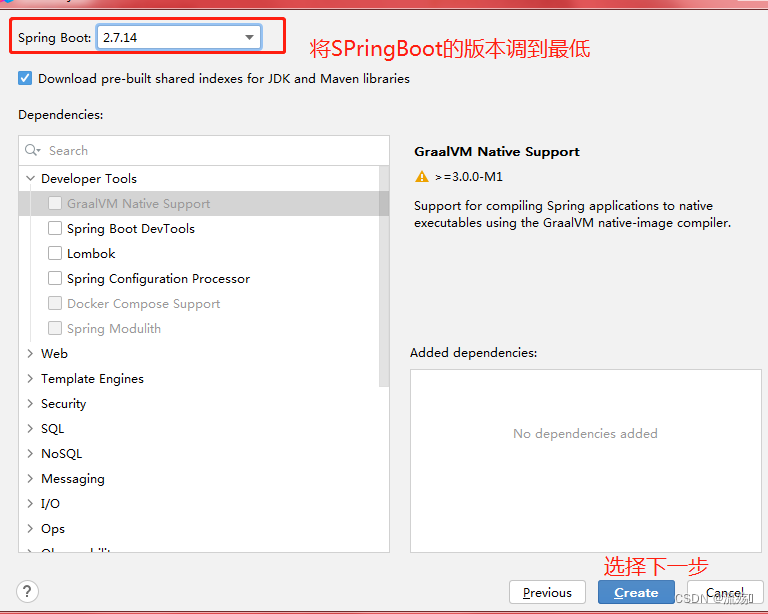
3.选择SPringBoot的版本和依赖
4.导入mysql,druid,mybatis-plus和lombok的依赖,导入后记得更新依赖
         <dependency>
            <groupId>com.mysql</groupId>
            <artifactId>mysql-connector-j</artifactId>
            <scope>runtime</scope>
        </dependency>
        <dependency>
            <groupId>com.alibaba</groupId>
            <artifactId>druid-spring-boot-starter</artifactId>
            <version>1.1.17</version>
        </dependency>
        <dependency>
            <groupId>com.baomidou</groupId>
            <artifactId>mybatis-plus-boot-starter</artifactId>
            <version>3.5.2</version>
        </dependency>
        <dependency>
            <groupId>org.projectlombok</groupId>
            <artifactId>lombok</artifactId>
            <version>1.18.22</version>
            <scope>compile</scope>
        </dependency>
5.编写配置文件
# MySQL数据库连接配置,SpringBoot默认使用的连接池是Hikari     连接速度最快的  被SpringBoot默认整合的
# 手动改成alibaba的连接池
spring.datasource.url=jdbc:mysql://localhost:3306/leq_pro?useUnicode=true&characterEncoding=utf8&useSSL=false&serverTimezone=UTC
spring.datasource.username=root
spring.datasource.password=0216

#添加并配置第三方数据源Druid
#数据源类型
spring.datasource.type=com.alibaba.druid.pool.DruidDataSource
#初始化连接数
spring.datasource.initialSize=20
#最小空闲数
spring.datasource.minIdle=10
#最大连接数
spring.datasource.maxActive=100


#配置MyBatis-Plus的xml配置文件的位置
mybatis-plus.mapper-locations=classpath:mapper/*.xml
mybatis-plus.type-aliases-package=com.example.mybatisplus.pojo
# 显示sql语句
mybatis-plus.configuration.log-impl=org.apache.ibatis.logging.stdout.StdOutImpl
6.提前准备数据,在navcat中运行下面的代码
create database leq_pro;
create table my(
mid int primary key auto_increment,
mname varchar(255),
mage varchar(255),
msex varchar(255),
mbirthday varchar(255)
);
insert into my values(0,'小满','18','女','2023-5-10');

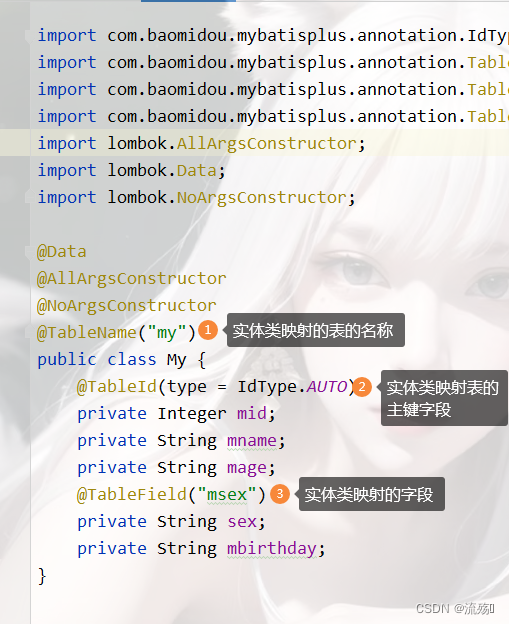
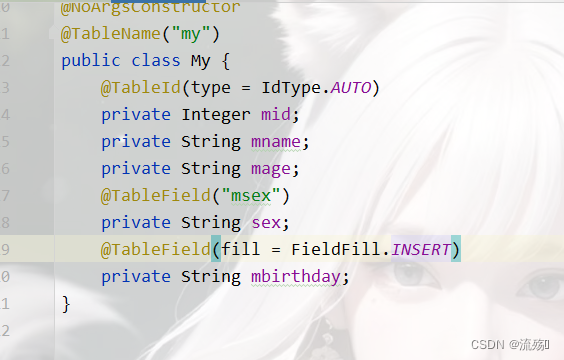
7.创建该表的实体类,mybatis-plus需要指定表名和主键id字段
import com.baomidou.mybatisplus.annotation.IdType;
import com.baomidou.mybatisplus.annotation.TableField;
import com.baomidou.mybatisplus.annotation.TableId;
import com.baomidou.mybatisplus.annotation.TableName;
import lombok.AllArgsConstructor;
import lombok.Data;
import lombok.NoArgsConstructor;

@Data
@AllArgsConstructor
@NoArgsConstructor
@TableName("my")
public class My {
    @TableId(type = IdType.AUTO)
    private Integer mid;
    private String mname;
    private String mage;
    @TableField("msex")
    private String sex;
    private String mbirthday;
}
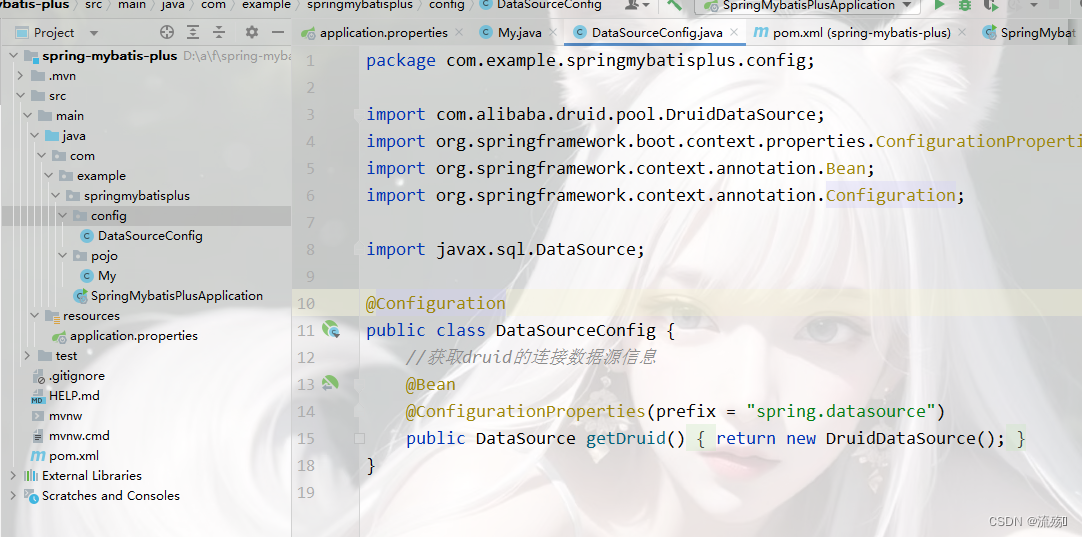
8.如果要使用druid连接池,可以使用这个配置类来连接
import com.alibaba.druid.pool.DruidDataSource;
import org.springframework.boot.context.properties.ConfigurationProperties;
import org.springframework.context.annotation.Bean;
import org.springframework.context.annotation.Configuration;

import javax.sql.DataSource;

@Configuration
public class DataSourceConfig {
    //获取druid的连接数据源信息
    @Bean
    @ConfigurationProperties(prefix = "spring.datasource")
    public DataSource getDruid(){
        return new DruidDataSource();
    }
}
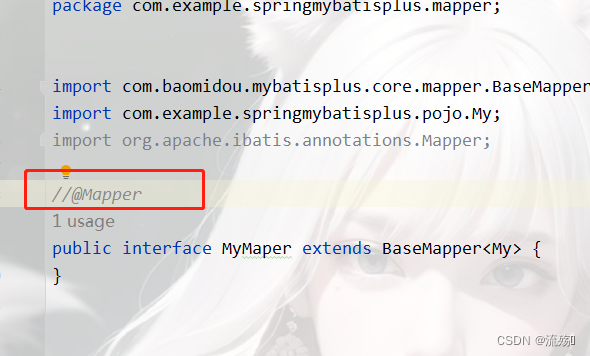
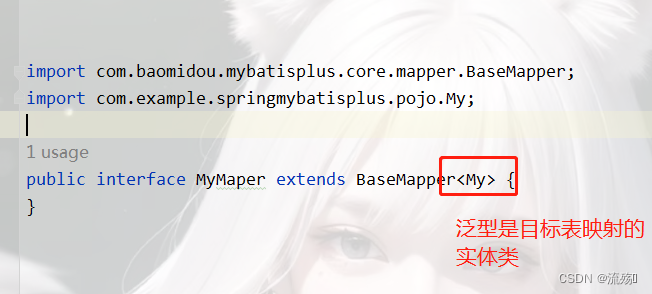
9.创建mapper层,继承BaseMapper,BaseMapper中封装了对sql的基本操作
import com.baomidou.mybatisplus.core.mapper.BaseMapper;
import com.example.springmybatisplus.pojo.My;

public interface MyMaper extends BaseMapper<My> {
}
10.在启动类上加上注解或者在MyMapper上加上@Mapper注解,有一个即可
@MapperScan("com.example.springmybatisplus.mapper")import org.mybatis.spring.annotation.MapperScan; import org.springframework.boot.SpringApplication; import org.springframework.boot.autoconfigure.SpringBootApplication; @MapperScan("com.example.springmybatisplus.mapper") @SpringBootApplication public class SpringMybatisPlusApplication { public static void main(String[] args) { SpringApplication.run(SpringMybatisPlusApplication.class, args); } }
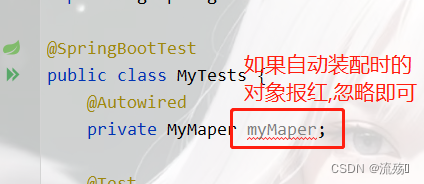
11.在test目录下创建MyTests来对表进行crud的操作
import com.example.springmybatisplus.pojo.My;
import org.junit.jupiter.api.Test;
import org.springframework.beans.factory.annotation.Autowired;
import org.springframework.boot.test.context.SpringBootTest;

import java.util.List;

@SpringBootTest
public class MyTests {
    @Autowired
    private MyMaper myMaper;
}


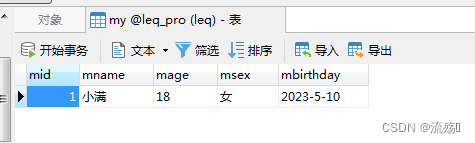
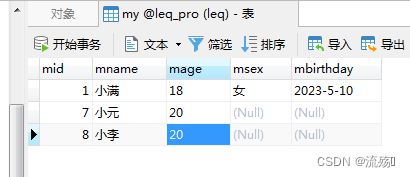
这是我们初始的表
1.新增数据,因为id设置了自增,所以我们不需要给id设置值
   @Test
    public void test01(){
        My my = new My();
        my.setMname("小元");
        my.setMage("20");
        my.setSex("男");
        my.setMbirthday("2018-5-1");
        int insert = myMaper.insert(my);
        System.out.println(insert>0);
    }
运行该方法后查询表,就可以看到新增的数据
2.删除数据
    @Test
    public void test02(){
        int insert = myMaper.deleteById(2);
    }
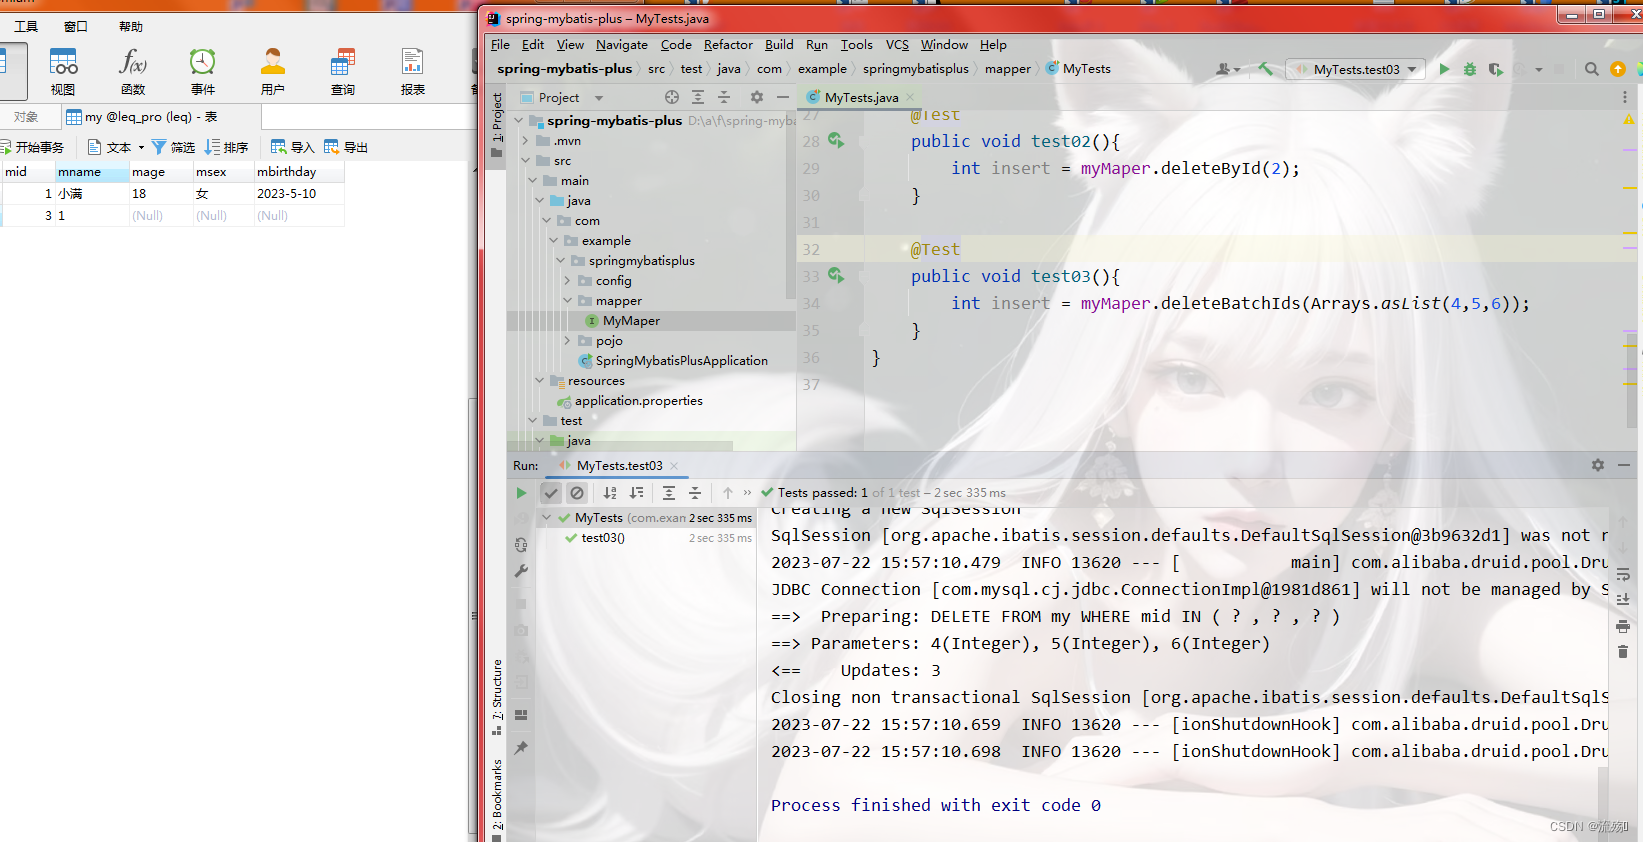
3.批量删除
随便添加的数据
    @Test
    public void test03(){
        int insert = myMaper.deleteBatchIds(Arrays.asList(4,5,6));
    }
4.条件删除
    @Test
    public void test04(){
        UpdateWrapper<My> w = new UpdateWrapper<>();
        //        gt() 大于      eq() 等于     or() 或者
        //        and() 并且    like()模糊   ge()大于等于
        w.gt("mid",1);//删除id大于1的
        myMaper.delete(w);
    }
5.通过集合的条件删除
添加数据
    @Test
    public void test05(){
        HashMap<String, Object> col = new HashMap<String, Object>(){
            {put("mname","小元");put("mid","7");}//and的关系
        };
        myMaper.deleteByMap(col);
    }
6.更新
     @Test//更新
    public void test06(){
        My my = new My();
        my.setMid(8);
        my.setMname("小元");
        my.setMage("18");
        myMaper.updateById(my);
    }
7.条件更新
    @Test//更新
     public void test07(){
        My gtypes = new My();
        gtypes.setMid(8);//执行要更新的id

        UpdateWrapper<My> wrapper = new UpdateWrapper<>();//更新的条件
        wrapper.eq("mid",8).set("mname","小李").set(false,"msex",null);


        myMaper.update(gtypes,wrapper);
}
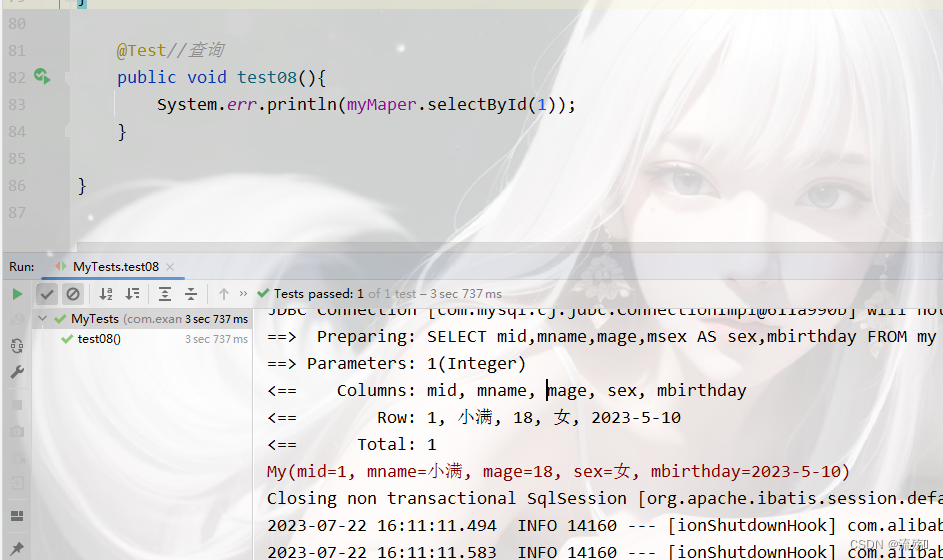
8.查询
    @Test//查询
    public void test08(){
        System.err.println(myMaper.selectById(1));
    }
9.批量查询
    @Test//批量查询
    public void test09(){
        ArrayList<Integer> col =new ArrayList<Integer>(){
            {add(1);add(8);}
        };
        List<My> gtypes = myMaper.selectBatchIds( col);
        gtypes.forEach(System.err::println);
    }
10条件查询
    @Test//条件查询
    public void test10(){
        QueryWrapper<My> wrapper = new QueryWrapper<>();
        wrapper.select("mname","mage");//要查询的字段
        wrapper.eq("mid","1");//查询的条件
        List<My> mies = myMaper.selectList(wrapper);
        mies.forEach(System.err::println);
    }
12.分页查询
    @Test//分页查询
    public void test11(){
        Page<My> page = new Page<>(1, 5);
        QueryWrapper<My> wrapper = new QueryWrapper<>();//不加条件就是查询所有
        wrapper.like("mname","小");

        IPage<My> iPage = myMaper.selectPage(page, wrapper);
        List<My> records = iPage.getRecords();//获取查询到的所有记录
        records.forEach(System.out::println);//soutc
    }
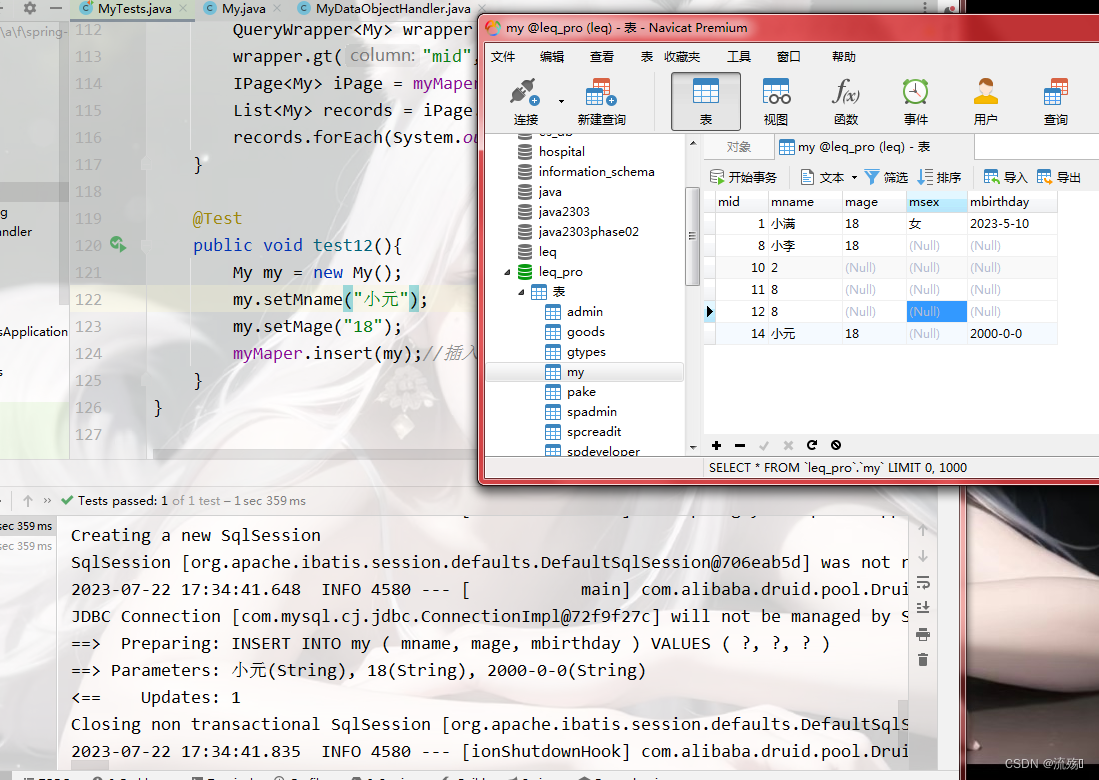
13.高级操作(插入)
在实体类中定义需要更改的字段
定义配置类
import com.baomidou.mybatisplus.core.handlers.MetaObjectHandler;
import org.apache.ibatis.reflection.MetaObject;
import org.springframework.stereotype.Component;

//自动填充数据
//    @TableField(fill = FieldFill.INSERT)  插入
//    @TableField(fill = FieldFill.UPDATE)  更新
//    @TableField(fill = FieldFill.DEFAULT) 删除
//    @TableField(fill = FieldFill.INSERT_UPDATE)   插入更新
@Component
public class MyDataObjectHandler implements MetaObjectHandler {
    @Override//插入数据时调用
    public void insertFill(MetaObject metaObject) {
                                    //   源对象         字段属性       取值类型   具体值
        this.strictInsertFill(metaObject,"mbirthday",String.class,"2000-0-0");
    }

    @Override//更新数据时调用
    public void updateFill(MetaObject metaObject) {
        this.strictInsertFill(metaObject,"mbirthday",String.class,"2000-1-1");
    }
}
进行测试
    @Test
    public void test12(){
        My my = new My();
        my.setMname("小元");
        my.setMage("18");
        myMaper.insert(my);//插入数据,没有设置日期
    }


接口中可以定义什么成员?
    dk1.7之前:
        1.静态常量  public static final int a=10;
        2.抽象方法public abstract String  a();
   jdk1.8以及之后的版本
        3.静态方法  public static
        4.默认方法  被default修饰的方法  public  default
public interface Myinterfae { public static final int a=10; public abstract String a(); public static void aa(){ System.out.println("静态方法"); } public default void aaa(){ System.out.println("静态方法"); } }