1. SpringBoot自动装配原理
1.1 SpringBoot包扫描原理
包建议大家放在主类所在包或者子包。默认包扫描的是主类所在的包以及子包。
主函数在运行时会加载一个使用@SpringBootApplication标记的类。而该注解是一个复合注解,包含@EnableAutoConfiguration,这个注解开启了自动配置功能。 该注解也是一个复合注解,包含@AutoConfigurationPackage。 该注解中包含@Import({Registrar.class}),这个注解引入Registrar类。该类中存在registerBeanDefinitions,可以获取扫描的包名。
如果需要人为修改包扫描的名称则需要在主类上加上@ComponentScan(basepackage={"包名"})
1.2SpringBoot自动装配原理
思考: 自己有没有使用DispatcherServlet. 为什么DispatcherServlet能用。
主函数在运行会执行一个使用@SpringbootApplication注解的类,该注解是一个复合注解,包含@EnableAutoConfiguration, 该注解开启自动配置功能,该注解也是一个复合注解,包含@Import() 该注解需要导入AutoConfigurationImportSelector类。 该类会加载很多自动装配类,而这些自动装配类完成相应的自动装配原理。
2. SpringBoot整合mybatis-plus
MyBatis-Plus (opens new window)(简称 MP)是一个 MyBatis (opens new window)的增强工具,在 MyBatis 的基础上只做增强不做改变,为简化开发、提高效率而生。
愿景
我们的愿景是成为 MyBatis 最好的搭档,就像 魂斗罗 中的 1P、2P,基友搭配,效率翻倍。

Mybatis-plus只能完成单表的增删改查,不能完全取代Mybatis
2.1 如何使用MyBatis-plus
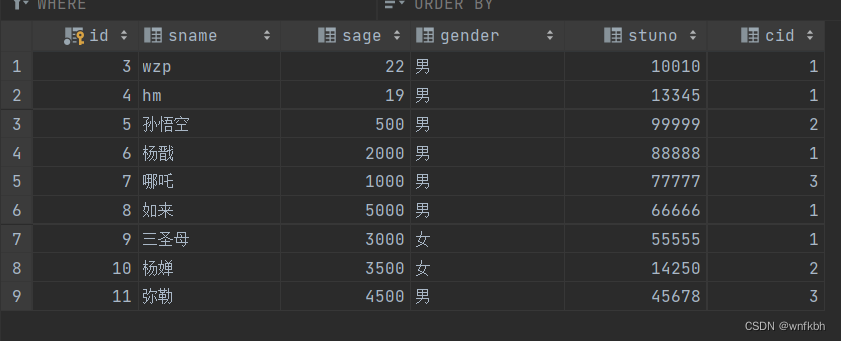
2.1.1 创建表并加入数据
2.1.2 创建一个SpringBoot工程并导入相关依赖
<?xml version="1.0" encoding="UTF-8"?>
<project xmlns="http://maven.apache.org/POM/4.0.0" xmlns:xsi="http://www.w3.org/2001/XMLSchema-instance"
xsi:schemaLocation="http://maven.apache.org/POM/4.0.0 https://maven.apache.org/xsd/maven-4.0.0.xsd">
<modelVersion>4.0.0</modelVersion>
<parent>
<groupId>org.springframework.boot</groupId>
<artifactId>spring-boot-starter-parent</artifactId>
<version>2.3.12.RELEASE</version>
<relativePath/> <!-- lookup parent from repository -->
</parent>
<groupId>com.lzx</groupId>
<artifactId>qy163-springboot02</artifactId>
<version>0.0.1-SNAPSHOT</version>
<name>qy163-springboot03</name>
<description>Demo project for Spring Boot</description>
<properties>
<java.version>1.8</java.version>
</properties>
<dependencies>
<dependency>
<groupId>org.springframework.boot</groupId>
<artifactId>spring-boot-starter-web</artifactId>
</dependency>
<dependency>
<groupId>mysql</groupId>
<artifactId>mysql-connector-java</artifactId>
</dependency>
<dependency>
<groupId>com.baomidou</groupId>
<artifactId>mybatis-plus-boot-starter</artifactId>
<version>3.5.1</version>
</dependency>
<dependency>
<groupId>org.springframework.boot</groupId>
<artifactId>spring-boot-starter-test</artifactId>
<scope>test</scope>
</dependency>
</dependencies>
<build>
<plugins>
<plugin>
<groupId>org.springframework.boot</groupId>
<artifactId>spring-boot-maven-plugin</artifactId>
</plugin>
</plugins>
</build>
</project>
2.1.3 配置数据源
spring.datasource.driver-class-name=com.mysql.cj.jdbc.Driver
spring.datasource.username=root//自己数据库的用户名
spring.datasource.password=123456//自己数据库的密码
spring.datasource.url=jdbc:mysql:///company
2.1.4 创建实体类

2.1.5 生成代理实现类
@SpringBootApplication
@MapperScan(basePackages = "com.lzx.mapper")
public class Qy163SpringBoot02Application {

    public static void main(String[] args) {
        SpringApplication.run(Qy163SpringBoot02Application.class, args);
    }

}

2.1.6 测试
@SpringBootTest
class Qy163SpringBoot02ApplicationTests {

    @Autowired
    private StudentMapper studentMapper;

    @Test
    void StudentById() {
        Student student = studentMapper.selectById(1);
        System.out.println(student);
    }
}
2.3 使用mp完成增删改查
@SpringBootTest
class Qy163SpringBoot02ApplicationTests {

    @Autowired
    private StudentMapper studentMapper;

    @Test
    void StudentById() {
        Student student = studentMapper.selectById(1);
        System.out.println(student);
    }

    /**
     * 添加
     */
    @Test
    void StudentInsert(){
        Student student = new Student("wzp",18,"男",8080,1);
        student.setId(1);
        int insert = studentMapper.insert(student);
        System.out.println(insert);
    }

    /**
     * 删除
     */
    @Test
    void StudentDelete(){
        val i = studentMapper.deleteById(1);
        System.out.println(i);
    }

    /**
     * 多行删除
     */
    @Test
    void StudentDeleteIds(){
        List<Integer> ids = new ArrayList<>();
        ids.add(1);
        ids.add(2);
        ids.add(3);
        int i = studentMapper.deleteBatchIds(ids);
        System.out.println(i);
    }

    /**
     * 修改
     */
   @Test
    void StudentUpdate(){
       Student student = new Student("杨志力",22,"男",11111,2);
       student.setId(5);
       System.out.println(studentMapper.updateById(student));

    }
}
2.4 使用mp完成分页查询
@Autowired
private StudentMapper studentMapper;
@Test
 void Page(){
    Page<Student> page = new Page<>(1,2);
    studentMapper.selectPage(page,null);
    System.out.println("当前页的记录:" + page.getRecords());
    System.out.println("获取总条数" + page.getTotal());
    System.out.println("获取总页数" + page.getPages());
}
2.5 使用mp完成条件查询
@Autowired
private StudentMapper studentMapper;
@Test
 void select(){
    QueryWrapper<Student> queryWrapper = new QueryWrapper<>();
     queryWrapper.ge("sage",18);
     queryWrapper.like("sname","%杨%");
     queryWrapper.ne("sage",20);//不等于
    queryWrapper.between("sage",20,25);
    System.out.println(studentMapper.selectList(queryWrapper));
 }