Dockerfile制作运行python的镜像
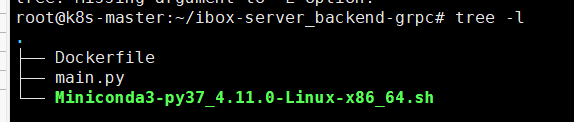
文件结构
#!/bin/bash
FROM ubuntu:18.04
SHELL ["/bin/bash", "-c"]

ENV version 2.0.1
RUN mv /etc/apt/sources.list /etc/apt/sources.list.bak

RUN echo 'deb http://mirrors.aliyun.com/ubuntu bionic main multiverse restricted universe' >> /etc/apt/sources.list

RUN echo 'deb http://mirrors.aliyun.com/ubuntu bionic-updates main multiverse restricted universe' >> /etc/apt/sources.list

RUN echo 'deb http://mirrors.aliyun.com/ubuntu bionic-security main multiverse restricted universe' >> /etc/apt/sources.list

RUN echo 'deb http://mirrors.aliyun.com/ubuntu bionic-proposed main multiverse restricted universe' >> /etc/apt/sources.list

RUN echo 'deb http://mirrors.aliyun.com/ubuntu bionic-backports main multiverse restricted universe' >> /etc/apt/sources.list


RUN echo 'nameserver 8.8.8.8' >> /etc/resolv.conf
RUN echo 'nameserver 223.5.5.5' >> /etc/resolv.conf
RUN echo 'nameserver 223.6.6.6' >> /etc/resolv.conf
RUN apt-get update

RUN apt-get install wget net-tools telnet tree nmap sysstat lrzsz dos2unix  vim less selinux-utils ntpdate unzip zip -y

# Step1: Install python3

RUN cd /root \
    && mkdir -p tools

COPY ./Miniconda3-py37_4.11.0-Linux-x86_64.sh /root/tools/

RUN /bin/bash /root/tools/Miniconda3-py37_4.11.0-Linux-x86_64.sh -b -p /root/Miniconda3/ \
    && export PATH=$PATH:/root/Miniconda3/bin \
    && rm /root/tools/Miniconda3-py37_4.11.0-Linux-x86_64.sh

RUN /root/Miniconda3/bin/conda create -n py36 python=3.6 -y

RUN rm -rf /root/ibox-server_backend-grpc

RUN cd /root \
    && mkdir -p ibox-server_backend-grpc

COPY ./*  /root/ibox-server_backend-grpc/

RUN ls -l /root/ibox-server_backend-grpc/

RUN cd /root/ibox-server_backend-grpc

# RUN export PATH=/Miniconda3/bin:$PATH \
#     && source activate py36 \
#     && pip3 install numpy -i https://mirrors.aliyun.com/pypi/simple/ \
#     && pip3 install sklearn -i https://mirrors.aliyun.com/pypi/simple/

WORKDIR /root/ibox-server_backend-grpc/

ENTRYPOINT ["/root/Miniconda3/envs/py36/bin/python", "-u", "main.py"]
python逻辑
import sys
import time
import os
import sched
import datetime
import logging
logging.basicConfig(stream=sys.stdout, level=logging.DEBUG)
schedule = sched.scheduler(time.time, time.sleep)
def execute_command(cmd, inc):
logging.info(datetime.datetime.now())
schedule.enter(inc, 0, execute_command, (cmd, inc))
def main(cmd, inc=10):
schedule.enter(0, 0, execute_command, (cmd, inc))
schedule.run()
if __name__ == '__main__':
main("ping www.baidu.com", 2)
docker build
docker build -t ibox-server_backend-grpc .
docker run
docker run -d --name=ibox-server_backend-grpc ibox-server_backend-grpc
查看日记
docker logs <contain-id> -f
参考
Dockerfile制作运行python的镜像