4-Real-world data representation using tensors
How do we take a piece of data, a video, or a line of text, and represent it with a tensor in a way that is appropriate for training a deep learning model? This is what we’ll learn in this chapter.
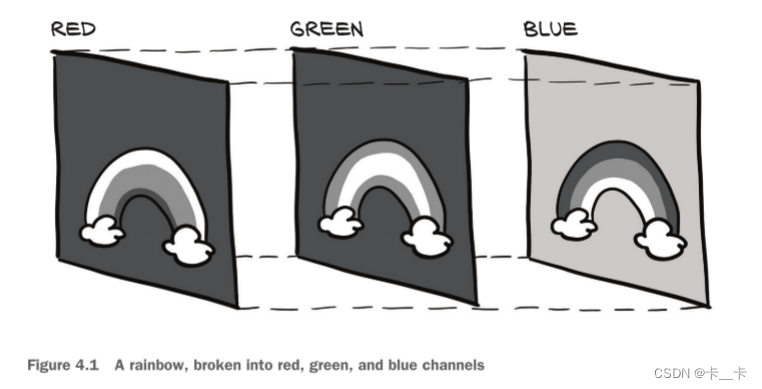
We mentioned colors earlier. There are several ways to encode colors into numbers. The most common is RGB, where a color is defined by three numbers representing the intensity of red, green, and blue. We can think of a color channel as a grayscale intensity map of only the color in question, similar to what you’d see if you looked at the scene in question using a pair of pure red sunglasses.
使用conda安装imageio
conda config --add channels conda-forge
conda install imgaug
Let’s start by loading a PNG image using the imageio module (code/p1ch4/1_image_dog.ipynb).
import imageio # 如果出现警告可换为:import imageio.v2 as imageio
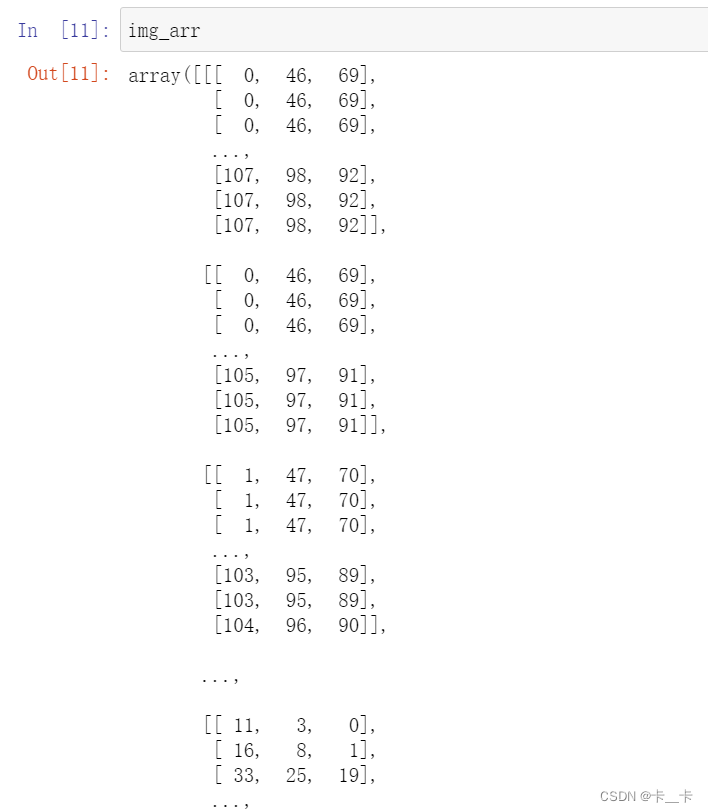
img_arr = imageio.imread('D:/20230716.png')
img_arr.shape # 注意:输入张量为H × W × C

At this point, img is a NumPy array-like object with three dimensions: two spatial dimensions, width and height; and a third dimension corresponding to the red, green, and blue channels. PyTorch modules dealing with image data require tensors to be laid out as C × H × W: channels, height, and width, respectively.
We can use the tensor’s permute method with the old dimensions for each new dimension to get to an appropriate layout. Given an input tensor H × W × C as obtained previously, we get a proper layout by having channel 2 first and then channels 0 and 1:
import torch
img = torch.from_numpy(img_arr)
out = img.permute(2, 0, 1)
out uses the same underlying storage as img and only plays with the size and stride information at the tensor level.
As a slightly more efficient alternative to using stack to build up the tensor, we can preallocate a tensor of appropriate size and fill it with images loaded from a directory, like so:
batch_size = 3
batch = torch.zeros(batch_size, 3, 500, 753, dtype=torch.uint8)
batch.shape


This indicates that our batch will consist of three RGB images 256 pixels in height and 256 pixels in width.Notice the type of the tensor: we’re expecting each color to be represented as an 8-bit integer, as in most photographic formats from standard consumer cameras.
We can now load all PNG images from an input directory and store them in the tensor:
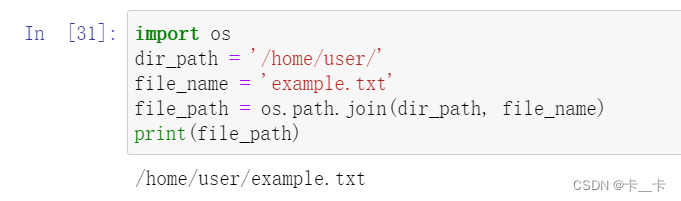
import os
import imageio.v2 as imageio
data_dir = 'D:/'  # 图像文件所在的目录路径
filenames = [name for name in os.listdir(data_dir)
    if os.path.splitext(name)[-1] == '.png']  #获取目录中所有以 .png 结尾的文件名
for i, filename in enumerate(filenames):  # 遍历每个文件名和对应的索引
    img_arr = imageio.imread(os.path.join(data_dir, filename))  # 根据路径加载图像文件并将其转换为 NumPy 数组
    img_t = torch.from_numpy(img_arr)  # 将 NumPy 数组转换为 PyTorch 张量
    img_t = img_t.permute(2, 0, 1)  # 调整通道的顺序,将通道维度置于最前面(前面的输入张量为H × W × C)
    img_t = img_t[:3]  # 只保留前三个通道。有时图像也有alpha通道表示透明度,但我们的网络只需要RGB输入。
    batch[i] = img_t
关于几个函数
①enumerate(iterable, start=0)
iterable:要迭代的可迭代对象,例如列表、元组、字符串等
start(可选):索引的起始值,默认为 0
②os.path.splitext() 拆分文件名和文件扩展名
③os.path.join() 连接路径
We mentioned earlier that neural networks usually work with floating-point tensors as their input. Neural networks exhibit the best training performance when the input data ranges roughly from 0 to 1, or from -1 to 1 (this is an effect of how their building blocks are defined).So a typical thing we’ll want to do is cast a tensor to floating-point and normalize the values of the pixels. Casting to floating-point is easy, but normalization is trickier, as it depends on what range of the input we decide should lie between 0 and 1 (or -1 and 1).
One possibility is to just divide the values of the pixels by 255 (the maximum representable number in 8-bit unsigned):
batch = batch.float()
batch /= 255.0
Another possibility is to compute the mean and standard deviation of the input data and scale it so that the output has zero mean and unit standard deviation across each channel:
batch = batch.float()
n_channels = batch.shape[1]
for c in range(n_channels):
    mean = torch.mean(batch[:, c])
    std = torch.std(batch[:, c])
    batch[:, c] = (batch[:, c] - mean) / std
Here, we normalize just a single batch of images because we do not know yet how to operate on an entire dataset. In working with images, it is good practice to compute the mean and standard deviation on all the training data in advance and then subtract and divide by these fixed, precomputed quantities.
总结:
此文讲述了使用张量处理图像数据的相关内容。
图像被表示为一个具有高度和宽度(以像素为单位)的规则网格上的标量集合。图像可以是灰度图像,其中每个网格点(像素)有一个标量;也可以是彩色图像,其中每个网格点通常有多个标量表示不同的颜色或特征。
在彩色图像中,常用的颜色编码方式是RGB,其中颜色由代表红色、绿色和蓝色强度的三个数字表示。可以将每个颜色通道看作仅包含相应颜色的灰度强度图像。
加载图像文件时,可以使用Python中的多种方法。上文使用了imageio模块来加载PNG图像。加载后的图像被表示为一个NumPy数组,其中有三个维度:空间维度(宽度和高度)和代表红色、绿色和蓝色通道的第三个维度。
为了与PyTorch处理图像数据的模块兼容,需要将数组的维度布局更改为C×H×W,即通道、高度和宽度。可以使用tensor.permute()方法来更改张量的布局,将通道维度放在第一个位置。
为了处理多个图像作为神经网络的输入,可以将图像存储在一个批次中,批次的第一个维度表示图像的数量。可以预先分配一个适当大小的张量,然后从目录中加载图像并将其存储在张量中。
最后,讨论了数据的归一化操作。神经网络通常以浮点张量作为输入,并且最佳的训练性能是当输入数据的范围大致在0到1之间或-1到1之间时。可以将整数张量转换为浮点类型,并将像素值归一化到0到1的范围内。另一种归一化方法是计算输入数据的均值和标准差,并将其缩放,使得输出在每个通道上具有零均值和单位标准差。