Springboot整合Zxing生成二维码
本篇是利用SpringBoot后端整合Zxing生成二维码。
原文参考链接:https://www.jianshu.com/p/a046ff84226e
1.在pom文件中引入项目所需依赖
        <!--谷歌二维码-->
        <dependency>
            <groupId>com.google.zxing</groupId>
            <artifactId>core</artifactId>
            <version>3.3.3</version>
        </dependency>
        <dependency>
            <groupId>com.google.zxing</groupId>
            <artifactId>javase</artifactId>
            <version>3.3.3</version>
        </dependency>
    </dependencies>
2.编写QRcodeUtil工具类
import java.awt.BasicStroke;
import java.awt.Graphics;
import java.awt.Graphics2D;
import java.awt.Image;
import java.awt.Shape;
import java.awt.geom.RoundRectangle2D;
import java.awt.image.BufferedImage;
import java.io.File;
import java.util.Hashtable;

import javax.imageio.ImageIO;

import com.google.zxing.BarcodeFormat;
import com.google.zxing.BinaryBitmap;
import com.google.zxing.DecodeHintType;
import com.google.zxing.EncodeHintType;
import com.google.zxing.MultiFormatReader;
import com.google.zxing.MultiFormatWriter;
import com.google.zxing.Result;
import com.google.zxing.client.j2se.BufferedImageLuminanceSource;
import com.google.zxing.common.BitMatrix;
import com.google.zxing.common.HybridBinarizer;
import com.google.zxing.qrcode.decoder.ErrorCorrectionLevel;

/**
 * 二维码生成解析工具类
 * @author 程就人生
 * @date 2019年7月27日
 * @Description
 *
 */
public class QRCodeUtil {


    //编码格式,采用utf-8
    private static final String UNICODE = "utf-8";
    //图片格式
    private static final String FORMAT = "JPG";
    //二维码宽度,单位:像素pixels
    private static final int QRCODE_WIDTH = 300;
    //二维码高度,单位:像素pixels
    private static final int QRCODE_HEIGHT = 300;
    //LOGO宽度,单位:像素pixels
    private static final int LOGO_WIDTH = 100;
    //LOGO高度,单位:像素pixels
    private static final int LOGO_HEIGHT = 100;

    /**
     * 生成二维码图片
     * @param content 二维码内容
     * @param logoPath 图片地址
     * @param needCompress 是否压缩
     * @return
     * @throws Exception
     */
    private static BufferedImage createImage(String content, String logoPath, boolean needCompress) throws Exception {


        Hashtable<EncodeHintType, Object> hints = new Hashtable<EncodeHintType, Object>();
        hints.put(EncodeHintType.ERROR_CORRECTION, ErrorCorrectionLevel.H);
        hints.put(EncodeHintType.CHARACTER_SET, UNICODE);
        hints.put(EncodeHintType.MARGIN, 1);
        BitMatrix bitMatrix = new MultiFormatWriter().encode(content, BarcodeFormat.QR_CODE, QRCODE_WIDTH, QRCODE_HEIGHT,
                hints);
        int width = bitMatrix.getWidth();
        int height = bitMatrix.getHeight();
        BufferedImage image = new BufferedImage(width, height, BufferedImage.TYPE_INT_RGB);
        for (int x = 0; x < width; x++) {


            for (int y = 0; y < height; y++) {


                image.setRGB(x, y, bitMatrix.get(x, y) ? 0xFF000000 : 0xFFFFFFFF);
            }
        }
        if (logoPath == null || "".equals(logoPath)) {


            return image;
        }
        // 插入图片
        QRCodeUtil.insertImage(image, logoPath, needCompress);
        return image;
    }

    /**
     * 插入LOGO
     * @param source 二维码图片
     * @param logoPath LOGO图片地址
     * @param needCompress 是否压缩
     * @throws Exception
     */
    private static void insertImage(BufferedImage source, String logoPath, boolean needCompress) throws Exception {


        File file = new File(logoPath);
        if (!file.exists()) {


            throw new Exception("logo file not found.");
        }
        Image src = ImageIO.read(new File(logoPath));
        int width = src.getWidth(null);
        int height = src.getHeight(null);
        if (needCompress) {

     // 压缩LOGO
            if (width > LOGO_WIDTH) {


                width = LOGO_WIDTH;
            }
            if (height > LOGO_HEIGHT) {


                height = LOGO_HEIGHT;
            }
            Image image = src.getScaledInstance(width, height, Image.SCALE_SMOOTH);
            BufferedImage tag = new BufferedImage(width, height, BufferedImage.TYPE_INT_RGB);
            Graphics g = tag.getGraphics();
            g.drawImage(image, 0, 0, null); // 绘制缩小后的图
            g.dispose();
            src = image;
        }
        // 插入LOGO
        Graphics2D graph = source.createGraphics();
        int x = (QRCODE_WIDTH - width) / 2;
        int y = (QRCODE_HEIGHT - height) / 2;
        graph.drawImage(src, x, y, width, height, null);
        Shape shape = new RoundRectangle2D.Float(x, y, width, width, 6, 6);
        graph.setStroke(new BasicStroke(3f));
        graph.draw(shape);
        graph.dispose();
    }

    /**
     * 生成二维码(内嵌LOGO)
     * 调用者指定二维码文件名
     * @param content 二维码的内容
     * @param logoPath 中间图片地址
     * @param destPath 存储路径
     * @param fileName 文件名称
     * @param needCompress 是否压缩
     * @return
     * @throws Exception
     */
    public static String encode(String content, String logoPath, String destPath, String fileName, boolean needCompress) throws Exception {


        BufferedImage image = QRCodeUtil.createImage(content, logoPath, needCompress);
        mkdirs(destPath);
        //文件名称通过传递
        fileName = fileName.substring(0, fileName.indexOf(".")>0?fileName.indexOf("."):fileName.length())
                + "." + FORMAT.toLowerCase();
        ImageIO.write(image, FORMAT, new File(destPath + "/" + fileName));
        return fileName;
    }

    /**
     * 创建文件夹, mkdirs会自动创建多层目录,区别于mkdir.(mkdir如果父目录不存在则会抛出异常)
     * @param destPath
     */
    public static void mkdirs(String destPath) {


        File file = new File(destPath);
        if (!file.exists() && !file.isDirectory()) {


            file.mkdirs();
        }
    }

    /**
     * 解析二维码
     * @param path 二维码图片路径
     * @return String 二维码内容
     * @throws Exception
     */
    public static String decode(String path) throws Exception {


        File file = new File(path);
        BufferedImage image = ImageIO.read(file);
        if (image == null) {


            return null;
        }
        BufferedImageLuminanceSource source = new BufferedImageLuminanceSource(image);
        BinaryBitmap bitmap = new BinaryBitmap(new HybridBinarizer(source));
        Result result;
        Hashtable<DecodeHintType, Object> hints = new Hashtable<DecodeHintType, Object>();
        hints.put(DecodeHintType.CHARACTER_SET, UNICODE);
        result = new MultiFormatReader().decode(bitmap, hints);
        return result.getText();
    }
}
我的是一个SpringBoot + Vue 的前后端分离的项目,所以,我要将二维码传给前端。由于本人主要做的是前端,是个后端小白,技术太菜,我想的是直接将二维码生成路径写为前端的图片存放路径,再直接从前端读取(求大佬指点更好的方法,小弟不胜感激!!!)。
    @RequestMapping(value = "/add", method = RequestMethod.POST)
    public RestResponse add(@RequestBody @Valid Order model) throws Exception {


        Order order = modelMapper.map(model,Order.class);
        //封装进二维码的数据
        String codeInformation = "景点名称 " + order.getTic().getSce().getScenicName() ;
        //二维码图片名称
        String title = "订单" + String.valueOf(order.getTic().getTicketId());
        //存入图片的数据,二维码中间的logo地址,二维码地址,二维码标题,是否压缩
        QRCodeUtil.encode(codeInformation,null,"D:\\vue\\src\\assets\\image",title,true);
        order.setOrderEncode(codeInformation);
        orderService.insertByFilter(order);
        return RestResponse.ok();
    }
如此,我在前端每次创建新订单时会直接生成这张订单的二维码存入前端,然后在前端通过img标签引用即可。
      <div>
        <img src="../../assets/image/订单8.jpg" />
      </div>
网上其实还有另一种后端SpringBoot 整合Zxing 创建二维码的方法,但是,如果jdk版本比较高的话,不建议使用这种方法,因为其中有一个方法据说在jdk1.8之后就已经不支持了,然鹅,我的版本是12,所以,没采用,但还是记录一下。
参考链接https://blog.csdn.net/kioo_i_see/article/details/82775097
1.创建一个Spring Boot项目
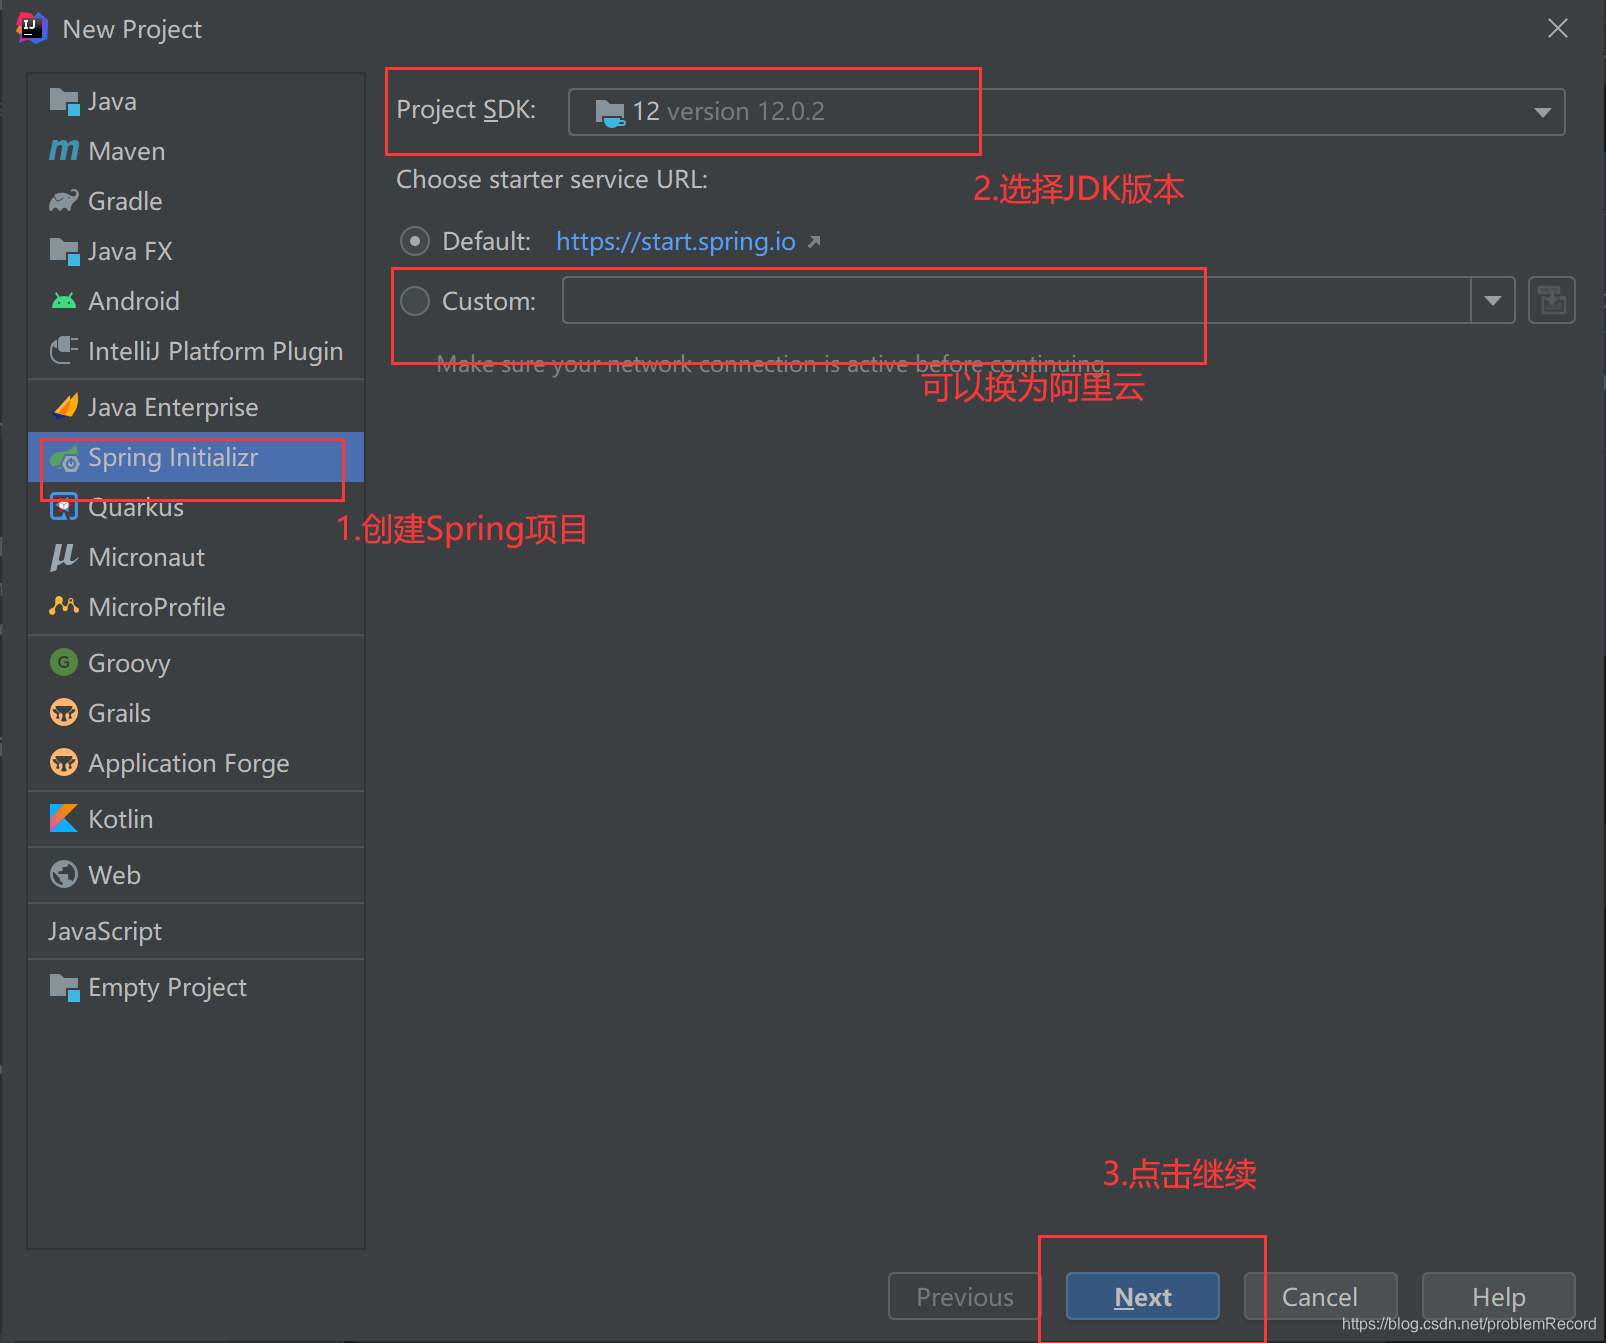

可以选择默认
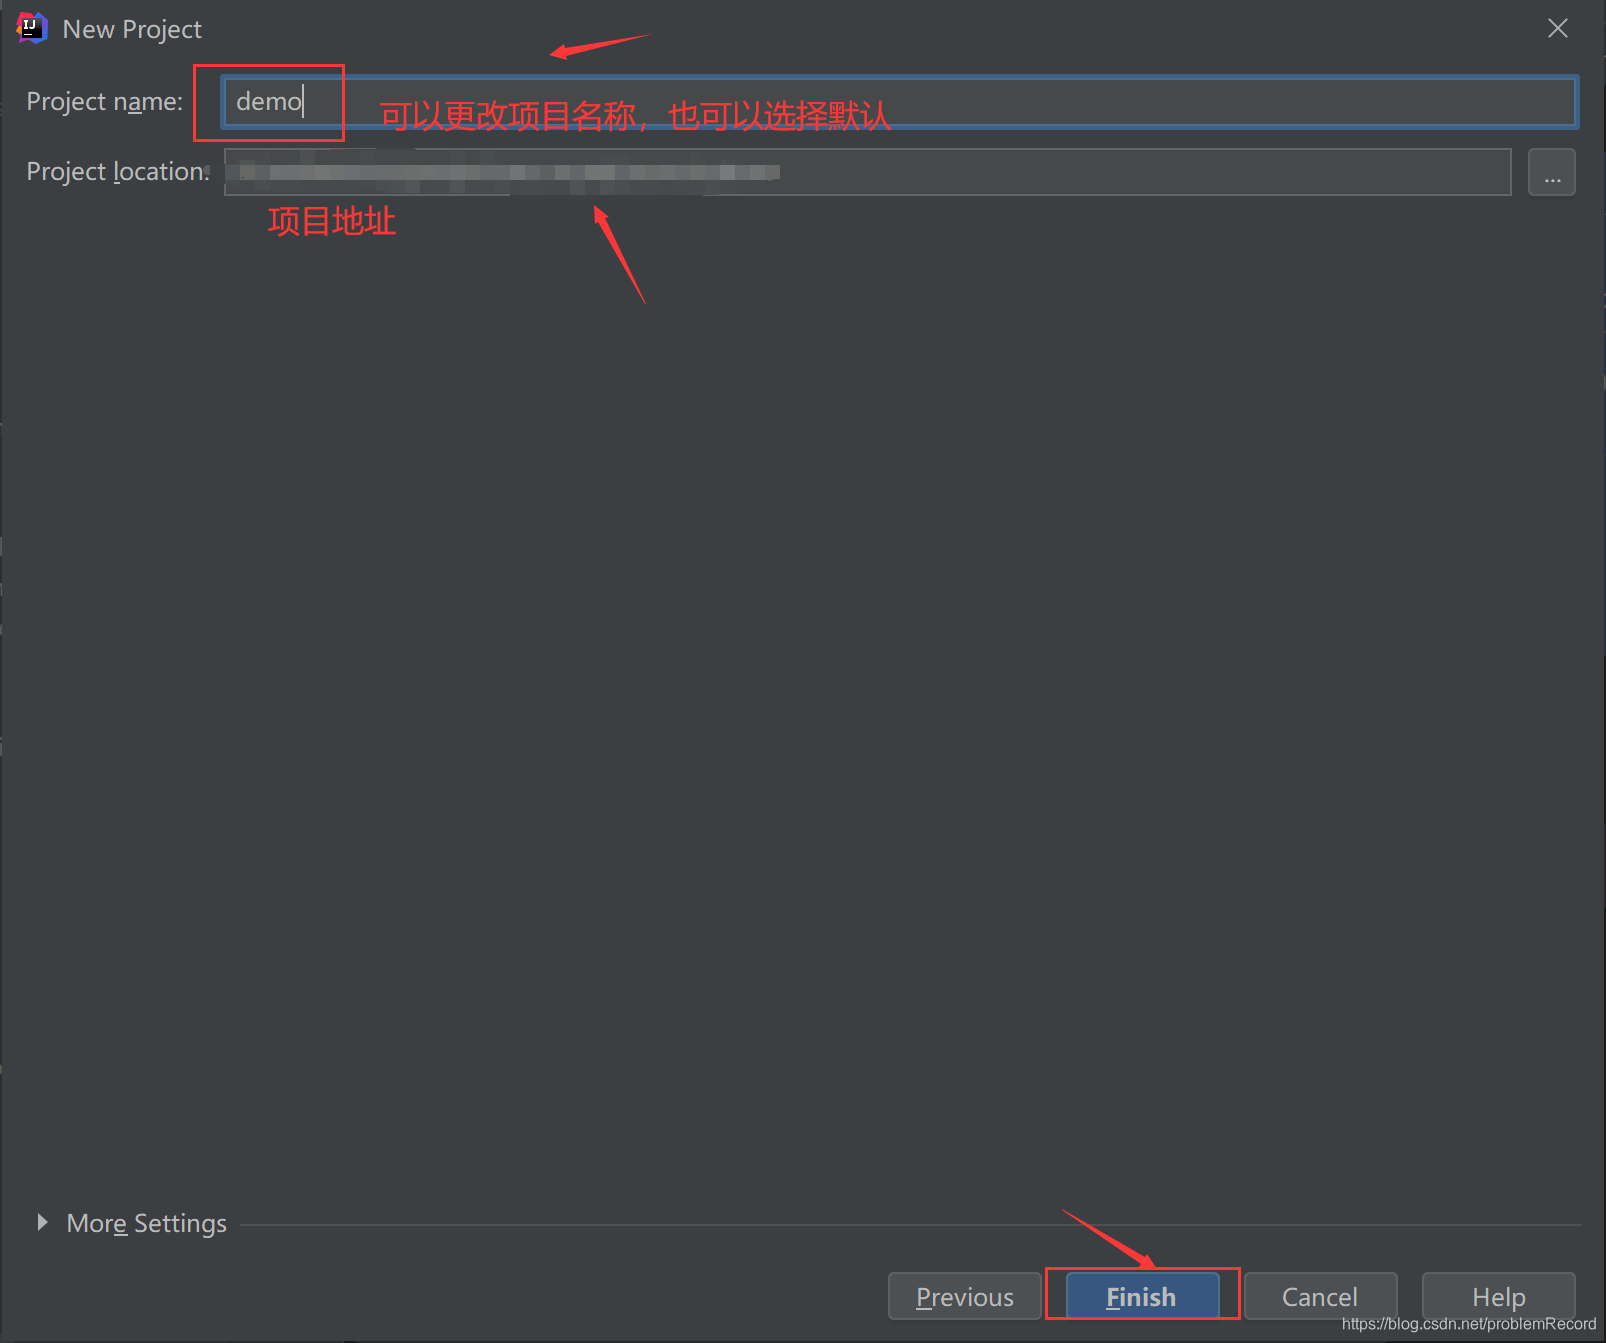
然后点击finish,等待依赖下载完成,就创建好了一个最基本的Spring Boot项目。
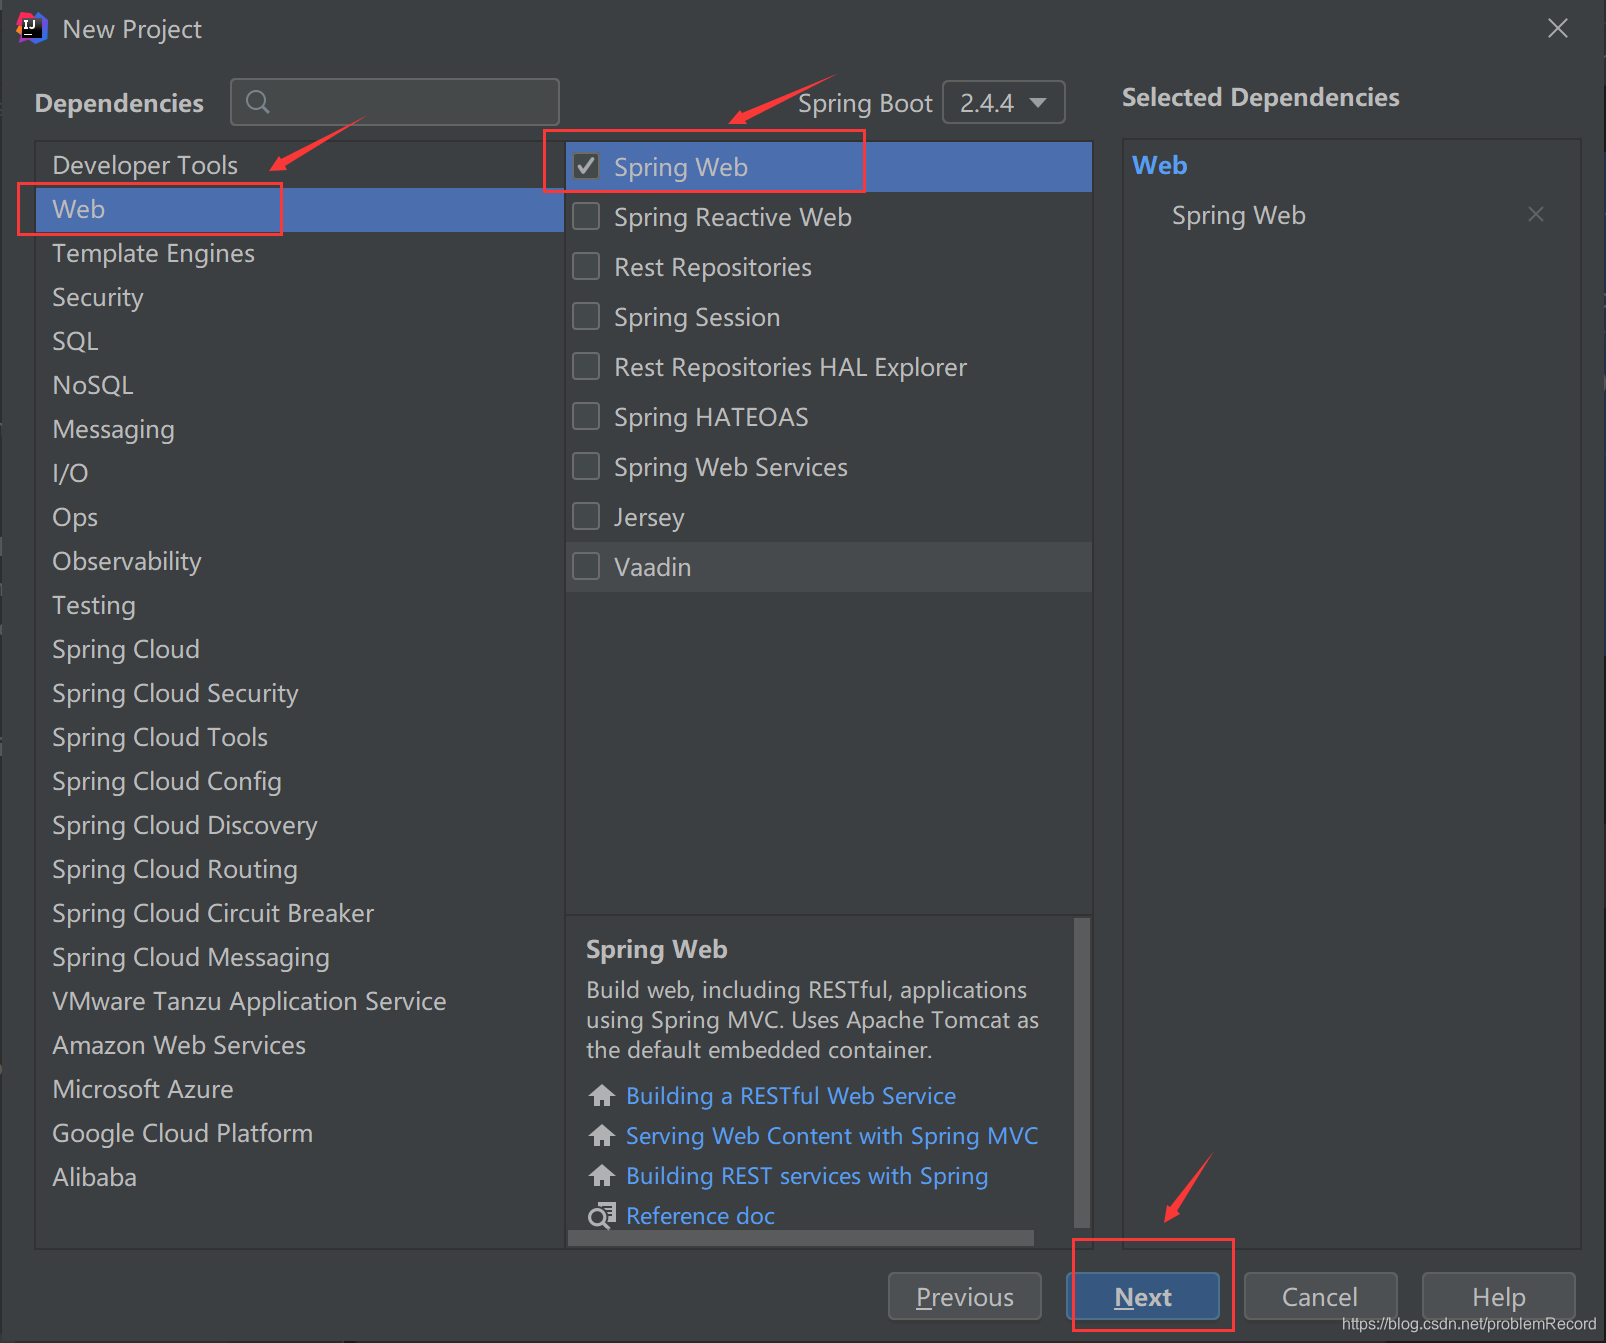
2.添加Zxing依赖
pom.xml文件中添加:
        <!--谷歌二维码-->
        <dependency>
            <groupId>com.google.zxing</groupId>
            <artifactId>core</artifactId>
            <version>3.3.3</version>
        </dependency>
        <dependency>
            <groupId>com.google.zxing</groupId>
            <artifactId>javase</artifactId>
            <version>3.3.3</version>
        </dependency>
    </dependencies>
2.创建QRcode的服务层,提供方法以便使用
import com.google.zxing.BarcodeFormat;
import com.google.zxing.EncodeHintType;
import com.google.zxing.client.j2se.MatrixToImageWriter;
import com.google.zxing.common.BitMatrix;

import com.google.zxing.qrcode.QRCodeWriter;
import com.google.zxing.qrcode.decoder.ErrorCorrectionLevel;
import com.sun.org.apache.xml.internal.security.utils.Base64;
import org.springframework.stereotype.Service;
import org.springframework.util.StringUtils;


import javax.imageio.ImageIO;
import javax.servlet.ServletOutputStream;
import java.awt.image.BufferedImage;
import java.io.ByteArrayOutputStream;
import java.io.IOException;
import java.util.HashMap;

/**
 * @description:
 * @author: Administrator
 * @date: 2021-04-01
 */
@Service
public class QRCodeService {


    public String crateQRCode(String content, int width, int height) throws IOException {


        String resultImage = "";
        if (!StringUtils.isEmpty(content)) {


            ServletOutputStream stream = null;
            ByteArrayOutputStream os = new ByteArrayOutputStream();
            @SuppressWarnings("rawtypes")
            HashMap<EncodeHintType, Comparable> hints = new HashMap<>();
            hints.put(EncodeHintType.CHARACTER_SET, "utf-8"); // 指定字符编码为“utf-8”
            hints.put(EncodeHintType.ERROR_CORRECTION, ErrorCorrectionLevel.M); // 指定二维码的纠错等级为中级
            hints.put(EncodeHintType.MARGIN, 2); // 设置图片的边距

            try {


                QRCodeWriter writer = new QRCodeWriter();
                BitMatrix bitMatrix = writer.encode(content, BarcodeFormat.QR_CODE, width, height, hints);

                BufferedImage bufferedImage = MatrixToImageWriter.toBufferedImage(bitMatrix);
                ImageIO.write(bufferedImage, "png", os);
                /**
                 * 原生转码前面没有 data:image/png;base64 这些字段,返回给前端是无法被解析,可以让前端加,也可以在下面加上
                 */
                resultImage = new String("data:image/png;base64," + Base64.encode(os.toByteArray()));

                return resultImage;
            } catch (Exception e) {


                e.printStackTrace();
            } finally {


                if (stream != null) {


                    stream.flush();
                    stream.close();
                }
            }
        }
        return null;
    }
}
Controller层使用
import org.springframework.beans.factory.annotation.Autowired;
import org.springframework.web.bind.annotation.RequestMapping;
import org.springframework.web.bind.annotation.RestController;

import java.io.IOException;

/**
 * @description: 二维码功能相关
 * @author: Administrator
 * @date: 2021-04-01
 */
@RestController
@RequestMapping("/qrcode")
public class QRCodeController {


    @Autowired
    QRCodeService qrCodeService;

    @RequestMapping(value="/getQRCode")
    public String getQRCode() throws IOException {


        return qrCodeService.crateQRCode("this is qrcode",200,200);
    }

}
这样按理说会生成Base64值传给前端,然后通过一些在线转换工具或者是前端使用img标签即可显示出二维码。但是,在实际开发中,会报错:
包com.sun.org.apache.xerces.internal.impl.dv.util不存在
原因就是这个版本在jdk1.8就已经被废弃了。网上有解决方法是:将Service中的
import com.sun.org.apache.xml.internal.security.utils.Base64;
改为
import org.apache.commons.codec.binary.Base64;
然后:
Base64.encode() 改为 Base64.encodeBase64String();
Base64.decode() 改为 Base64.decodeBase64()。
参考链接:https://blog.csdn.net/u013252072/article/details/96480808