vue3.0 使用原生websocket通信
// Websoket连接成功事件
    const websocketonopen = (res: any) => {
      console.log("WebSocket连接成功", res);
    };
    // Websoket接收消息事件
    const websocketonmessage = (res: any) => {
      console.log("数据", res);
    };
    // Websoket连接错误事件
    const websocketonerror = (res: any) => {
      console.log("连接错误", res);
    };
    // Websoket断开事件
    const websocketclose = (res: any) => {
      console.log("断开连接", res);
    };

    onMounted(() => {
      // 创建 websocket 的实例
      const wsurl = "ws://*****";
      socket = new WebSocket(wsurl);
      socket.onopen = websocketonopen;
      socket.onmessage = websocketonmessage;
      socket.onerror = websocketonerror;
      socket.onclose = websocketclose;
    });

    // 组件被销毁之前,清空 sock 对象
    onBeforeUnmount(() => {
      // 关闭连接
      websocketclose;

      // 销毁 websocket 实例对象
      socket = null;
});添加了sendWebSocketMessage函数,该函数用于向WebSocket服务器发送消息。您可以在需要发送消息的地方调用该函数,并将消息作为参数传递给它。函数会检查WebSocket连接是否已建立,并且连接状态为OPEN时才发送消息。
15396 Jps

netstat -lnp|grep java
let downloadLoadingInstance;
// 是否显示重新登录
export let isRelogin = { show: false };
axios.defaults.headers['Content-Type'] = 'application/json;charset=utf-8'
// 创建axios实例
const service = axios.create({
 // axios中请求配置有baseURL选项,表示请求URL公共部分
 baseURL: process.env.VUE_APP_BASE_API
 // 超时
 timeout: 10000
})
/monitor/online/list
public void refreshToken(loginUser loginUser)
{
 loginUser.setLoginTime(System.currentTimeMillis());
 loginUser.setExpireTime(loginUser.getLoginTime() + expireTime * MILLIS_MINUTE);
 String userKey = getTokenKey(loginUser.getToken());
 redisCache.setCacheObject(userKey, loginUser, expireTime, TimeUnit.MINUTES);
}
public void refreshToken(LoginUser loginUser)
{
loginUser.setLoginTime(System.currentTimeMillis());
loginUser.setExpireTime(loginUser.getLoginTime() + expireTime * MILLIS_MINUTE);
// 根据uuid将loginUser缓存
String userKey = getTokenKey(loginUser.getToken());
redisCache.setCacheObject(userKey, loginUser, expireTime, TimeUnit.MINUTES);
}@PreAuthorize("@ss.hasPermi('system:config:query')")
@GetMapping(value = "/{configId}")
public AjaxResult getInfo(@PathVariable Long configId)
{
return AjaxResult.success(configService.selectConfigById(configId));
}export default {
install(Vue) {
Vue.prototype.$tab = tab // 页签操作
Vue.prototype.$auth = auth // 认证对象
Vue.prototype.$cache = cache // 缓存对象
Vue.prototype.$modal = modal // 模拟框对象
Vue.prototype.$download = download // 下载文件
}
}VueComponent.prototype.__proto__ === Vue.prototype

Nginx 做为 HTTP 服务器,有以下几项基本特性:
处理静态文件,索引文件以及自动索引;打开文件描述符缓冲.
无缓存的反向代理加速,简单的负载均衡和容错.
FastCGI,简单的负载均衡和容错.
模块化的结构。包括 gzipping, byte ranges, chunked responses,以及 SSI-filter 等 filter。如果由 FastCGI 或其它代理服务器处理单页中存在的多个 SSI,则这项处理可以并行运行,而不需要相互等待。
支持 SSL 和 TLSSNI.
Nginx 专为性能优化而开发,性能是其最重要的考量,实现上非常注重效率 。它支持内核 Poll 模型,能经受高负载的考验,有报告表明能支持高达 50,000 个并发连接数。
Nginx 具有很高的稳定性。其它 HTTP 服务器,当遇到访问的峰值,或者有人恶意发起慢速连接时,很可能会导致服务器物理内存耗尽频繁交换,失去响应,只能重启服务器。例如当前 apache 一旦上到 200 个进程以上,web响应速度就明显非常缓慢了。而 Nginx 采取了分阶段资源分配技术,使得它的 CPU 与内存占用率非常低。Nginx 官方表示在保持 10,000 个无活动连接时,它只占 2.5M 内存,所以类似 DOS 这样的攻击对 Nginx 来说基本上是毫无用处的。就稳定性而言,Nginx 比 lighthttpd 更胜一筹。
Nginx 支持热部署。它的启动特别容易, 并且几乎可以做到 7*24 不间断运行,即使运行数个月也不需要重新启动。你还能够在不间断服务的情况下,对软件版本进行升级。
Nginx 采用 master-slave 模型(主从模型,一种优化阻塞的模型),能够充分利用 SMP (对称多处理,一种并行处理技术)的优势,且能够减少工作进程在磁盘 I/O 的阻塞延迟。当采用 select()/poll() 调用时,还可以限制每个进程的连接数。
Nginx 代码质量非常高,代码很规范,手法成熟,模块扩展也很容易。特别值得一提的是强大的 Upstream 与 Filter 链。Upstream 为诸如 reverse proxy,与其他服务器通信模块的编写奠定了很好的基础。而 Filter 链最酷的部分就是各个 filter 不必等待前一个 filter 执行完毕。它可以把前一个 filter 的输出做为当前 filter 的输入,这有点像 Unix 的管线。这意味着,一个模块可以开始压缩从后端服务器发送过来的请求,且可以在模块接收完后端服务器的整个请求之前把压缩流转向客户端。
屏幕分辨率统计
//引入 echarts 核心模块,核心模块提供了 echarts 使用必须要的接口。

import * as echarts from 'echarts/core'
//引入柱状图图表,图表后缀都为 Chart
import {
    BarChart,
    LineChart,
    PieChart,
    MapChart,
    PictorialBarChart,
    RadarChart,
    ScatterChart,
    GaugeChart
} from 'echarts/charts'
// 引入提示框,标题,直角坐标系,数据集,内置数据转换器组件,组件后缀都为 Component
import {
    TitleComponent,
    TooltipComponent,
    GridComponent,
    PolarComponent,
    AriaComponent,
    ParallelComponent,
    LegendComponent,
    RadarComponent,
    ToolboxComponent,
    DataZoomComponent,
    VisualMapComponent,
    TimelineComponent,
    CalendarComponent,
    GraphicComponent
} from 'echarts/components'

//引入 Canvas 渲染器,注意引入 CanvasRenderer 或者 SVGRenderer 是必须的一步
import { CanvasRenderer } from 'echarts/renderers'
//标签自动布局,全局过渡动画等特性
import { LabelLayout, UniversalTransition } from 'echarts/features'

// 注册必须的组件
echarts.use([
    LegendComponent,
    TitleComponent,
    TooltipComponent,
    GridComponent,
    PolarComponent,
    AriaComponent,
    ParallelComponent,
    BarChart,
    LineChart,
    PieChart,
    MapChart,
    RadarChart,
    PictorialBarChart,
    RadarComponent,
    ToolboxComponent,
    DataZoomComponent,
    VisualMapComponent,
    TimelineComponent,
    CalendarComponent,
    GraphicComponent,
    ScatterChart,
    CanvasRenderer,
    LabelLayout,
    UniversalTransition,
    GaugeChart
])

npm install echarts --save

有淘宝镜像的可以选择  (安装速度快)
cnpm install echarts --save
// 挂载到vue实例中
// Vue.prototype.$echarts = echarts;//vue2的挂载方式
app.config.globalProperties.$echarts = echarts;//vue3的挂载方式
dataZoom 组件 用于区域缩放,从而能自由关注细节的数据信息,或者概览数据整体,或者去除离群点的影响。
现在支持这几种类型的 dataZoom 组件:
内置型数据区域缩放组件(dataZoomInside):内置于坐标系中,使用户可以在坐标系上通过鼠标拖拽、鼠标滚轮、手指滑动(触屏上)来缩放或漫游坐标系。
滑动条型数据区域缩放组件(dataZoomSlider):有单独的滑动条,用户在滑动条上进行缩放或漫游。
框选型数据区域缩放组件(dataZoomSelect):提供一个选框进行数据区域缩放。即 toolbox.feature.dataZoom,配置项在
toolbox中。
✦ dataZoom 和 数轴的关系 ✦
dataZoom 主要是对 数轴(axis) 进行操作(控制数轴的显示范围,或称窗口(window))。
可以通过 dataZoom.xAxisIndex 或 dataZoom.yAxisIndex 或 dataZoom.radiusAxisIndex 或 dataZoom.angleAxisIndex 来指定
dataZoom控制哪个或哪些数轴。
dataZoom 组件可 同时存在多个,起到共同控制的作用。如果多个 dataZoom 组件共同控制同一个数轴,他们会自动联动。
一个MyBatis的映射文件(Mapper),用于操作sys_role表的角色信息。下面是每个标签的功能说明:
resultMap: 定义查询结果映射,将数据库字段映射到Java对象的属性。sql: 定义一个可重用的SQL片段,供其他语句引用。select: 定义查询语句,用于查询角色列表、角色权限等信息。insert: 定义插入语句,用于向sys_role表中插入角色信息。update: 定义更新语句,用于更新sys_role表中的角色信息。delete: 定义删除语句,用于删除角色信息。<mapper>:映射文件的根节点,指定了命名空间为com.wxapp.system.mapper.SysOperLogMapper。<resultMap>:定义了结果映射SysOperLogResult,将查询结果映射到SysOperLog对象的各个属性上。<sql>:定义了查询语句片段selectOperLogVo,该语句用于查询操作日志的基本信息。<insert>:定义了插入操作日志的语句insertOperlog,通过传入的SysOperLog对象插入到数据库中。<select>:定义了查询操作日志列表的语句selectOperLogList,根据条件查询操作日志,并将结果映射到SysOperLogResult。<delete>:定义了根据ID删除操作日志的语句deleteOperLogByIds,可以批量删除指定ID的操作日志。<update>:定义了清空操作日志的语句cleanOperLog,用于清空sys_oper_log表中的数据。
netstat -ntpl
docker run -d --name nginxapp nginx

# 启动一个容器
docker run -d --name nginxapp nginx
# 查看容器是否启动成功
docker container ls
# 在当前目录下创建目录 conf,我的当前目录是/root/nginx
mkdir conf
# 拷贝容器内nginx默认配置文件到当前目录下
docker cp nginxapp:/etc/nginx/nginx.conf $PWD/conf
docker cp nginxapp:/etc/nginx/nginx.conf.d $PWD/conf
# 完成拷贝后,停止删除容器,重启一个容器关联配置文件
docker stop nginxapp # 停止容器
docker rm nginxapp # 删除容器
# 创建html目录 存放静态资源
mkdir html
# 创建logs目录 保存访问日志
mkdir logs
docker run -d -p 8080:80  \
 --name nginxapp \
 -v /root/nginx/html:/usr/share/nginx/html \
 -v /root/nginx/conf/nginx.conf:/etc/nginx/nginx.conf \
 -v /root/nginx/conf/conf.d:/etc/nginx/conf.d \
 -v /root/nginx/logs:/var/log/nginx \
 nginx


docker run -d -p 8080:80 --name nginxapp -v /Users/jeskson/html:/usr/share/nginx/html -v /Users/jeskson/conf/nginx.conf:/etc/nginx/nginx.conf -v /Users/jeskson/conf/conf.d:/etc/nginx/conf.d -v /Users/jeskson/logs:/var/log/nginx nginx

5ed3c6
user nginx;
worker_processes auto;
error_log /var/log/nginx/error.log notice;
pid /var/run/nginx.pid;
events {
worker_connections 1024;
}
http {
include /etc/nginx/mime.types;
default_type application/octet-stream;
log_format main '$remote_addr - $remote_user [$time_local] "$request" '
'$status $body_bytes_sent "$http_referer" '
'"$http_user_agent" "$http_x_forwarded_for"';
access_log /var/log/nginx/access.log main;
sendfile on;
#tcp_nopush on;
keepalive_timeout 65;
#gzip on;
include /etc/nginx/conf.d/*.conf;
server {
listen 80;
server_name localhost;
location / {
root html;
index index.html index.htm;
}
#error_page 404 /404.html;
# redirect server error pages to the static page /50x.html
#
error_page 500 502 503 504 /50x.html;
location = /50x.html {
root html;
}
location /testApp/ { # 映射访问url,到静态资源文件下
alias /usr/share/nginx/html/testApp;
index index.html index.htm;
}
}
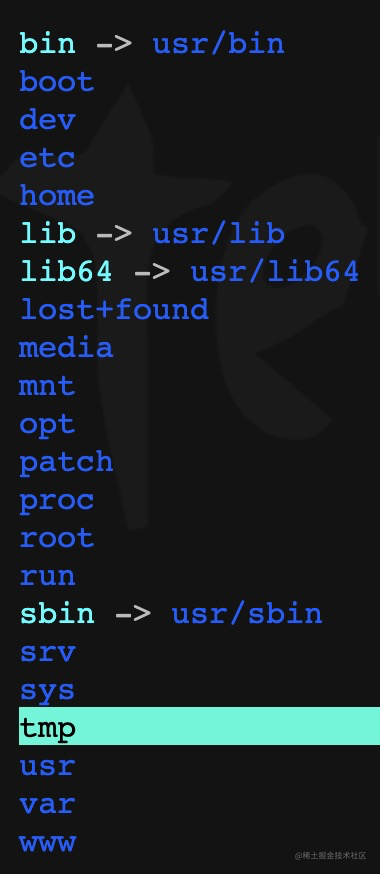
}Nginx 的安装目录在 /etc/nginx/ 或 /usr/local/nginx/。
/etc/nginx
docker run -p 8080:80 -d -v /home/nginx/www/hello-vue:/usr/share/nginx/html nginx
将目录/home/nginx/www/hello-vue 映射到nginx容器目录 /usr/share/nginx/html
server {
listen 80;
server_name localhost;
location / {
root /usr/share/nginx/html;
index index.html index.htm;
}
location /testApp/ {
alias /usr/share/nginx/html/testApp;
}
}
-v D:/study/docker/nginx/www:/usr/share/nginx/html:将我们自己创建的 www 目录挂载到容器的 /usr/share/nginx/html。
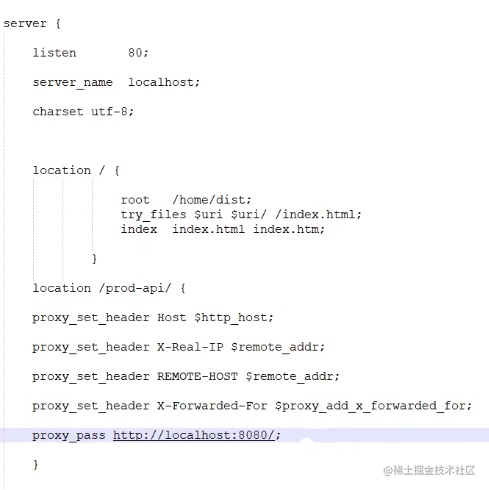
-v D:/study/docker/nginx/conf/nginx.conf:/etc/nginx/nginx.conf:/etc/nginx/nginx.conf:将我们自己创建的 nginx.conf 挂载到容器的 /etc/nginx/nginx.conf。server {
listen 80; #监听的端口
server_name aabbcc.com; #域名
location / {
root /usr/local/nginx/html;
index xdclass.html;
}
}
server {
listen 80;
server_name aabbccdd.com;
location / {
root html;
index xdclass.html index.htm;
}
}docker run -d -p 8080:80 --name nginxapp -v /Users/jeskson/html:/usr/share/nginx/html -v /Users/jeskson/conf/nginx.conf:/etc/nginx/nginx.conf -v /Users/jeskson/conf/conf.d:/etc/nginx/conf.d -v /Users/jeskson/logs:/var/log/nginx nginx加群联系作者vx:xiaoda0423
仓库地址:https://github.com/webVueBlog/WebGuideInterview