先执行install
cnpm install webpack-spritesmith
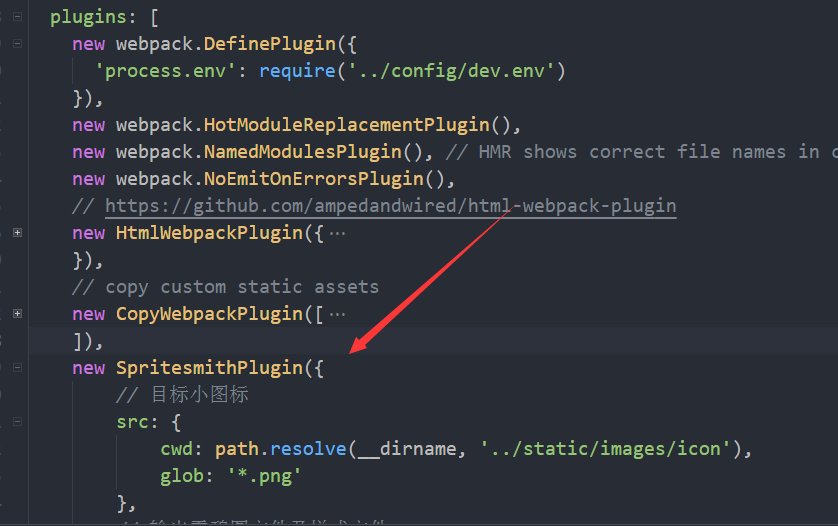
文件位置
build\webpack.dev.conf.js

添加内容:
const SpritesmithPlugin = require('webpack-spritesmith');
找到
文件内 plugins:
我是生成less文件后,单位rem实现雪碧图的响应式适配,用的是阿里方案页面内需引用flexbile.min.js(参考阿里手淘适配)
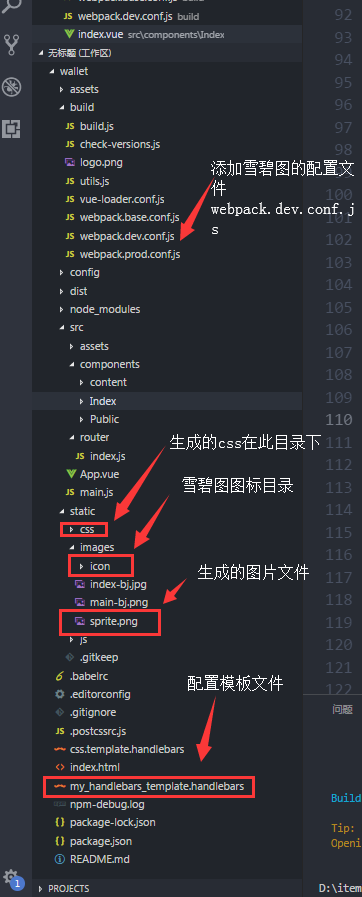
目录结构:
添加如下内容:
文件位置:
build\webpack.dev.conf.js
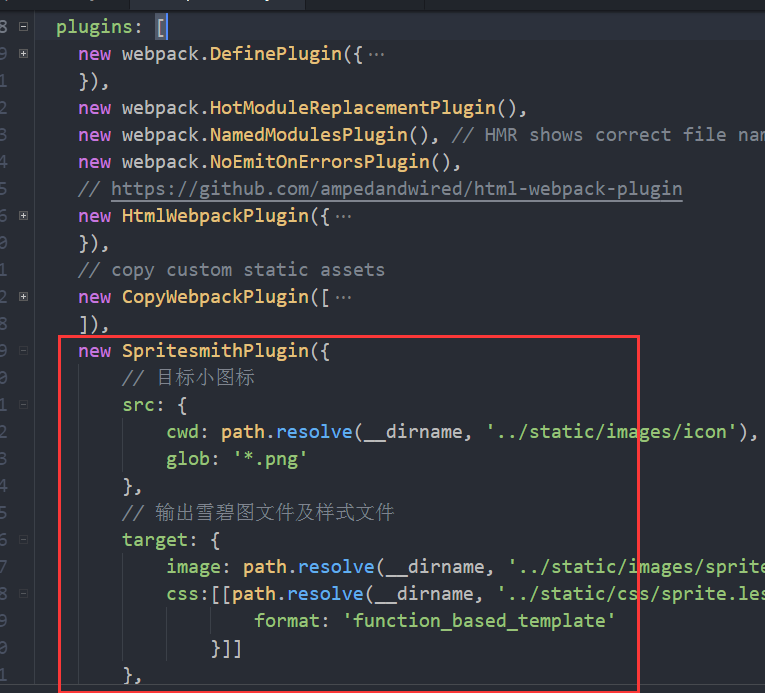
plugins: 内添加如下内容
    new SpritesmithPlugin({
        // 目标小图标
        src: {
            cwd: path.resolve(__dirname, '../static/images/icon'),
            glob: '*.png'
        },
        // 输出雪碧图文件及样式文件
        target: {
            image: path.resolve(__dirname, '../static/images/sprite.png'),
            css:[[path.resolve(__dirname, '../static/images/sprite.less'),{
                    format: 'function_based_template'
                }]]
        },
        customTemplates: {
            'function_based_template': path.resolve(__dirname, '../my_handlebars_template.handlebars')
        },
        // 样式文件中调用雪碧图地址写法
        apiOptions: {
            cssImageRef: './sprite.png?v='+Date.parse(new Date())
        },
        spritesmithOptions: {
            algorithm: 'binary-tree'
        }
    })

添加文件:my_handlebars_template.handlebars
文件位置:项目根目录下:\my_handlebars_template.handlebars
文件内容:
{{#block "sprites"}}
{{#block "spritesheet"}}
@img:url('{{{spritesheet.escaped_image}}}');
@r:75rem;
.icon{
   background-size: {{spritesheet.width}}/@r {{spritesheet.height}}/@r;
   background-repeat:no-repeat;
   display:inline-block;
};
{{/block}}
{{#each sprites}}
.icon-{{{strings.name}}} {
  background-image: @img;
  background-position: {{offset_x}}/@r {{offset_y}}/@r;
  width: {{width}}/@r;
  height: {{height}}/@r
};
{{/each}}
{{/block}}
命令行内运行:
npm run dev 即可
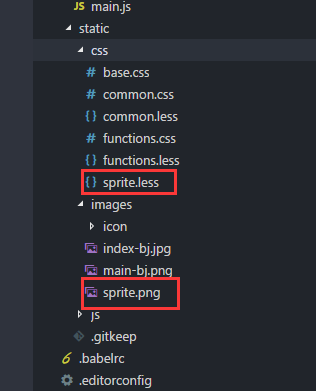
生成这2个文件引用对应的less文件即可