1. 进程与线程
1.1 进程与线程的基本认识
1.1.1 进程(Process)
进程是程序的一次动态执行过程,它经历了从代码加载、执行、到执行完毕的一个完整过程;同时也是并发执行的程序在执行过程中分配和管理资源的基本单位,竞争计算机系统资源的基本单位。
1.1.2 线程(Thread)
线程可以理解为进程中的执行的一段程序片段,是进程的一个执行单元,是进程内可调度实体,是比进程更小的独立运行的基本单位,线程也被称为轻量级进程。
1.2 为什么会有线程
每个进程都有自己的地址空间,即进程空间,在网络或多用户换机下,一个服务器通常需要接收大量不确定数量用户的并发请求,为每一个请求都创建一个进程显然行不通,即使多进程可以提高硬件资源的利用率,但是进程的启动和销毁需要消耗大量的系统性能,从而导致程序的执行性能下降。所以为了进一步提升并发操作的处理能力,在进程的基础上又划分了多线程概念。
1.2.1 以看视频为例
打开看视频可以理解为实现了一个“进程”,而在看的时候,会同时听到声音,看到图片,还有可以发弹幕等……这些都是多线程实现。
简而言之:一个程序至少一个进程,一个进程至少一个线程。
2. 多线程实现
在java中,如果要实现多线程,就必须依靠线程主体类,而java.lang.Thread是java中负责多线程操作类,只需继承Thread类,就能成为线程主体类,为满足一些特殊要求,也可以通过实现Runnable接口或者Callable接口来完成定义。
具体方式如下:
-
继承Thread类,重写run方法(无返回值)
-
实现Runnable接口,重写run方法(无返回值)
-
实现Callable接口,重写call方法(有返回值且可以抛出异常)
2.1 Thread类实现多线程
通过继承Thread类,并重写父类的run()方法实现
public void run()
定义线程类:
class MyThread extends Thread{


	private String name;
	public MyThread(String name) {


		this.name = name;
	}
	@Override
	public void run() {


		for(int i = 0 ; i < 50 ; i++) {


			System.out.println(this.name + "正在工作中……" + i);
		}
	}
}
多线程启动:
public class testThread {


	public static void main(String[] args) {


		// 实例化线程对象
		MyThread mt1 = new MyThread("线程一");
		MyThread mt2 = new MyThread("线程二");
		MyThread mt3 = new MyThread("线程三");
		// 启动实例线程对象
		mt1.start();
		mt2.start();
		mt3.start();
	}
}
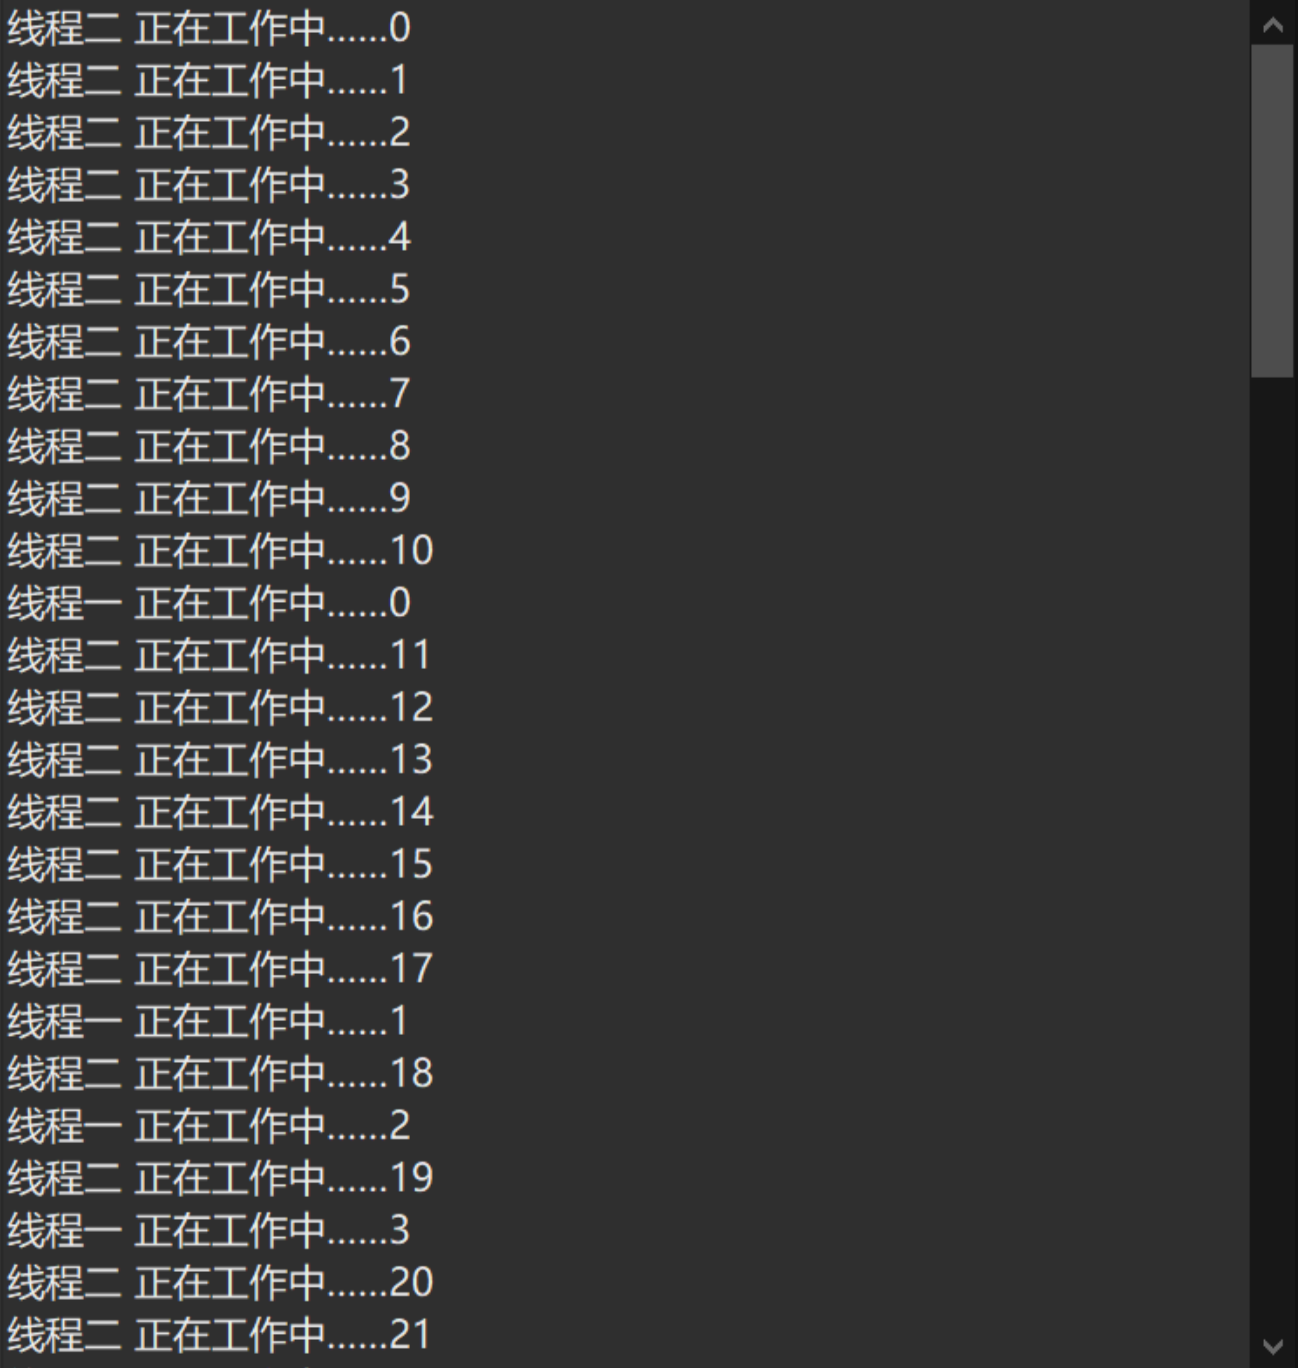
运行情况:
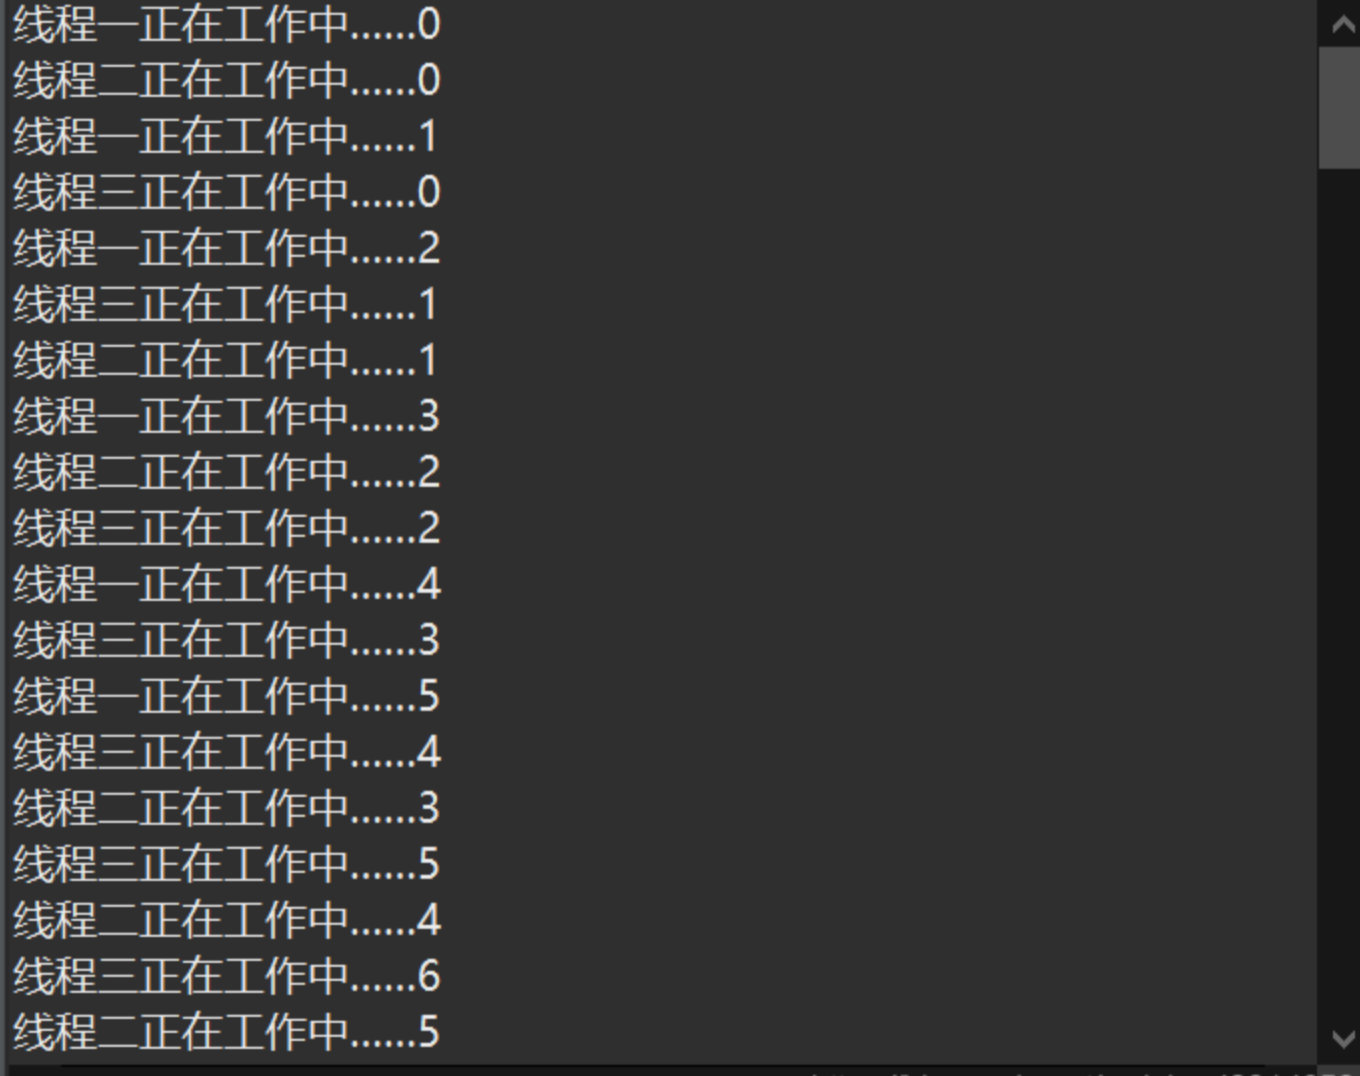
以上结果可以发现,它并不是按照顺序执行,而是以一种随机交替方式执行的,每次的结果都可能不一样。
通过以上代码可以知道,要想实现多线程,就要依靠Thread类的start()方法执行,线程启动后会默认调用run()方法。
2.2 Runnable接口实现多线程
使用Thread类的确可以实现多线程,但是也容易发现它的缺陷:面向对象的单继承局限,因此才采用Runnable接口来实现多线程。
该接口的定义如下(以下并不需要在代码中实现):
@FunctionalInterface
public interface Runnable{


	public void run();
}
定义线程类:
public class MyThread implements Runnable{


	private String name;
	public MyThread(String name) {


		this.name = name;
	}
	@Override
	public void run() {


		for(int i = 0 ; i<50 ;i++) {


			System.out.println(this.name + " 正在执行中……" + i);
		}
	}
}
多线程启动:
public class testThread {


	public static void main(String[] args) {


		// 实例化继承Runnable接口的MyThread类
		Runnable mt1 = new MyThread("线程一");
		Runnable mt2 = new MyThread("线程二");
		Runnable mt3 = new MyThread("线程三");

		// 多线程启动
		new Thread(mt1).start();
		new Thread(mt2).start();
		new Thread(mt3).start();
	}
}
运行情况:
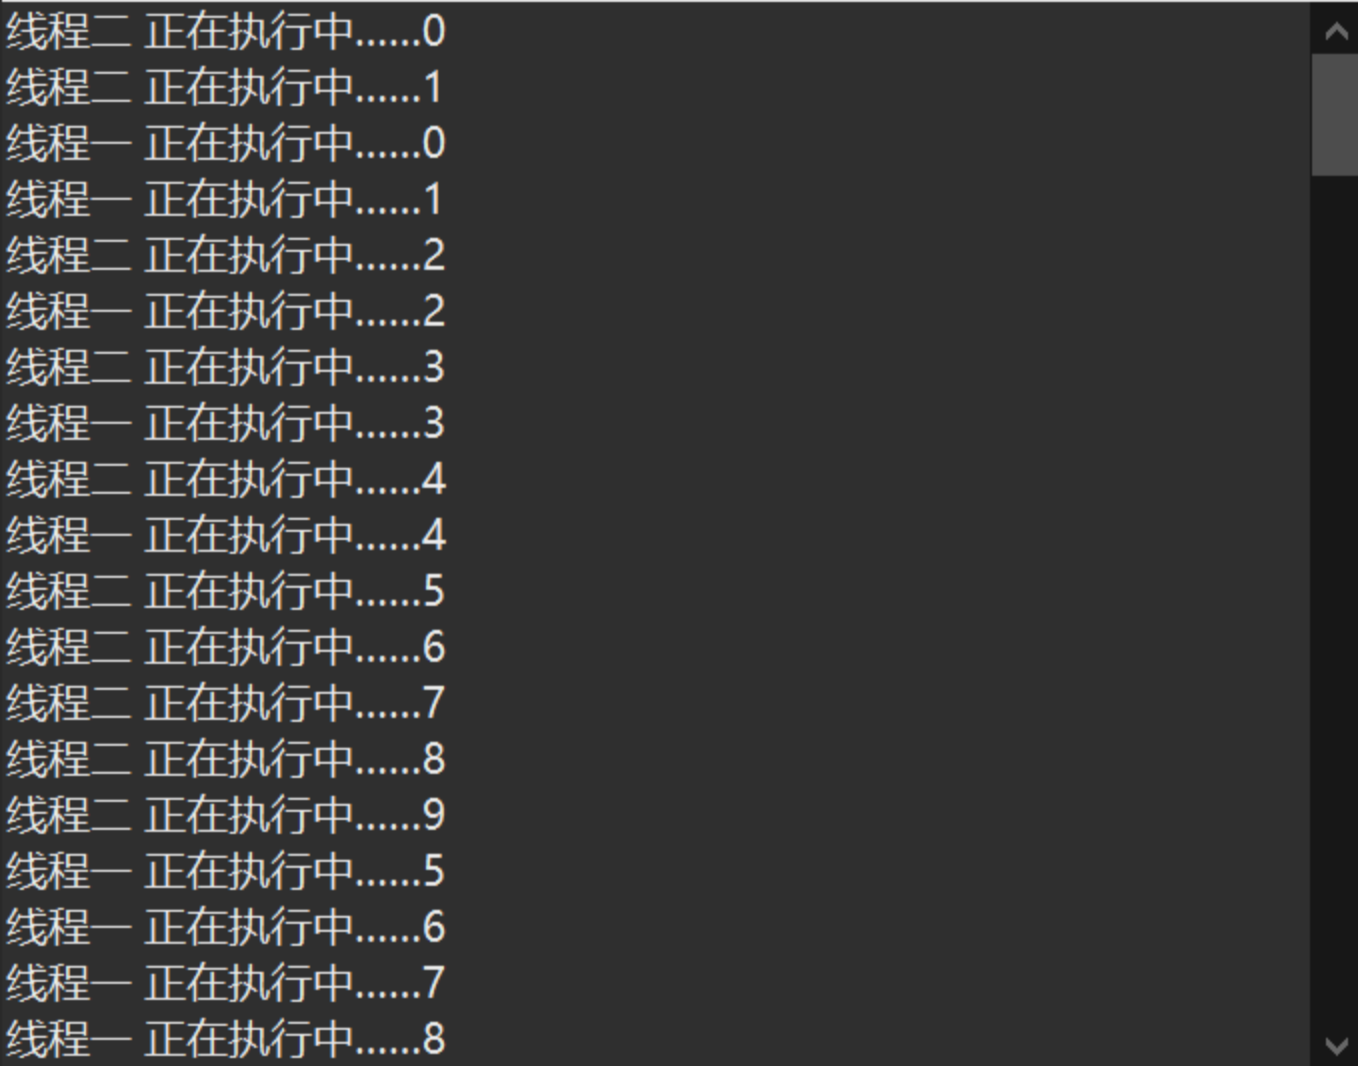
以上程序实例化三个继承Runnable接口的MyThread类,然后通过Thread类的一个构造函数public Thread(Runnable target)分别实例化Thread类,再利用start()方法实现多线程。
Thread方案实现和Runnable方案实现的区别:
// Thread类定义:
public class Thread extends Object implements Runnable {

    }
也就是说,Thread类是Runable接口的子类,通过直接覆写Thread类的run方法实际上依然是覆写Runnable接口内的run方法,其实本质上是没有区别的,但是利用Runnable方案实现更加能体现面向对象思维,有点类似于代理设计模式。
2.3 Callable接口实现多线程
使用Runnable接口实现的多线程可以避免单继承的局限,但是还有一个问题就是run方法没有返回值,为了解决这个问题,所以提供了一个Callable接口java.util.concurrent.Callable
其定义如下:
@FunctionalIterface
public interface Callable<T>{


	public T call() throws Exception;
}
FutureTask类常用方法:
import java.util.concurrent.ExecutionException; // 导入ExecutionException异常包
public FutureTask(Callable<T> callable) // 构造函数:接收Callable接口实例
public FutureTask(Runable runnable,T result) // 构造函数:接收Runnable接口实例,同时指定返回结果类型
public T get() throws InterruptedException,ExecutionException // 取得线程操作返回结果
Thread类的一个构造方法:
public Thread(FutureTask<T> futuretask) //构造方法:接收FutureTask实例化对象
定义线程主体类:
import java.util.concurrent.Callable;
public class MyThread implements Callable<Integer>{


	private String name;
	public MyThread(String name) {


		this.name = name;
	}
	@Override
	public Integer call(){


		Integer sum = 0;
		for(int i = 0 ; i < 500;i++) {


			System.out.println(this.name + i);
			sum += i;
		}
		return sum;
	}
}
多线程启动:
import java.util.concurrent.FutureTask;
public class testThread {


	public static void main(String[] args)  throws Exception{


		// 实例化继承Callable接口的MyThread类
		MyThread mt1 = new MyThread("线程一");
		MyThread mt2 = new MyThread("线程二");
		MyThread mt3 = new MyThread("线程三");

		// FutureTask类接收继承Callable接口的MyThread的实例
		FutureTask<Integer> ft1 = new FutureTask<Integer>(mt1);
		FutureTask<Integer> ft2 = new FutureTask<Integer>(mt2);
		FutureTask<Integer> ft3 = new FutureTask<Integer>(mt3);

		// 启动多线程
		new Thread(ft1).start();
		new Thread(ft2).start();
		new Thread(ft3).start();
		System.out.println(ft1.get());
		System.out.println(ft2.get());
		System.out.println(ft3.get());
	}
}
运行情况:

通过以上代码容易了解到,Callable接口实现采用泛型技术实现,继承需要重写call方法,再通过FutureTask包装器包装,传入后实例化Thread类实现多线程。
其中FutureTask类是Runnable接口的子类,所以才可以利用Thread类的start方法启动多线程,读者可以将call方法假设为有返回值的run方法。
2.3 多线程运行状态
任意线程具有5种基本的状态:
2.3.1 创建状态
实现Runnable接口和继承Thread类创建一个线程对象后,该线程对象处于创建状态,此时它已经有了内存空间和其它资源,但他还是处于不可运行的。
2.3.2 就绪状态
新建线程对象后,调用该线程的start方法启动该线程。启动后,进入线程队列排队,由CPU调度服务。
2.3.3 运行状态
就绪状态的线程获得处理器的资源时,线程就进入了运行状态,此时将自动调用run方法。
2.3.4 阻塞状态
正在运行的线程在某些特殊情况下,如:当前线程调用sleep、suspend、wait等方法时,运行在当前线程里的其它线程调用join方法时,以及等待用户输入的时候。只有当引起阻塞原因消失后,线程才能进入就绪状态。
2.3.5 终止状态
当线程run方法运行结束后,或者主线程的main()方法结束后,线程才能处于终止状态,线程一旦死亡就不能复生。
3. 多线程常用操作方法
- 线程的命名与取得
- 线程休眠方法
- 线程中断方法
- 线程强制执行
- 线程让步
- 线程优先级
3.1 线程的命名和获取
线程是不确定的运行状态,名称就是线程的主要标记。因此,需要注意的是,对于线程的名字一定要在启动之前设置进程名称,不建议对已经启动的线程,进行更改名称,或者为不同线程设置重名。
其主要方法:
public Thread(Runnable runnable,String name) //构造函数:实例化线程对象,为线程对象设置名称
public final void setName(String name) // 普通函数:设置线程名字
public final String getName() // 普通函数:获取线程名字
观察线程命名操作:
class MyThread implements Runnable{


	@Override
	public void run() {


		System.out.println( Thread.currentThread().getName());
		System.out.println( Thread.currentThread().getName());
	}
}

public class ThreadDemo {


	public static void main(String[] args) {


		MyThread mt1 = new MyThread();
		MyThread mt2 = new MyThread();
		MyThread mt3 = new MyThread();

		new Thread(mt1,"线程一").start();
		new Thread(mt2,"线程二").start();
		new Thread(mt3).start(); // 使用默认的线程名称
		mt1.run(); // 这里直接查看main方法的线程名称
	}
}
运行情况:
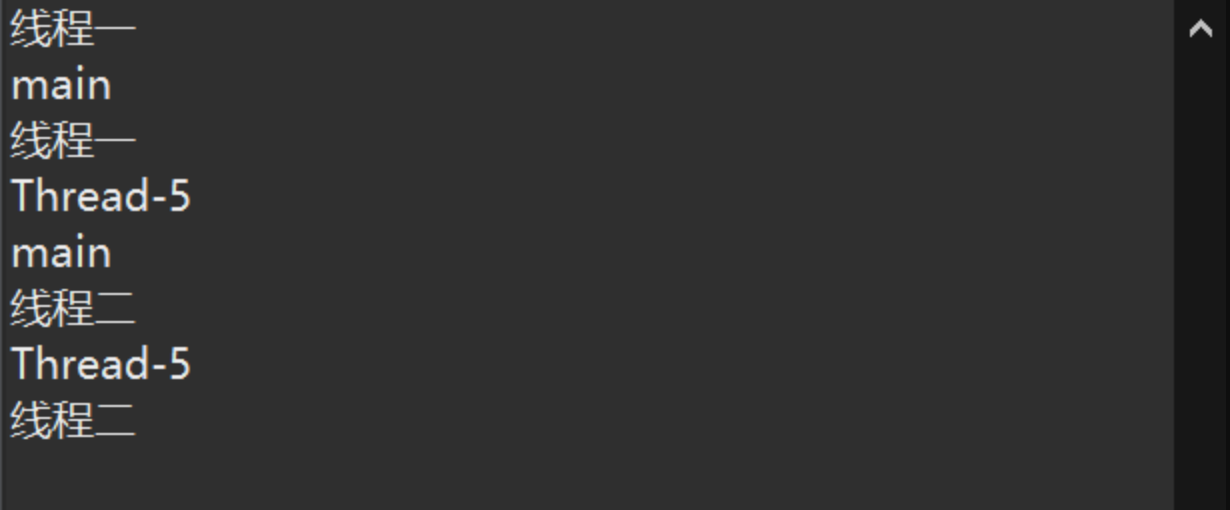
需要注意的是主方法也是进程的一个线程。
3.2 线程休眠
sleep方法定义在java.lang.Thread中,由Thread.sleep()调用实现。其作用是需要暂缓线程的执行速度,则可以让当前线程休眠,即当前线程从“运行状态”进入到“阻塞状态”。sleep方法会指定休眠时间,线程休眠的时间会大于或等于该休眠时间,该线程会被唤醒,此时它会由“阻塞状态”变成“就绪状态”,然后等待CPU的调度执行。
其主要方法:
public static void sleep(long millis) throws InterruptedException // 普通函数:设置休眠时间的毫秒数
public static void sleep(long millis,int nanos) throws InterruptedException // 普通函数:设置休眠毫秒数和纳秒数
定义线程主体类:
public class MyThread implements Runnable{


	@Override
	public void run() {


		for(int i = 0 ; i<90 ; i++) {


			System.out.println(Thread.currentThread().getName() + " 正在工作中……" + i );
			if(i == 20) {


				try {


					System.out.println(Thread.currentThread().getName() + " 等一会儿就要休息五秒钟了……");
					Thread.sleep(5000); // 当前线程休眠五秒钟
					 System.out.println(Thread.currentThread().getName() + " 已经休息五秒钟了……");
				}catch (InterruptedException e) {


					System.out.println(Thread.currentThread().getName() + " 休眠被打扰了……");
				}
			}
		}
	}
}
观察线程休眠操作:
public class ThreadDemo {


	public static void main(String[] args){


		 MyThread mt1 = new MyThread();
		 MyThread mt2 = new MyThread();
		 MyThread mt3 = new MyThread();

		 new Thread(mt1,"线程一").start();
		 new Thread(mt2,"线程二").start();
		 new Thread(mt3,"线程三").start();
	}
}
运行情况:
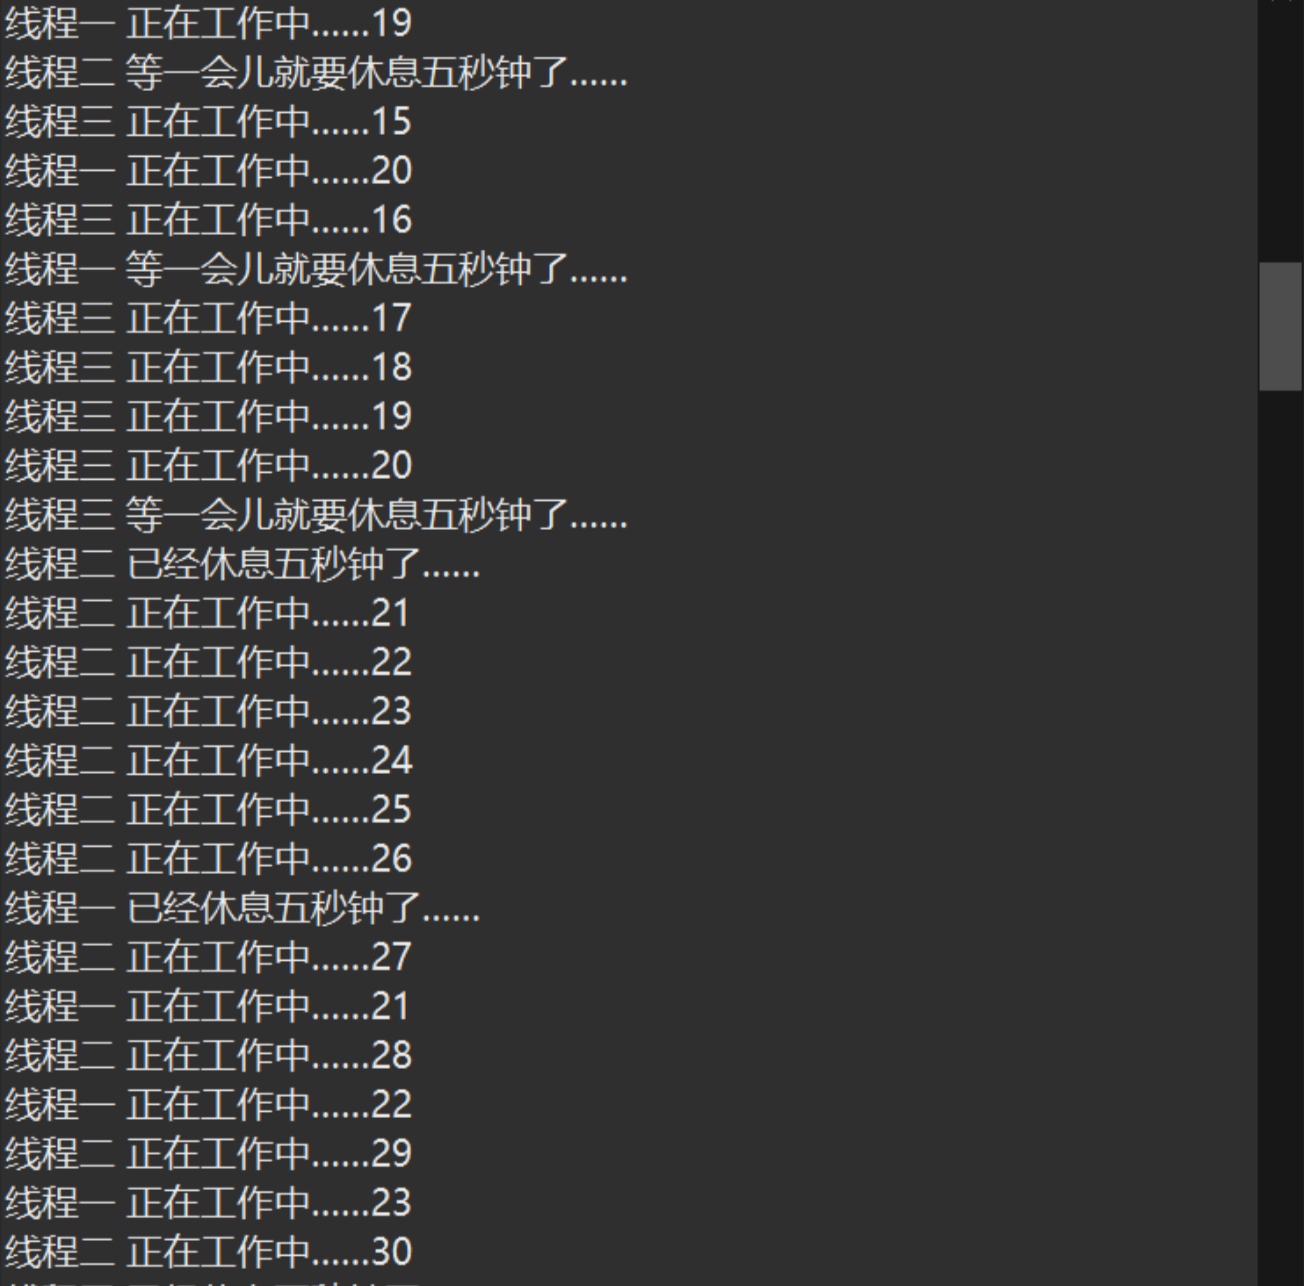
由以上结果容易了解到,休眠期间该线程并没有工作,而其他未休眠的线程则在继续工作。
3.3 线程中断
interrupt方法定义在java.lang.Thread中,由Thread.interrupt()调用实现。该方法将会设置该线程的中断状态位,即设置为true,中断的结果线程是终止状态、还是阻塞状态或是继续运行至下一步,就取决于该程序本身。线程会不时地检测这个中断标示位,以判断线程是否应该被中断(即中断标示值是否为true)。它并不像stop方法那样会中断一个正在运行的线程。
其主要方法:
// 以下均为Thread类的方法
public boolean isInterrupted() //普通函数:判断线程是否被中断
public void interrupt() //普通函数:中断线程执行
定义线程主体类:
public class MyThread implements Runnable {


	@Override
	public void run() {


		int i = 0;
		while(true) {


			System.out.println(Thread.currentThread().getName() + " 正在努力工作中……" + i++);
			try {


				System.out.println(Thread.currentThread().getName() + " 准备休息5秒钟了……");
				Thread.sleep(5000);  // 休眠5秒钟
				System.out.println(Thread.currentThread().getName() + " 已经休息5秒钟了……");
			}catch(InterruptedException e) {


				System.out.println(Thread.currentThread().getName() + " 被打扰了,不想工作了……");
				break;
			}
		}
	}
}
观察线程中断操作:
public class ThreadDemo {


	public static void main(String[] args) throws Exception{


		Runnable mt1 = new MyThread();
		Runnable mt2 = new MyThread();
		Runnable mt3 = new MyThread();

		Thread thread1 = new Thread(mt1,"线程一"); //线程一就绪
		Thread thread2 = new Thread(mt2,"线程二"); //线程二就绪
		Thread thread3 = new Thread(mt3,"线程三"); //线程三就绪
		thread1.start(); //线程一启动
		thread2.start(); //线程二启动
		thread3.start(); //线程三启动

		// 以下通过利用main线程控制 线程一 中断
		Thread.sleep(6000); //使main方法先休眠6秒钟,即让子线程先运行6秒钟
		if(!thread1.isInterrupted()) {


			System.out.println("吵闹~~~");
			thread1.interrupt(); //中断线程一的执行
		}
	}
}
运行情况:
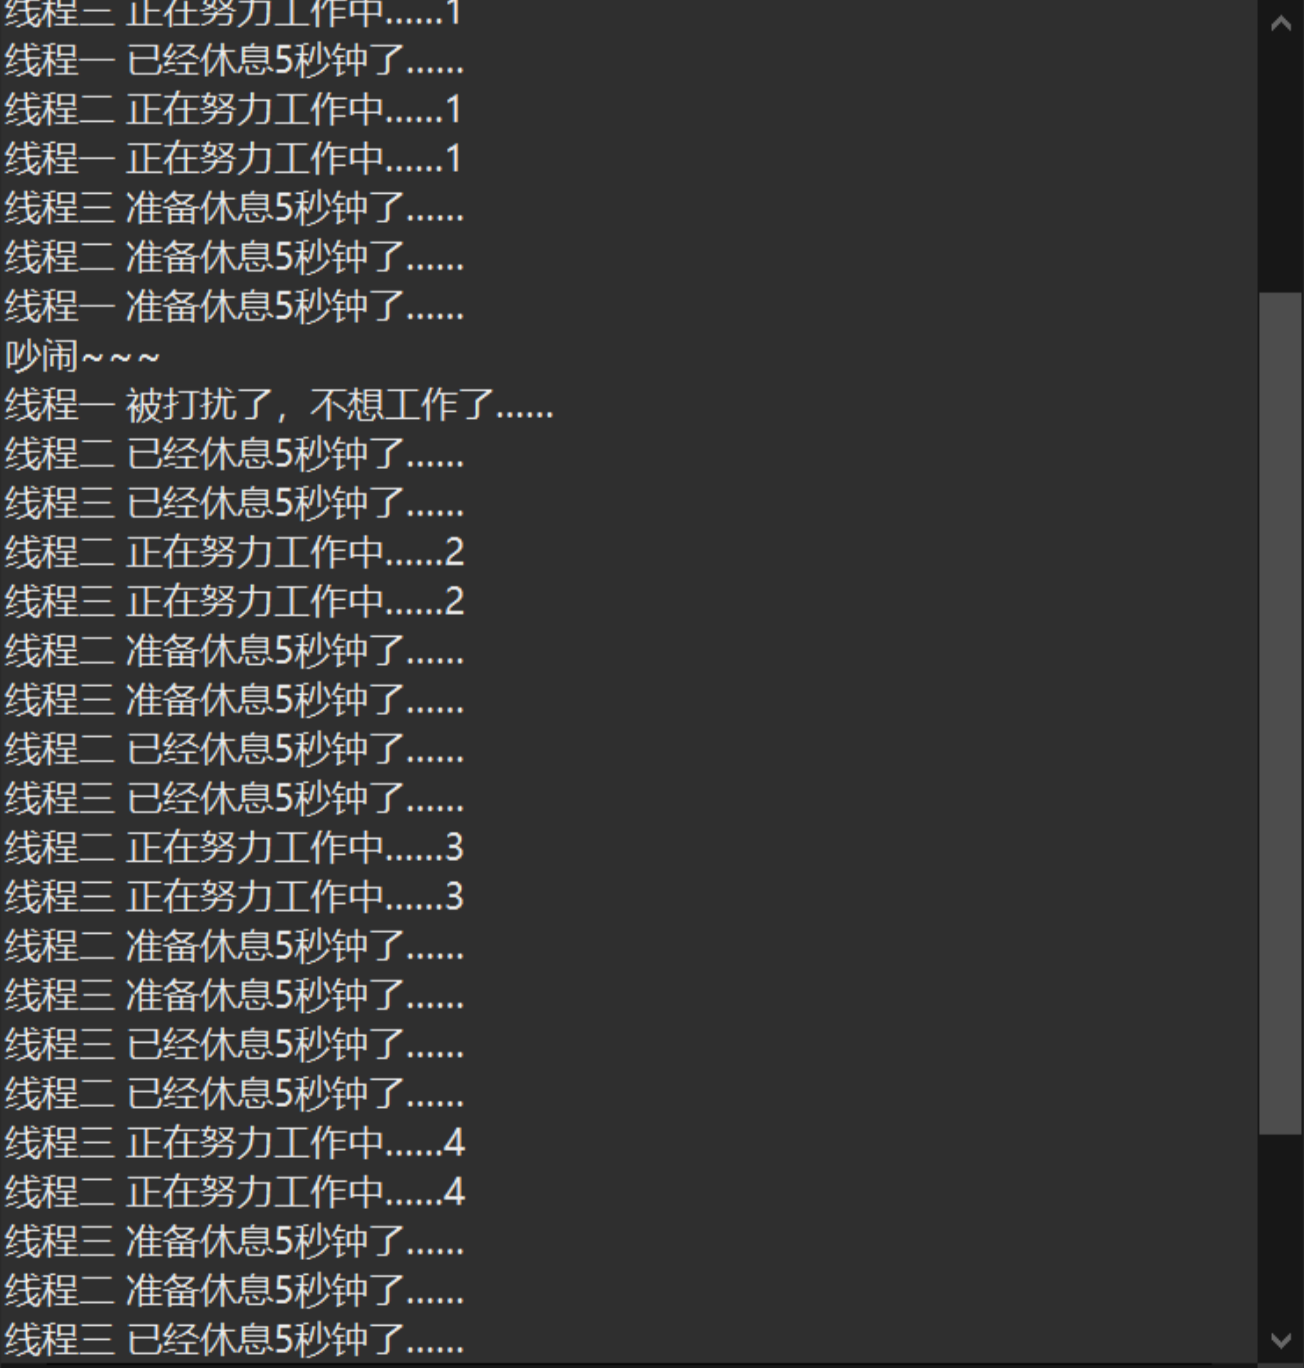
以上代码线程一在休眠期间被中断,然后直接break,也就是说以后就只有线程二和三工作了。这里每当中断执行都会产生InterruptedException异常。
3.4 线程强制执行
join方法定义在java.lang.Thread中,由Thread.join()调用实现。多线程启动后会交替进行资源抢占和线程体执行,如果此时某些线程异常重要,也就是说这个对象需要优先执行完成,则可以设置为线程强制执行,待其完成后其它线程继续执行。
其主要方法:
// Thread类方法
public final void join() throws InterruptedException //普通函数:强制执行
定义线程主体类:
public class MyThread implements Runnable{


	private Thread thread = null;
	public MyThread() {

    }
	public MyThread(Thread thread) {


		this.thread = thread;
	}
	@Override
	public void run() {


		for(int i = 0; i<50 ; i++) {


			if(i >= 20 && i <= 25) {


					try {


						System.out.println(thread.getName()  + "被迫参与 " + Thread.currentThread().getName() + " 的工作了……" +i);
						thread.join();
					}catch(InterruptedException e) {


						e.printStackTrace();
					}
			}
			// 以下语句不管上面判断语句是否执行都会执行的
			System.out.println(Thread.currentThread().getName() + " 正在工作中……" +i);
		}
	}
}
观察线程强制执行操作:
public class ThreadDemo {


	public static void main(String[] args) {


		Thread mainThread = Thread.currentThread();
		MyThread mt1 = new MyThread(mainThread);
		Thread thread1 = new Thread(mt1,"子线程");

		thread1.start();
		for(int i = 0 ;i<20;i++) {


			try {


				Thread.sleep(1000); // 每次main线程休眠1秒
				System.out.println(Thread.currentThread().getName() +  "正在工作中……" + i);
			}catch(InterruptedException e) {


				e.printStackTrace();
			}
		}
		System.out.println("我main线程已经完成了所有任务,从此无法再复生了……");
	}
}
运行情况:
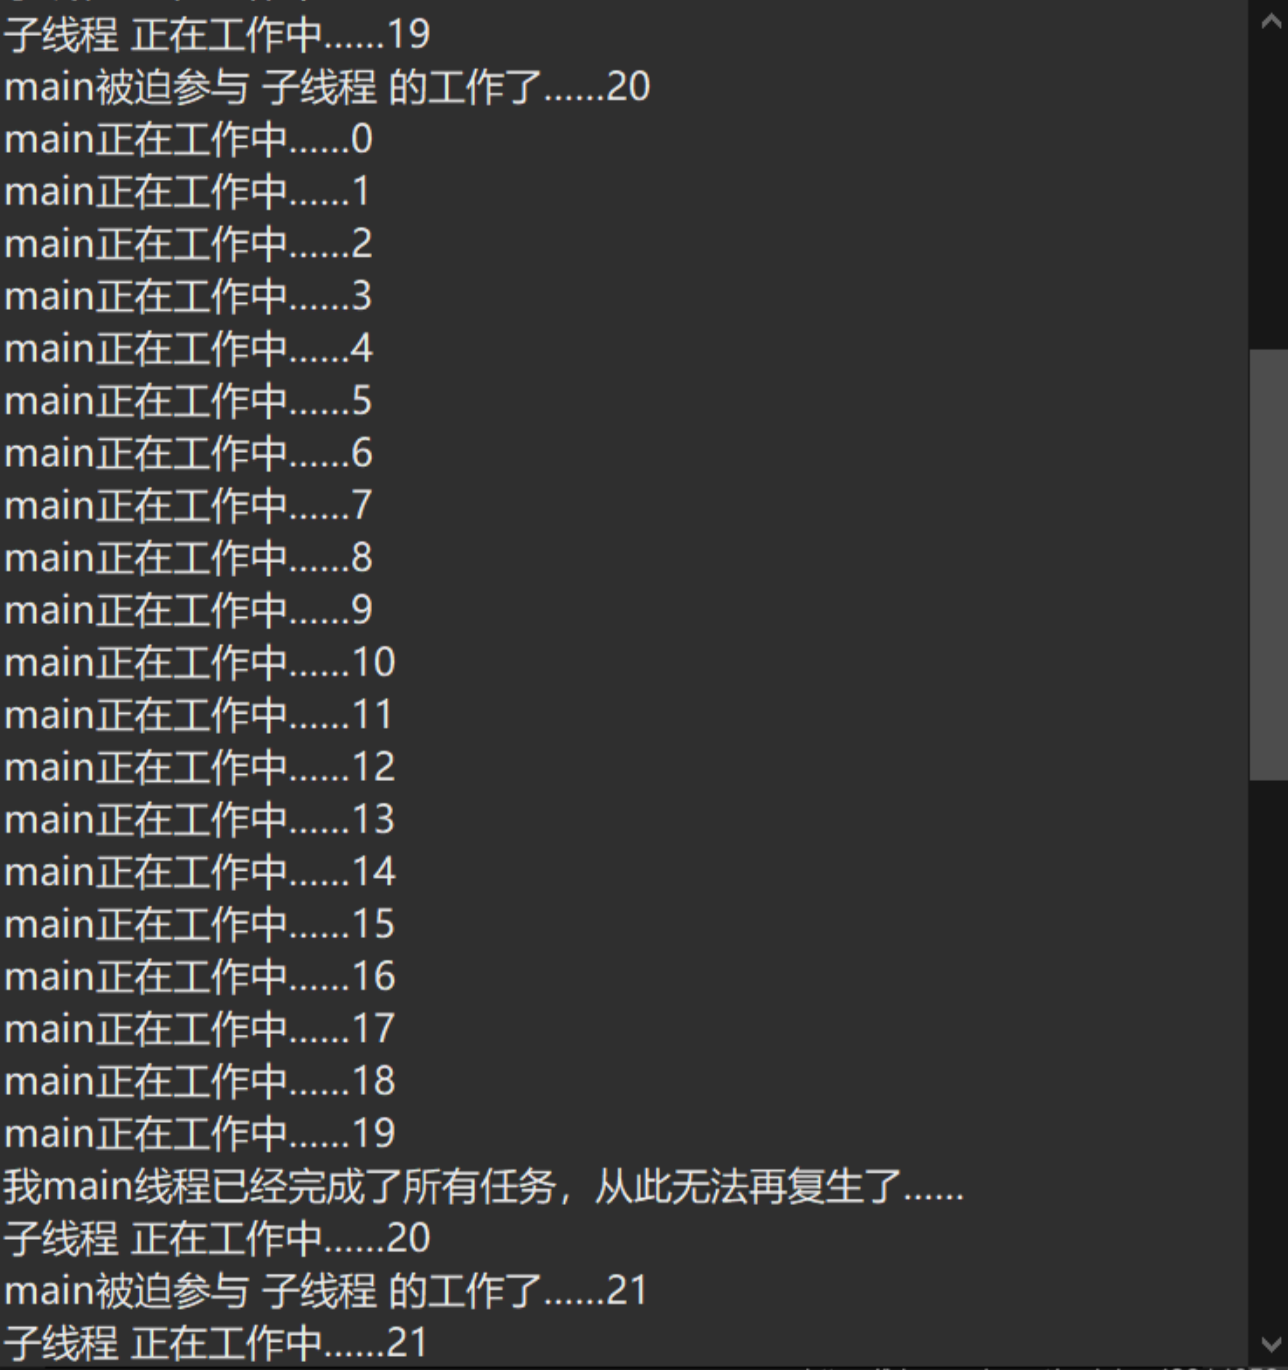
由以上结果容易了解到,当子线程经行到第20次时,开始强制执行main线程任务,直至全部完成为止,而且只能够完整地执行地一次。当main线程执行完毕后,子线程才能开始继续执行。
3.5 线程让步
yield方法定义在java.lang.Thread中,由Thread.yield()调用实现。多线程在彼此交替执行的时候往往需要进行资源的轮流抢占,如果某些不是很重要的线程抢占到资源但是又不急于执行时,就可以将当前的资源暂时让步出去,交给其它资源先执行。但是,因为yeild是将线程由“运行状态”转别为“就绪状态”,这样并不能保证在当前线程调用yield方法之后,其它具有相同优先级的线程就一定能获得执行权,也有可能是当前线程又进入到“运行状态”继续运行,因为还是要依靠CPU调度才可以。
其主要方法:
public static void yield() // 静态函数:线程让步
定义线程主体类:
public class MyThread implements Runnable{


	private Thread thread = null;
	public MyThread () {

    }
	public MyThread(Thread thread) {


		this.thread = thread;
	}
	@Override
	public void run() {


		for(int i = 0 ; i<50 ; i++) {


			System.out.println(Thread.currentThread().getName()  + " 正在工作中……" + i);
			if( i  == 30) {


				System.out.println(Thread.currentThread().getName() + " 打算将工作交给 "+thread.getName() + "了……");
				Thread.yield(); // 当前线程让步出去
				System.out.println(Thread.currentThread().getName() + " 又想自己工作了……");
			}
		}
	}
}
观察线程让步操作:
public class ThreadDemo {


	public static void main(String[] args) {


		Thread mainThread = Thread.currentThread();
		Runnable mt1 = new MyThread(mainThread);
		Thread thread1 = new Thread(mt1,"子线程");

		thread1.start();
		for(int i = 0 ; i < 40 ; i++) {


	*运行情况:*		System.out.println(Thread.currentThread().getName() + " 正在工作中……" + i);
		}
	}
}
运行情况:
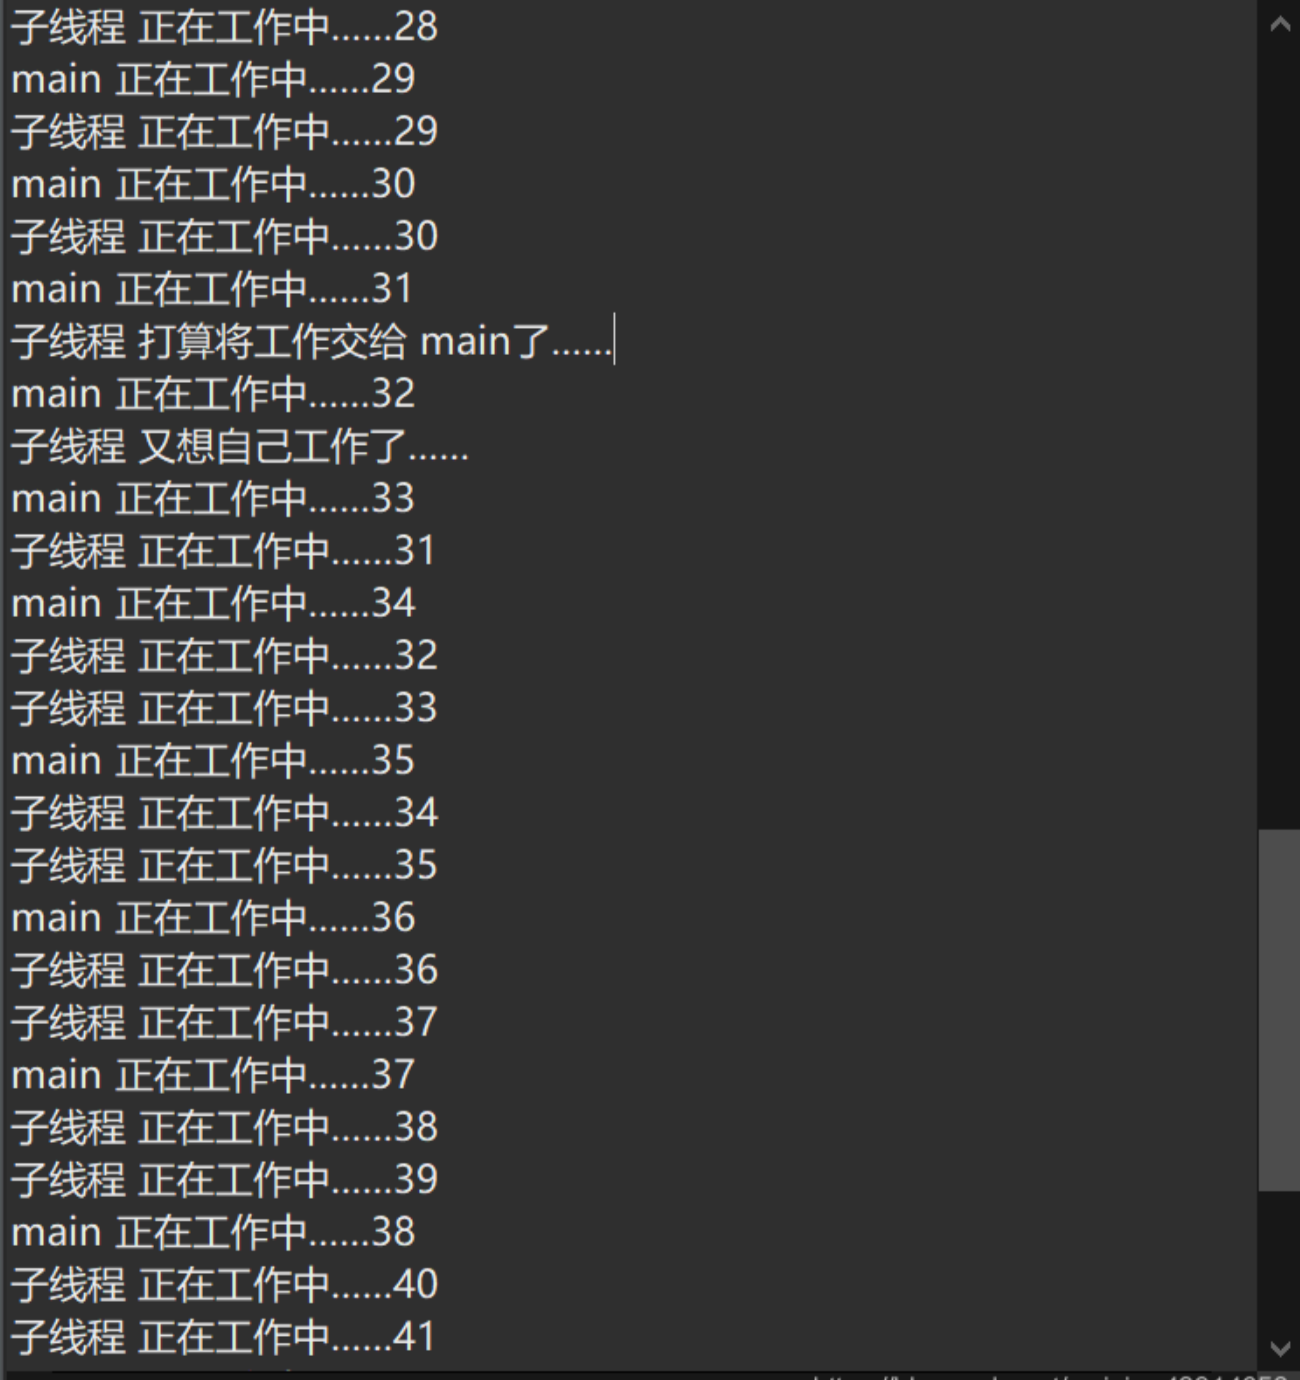
由以上结果容易了解到,会短暂地将资源调度让给其它的线程,当然这并不是严格的,因为还是要CPU调度的。
3.6 线程优先级
所有创造的线程都是子线程,所有的子线程在启动时都会保持同样的优先级权限,但是如果现在某些重要的线程希望可以优先抢占到资源并且先执行,就可以修改优先级权限来实现。
记住当线程的优先级没有指定时,所有线程都携带普通优先级。
需要理解的是:
优先级用从1到10的范围的整数指定。10表示最高优先级,1表示最低优先级,5是普通优先级,也就是默认优先级。
优先级相对最高的线程在执行时被给予优先权限。但是不能保证线程在启动时就进入运行状态。
优先级越高越有可能先执行。
其主要方法以及常量:
public static final int MAX_PRIORITY // 静态常量:最高优先级,数值为10
public static final int NORM_PRIORITY //静态常量:普通优先级,数值为5
public static final int MIN_PRIORITY // 静态常量:最低优先级,数值为1
public final void setPriority(int newPriority) // 普通函数:设置优先级
public final int getPriority() //普通函数:获取优先级
定义线程主体类:
public class MyThread implements Runnable{


	@Override
	public void run() {


		for(int i  = 0 ; i<50 ; i++) {


			System.out.println(Thread.currentThread().getName() + " 正在工作中……" + i);
		}
	}
}
观察线程优先级操作:
public class ThreadDemo {


	public static void main(String[] args) {


		Runnable mt1 = new MyThread();
		Runnable mt2 = new MyThread();

		Thread thread1  = new Thread(mt1,"线程一");
		Thread thread2  = new Thread(mt2,"线程二");

		// 设置优先级
		thread2.setPriority(Thread.MAX_PRIORITY);
		thread1.setPriority(Thread.MIN_PRIORITY);

		// 启动
		thread1.start();
		thread2.start();
	}
}
运行情况:
由以上可以看出,线程二执行的概率高于线程一的执行概率,前面的执行情况大致为交替执行,是因为它们的优先级均相等,默认都等于5。
4. 线程的同步和锁死
当这样也导致了一个问题:在某一时刻,这一份资源在某一个线程发生改变时,其它线程正在执行的操作也会受到其影响。
如下程序为售票员售票代码以及结果:
定义线程主体类:
public class MyThread implements Runnable{


	private int ticket = 10;
	@Override
	public void run() {


		while(true) {


				if(ticket<0) {


					System.out.println(Thread.currentThread().getName() + "的票已经全部售完,此时的票数量为:"+ticket);
					break;
				}
				try {


					Thread.sleep(1000); // 延迟1秒,使得ticket可以被其它线程充分改变(可能此时的ticket小于等于0了)
				}catch(InterruptedException e) {


					e.printStackTrace();
				}
				System.out.println(Thread.currentThread().getName()  + " 正在售票,还剩余票数为:" + ticket--);
			}
	}
}
观察售票状态:
public class ThreadDemo {


	public static void main(String[] args) {


		// 一份资源
		Runnable mt1 = new MyThread();

		// 共享同一份资源
		new Thread(mt1,"售票员A").start();
		new Thread(mt1,"售票员B").start();
		new Thread(mt1,"售票员C").start();
	}
}
运行情况:
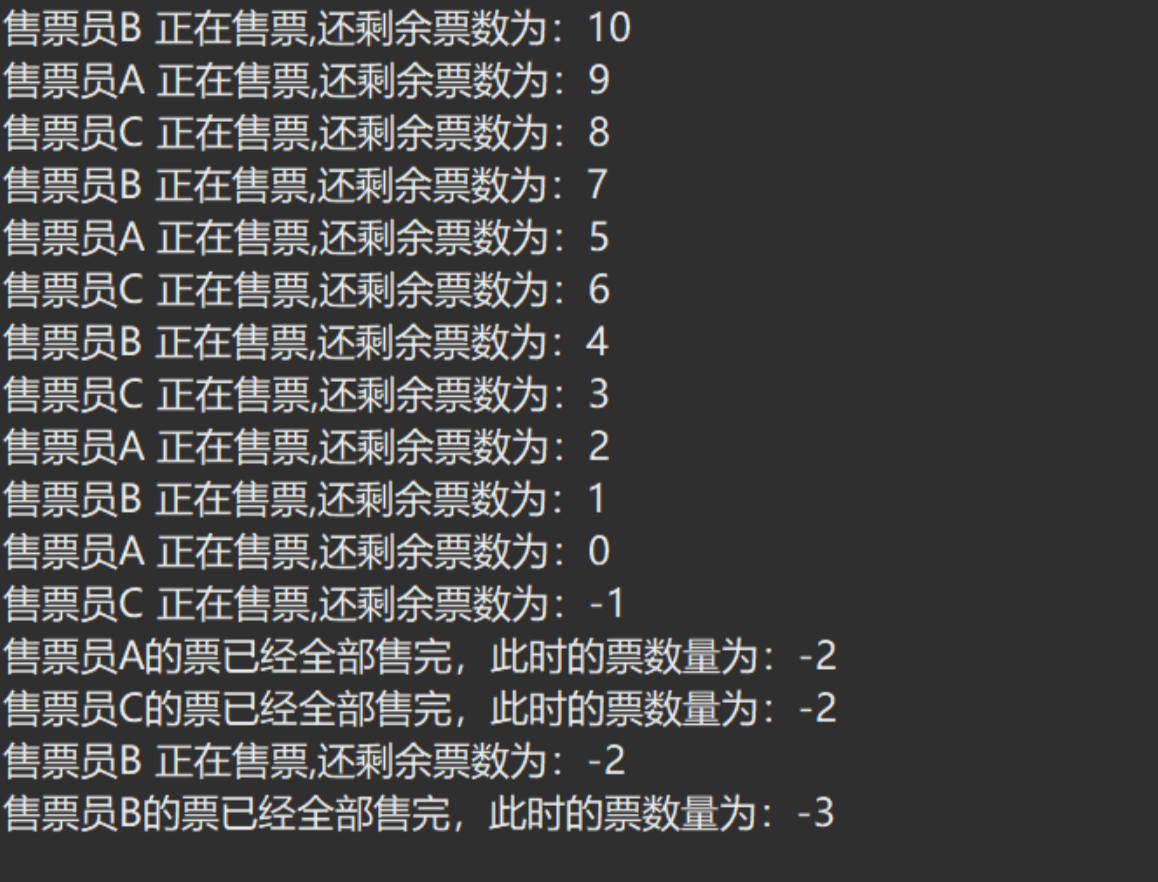
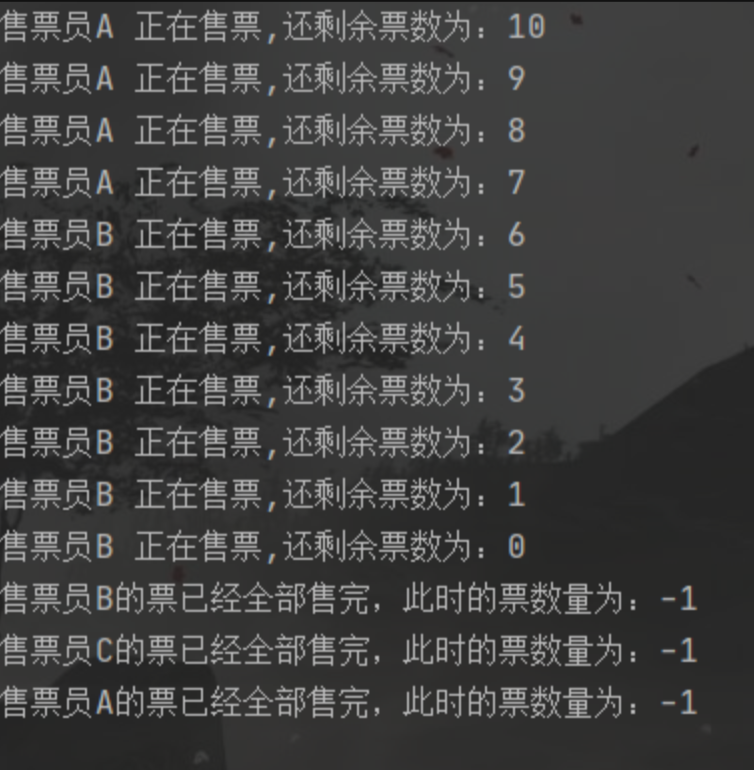
以上结果就很好地说明了多线程的不安全问题,票数本来应该大于等于0的,但是因为某一个A线程延迟,由于共享资源,此时可能其它某个线程已经将票数售完(ticket-- == 0),然后线程A继续执行就会使得票数小于0。要解决类似于上面的问题,就需要引入线程同步和死锁概念。
4.1 线程同步
解决数据共享问题必须使用同步,所谓的同步就是指多个线程在同一个时间段内只能有一个线程执行指定的代码,其他线程要等待此线程完成之后才可以继续进行执行,在Java中提供有synchronized关键字以实现同步处理,同步的关键是要为代码加上“锁”。
而锁的操作有三种:
- 同步代码块
- 同步方法
- Lock实现
4.1.1 同步代码块实现
使用方式:
synchronized(需要同步的对象){


    需要同步的操作
}
定义线程主体类:
public class MyThread implements Runnable{


	private int ticket = 10;
	@Override
	public void run() {


		while(true) {


			// 同步代码块
			synchronized(this) {


				if(ticket<0) {


					System.out.println(Thread.currentThread().getName() + "的票已经全部售完,此时的票数量为:"+ticket);
					break;
				}
				try {


					Thread.sleep(10); // 延迟0.01秒,使得ticket可以被其它线程充分改变(可能此时的ticket小于等于0了)
				}catch(InterruptedException e) {


					e.printStackTrace();
				}
				System.out.println(Thread.currentThread().getName()  + " 正在售票,还剩余票数为:" + ticket--);
			}
		}
	}
}
观察售票状态:
public class ThreadDemo {


	public static void main(String[] args) {


		// 一份资源
		Runnable mt1 = new MyThread();

		// 共享同一份资源
		new Thread(mt1,"售票员A").start();
		new Thread(mt1,"售票员B").start();
		new Thread(mt1,"售票员C").start();
	}
}
运行情况:
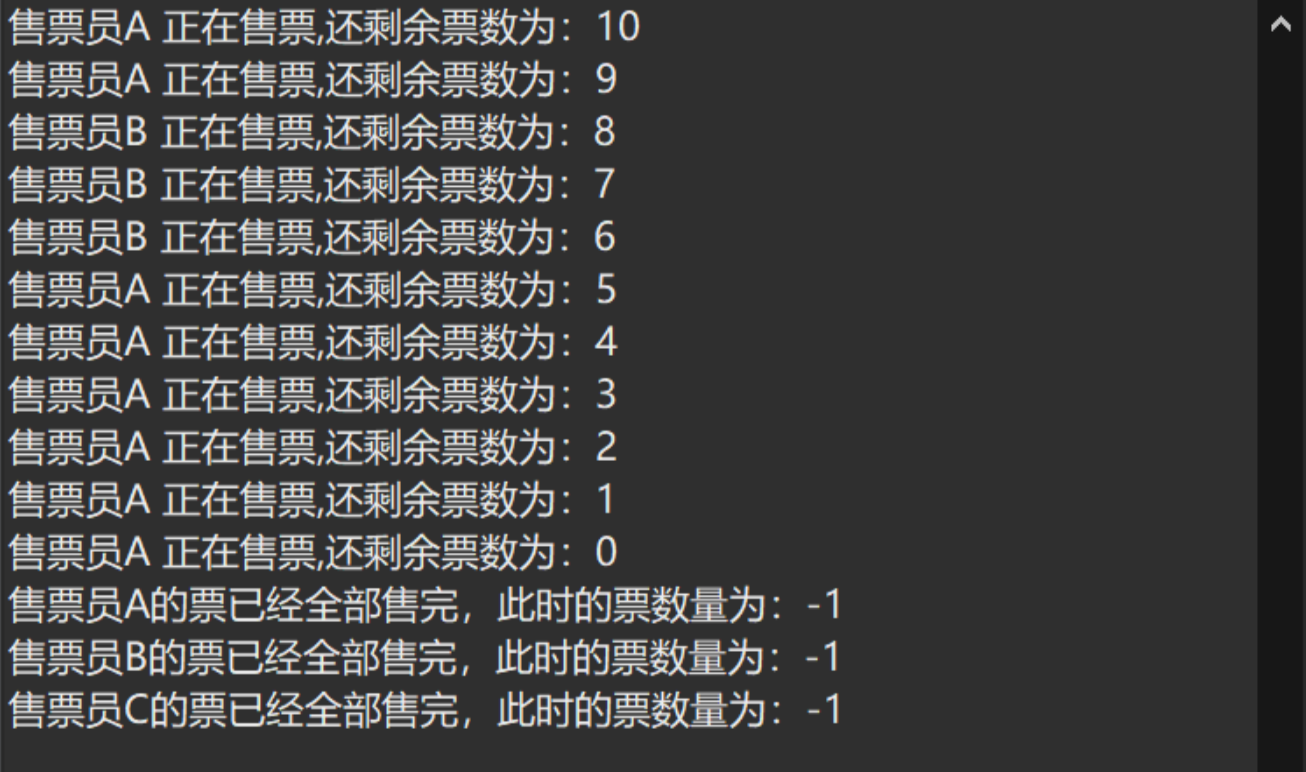
读者从上面代码也容易了解到,虽然它的确起到了安全的作用,但是执行的效率却下降了,因为每次都只有一个线程才能访问同步代码块。
4.1.2 同步方法实现
使用方式:
利用函数包装的形式实现,如下:
修饰符 synchronized 返回类型 函数名()
定义线程主体类:
public class MyThread implements Runnable{


	private int ticket = 10;
	@Override
	public void run() {


		while(this.sale()) {

    }
	}
	public synchronized boolean sale() {


			if(ticket<0) {


				System.out.println(Thread.currentThread().getName() + "的票已经全部售完,此时的票数量为:"+ticket);
				return false;
			}
			try {


				Thread.sleep(10); // 延迟0.01秒,使得ticket可以被其它线程充分改变(可能此时的ticket小于等于0了)
			}catch(InterruptedException e) {


				e.printStackTrace();
			}
			System.out.println(Thread.currentThread().getName()  + " 正在售票,还剩余票数为:" + ticket--);
			return true;
		}
}
观察售票状态:
public class ThreadDemo {


	public static void main(String[] args) {


		// 一份资源
		Runnable mt1 = new MyThread();

		// 共享同一份资源
		new Thread(mt1,"售票员A").start();
		new Thread(mt1,"售票员B").start();
		new Thread(mt1,"售票员C").start();
	}
}
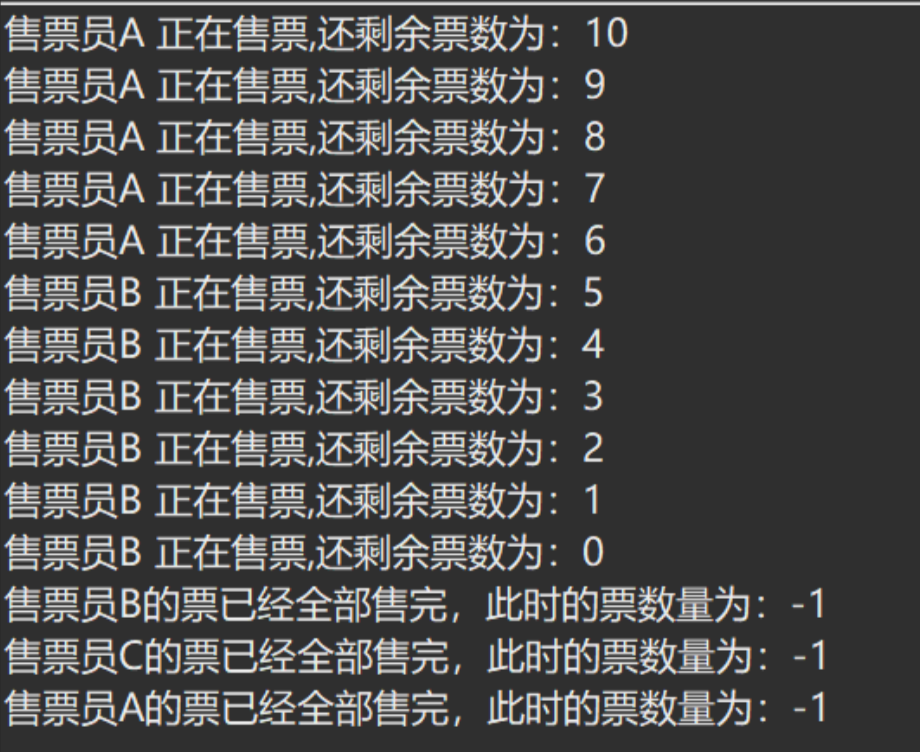
运行情况:
4.1.3 Lock锁实现
定义线程主体类:
package cn.wu;

import java.util.concurrent.locks.Lock;
import java.util.concurrent.locks.ReentrantLock;

public class MyThread implements Runnable{


    private int ticket = 10;
    private final Lock lock = new ReentrantLock();
    @Override
    public void run() {


        while(this.sale()) {

    }
    }
    public boolean sale() {


        lock.lock();
        try{


            if(ticket<0) {


                System.out.println(Thread.currentThread().getName() + "的票已经全部售完,此时的票数量为:"+ticket);
                return false;
            }
            Thread.sleep(200);
            System.out.println(Thread.currentThread().getName()  + " 正在售票,还剩余票数为:" + ticket--);
        }catch (Exception e) {


            e.printStackTrace();
        }finally {


            lock.unlock();
        }
        return true;
    }
}
观察售票状态:
public class ThreadDemo {


	public static void main(String[] args) {


		// 一份资源
		Runnable mt1 = new MyThread();

		// 共享同一份资源
		new Thread(mt1,"售票员A").start();
		new Thread(mt1,"售票员B").start();
		new Thread(mt1,"售票员C").start();
	}
}
运行情况:
4.2 线程死锁
所谓死锁是指两个或两个以上的线程在执行过程中,因争夺资源而造成的一种互相等待的现象,若无外力作用,它们都将无法推进下去,死锁的操作一般是在程序运行时候才有可能出现,死锁是在多线程开发中较为常见的一种问题,过多的同步就有可能出现死锁。
观察死锁状态:
class firstCorssBridge{


	public synchronized void tell(secondCorssBridge scb) {


		System.out.println("张三告诉王五:我先过,你后过,否则你别想过这桥!");
		scb.cross();
	}
	// 以下函数不会执行
	public synchronized void cross() {


		System.out.println("张三快快乐乐地过桥了……");
	}
}
class secondCorssBridge{


	public synchronized void tell(firstCorssBridge fcb) {


		System.out.println("王五告诉张三:我先过,你后过,否则你别想过这桥!");
		fcb.cross();
	}
	// 以下函数不会执行
	public synchronized void cross() {


		System.out.println("王五快快乐乐地过桥了……");
	}
}


public class DeadLock implements Runnable{


	private firstCorssBridge fcb = new firstCorssBridge();
	private secondCorssBridge scb = new secondCorssBridge();

	public DeadLock() {


		// 启动线程 并执行以下语句
		new Thread(this).start(); // 会运行run函数
		fcb.tell(scb); // 运行到里面时 fcb会等待scb
	}
	@Override
	public void run() {


		scb.tell(fcb); // 运行到里面时 scb会等待fcb
	}

	public static void main(String[] args) {


		new DeadLock();
	}
}
运行情况:

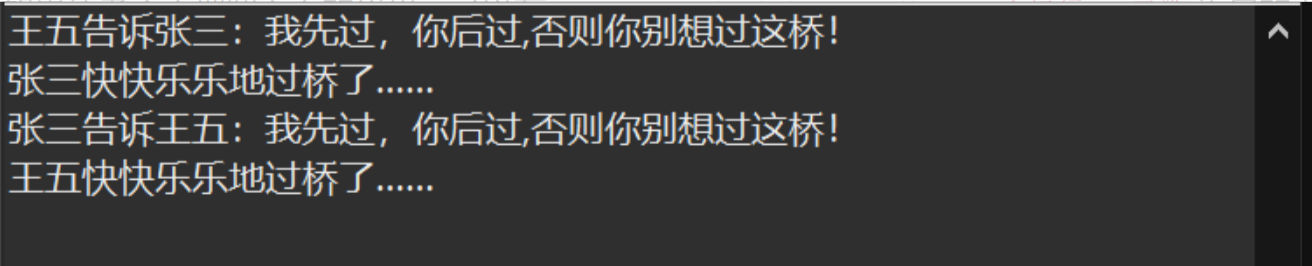
上面红色的说明:两者已经处于相互等待状态,后续代码并不会执行。
如果读者不太理解上面的代码,可以在new Thread(this).start(); // 会运行run函数语句的下面加上:
try {


		Thread.sleep(100); // 休眠0.1秒钟
	}catch(InterruptedException e) {


		e.printStackTrace();
	}
结果就为:
这实际上是“锁中有锁”的情况。
5. 后台守护线程
Java中的线程分为两类,用户线程和守护线程。守护线程(Daemon)是一种运行在后台的线程服务线程,当用户线程存在时,守护线程可以同时存在,但是,当用户线程不存在时,守护线程会全部消失。
主要操作方法:
public final setDaemon(boolean on) throws Exception // 普通函数:是否设置为守护线程
public  final boolean isDaemon() //普通函数:  判断是否为
5.1 观察守护线程操作
class MyThread implements Runnable{


	private int times;
	public MyThread(int times) {


		this.times = times;
	}
	@Override
	public void run() {


		for(int i = 0 ; i<times;i++) {


			if(Thread.currentThread().isDaemon()) {


				try {


					Thread.sleep(10); // 如果是守护线程,则休眠0.01秒钟
				}catch(InterruptedException e) {


					e.printStackTrace();
				}
			}
			System.out.println(Thread.currentThread().getName() + " 正在工作中……"+i);
		}
	}
}


public class testDemo {


	public static void main(String[] args) {


		MyThread mt1 = new MyThread(4);
		MyThread mt2 = new MyThread(100); //守护线程的循环次数远多于用户线程

		Thread thread1 = new Thread(mt1,"用户线程");
		Thread thread2 = new Thread(mt2,"守护线程");
		thread2.setDaemon(true); //thread2设置为守护线程

		thread1.start();
		thread2.start();
	}
}
运行情况:
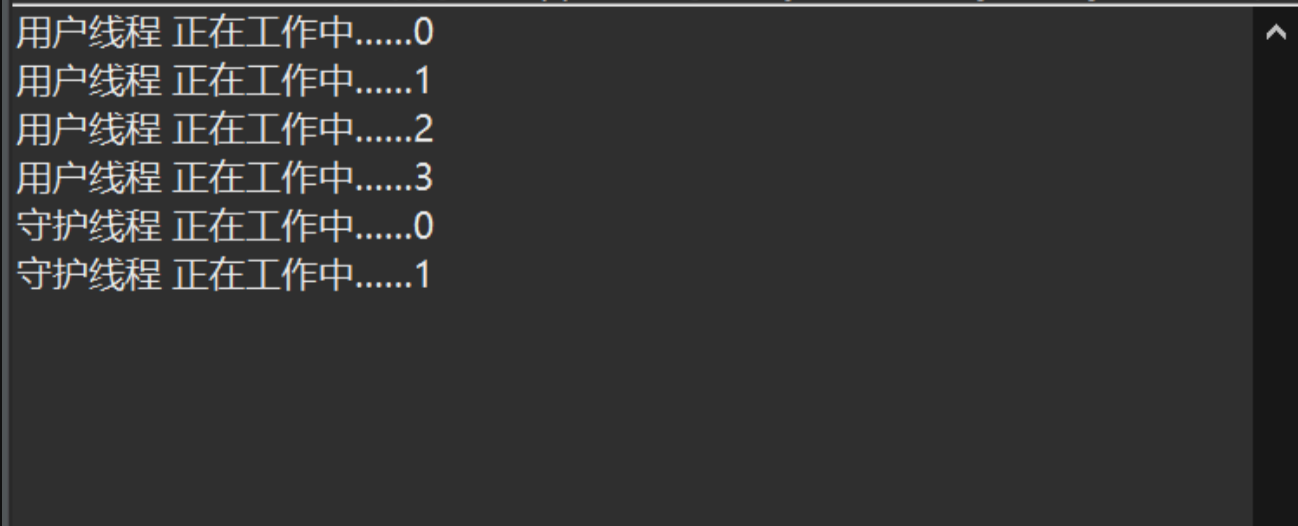
由以上可以了解到,守护线程已经提前结束了,原因是main线程等用户线程全部消失了。
5.2 守护线程的应用场景
在主线程关闭后无需手动关闭守护线程,因为会自动关闭,避免了麻烦,Java垃圾回收线程就是一个典型的守护线程,简单粗暴地可以理解为所有为线程服务而不涉及资源的线程都能设置为守护线程。
6. 线程池
6.1 线程池的概念
容纳多个线程的容器,其中的线程可以反复使用,省去了频繁创建线程的操作,无需反复创建线程而消耗过多的资源。
6.2 为何引入线程池?
如果并发的线程数量过多,并且每个线程都是执行一个时间很短的任务就结束,这样频繁创建线程就会大大降低系统的效率,因为频繁创建线程和销毁线程需要消耗时间,线程也属于宝贵的系统资源,因此,线程池就是为了能使线程可以复用而创建的。
6.3 线程池的好处?
- 降低资源的消耗,减少创建和销毁线程的次数,每个工作线程都可以被重复使用,可执行多个任务
- 提高响应速度,不需要频繁地创建线程,如果有线程可以直接使用,避免了系统僵死
- 提高线程的可管理性
6.4 核心思想:线程复用
Runnable简单实例:
package cn.wu;

import java.util.concurrent.ExecutorService;
import java.util.concurrent.Executors;

public class Test {


    public static void main(String[] args) {


        // 1.创建一个线程池,指定线程的数量为4
        ExecutorService pools = Executors.newFixedThreadPool(4);
        // 2.添加线程任务
        Runnable target = new MyRunnable();
        pools.submit(target); // 第一次提交任务,此时创建新线程
        pools.submit(target); // 第二次提交任务,此时创建新线程
        pools.submit(target); // 第三次提交任务,此时创建新线程
        pools.submit(target); // 第四次提交任务,此时创建新线程
        pools.submit(target); // 第五次提交任务,复用之前的线程
        pools.shutdown(); // 当所有任务全部完成后才关闭线程池
//        pools.shutdownNow(); // 立即关闭线程池

    }
}
class MyRunnable implements Runnable {


    @Override
    public void run() {


        for(int i = 0 ; i<10 ; i++) {


            System.out.println(Thread.currentThread().getName()+"正在执行任务…  "+i);
        }
    }
}
结果:
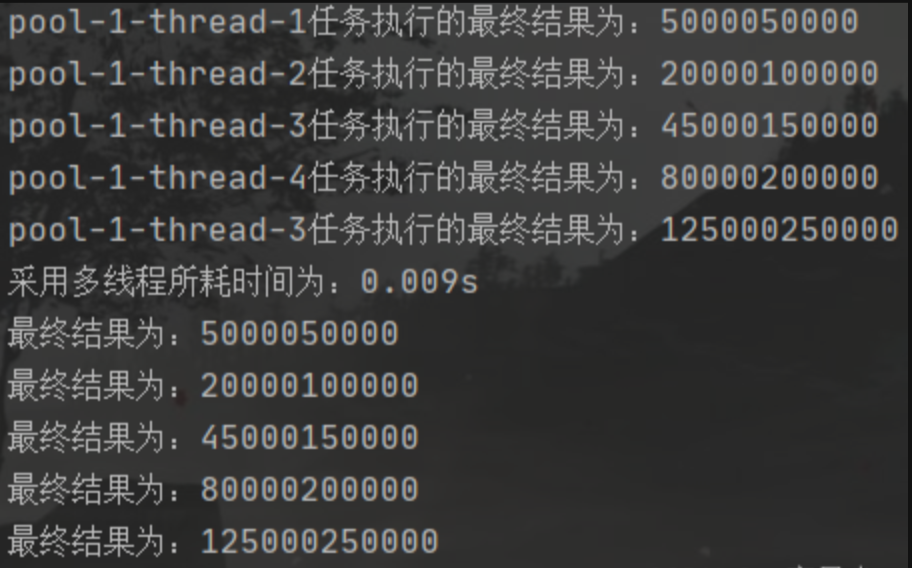
Callable简单实例:
package cn.wu;

import java.util.concurrent.Callable;
import java.util.concurrent.ExecutorService;
import java.util.concurrent.Executors;
import java.util.concurrent.Future;

public class Test {


    public static void main(String[] args) {


        // 1.创建一个线程池,指定线程的数量为4
        ExecutorService pools = Executors.newFixedThreadPool(4);
        try{


            long start = System.currentTimeMillis();
            // 2.添加线程任务
            Future<String> t1 = pools.submit(new MyCallable(100000)); // 提交求出1-100000和的线程任务
            Future<String> t2 = pools.submit(new MyCallable(200000)); // 提交求出1-200000和的线程任务
            Future<String> t3 = pools.submit(new MyCallable(300000)); // 提交求出1-300000和的线程任务
            Future<String> t4 = pools.submit(new MyCallable(400000)); // 提交求出1-400000和的线程任务
            Future<String> t5 = pools.submit(new MyCallable(500000)); // 提交求出1-500000和的线程任务
            System.out.println(t1.get());
            System.out.println(t2.get());
            System.out.println(t3.get());
            System.out.println(t4.get());
            System.out.println(t5.get());

            long end = System.currentTimeMillis();
            System.out.println("采用多线程所耗时间为:"+(end-start)*1.0/1000+"s");
            start = System.currentTimeMillis();
            long sum = 0;
            for(int i = 1 ; i<=100000 ; i++) {


                sum += i;
            }
            System.out.println("最终结果为:"+sum);
            sum = 0;
            for(int i = 1 ; i<=200000 ; i++) {


                sum += i;
            }
            System.out.println("最终结果为:"+sum);
            sum = 0;
            for(int i = 1 ; i<=300000 ; i++) {


                sum += i;
            }
            System.out.println("最终结果为:"+sum);
            sum = 0;
            for(int i = 1 ; i<=400000 ; i++) {


                sum += i;
            }
            System.out.println("最终结果为:"+sum);
            sum = 0;
            for(int i = 1 ; i<=500000 ; i++) {


                sum += i;
            }
            System.out.println("最终结果为:"+sum);
            end = System.currentTimeMillis();
            System.out.println("采用单线程所耗时间为:"+(end-start)*1.0/1000+"s");
        }catch(Exception e) {


            e.printStackTrace();
        }
    }
}
class MyCallable implements Callable<String> {


    private int num;
    public MyCallable(int num) {


        this.num = num;
    }
    @Override
    public String call() throws Exception {


        long sum = 0;
        for(int i = 1 ; i <= num ; i++) {


            sum += i;
        }
        return Thread.currentThread().getName()+
                "任务执行的最终结果为:"+sum;
    }
}
结果: