nginx访问控制、基于用户认证、https配置、开启监控状态
1、nginx访问控制
用于location段
allow:设定允许哪台或哪些主机访问,多个参数间用空格隔开
deny:设定禁止哪台或哪些主机访问,多个参数间用空格隔开
案例:
配置要求
限制主机192.168.183.135访问界面,其余同网段192.168.183.0/24其它主机都可以访问界面,并且拒绝其它所有主机访问。
配置环境
| 主机名 | IP地址 | 配置 |
|---|---|---|
| nginx | 192.168.183.138 | nginx |
| r1 | 192.168.183.135 | 访问测试 |
| r2 | 192.168.183.136 | 访问测试 |
nginx配置
location = / {


            echo "hello world!";
            deny 192.168.183.135;
            allow 192.168.183.0/24;
            deny all;
        }
r1访问测试
[root@r1 ~]# ip a s ens33
2: ens33: <BROADCAST,MULTICAST,UP,LOWER_UP> mtu 1500 qdisc fq_codel state UP group default qlen 1000
    link/ether 00:0c:29:7f:37:b0 brd ff:ff:ff:ff:ff:ff
    inet 192.168.183.135/24 brd 192.168.183.255 scope global dynamic noprefixroute ens33
       valid_lft 1118sec preferred_lft 1118sec
    inet6 fe80::20c:29ff:fe7f:37b0/64 scope link noprefixroute
       valid_lft forever preferred_lft forever

[root@r1 ~]# curl 192.168.183.138
<html>
<head><title>403 Forbidden</title></head>
<body>
<center><h1>403 Forbidden</h1></center>
<hr><center>nginx/1.22.0</center>
</body>
</html>
r2访问测试
[root@r2 ~]# ip a s ens33
2: ens33: <BROADCAST,MULTICAST,UP,LOWER_UP> mtu 1500 qdisc fq_codel state UP group default qlen 1000
    link/ether 00:0c:29:07:de:9b brd ff:ff:ff:ff:ff:ff
    inet 192.168.183.136/24 brd 192.168.183.255 scope global dynamic noprefixroute ens33
       valid_lft 1146sec preferred_lft 1146sec
    inet6 fe80::20c:29ff:fe07:de9b/64 scope link noprefixroute
       valid_lft forever preferred_lft forever

[root@r2 ~]# curl 192.168.183.138
hello world!
2、用户认证
auth_basic "欢迎信息";
auth_basic_user_file "/path/to/user_auth_file"
user_auth_file内容格式为:
username:password
这里的密码为加密后的密码串,建议用htpasswd来创建此文件:
htpasswd -c -m /path/to/.user_auth_file USERNAME
配置示例:
//安装需要的工具
[root@nginx ~]# dnf -y install httpd-tools

//创建用户并设置密码
[root@nginx ~]# htpasswd -c -m /usr/local/nginx/conf/.pass george
New password:
Re-type new password:
Adding password for user george
[root@nginx ~]# cat /usr/local/nginx/conf/.pass
george:$apr1$Cor06uuV$Btb.Kaf/upk3YRXpPcnaB1

//修改nginx配置文件
		location = / {


            auth_basic "xxx";		//此处on为关闭,其它任何字段都为开启
            auth_basic_user_file ".pass";
            echo "hello world!";
        }

//重启生效
[root@nginx ~]# nginx -t
nginx: the configuration file /usr/local/nginx/conf/nginx.conf syntax is ok
nginx: configuration file /usr/local/nginx/conf/nginx.conf test is successful
[root@nginx ~]# systemctl restart nginx
访问测试


3、https配置
有域名可以去免费申请ssl证书进行下载,下载后可直接修改nginx配置文件即可完成
如下配置为openssl实现私有CA证书
//CA生成密钥
[root@nginx conf]# pwd
/usr/local/nginx/conf
[root@nginx conf]# mkdir -p /etc/pki/CA/private
[root@nginx conf]# cd /etc/pki/CA/
//生成密钥
[root@nginx CA]# (umask 077;openssl genrsa -out private/cakey.pem 2048)
Generating RSA private key, 2048 bit long modulus (2 primes)
.....+++++
........+++++
e is 65537 (0x010001)

//自签证书
[root@nginx CA]# openssl req -new -x509 -key private/cakey.pem -out cacert.pem -days 365
[root@nginx CA]# ls
cacert.pem  private
[root@nginx CA]# mkdir certs newcerts crl
[root@nginx CA]# touch index.txt && echo 01 > serial

//客户端生成密钥
[root@nginx CA]# cd /usr/local/nginx/conf/
[root@nginx conf]# mkdir ssl
[root@nginx conf]# cd ssl/
[root@nginx ssl]# (umask 077;openssl genrsa -out nginx.key 2048)

//生成证书签署请求
[root@nginx ssl]# openssl req -new -key nginx.key -days 365 -out nginx.csr
[root@nginx ssl]# ls
nginx.csr  nginx.key

//ca签署提交证书
[root@nginx ssl]# openssl ca -in nginx.csr -out nginx.crt -days 365
[root@nginx ssl]# ls
nginx.crt  nginx.csr  nginx.key
[root@nginx ssl]# rm -f *.csr
[root@nginx ssl]# ls
nginx.crt  nginx.key


//修改配置文件
server {


        listen       443 ssl;
        server_name  localhost;

        ssl_certificate      ssl/nginx.crt;
        ssl_certificate_key  ssl/nginx.key;

        ssl_session_cache    shared:SSL:1m;
        ssl_session_timeout  5m;

        ssl_ciphers  HIGH:!aNULL:!MD5;
        ssl_prefer_server_ciphers  on;

        location / {


            root html;
            index index.html index.htm;
        }
    }


4、状态页面开启和监控
开启status:
location /status {
  stub_status {on | off};
  allow 172.16.0.0/16;
  deny all;
}
访问状态页面的方式:http://server_ip/status
状态页面信息详解:
| 状态码 | 表示的意义 |
|---|---|
| Active connections 2 | 当前所有处于打开状态的连接数 |
| accepts | 总共处理了多少个连接 |
| handled | 成功创建多少握手 |
| requests | 总共处理了多少个请求 |
| Reading | nginx读取到客户端的Header信息数,表示正处于接收请求状态的连接数 |
| Writing | nginx返回给客户端的Header信息数,表示请求已经接收完成, 且正处于处理请求或发送响应的过程中的连接数 |
| Waiting | 开启keep-alive的情况下,这个值等于active - (reading + writing), 意思就是Nginx已处理完正在等候下一次请求指令的驻留连接 |
配置案例
//编辑配置文件
	location = /status {


                stub_status;
        }

[root@nginx ~]# systemctl restart nginx

//访问测试
[root@nginx ~]# curl 192.168.183.138/status
Active connections: 1
server accepts handled requests
 2 2 2
Reading: 0 Writing: 1 Waiting: 0
[root@nginx ~]# curl 192.168.183.138/status
Active connections: 1
server accepts handled requests
 3 3 3
Reading: 0 Writing: 1 Waiting: 0
[root@nginx ~]# curl 192.168.183.138/status
Active connections: 1
server accepts handled requests
 4 4 4
Reading: 0 Writing: 1 Waiting: 0
监控nginx状态
环境说明
| 主机名 | IP地址 | 服务 |
|---|---|---|
| zabbix | 192.168.183.137 | zabbix |
| nginx | 192.168.183.138 | zabbix_agentd、nginx |
在nginx服务端安装zabbix_agentd
//创建用户
[root@nginx ~]# useradd -rMs /sbin/nologin zabbix

//安装依赖包
[root@nginx ~]# dnf -y install make gcc gcc-c++ pcre-devel openssl openssl-devel wget

//下载软件包
[root@nginx ~]# wget https://cdn.zabbix.com/zabbix/sources/stable/6.2/zabbix-6.2.2.tar.gz

//解压编译
[root@nginx ~]# tar -xf zabbix-6.2.2.tar.gz
[root@nginx ~]# cd zabbix-6.2.2/
[root@nginx zabbix-6.2.2]# ./configure --enable-agent
[root@nginx zabbix-6.2.2]# make install

//修改配置文件
[root@nginx zabbix-6.2.2]# vim /usr/local/etc/zabbix_agentd.conf
Server=192.168.183.137
…………
ServerActive=192.168.183.137
…………
Hostname=nginx

//启动服务
[root@nginx zabbix-6.2.2]# zabbix_agentd
[root@nginx zabbix-6.2.2]# ss -antl
State   Recv-Q  Send-Q   Local Address:Port      Peer Address:Port  Process
LISTEN  0       128            0.0.0.0:80             0.0.0.0:*
LISTEN  0       128            0.0.0.0:22             0.0.0.0:*
LISTEN  0       128            0.0.0.0:443            0.0.0.0:*
LISTEN  0       128            0.0.0.0:10050          0.0.0.0:*
LISTEN  0       128               [::]:22                [::]:*
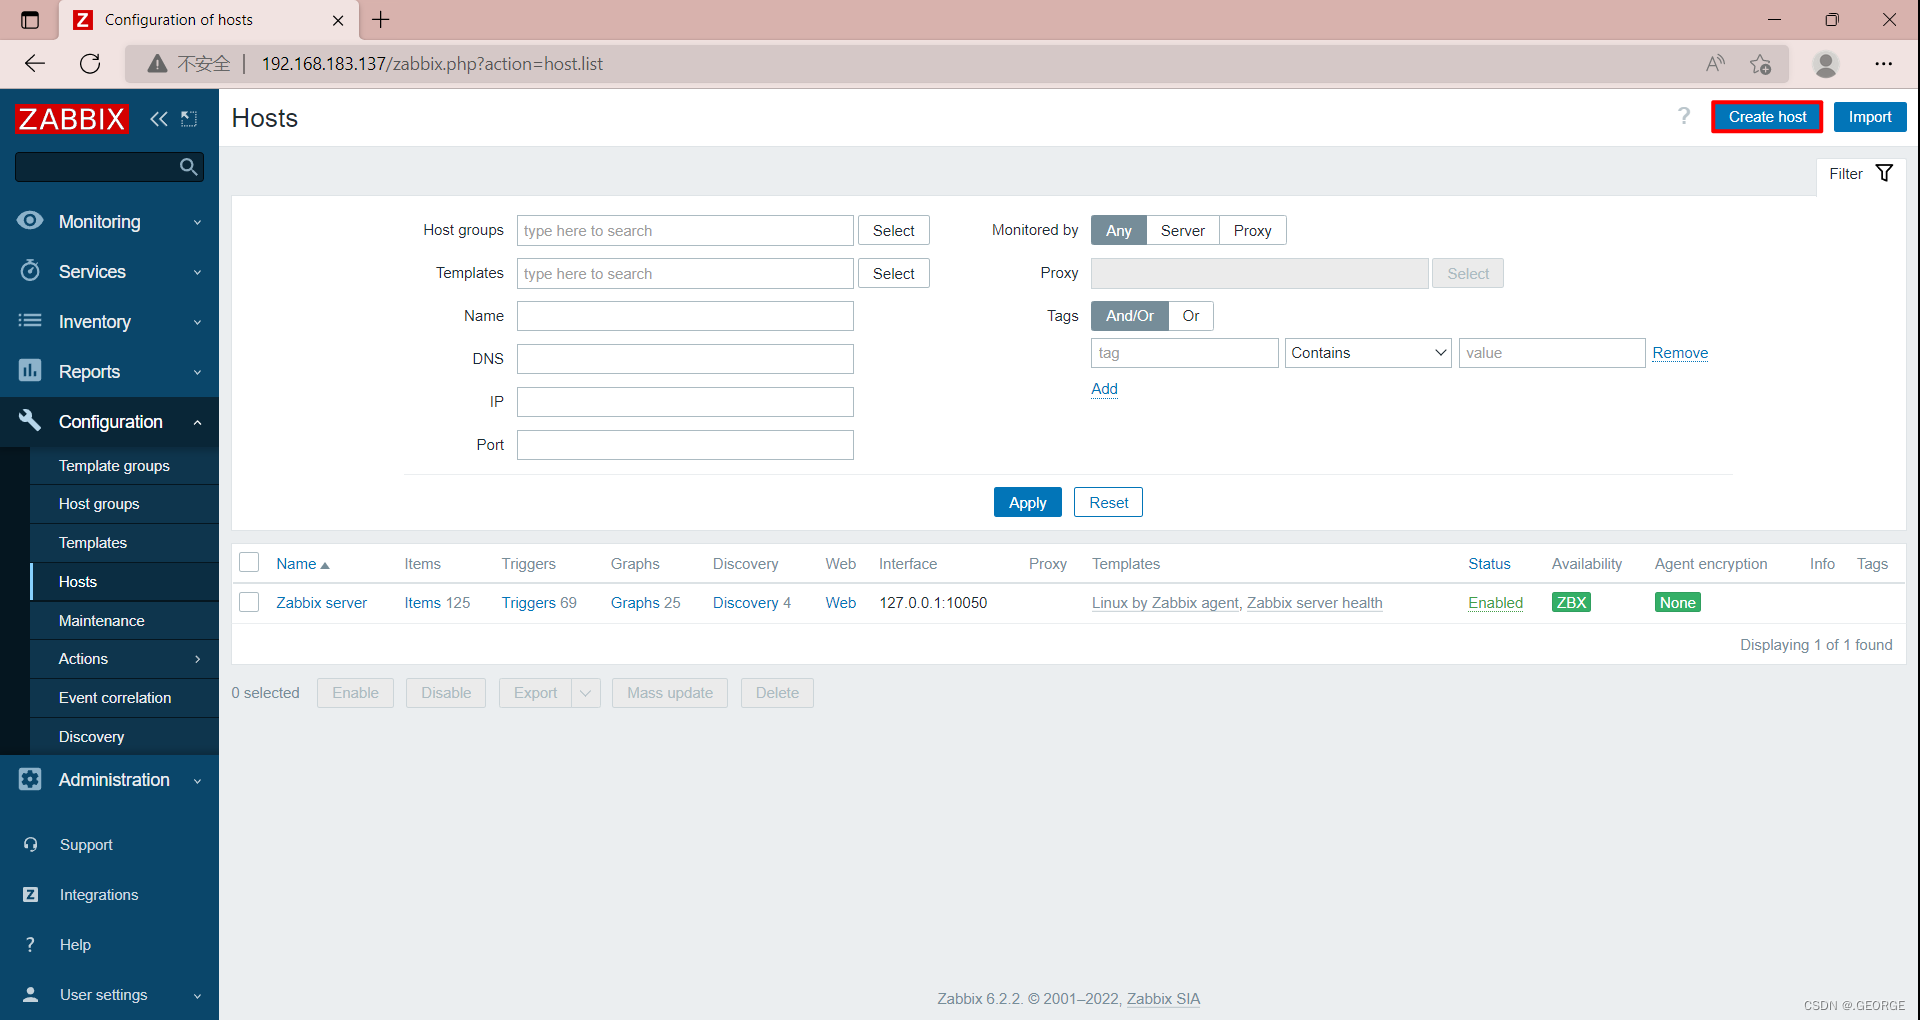
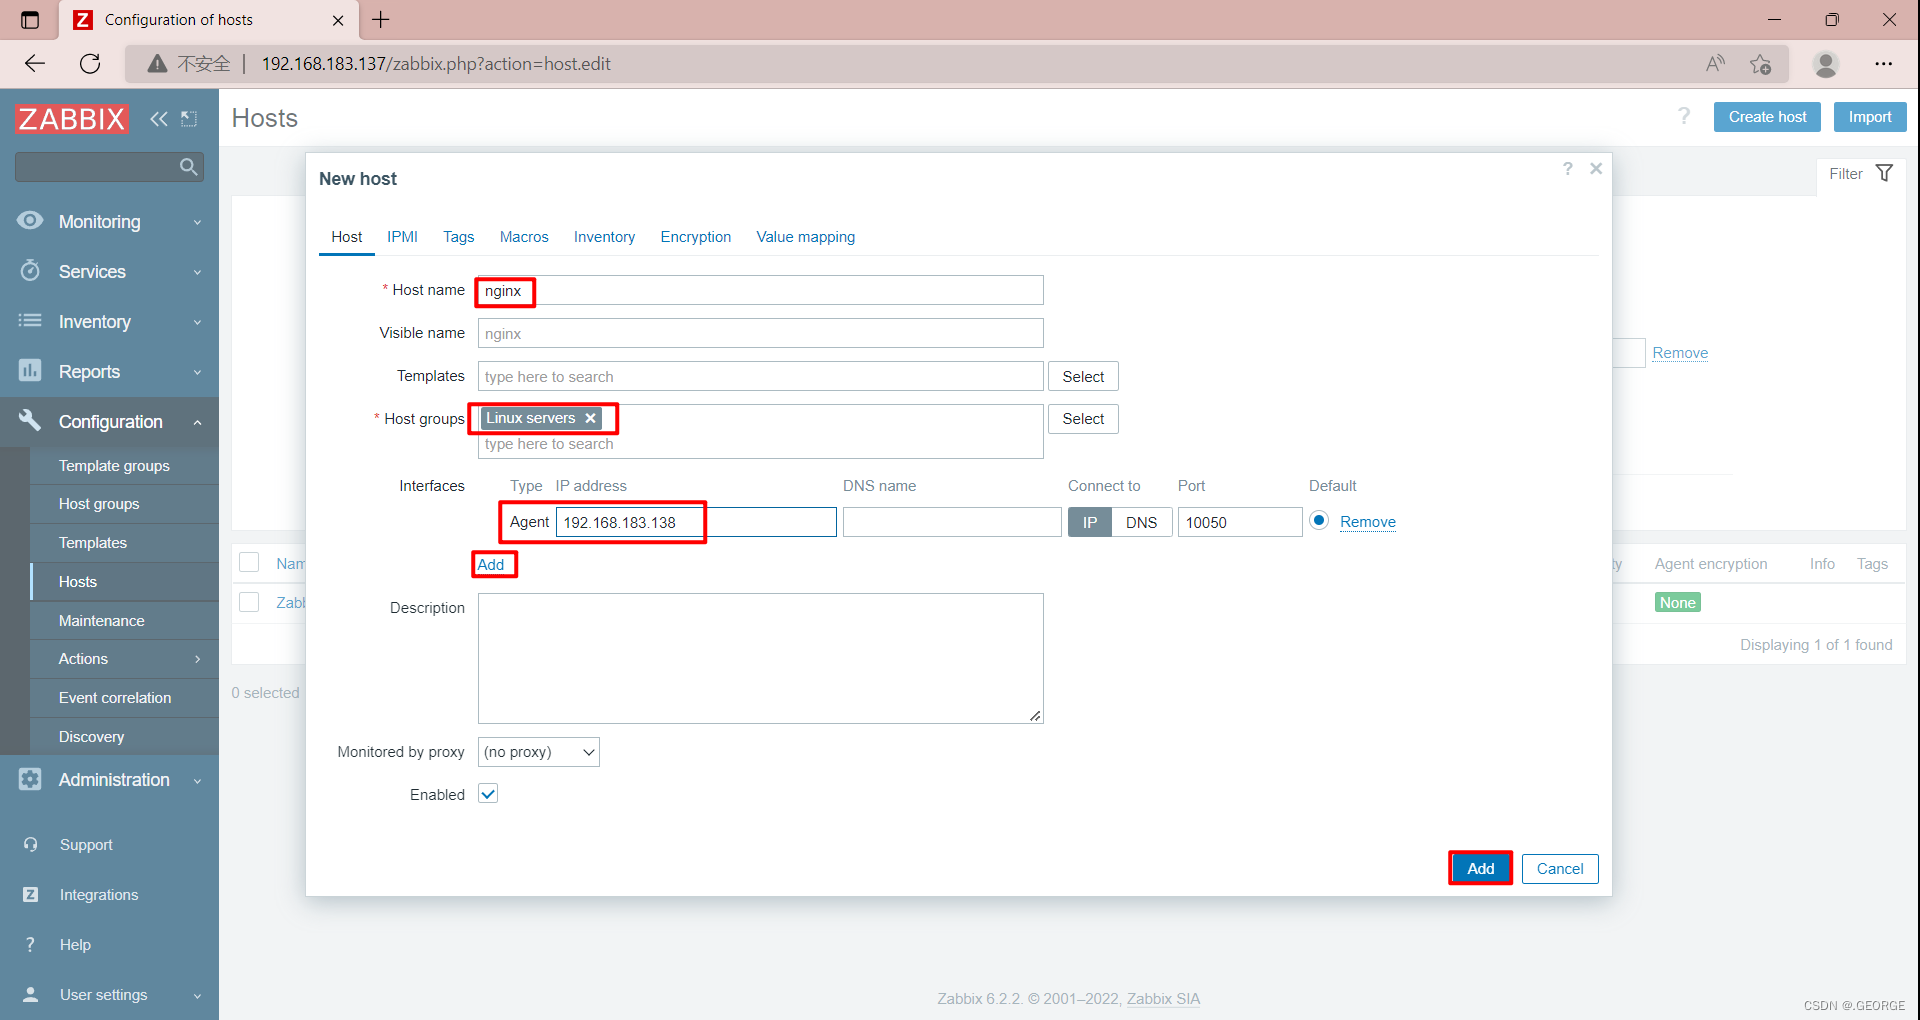
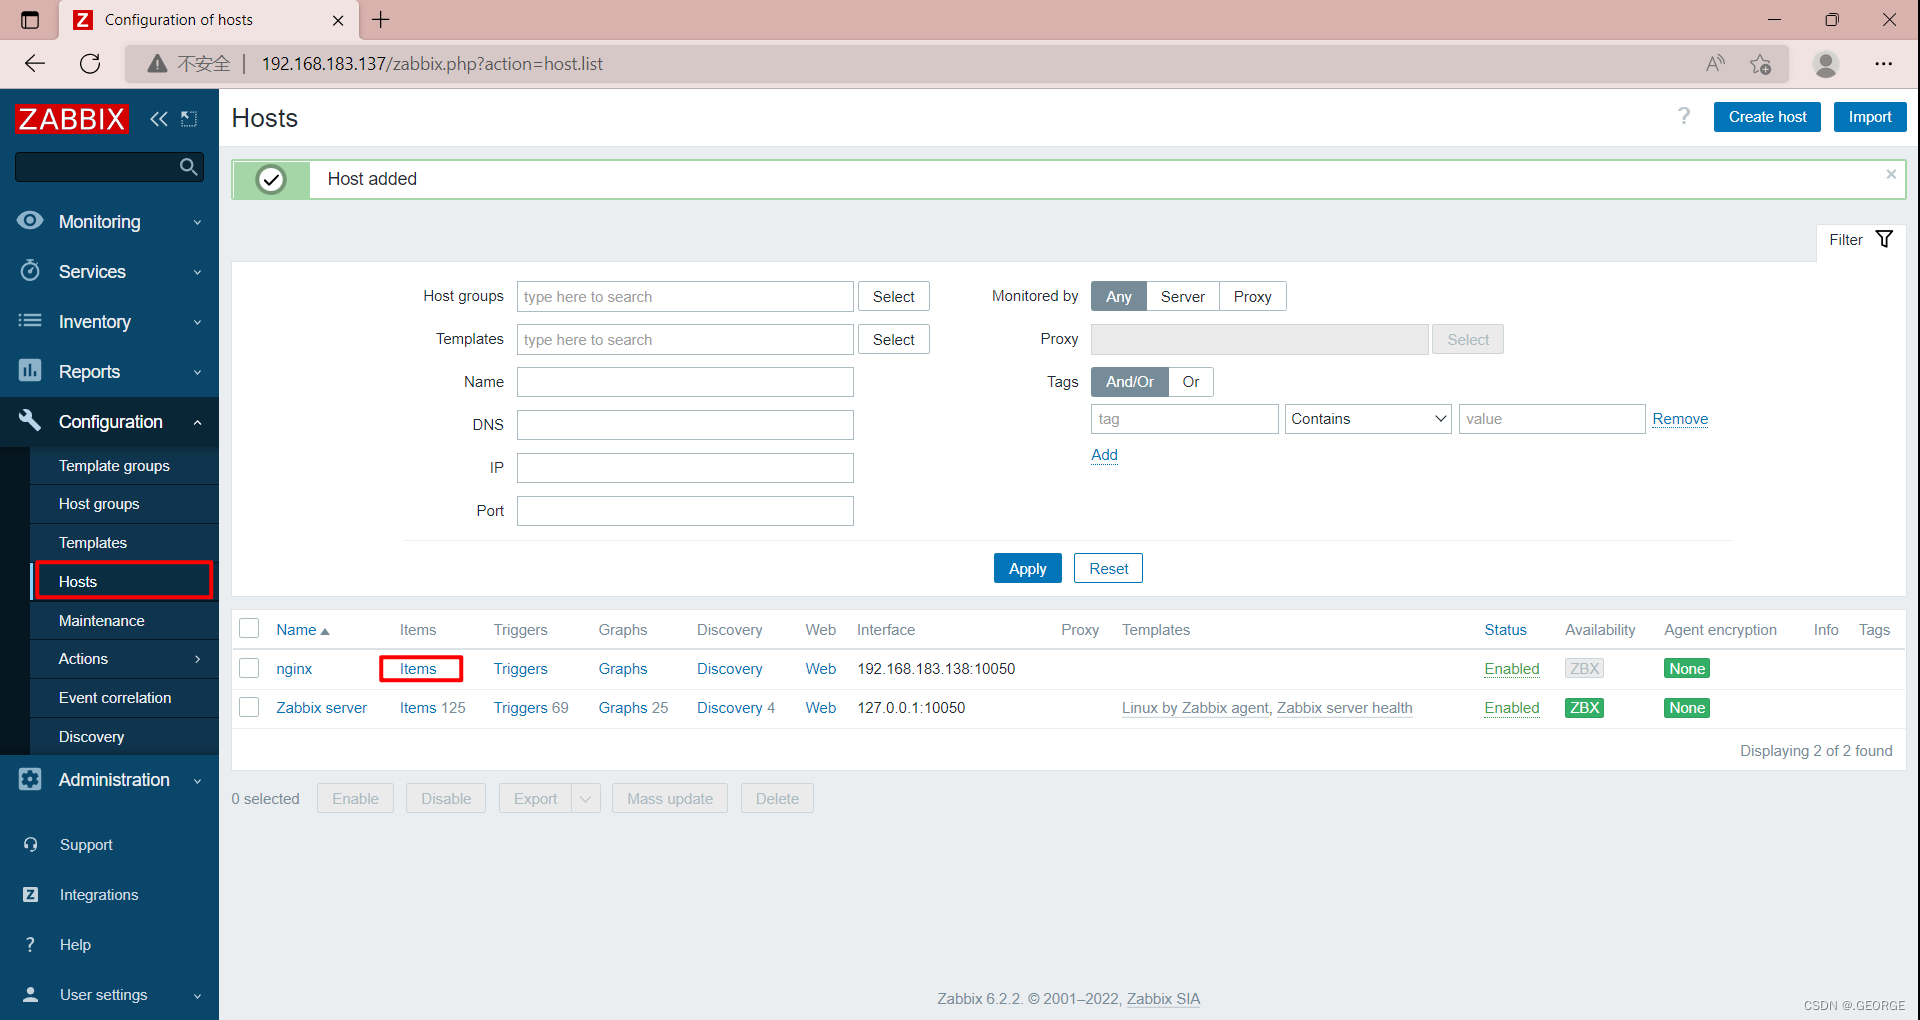
添加主机
创建自定义监控脚本
[root@nginx ~]# mkdir /scripts
[root@nginx ~]# cd /scripts/
[root@nginx scripts]# vim nginx_status.sh
[root@nginx scripts]# cat nginx_status.sh
#!/bin/bash

case $1 in
active)
    curl -s http://192.168.183.138/status |awk '/Active/{print $NF}';;
waiting)
    curl -s http://192.168.183.138/status |awk '/Waiting/{print $NF}';;
esac


[root@nginx scripts]# chmod +x nginx_status.sh


//修改配置文件
[root@nginx scripts]# vim /usr/local/etc/zabbix_agentd.conf
UnsafeUserParameters=1
UserParameter=nginx.status[*],/scripts/nginx_status.sh $1

//重启服务
[root@nginx scripts]# pkill zabbix_agentd
[root@nginx scripts]# zabbix_agentd

//在服务端检查key
[root@localhost ~]# zabbix_get -s 192.168.183.138 -k 'nginx.status[waiting]'
0
[root@localhost ~]# zabbix_get -s 192.168.183.138 -k 'nginx.status[active]'
1
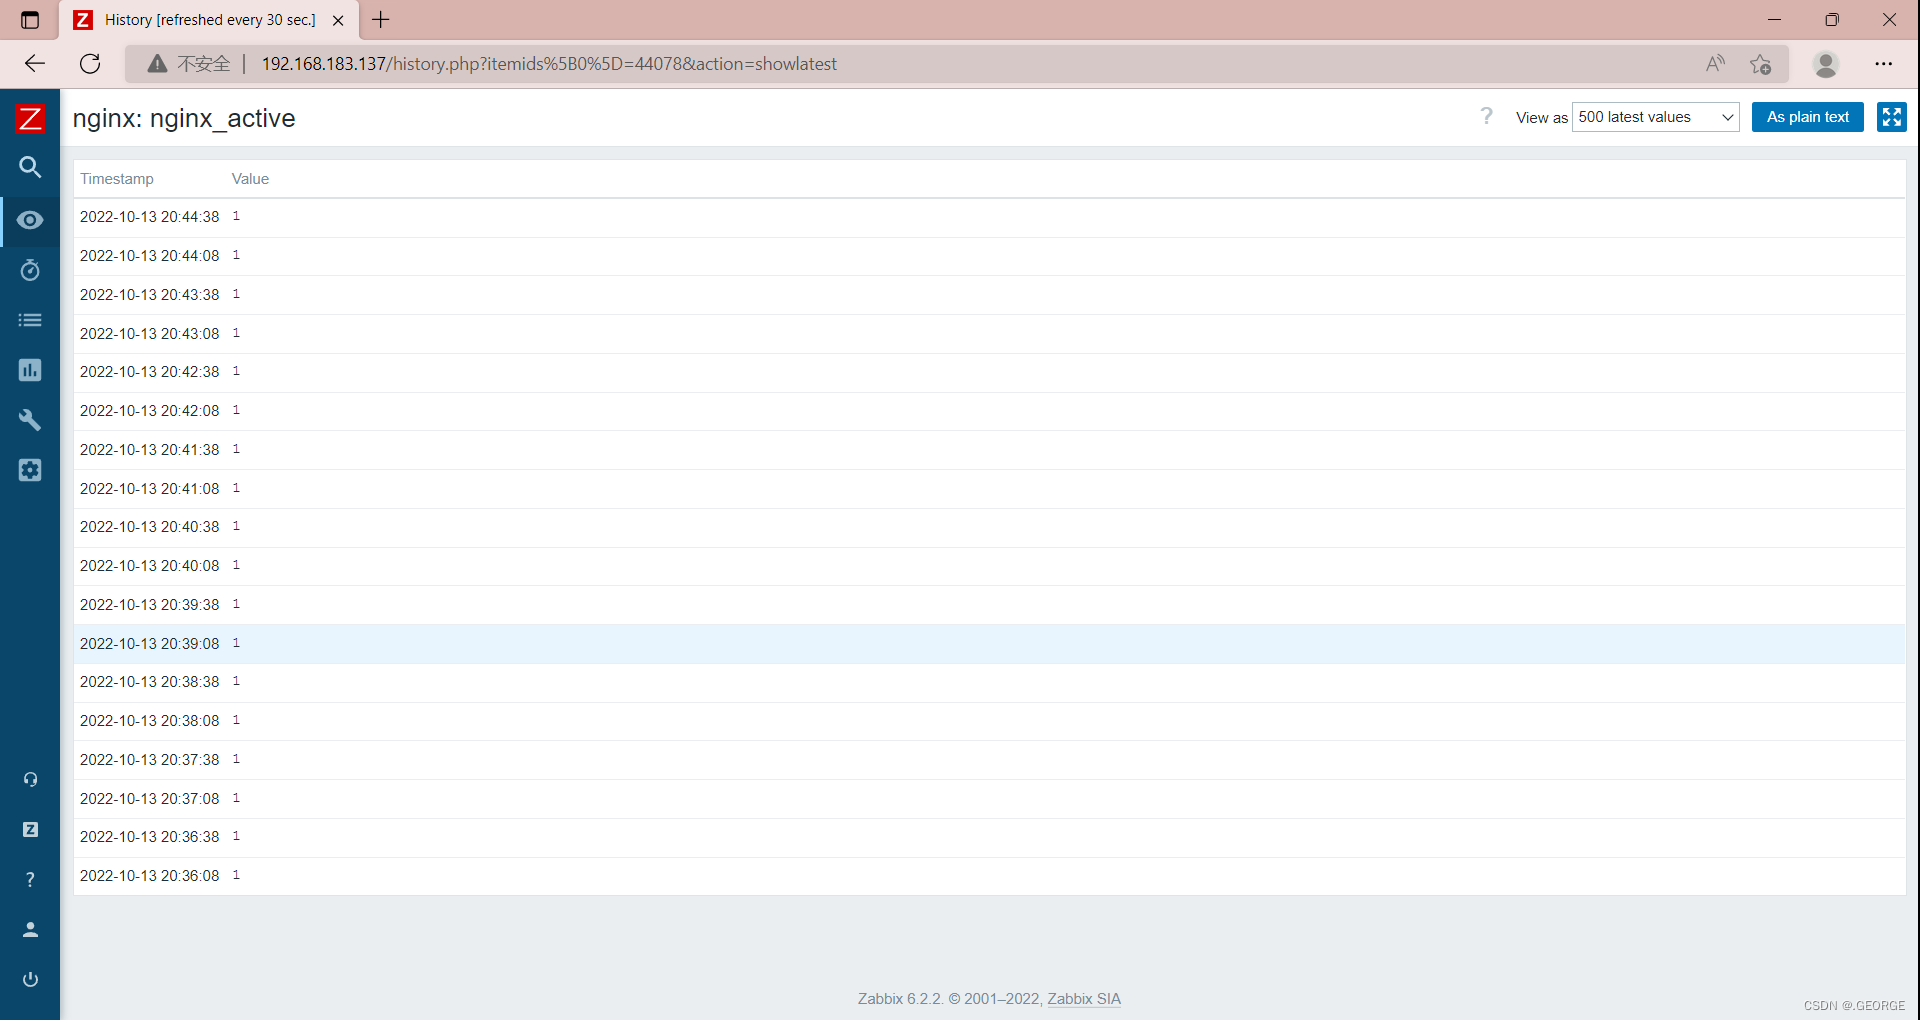
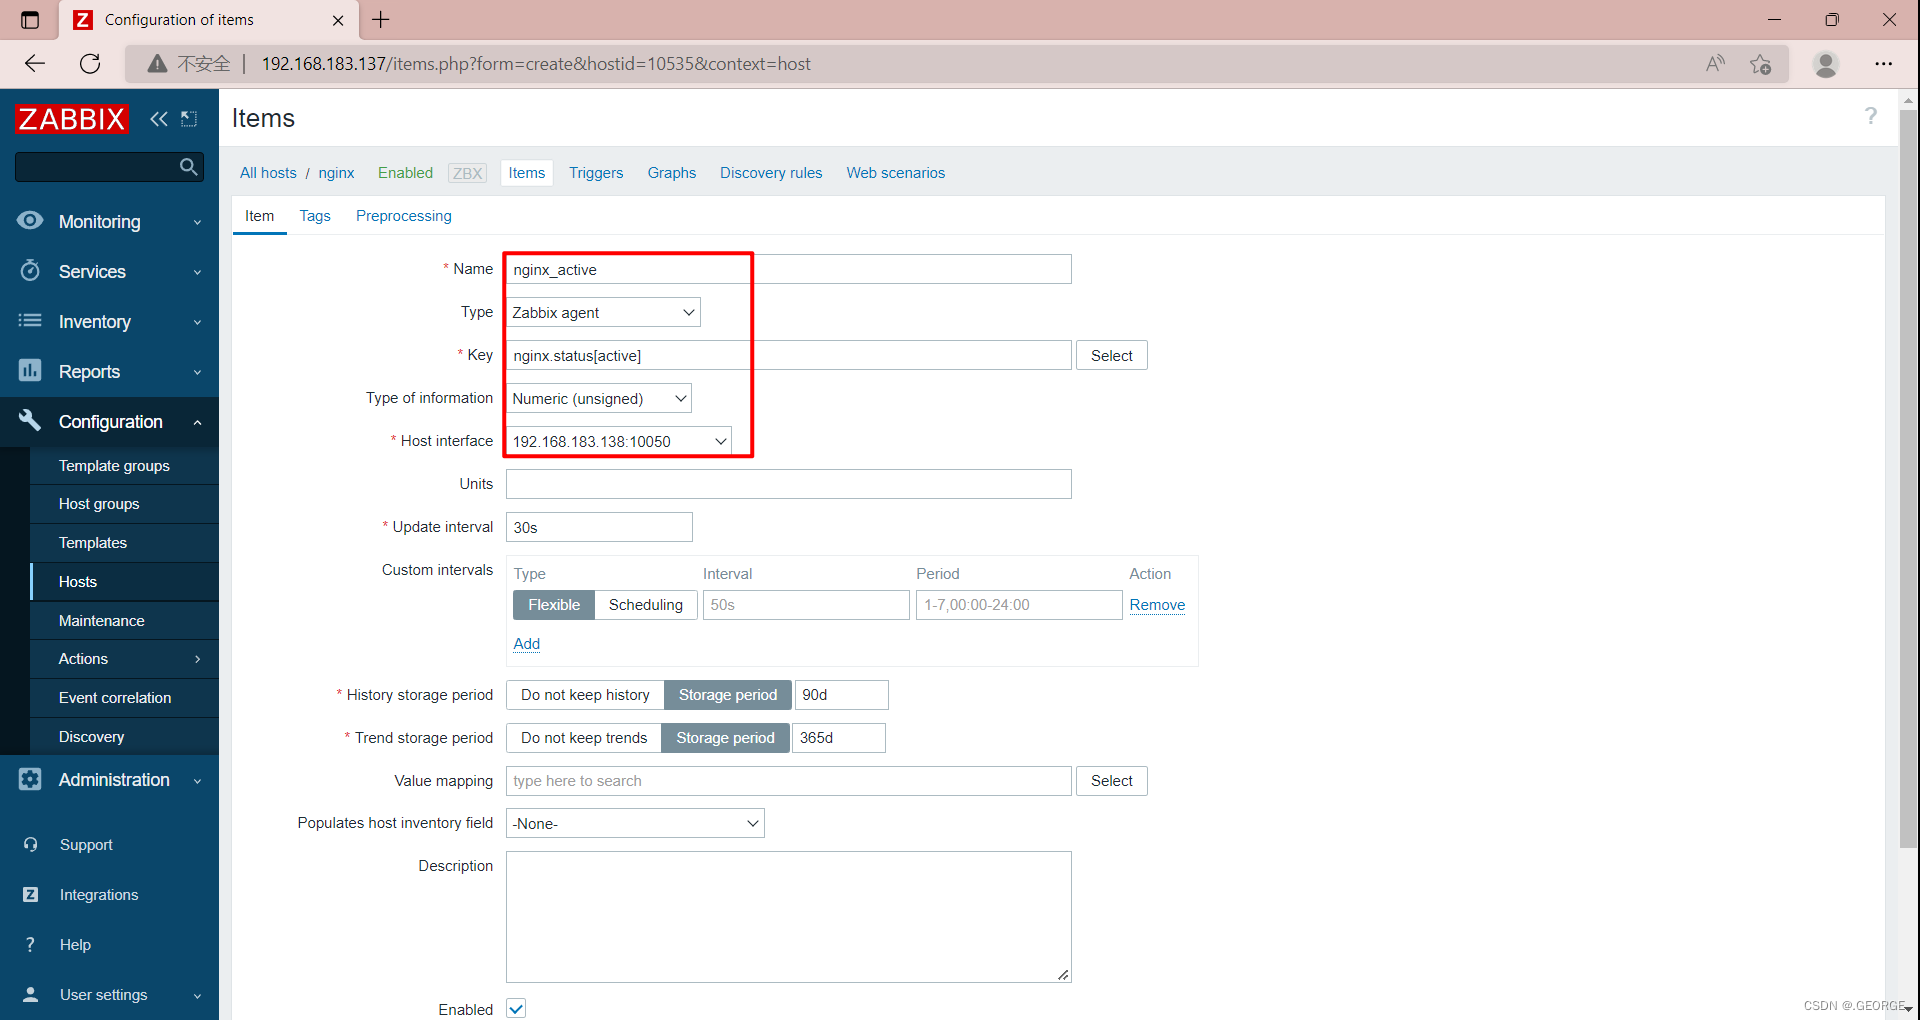
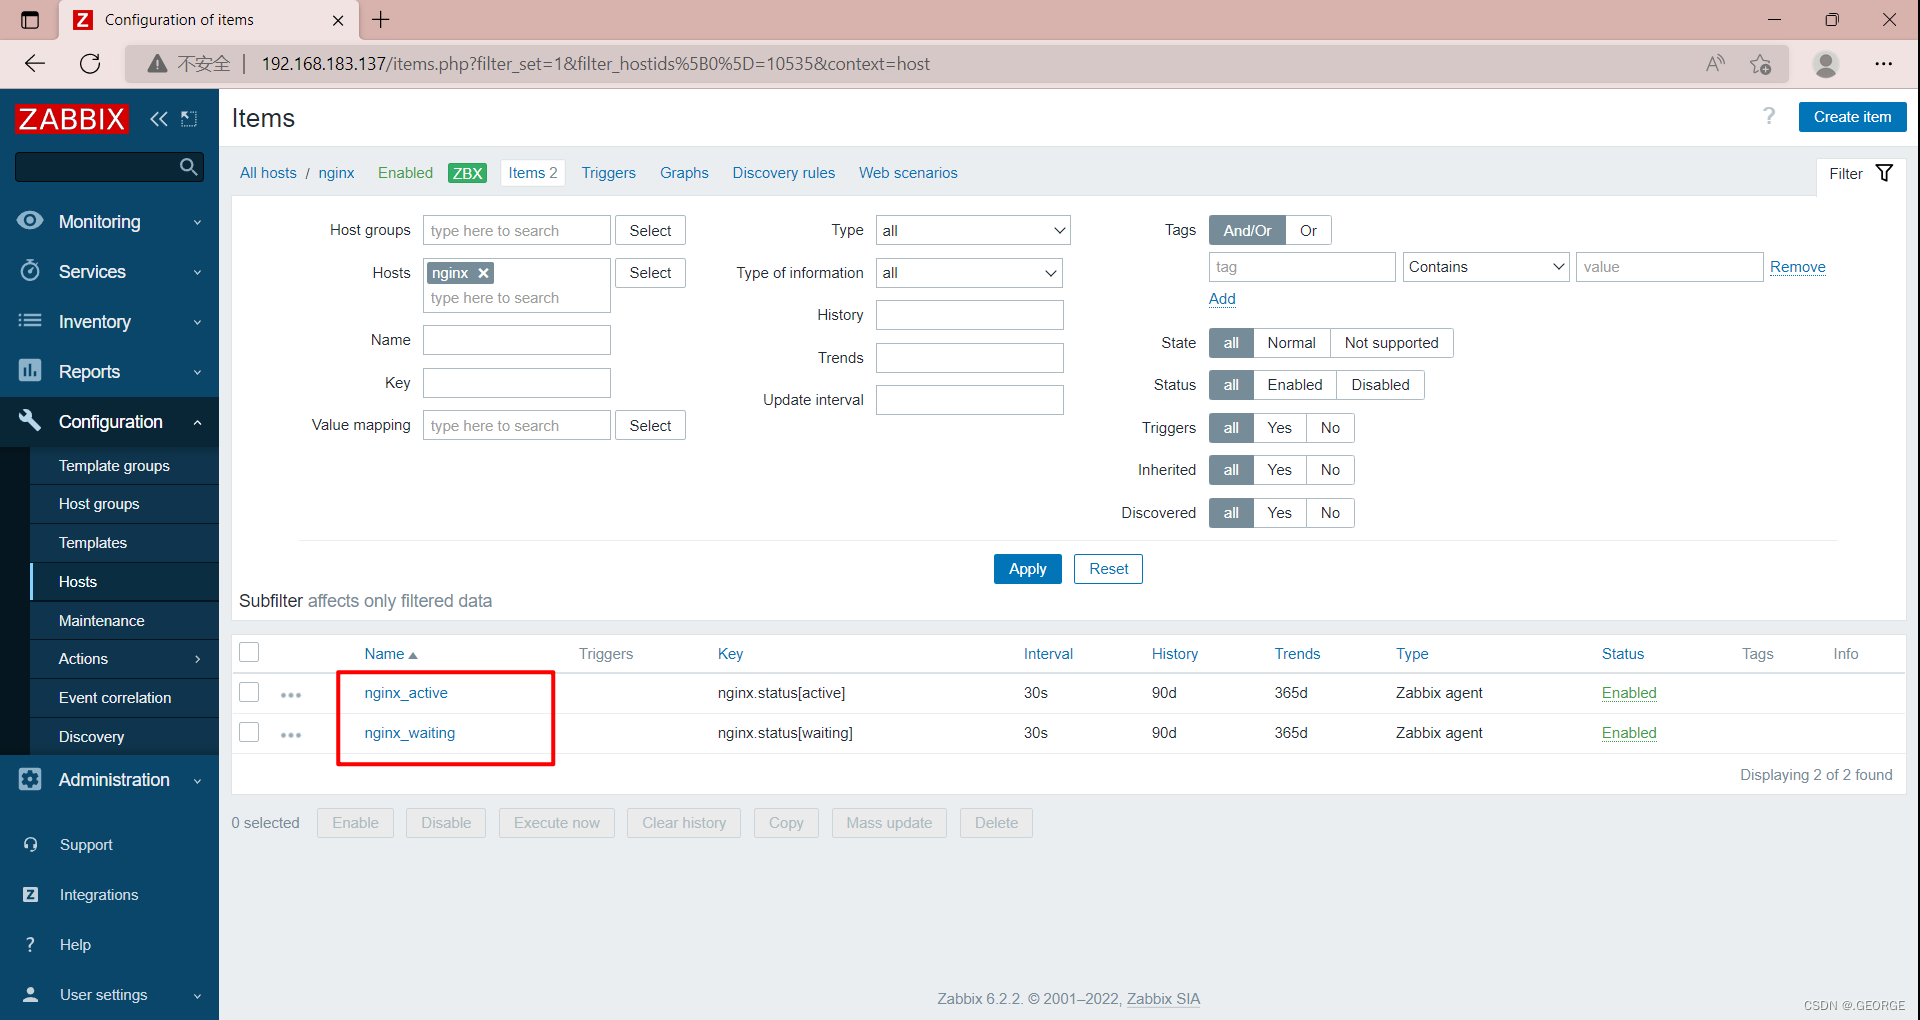
添加监控项
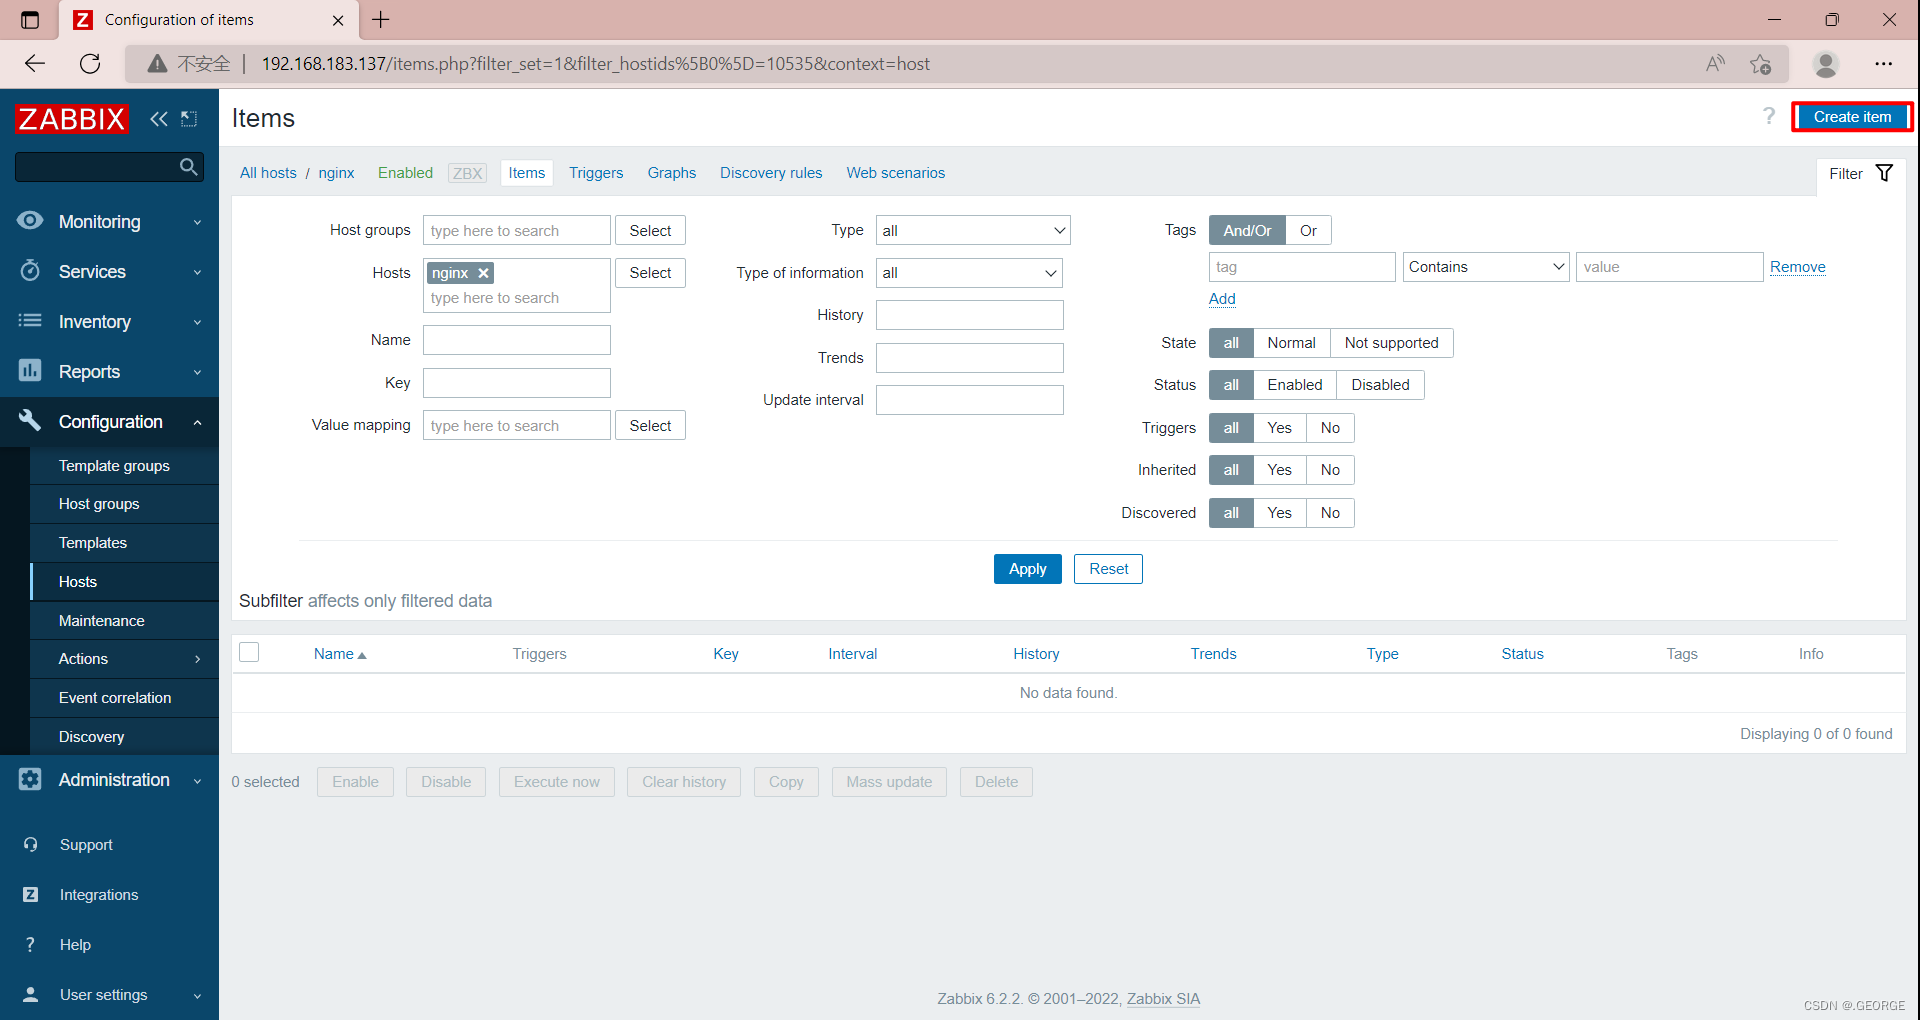
配置监控项

查看监控数据