一,Elastalert简介
Elastalert是Yelp公司基于python开发的ELK日志告警插件,Elastalert通过查询Elasticsearch中的记录与定于的告警规则进行对比,判断是否满足告警条件。发生匹配时,将为该告警触发一个或多个告警动作。告警规则由Elastalert的rules定义,每个规则定义一个查询。
1.1 ElastAlert 工作原理
周期性的查询Elastsearch并且将数据传递给规则类型,规则类型定义了需要查询哪些数据。
当一个规则匹配触发,就会给到一个或者多个的告警,这些告警具体会根据规则的配置来选择告警途径,就是告警行为,比如邮件、企业微信等
1.2 elastalert特性
- 架构简单,定制灵活
- 支持多种匹配规则(频率、阈值、数据变化、黑白名单、变化率等)
- 支持多种警报类型(邮件、HTTP POST、自定义脚本等)
- 匹配项汇总报警,重复警报抑制,报警失败重试和过期
- 可用性强,状态信息保存到Elasticsearch的索引中
- 过程的调试和审计等
二,elastalert部署
环境准备:
系统:centos7.6
elastalert:0.2.4
elasticsearch: 7.9.3
Python:3.6.9
pip:19.3
2.1 配置python3.6.9环境
安装依赖包
yum -y install wget openssl openssl-devel gcc gcc-c++
#下载包
wget https://www.python.org/ftp/python/3.6.9/Python-3.6.9.tgz
# 解压,编译安装
tar xf Python-3.6.9.tgz
cd Python-3.6.9
./configure --prefix=/usr/local/python --with-openssl
make && make install

#安装git
yum install –y git
#配置,创建软链接,升级pip
mv /usr/bin/python /usr/bin/python_old
ln -s /usr/local/python/bin/python3 /usr/bin/python
ln -s /usr/local/python/bin/pip3 /usr/bin/pip
pip install --upgrade pip
#注意,所有依赖python2的脚本,都需要更改为python2.7,因为现在默认的python为3.6
sed -i '1s/python/python2.7/g' /usr/bin/yum
sed -i '1s/python/python2.7/g' /usr/libexec/urlgrabber-ext-down
验证:python –V
pip -V

2.2 安装elastalert
下载安装包
直接使用pip安装:
pip install elastalert 直接装的官网发布的,不好用,还是下载源码安装
或者使用克隆源码安装:
git clone https://github.com/Yelp/elastalert.git
#安装
#cd elastalert
2.1 pip install elasticsearch>=7.0.0
- 若是在执行此命令后报错如下:
![]()
出现这个问题的原因是python国内网络不稳定,直接导致报错。因此我们常用镜像源来解决此问题
pip install "elasticsearch>=7.0.0" -i https://pypi.tuna.tsinghua.edu.cn/simple/ --trusted-host pypi.tuna.tsinghua.edu.cn
- 方法一:pip install 安装包名字 -i http://pypi.doubanio.com/simple/ --trusted-host pypi.doubanio.com //豆瓣镜像网站
- 方法二:pip install 安装包名字 -i http://pypi.douban.com/simple/ --trusted-host pypi.douban.com //豆瓣
- 方法三:pip install 安装包名字 -i https://pypi.tuna.tsinghua.edu.cn/simple/ --trusted-host pypi.tuna.tsinghua.edu.cn //清华大学
- 还有下面几个国内pip 源,大家可以依次按照上面的方法试下
1)http://mirrors.aliyun.com/pypi/simple/ 阿里云
2)https://pypi.mirrors.ustc.edu.cn/simple/ 中国科技大学
3) http://pypi.mirrors.ustc.edu.cn/simple/ 中国科学技术大学
2.2 pip install -r requirements.txt
2.3 python setup.py install
安装成功后可以看到四个命令
ll /usr/local/python/bin/elastalert*

#软连接到/usr/bin下,方便使用
ln -s /usr/local/python/bin/elastalert* /usr/bin
#创建elastalert索引
elastalert-create-index
参数说明
- elastalert 报警执行的命令,会根据报警规则执行相应操作。
- elastalert-create-index会创建一个索引,ElastAlert会把执行记录存放到这个索引中,默认情况下,索引名叫elastalert_status。其中有4个_type,都有自己的@timestamp字段,所以同样也可以用kibana来查看这个索引的日志记录情况。
- elastalert-rule-from-kibana从Kibana3已保存的仪表盘中读取Filtering设置,帮助生成config.yaml里的配置。不过注意,它只会读取filtering,不包括queries。
- elastalert-test-rule测试自定义配置中的rule设置。
三,使用
官方文档:https://elastalert.readthedocs.io (opens new window)
规则文档:https://elastalert.readthedocs.io/en/latest/ruletypes.html#include
3.1创建告警索引
elastalert-create-index

3.2 主要配置文件

首先是主配置文件的模板为config.yaml.example,生成全局配置
vim config.yaml
# 用来加载rule的目录,默认是example_rules
rules_folder: rules
# 用来设置定时向elasticsearch发送请求,也就是告警执行的频率
run_every:
seconds: 30
# 用来设置请求里时间字段的范围
buffer_time:
seconds: 30
# elasticsearch的host地址,端口
es_host: 192.168.1.x
es_port: 9200
# elastalert产生的日志在elasticsearch中的创建的索引
writeback_index: elastalert_status
writeback_alias: elastalert_alerts
# 失败重试的时间限制
alert_time_limit:
days: 2
3.3 邮件告警配置
所有的告警规则,通过在rule目下创建配置文件进行定义,这里简单创建一个来作为演示。检索到heartbeat索引中监控的URL挂掉之后进行邮件告警
现在去kibana中利用检索规则,过滤出我想要的告警内容。
注意里边在配置邮件通知的时候,还需要引用外部的一个文件,这个文件里用于存放对应邮箱的用户名密码。先进性发件邮箱设置
smtp_auth_file: /data/ELK/elastalert/smtp_auth_file.yaml

password为授权码
以下为一条完整的告警规则文件
[root@good rule]# cat test.yaml
# elastalert邮件告警规则配置
es_host: 192.168.136.125
es_port: 9200
# es_username: elastic
# es_password: 123456
rules_folder: /data/elastalert/rule
name: test.yaml
# #type: any
type: frequency
index: filebeat* #我这里是直接保存日志到es
num_events: 2
timeframe:
minutes: 1
realert:
minutes: 1
# #hours: 2 #n分钟内不会重复告警
exponential_realert:
minutes: 5
# hours: 4 #报警时间以指数的形式递增,最长为n个小时
filter:
- query:
query_string:
query: "message: error"# 邮件发送配置
smtp_host: "smtp.qq.com"
smtp_port: 25
smtp_auth_file: /data/elastalert/smtp_auth_file.yml
email_reply_to: "[email protected]"
from_addr: "[email protected]"
alert:
- "email"
#在邮件正文会显示你定义的alert_text
alert_text: "监控告警 test.log有报错日志产生,请及时排查"
#
#设置只需要的告警字段
include: ["error.message","message","@timestamp","log.file.path"]
# 接收邮件邮箱
email:
- "[email protected]"
3.3 规则测试
刚刚已经添加了一条规则,现在可以用自身的命令测试一下刚刚添加的规则。
elastalert-test-rule --config config.yaml test_rule.yml
如果没有报错,则说明此规则可用。
3.4 启动
启动方式有两种
(1)指定规则文件路径
python -m elastalert.elastalert --verbose --config config.yaml --rule rules/ test_rule.yml
(2)在全局路径config.yaml下,配置规则存放在加载规则rules目录下
python -m elastalert.elastalert --verbose
3.5 服务器/主机预警规则配置如下:
# elastalert邮件告警规则配置
#此规则文件旨在通过elk+heartbeat(心跳检测)+elastalert(弹性告警)实现某服务器宕机预警
es_host: 192.168.x.x           #elasticsearch主机IP
es_port: 9200                  #elasticsearch端口号
es_username: elastic
es_password: 123456
# rules_folder规则文件存放路径
rules_folder: /data/ELK/elastalert/rule/service_status-rule/
name: test_localhost_status    #规则文件名(同一规则文件目录下需唯一)
type: any                      #触发告警符合类型【ang--标识有命中规则限制条件及触发告警】
index: heartbeat*              #查询的索引【在elk系统中使用heartbeat监视服务/主机的存活状态】
num_events: 3                  #规定时间内命中规则次数【适用于frequency类型】
timeframe:
  minutes: 2                   #每2分钟内检测规则命中
realert:
 minutes: 30                   #n分钟内不会重复告警
exponential_realert:
 #minutes: 2
 hours: 2                      #报警时间以指数的形式递增,最长为n个小时
filter:
- query:
    query_string:
      query: "monitor.name: test_host AND monitor.status: down"
# @timestamp时间同步配置/data/ELK/elastalert/elastalert/elastalert_modules
match_enhancements:
  - "elastalert.elastalert_modules.time_enhancement.TimeEnhancement"

# 邮件发送配置
smtp_host: "smtp.qq.com"        #邮件协议服务地址
smtp_port: 25
#发送邮件存储路径(发件邮箱账户/授权码or密码)
smtp_auth_file: /data/ELK/elastalert/smtp_auth_file.yaml
email_reply_to: "[email protected]"     #发件账号
from_addr: "[email protected]"
alert:
- "email"
#在邮件正文会显示你定义的alert_text
alert_text: "elk监控告警:test_host(192.168.x.x)服务器/主机疑检测到宕机,请及时排查"
#设置只需要的告警字段
include: ["monitor.status","error.message","monitor.ip","monitor.name","@timestamp"]
# 接收邮件邮箱
email:
- "[email protected]"
测试:停止某台主机
heartbeat已检测到停服主机

执行elastalert规则测试告警
python -m elastalert.elastalert --verbose --config config.yaml --rule rules/ test_rule.yml
3.6 遇到的报错
创建索引时报错
分析报错:
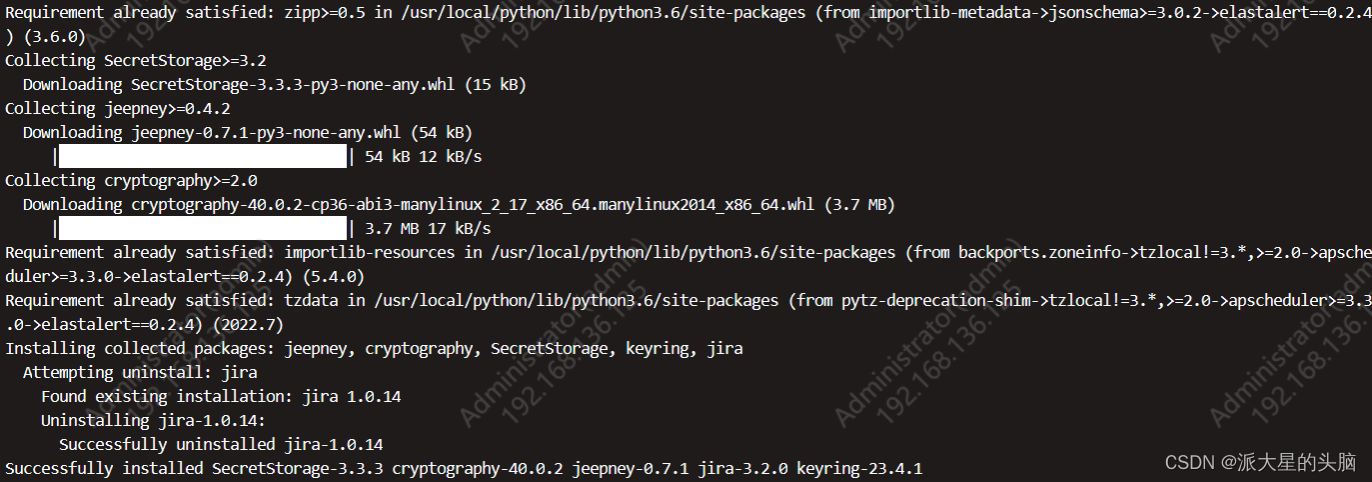
根据报错信息可以看出,elastalert-create-index命令在执行时发生了异常,具体原因是jira包的版本冲突。在执行该命令之前,建议先确认jira包的版本是否满足要求。
如果jira包存在版本冲突,可以尝试卸载该包并重新安装符合要求的版本,例如:
pip uninstall jira pip install jira==2.0.0
或者使用pip工具安装elastalert时指定版本号,例如:
pip install elastalert==0.2.4
这样就可以避免jira包版本冲突带来的影响,保证elastalert命令正常运行。