未完成,编辑中。。。
目录
一,一些准备工作
1.安装CUDA10.2 并更新CUDNN到7.6.5
到https://developer.nvidia.com/rdp/cudnn-download下载CUDNN7.6.5 for CUDA10.2
更新和安装参考我的另一篇文章cuda安装
2.编译安装OpenCV4.4.0
参考我的另一篇文章Ubuntu C++ OpenCV4.4.0编译安装
3.解决/usr/local/cuda/lib64/libcudnn.so.7 is not a symbolic link的问题
参考Why do I get “/sbin/ldconfig.real: /usr/local/cuda/lib64/libcudnn.so.7 is not a symbolic link”?
装好CUDNN7.6.5后,进入
cd /usr/local/cuda/lib64/
ls -lha libcudnn*
输出
-rwxr-xr-x 3 root root 439M 8月   8 23:09 libcudnn.so
-rwxr-xr-x 2 root root 439M 8月   8 23:09 libcudnn.so.7
-rwxr-xr-x 2 root root 439M 8月   8 23:09 libcudnn.so.7.6.5
-rw-r--r-- 1 root root 413M 8月   8 23:09 libcudnn_static.a
然后手动ln一下
sudo rm libcudnn.so.7
sudo rm libcudnn.so
sudo ln libcudnn.so.7.6.5 libcudnn.so.7
sudo ln libcudnn.so.7 libcudnn.so
5.更新cmake
Ubuntu 18.04默认的cmake是3.10,TensorRT推荐3.13以上,所以直接升级
sudo apt remove --purge cmake #删除现有版本
hash -r
sudo snap install cmake --classic
检查一下有没有安装成功
cmake --version
cmake version 3.18.1

CMake suite maintained and supported by Kitware (kitware.com/cmake).
更新成功!
二,安装TensorRT7.0
cudnn7.6.5官方最高TRT版本是7.0。TRT7.1.3版本需要cudnn8.x然而opencv4.4.0不支持,所以目前停留在TRT7.0,OpenCV4.4.0,CUDNN7.6.5保持版本兼容
下载TRT Binary
https://developer.nvidia.com/nvidia-tensorrt-7x-download
解压到home文件夹或者随便其他什么文件夹
然后把lib路径加入系统动态路径上
vim ~/.bashrc
加入
export LD_LIBRARY_PATH=$LD_LIBRARY_PATH:/home/xxx/TensorRT-7.0.0.11/lib
然后source一下bashrc就完成了
source ~/.bashrc
三,SampleONNXMNIST示例
1.安装OpenJDK8,使用nsight进行代码编辑
sudo apt install openjdk-8-jre-headless
启动nsight(nsight是安装cuda后自带的,直接命令行启动)
nsight
桌面版ubuntu可以在打开nsight后右键任务栏图标add to favourite后续直接点击图标打开。

1.1 或者使用VSCode + Microsoft C/C++ Extension

看个人喜好,个人推荐VSCode,python c++一条龙
2.准备MNIST的.PGM图像
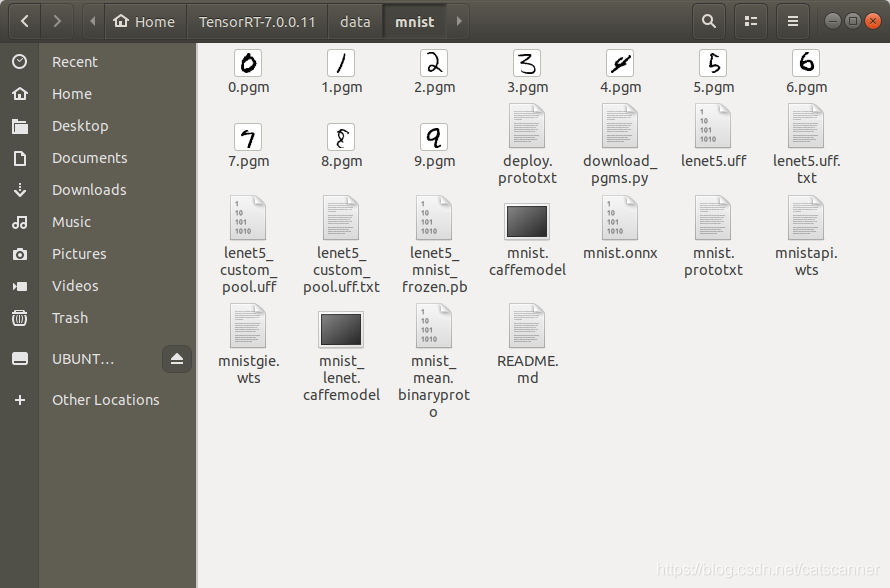
SampleONNXMNIST的示例会搜索data/mnist文件夹,所以事先下载好10张0~9的MNIST图像,如下图命名为0.PGM,1.PGM…
当然可以修改代码改变默认的data目录也可以在运行的时候添加–datadir参数制定文件位置
void printHelpInfo()
{


    std::cout
        << "Usage: ./sample_onnx_mnist [-h or --help] [-d or --datadir=<path to data directory>] [--useDLACore=<int>]"
        << std::endl;
    std::cout << "--help          Display help information" << std::endl;
    std::cout << "--datadir       Specify path to a data directory, overriding the default. This option can be used "
                 "multiple times to add multiple directories. If no data directories are given, the default is to use "
                 "(data/samples/mnist/, data/mnist/)"
              << std::endl;
    std::cout << "--useDLACore=N  Specify a DLA engine for layers that support DLA. Value can range from 0 to n-1, "
                 "where n is the number of DLA engines on the platform."
              << std::endl;
    std::cout << "--int8          Run in Int8 mode." << std::endl;
    std::cout << "--fp16          Run in FP16 mode." << std::endl;
}
修改代码的话
samplesCommon::OnnxSampleParams initializeSampleParams(const samplesCommon::Args& args)
{


    samplesCommon::OnnxSampleParams params;
    if (args.dataDirs.empty()) //!< Use default directories if user hasn't provided directory paths
    {


        params.dataDirs.push_back("data/mnist/");
        params.dataDirs.push_back("data/samples/mnist/");
    }
    else //!< Use the data directory provided by the user
    {


        params.dataDirs = args.dataDirs;
    }
    params.onnxFileName = "mnist.onnx";
    params.inputTensorNames.push_back("Input3");
    params.batchSize = 1;
    params.outputTensorNames.push_back("Plus214_Output_0");
    params.dlaCore = args.useDLACore;
    params.int8 = args.runInInt8;
    params.fp16 = args.runInFp16;

    return params;
}
3.编译运行SampleONNXMNIST
进入SampleONNXMNIST.cpp目录
cd ~/TensorRT-7.0.0.11/samples/sampleOnnxMNIST
make
然后运行
~/TensorRT-7.0.0.11/bin/sampleOnnxMNIST
结果输出
[08/09/2020-09:31:43] [I] Building and running a GPU inference engine for Onnx MNIST
----------------------------------------------------------------
Input filename:   ../../../data/mnist/mnist.onnx
ONNX IR version:  0.0.3
Opset version:    8
Producer name:    CNTK
Producer version: 2.5.1
Domain:           ai.cntk
Model version:    1
Doc string:
----------------------------------------------------------------
[08/09/2020-09:31:43] [W] [TRT] onnx2trt_utils.cpp:198: Your ONNX model has been generated with INT64 weights, while TensorRT does not natively support INT64. Attempting to cast down to INT32.
[08/09/2020-09:31:43] [W] [TRT] onnx2trt_utils.cpp:198: Your ONNX model has been generated with INT64 weights, while TensorRT does not natively support INT64. Attempting to cast down to INT32.
[08/09/2020-09:31:44] [I] [TRT] Detected 1 inputs and 1 output network tensors.
[08/09/2020-09:31:44] [W] [TRT] Current optimization profile is: 0. Please ensure there are no enqueued operations pending in this context prior to switching profiles
[08/09/2020-09:31:44] [I] Input:
[08/09/2020-09:31:44] [I] @@@@@@@@@@@@@@@@@@@@@@@@@@@@
@@@@@@@@@@@@@@@@@@@@@@@@@@@@
@@@@@@@@@@@@@@@@@@@@@@@@@@@@
@@@@@@@%+    :#@@@@@@@@@@@@@
@@@@@@@. ::=:  #@@@@@@@@@@@@
@@@@@@@%#@@@@*  %@@@@@@@@@@@
@@@@@@@@@@@@@@# :@@@@@@@@@@@
@@@@@@@@@@@@@@@= +@@@@@@@@@@
@@@@@@@@@@@@@@@% .@@@@@@@@@@
@@@@@@@@@@@@@@@@. #@@@@@@@@@
@@@@@@@@@@@@@@@@+ +@@@@@@@@@
@@@@@@@@@@@@@@@@* +@@@@@@@@@
@@@@@@@@@@@@@@@@* +@@@@@@@@@
@@@@@@@@@@@@@@@@+ +@@@@@@@@@
@@@@@@@@@@@@@@@@- +@@@@@@@@@
@@@@@@@@@@#**%@@.-@@@@@@@@@@
@@@@@@@@@=    -= *@@@@@@@@@@
@@@@@@@@# :#*.   *@@@@@@@@@@
@@@@@@@@  @@@@.  .*@@@@@@@@@
@@@@@@@@ -@@@= .=  -@@@@@@@@
@@@@@@@@ .%%= .%@#= -@@@@@@@
@@@@@@@@.    :%@@@@= =@@@@@@
@@@@@@@@%=..#@@@@@@@+ =@@@@@
@@@@@@@@@@@@@@@@@@@@@@@@@@@@
@@@@@@@@@@@@@@@@@@@@@@@@@@@@
@@@@@@@@@@@@@@@@@@@@@@@@@@@@
@@@@@@@@@@@@@@@@@@@@@@@@@@@@
@@@@@@@@@@@@@@@@@@@@@@@@@@@@

[08/09/2020-09:31:44] [I] Output:
[08/09/2020-09:31:44] [I]  Prob 0  0.0000 Class 0:
[08/09/2020-09:31:44] [I]  Prob 1  0.0000 Class 1:
[08/09/2020-09:31:44] [I]  Prob 2  1.0000 Class 2: **********
[08/09/2020-09:31:44] [I]  Prob 3  0.0000 Class 3:
[08/09/2020-09:31:44] [I]  Prob 4  0.0000 Class 4:
[08/09/2020-09:31:44] [I]  Prob 5  0.0000 Class 5:
[08/09/2020-09:31:44] [I]  Prob 6  0.0000 Class 6:
[08/09/2020-09:31:44] [I]  Prob 7  0.0000 Class 7:
[08/09/2020-09:31:44] [I]  Prob 8  0.0000 Class 8:
[08/09/2020-09:31:44] [I]  Prob 9  0.0000 Class 9:
[08/09/2020-09:31:44] [I]
&&&& PASSED TensorRT.sample_onnx_mnist # ./sample_onnx_mnist
这个示例会读取~/TensorRT-7.0.0.11/data/mnist/mnist.onnx并转换成TRT engine然后随机选取0到9中的一张pgm图像进行推理预测,如果结果与文件名的lable一致就Passed。
至此基本的环境搭建就完成了。
四,如何在SampleONNXMNIST示例中添加OpenCV?
1.在SampleONNXMNIST使用opencv来读取图片
我们改用opencv来读取mnist图片,然后放进保持原流程不变进行推理
修改代码如下:
1.添加opencv支持:
#include "argsParser.h"
#include "buffers.h"
#include "common.h"
#include "logger.h"
#include "parserOnnxConfig.h"

#include "NvInfer.h"
#include <cuda_runtime_api.h>
//添加opencv支持
#include <opencv2/opencv.hpp>

#include <cstdlib>
#include <fstream>
#include <iostream>
#include <sstream>
2.修改processInput方法
bool SampleOnnxMNIST::processInput(const samplesCommon::BufferManager& buffers)
{


    const int inputH = mInputDims.d[2];
    const int inputW = mInputDims.d[3];

    // Read a random digit file
    srand(unsigned(time(nullptr)));
    // std::vector<uint8_t> fileData(inputH * inputW);
    mNumber = rand() % 10;

    //原来的代码使用readPGMFile方法读取:
    //readPGMFile(locateFile(std::to_string(0) + ".pgm", mParams.dataDirs), fileData.data(), inputH, inputW);

    //新的代码使用openCV读取:
    std::string fileLocation = locateFile(std::to_string(mNumber) + ".pgm", mParams.dataDirs);
    cv::Mat src = cv::imread(fileLocation, cv::IMREAD_GRAYSCALE);
    if (!src.data)
    {


        cerr << "Error : could not load image." << endl;
        return false;
    }
    std::vector<uint8_t> fileData = (vector<uint8_t>)(src.reshape(1, 1));

    // Print an ascii representation
    gLogInfo << "Input:" << std::endl;
    for (int i = 0; i < inputH * inputW; i++)
    {


        gLogInfo << (" .:-=+*#%@"[fileData[i] / 26]) << (((i + 1) % inputW) ? "" : "\n");
    }
    gLogInfo << std::endl;

    float* hostDataBuffer = static_cast<float*>(buffers.getHostBuffer(mParams.inputTensorNames[0]));
    for (int i = 0; i < inputH * inputW; i++)
    {


        hostDataBuffer[i] = 1.0 - float(fileData[i] / 255.0);
    }

    return true;
}
2.编写自己的CMakeList.txt
因为Nvidia的samples中包含caffe Makefile.config等其他东西,但作为OPENCV-PYTORCH-PTH-ONNX-TRT这个路子的用不到,所以可以自己写一个cmakelist.txt来准备编译这个示例。把sampleONNXMNIST文件夹拷贝到任意地方,添加如下CMakeList.txt
cmake_minimum_required(VERSION 3.10)

#set(CMAKE_CUDA_COMPILER /usr/local/cuda-10.2/bin/nvcc)

project(MyOpenCVONNX VERSION 0.1
               DESCRIPTION "a must success:)"
               LANGUAGES CXX)

set(CMAKE_CXX_STANDARD 11)
set(CMAKE_CXX_FLAGS "-std=c++11 -Wl,--no-as-needed" )

# ===================
# include header files and correspond source files
# ===================
include_directories(/home/xxx/TensorRT-7.0.0.11/samples/common)
include_directories(/home/xxx/TensorRT-7.0.0.11/include)
include_directories(/home/xxx/TensorRT-7.0.0.11/lib)
include_directories(/usr/local/cuda/targets/x86_64-linux/include)
include_directories(/usr/local/lib)

# ===================
# link tensorrt libraries
# ===================
link_directories(/home/xxx/TensorRT-7.0.0.11/lib)
# //
link_libraries(libmyelin_compiler_static.a)
link_libraries(libmyelin_executor_static.a)
link_libraries(libmyelin_pattern_library_static.a)
link_libraries(libmyelin_pattern_runtime_static.a)
link_libraries(libmyelin.so)
link_libraries(libnvcaffe_parser.a)
link_libraries(libnvcaffe_parser.so)
link_libraries(libnvinfer_plugin.so)
link_libraries(libnvinfer.so)
link_libraries(libnvonnxparser.so)
link_libraries(libnvparsers.so)
link_libraries(libnvparsers_static.a)
link_libraries(libonnx_proto.a)
link_libraries(libprotobuf.a)
link_libraries(libprotobuf-lite.a)
link_libraries(libnvinfer_plugin_static.a)
link_libraries(libnvinfer_static.a)

# ===================
# link cuda libraries
# ===================
link_directories(/usr/local/cuda/targets/x86_64-linux/lib)
# //
link_libraries(cudnn)
link_libraries(cublas)
link_libraries(nvToolsExt)
link_libraries(cudart)
link_libraries(glog)
link_libraries(nvgraph)

# ===================
# link opencv4.4.0 libraries
# ===================
SET(OPENCV_DIR /usr/local/include/opencv4)
SET(OPENCV_TARGET_LIBRARIES
        libopencv_calib3d.so
        libopencv_core.so
        libopencv_dnn.so
        libopencv_features2d.so
        libopencv_flann.so
        libopencv_highgui.so
        libopencv_imgcodecs.so
        libopencv_imgproc.so
        libopencv_ml.so
        libopencv_objdetect.so
        libopencv_photo.so
        libopencv_shape.so
        libopencv_stitching.so
        libopencv_superres.so
        libopencv_video.so
        libopencv_videoio.so
        libopencv_videostab.so
        )
include_directories(${OPENCV_DIR})
link_libraries(${OPENCV_TARGET_LIBRARIES})

# ===================
# link other libraries
# ===================
#link_directories(/usr/lib/x86_64-linux-gnu)
# //
#link_libraries(libglog.a)


# ===================
# compile main
# ===================
set(SAMPLES_COMMON_SOURCES /home/xxx/TensorRT-7.0.0.11/samples/common/logger.cpp)
add_executable(sampleOnnxMNIST sampleOnnxMNIST.cpp ${SAMPLES_COMMON_SOURCES})
然后直接cmake
cmake . && make
生成sampleOnnxMNIST,运行
~/Desktop/sampleOnnxMNIST$ ./sampleOnnxMNIST
&&&& RUNNING TensorRT.sample_onnx_mnist # ./sampleOnnxMNIST
[08/12/2020-17:32:38] [I] Building and running a GPU inference engine for Onnx MNIST
----------------------------------------------------------------
Input filename:   /home/xxx/TensorRT-7.0.0.11/data/mnist/mnist.onnx
ONNX IR version:  0.0.3
Opset version:    8
Producer name:    CNTK
Producer version: 2.5.1
Domain:           ai.cntk
Model version:    1
Doc string:
----------------------------------------------------------------
[08/12/2020-17:32:39] [W] [TRT] onnx2trt_utils.cpp:198: Your ONNX model has been generated with INT64 weights, while TensorRT does not natively support INT64. Attempting to cast down to INT32.
[08/12/2020-17:32:39] [W] [TRT] onnx2trt_utils.cpp:198: Your ONNX model has been generated with INT64 weights, while TensorRT does not natively support INT64. Attempting to cast down to INT32.
[08/12/2020-17:32:39] [I] [TRT] Detected 1 inputs and 1 output network tensors.
[08/12/2020-17:32:39] [W] [TRT] Current optimization profile is: 0. Please ensure there are no enqueued operations pending in this context prior to switching profiles
/home/xxx/TensorRT-7.0.0.11/data/mnist/3.pgm
[08/12/2020-17:32:39] [I] Input:
[08/12/2020-17:32:39] [I] @@@@@@@@@@@@@@@@@@@@@@@@@@@@
@@@@@@@@@@@@@@@@@@@@@@@@@@@@
@@@@@@@@@@@@@@@@@@@@@@@@@@@@
@@@@@@@@@@@@@@@@@@@@@@@@@@@@
@@@@@@@@@@@@@@@@@@@@@@@@@@@@
@@@@@##+--:      .%@@@@@@@@@
@@@@@.     .....  *@@@@@@@@@
@@@@@%#####@@@@* .#@@@@@@@@@
@@@@@@@@@@@@@@-  *@@@@@@@@@@
@@@@@@@@@@@@@-  *@@@@@@@@@@@
@@@@@@@@@@@*  .#@@@@@@@@@@@@
@@@@@@@@@@- .+%@@@@@@@@@@@@@
@@@@@@@@=. =@@@@@@@@@@@@@@@@
@@@@@@@-   -**@@@@@@@@@@@@@@
@@@@@@@#:...    :+%@@@@@@@@@
@@@@@@@@@@@@##*=:  =@@@@@@@@
@@@@@@@@@@@@@@@@@%+.:%@@@@@@
@@@@@@@@@@@@@@@@@@@% :@@@@@@
@@@@@@@@@@@@@@@@@@@@* %@@@@@
@@@@@@@@@@@@@@@@@@@@@.*@@@@@
@@@@@@@@@@@@@@@@@@@@@ +@@@@@
@@@@@@@@=@@@@@@@@@@@% +@@@@@
@@@@@@@@-:+#@@@@@@@*  #@@@@@
@@@@@@@@@*.  ......  =@@@@@@
@@@@@@@@@@@%--     -+@@@@@@@
@@@@@@@@@@@@@@@@@@@@@@@@@@@@
@@@@@@@@@@@@@@@@@@@@@@@@@@@@
@@@@@@@@@@@@@@@@@@@@@@@@@@@@

[08/12/2020-17:32:39] [I] Output:
[08/12/2020-17:32:39] [I]  Prob 0  0.0000 Class 0:
[08/12/2020-17:32:39] [I]  Prob 1  0.0000 Class 1:
[08/12/2020-17:32:39] [I]  Prob 2  0.0000 Class 2:
[08/12/2020-17:32:39] [I]  Prob 3  1.0000 Class 3: **********
[08/12/2020-17:32:39] [I]  Prob 4  0.0000 Class 4:
[08/12/2020-17:32:39] [I]  Prob 5  0.0000 Class 5:
[08/12/2020-17:32:39] [I]  Prob 6  0.0000 Class 6:
[08/12/2020-17:32:39] [I]  Prob 7  0.0000 Class 7:
[08/12/2020-17:32:39] [I]  Prob 8  0.0000 Class 8:
[08/12/2020-17:32:39] [I]  Prob 9  0.0000 Class 9:
[08/12/2020-17:32:39] [I]
&&&& PASSED TensorRT.sample_onnx_mnist # ./sampleOnnxMNIST
结果如上一致,那一个基本的流程(ONNX->TRT Engine->OpenCV Mat Image->Inference)就完全跑通了。
可能遇到 error while loading shared libraries: libopencv_core.so.4.4: cannot open shared object file: No such file or directory的问题
可能会遇到,解决方法:
cd /etc/ld.so.conf.d/
sudo echo /usr/local/lib >> opencv.conf
sudo ldconfig -v
五,另一种方式:使用onnx-trt将ONNX模型事先转换成TRT Engine供后续推理使用
我们还是基于sampleONNXMNIST这个例子来进行说明
1.编译ONNX-TRT
https://github.com/onnx/onnx-tensorrt/tree/7.0
下载onnx-tensorrt的7.0版本,然后再下载 onnx1.6版本
放入onnx-tensorrt的thirdparty文件夹
当然,也可以git pull之后update submodule的方法来自动下载第三方源文件

然后cmake make就行了
cd onnx-tensorrt
mkdir build && cd build
cmake .. -DTENSORRT_ROOT=<path_to_trt> && make -j
// Ensure that you update your LD_LIBRARY_PATH to pick up the location of the newly built library:
export LD_LIBRARY_PATH=$PWD:$LD_LIBRARY_PATH
2.将mnist.onnx转换成TRT Engine
在build文件夹中运行编译出来的onnx2trt
~/onnx-tensorrt-7.0/build$ ./onnx2trt ~/TensorRT-7.0.0.11/data/mnist/mnist.onnx -o ~/TensorRT-7.0.0.11/data/mnist/mnist.trt
----------------------------------------------------------------
Input filename:   /home/xxx/TensorRT-7.0.0.11/data/mnist/mnist.onnx
ONNX IR version:  0.0.3
Opset version:    8
Producer name:    CNTK
Producer version: 2.5.1
Domain:           ai.cntk
Model version:    1
Doc string:
----------------------------------------------------------------
Parsing model
[2020-08-12 08:25:35 WARNING] /home/xxx/onnx-tensorrt-7.0/onnx2trt_utils.cpp:235: Your ONNX model has been generated with INT64 weights, while TensorRT does not natively support INT64. Attempting to cast down to INT32.
Building TensorRT engine, FP16 available:0
    Max batch size:     32
    Max workspace size: 1024 MiB
Writing TensorRT engine to /home/xxx/TensorRT-7.0.0.11/data/mnist/mnist.trt
All done
至此,我们得到了mnist.trt的engine文件,接下来我们使用这个engine文件来进行推理。
3.修改代码编译运行
这次,我们写一个干净的最简单的main函数来说明TensorRT的运行过程,直接上代码:
在这里插入代码片
还是用上面的Cmake文件
cmake . && make
运行
在这里插入代码片
成功!
至此,两种方式的trt推理方式就基本说清楚了。
六,使用Pytorch生成这个可以转化为TRT Engine的mnist.onnx
1. 使用Netron看一下mnist.onnx的模型结构
2. 在pytorch中复现mnist网络
3. 使用mnist数据集训练网络
4. 将Pytorch model转化成onnx模型
5. 转化成TRT Engine进行推理验证结果
七,一些测试
八,最后
至此,一个基本的使用Pytorch训练和转化trt engine部署的流程就说明清楚了,后续在生产实战中其实还有大量的挑战1)复杂的pytorch模型转化成trt engine 2)各类嵌入式平台的实际部署编译 3)pytorch预处理与后处理的代码的C++移植(当然,某些实时性要求不高的场合使用py-trt也是可以的)