一、傅里叶变换
halcon 案例
detect_indent_fft.hdev
* This program demonstrates how to detect small texture
* defects on the surface of plastic items by using the fast
* fourier transform (FFT).
* First, we construct a suitable filter using Gaussian
* filters. Then, the images and the filter are convolved
* by using fast fourier transforms. Finally, the defects
* are detected in the filtered images by using
* morphology operators.
*
* Initializations
dev_update_off ()
dev_close_window ()
read_image (Image, 'plastics/plastics_01')
get_image_size (Image, Width, Height)
dev_open_window (0, 0, Width, Height, 'black', WindowHandle)
set_display_font (WindowHandle, 14, 'mono', 'true', 'false')
dev_set_draw ('margin')
dev_set_line_width (3)
dev_set_color ('red')
*
* Optimize the fft speed for the specific image size
optimize_rft_speed (Width, Height, 'standard')
*
* Construct a suitable filter by combining two gaussian
* filters
Sigma1 := 10.0
Sigma2 := 3.0
gen_gauss_filter (GaussFilter1, Sigma1, Sigma1, 0.0, 'none', 'rft', Width, Height)
gen_gauss_filter (GaussFilter2, Sigma2, Sigma2, 0.0, 'none', 'rft', Width, Height)
gen_sin_bandpass (ImageFilter, 0.1, 'none', 'rft', 512, 512)
sub_image (GaussFilter1, GaussFilter2, Filter, 1, 0)
*
* Process the images iteratively
NumImages := 11
for Index := 1 to NumImages by 1
    *
    * Read an image and convert it to gray values
    read_image (Image, 'plastics/plastics_' + Index$'02')
    rgb1_to_gray (Image, Image)
    * Perform the convolution in the frequency domain
    rft_generic (Image, ImageFFT, 'to_freq', 'none', 'complex', Width)
    convol_fft (ImageFFT, Filter, ImageConvol)
    rft_generic (ImageConvol, ImageFiltered, 'from_freq', 'n', 'real', Width)
    *
    * Process the filtered image
    gray_range_rect (ImageFiltered, ImageResult, 10, 10)
    min_max_gray (ImageResult, ImageResult, 0, Min, Max, Range)
    threshold (ImageResult, RegionDynThresh, max([5.55,Max * 0.8]), 255)
    connection (RegionDynThresh, ConnectedRegions)
    select_shape (ConnectedRegions, SelectedRegions, 'area', 'and', 4, 99999)
    union1 (SelectedRegions, RegionUnion)
    closing_circle (RegionUnion, RegionClosing, 10)
    connection (RegionClosing, ConnectedRegions1)
    select_shape (ConnectedRegions1, SelectedRegions1, 'area', 'and', 10, 99999)
    area_center (SelectedRegions1, Area, Row, Column)
    *
    * Display the results
    dev_display (Image)
    Number := |Area|
    if (Number)
        gen_circle_contour_xld (ContCircle, Row, Column, gen_tuple_const(Number,30), gen_tuple_const(Number,0), gen_tuple_const(Number,rad(360)), 'positive', 1)
        ResultMessage := ['Not OK',Number + ' defect(s) found']
        Color := ['red','black']
        dev_display (ContCircle)
    else
        ResultMessage := 'OK'
        Color := 'forest green'
    endif
    disp_message (WindowHandle, ResultMessage, 'window', 12, 12, Color, 'true')
    if (Index != NumImages)
        disp_continue_message (WindowHandle, 'black', 'true')
        stop ()
    endif
endfor
detect_mura_defects_texture.hdev

* This example shows how to detect mura defects
* in highly textured images
*
dev_close_window ()
dev_update_off ()
Path := 'lcd/mura_defects_texture_'
read_image (Image, Path + '01')
get_image_size (Image, Width, Height)
dev_open_window (0, 0, 640, 480, 'black', WindowHandle)
set_display_font (WindowHandle, 14, 'mono', 'true', 'false')
dev_set_draw ('margin')
dev_set_line_width (3)
dev_set_color ('red')
for F := 1 to 2 by 1
    read_image (Image, Path + F$'.2i')
    decompose3 (Image, R, G, B)
    * Defects are characterized by dark patches. Hence, by substracting the
    * estimated background illumination from the original image the
    * defects become more apparent.
    estimate_background_illumination (B, ImageFFT1)
    sub_image (B, ImageFFT1, ImageSub, 2, 100)
    * Median filter smoothes out the fine texture, simplifying the following
    * segmentation and final detection of defects.
    median_image (ImageSub, ImageMedian, 'circle', 9, 'mirrored')
    watersheds_threshold (ImageMedian, Basins, 20)
    * Dark patches corresponding to defects have a very low energy.
    cooc_feature_image (Basins, ImageMedian, 6, 0, Energy, Correlation, Homogeneity, Contrast)
    Mask := Energy [<=] 0.05
    select_mask_obj (Basins, Defects, Mask)
    *
    dev_display (Image)
    dev_display (Defects)
    count_obj (Defects, NDefects)
    disp_message (WindowHandle, NDefects + ' \'mura\' defects detected', 'window', 12, 12, 'red', 'true')
    if (F < 2)
        disp_continue_message (WindowHandle, 'black', 'true')
        stop ()
    endif
endfor
检测-光度立体法检测药片包装背面的缺陷
inspect_blister_photometric_stereo.hdev

* 该示例通过使用光度立体技术检测药片包装背面的缺陷
* 输入是4张不同的药片包装背面图片,光从不同的角度照射

* Initialization
dev_close_window ()
dev_update_off ()
dev_open_window (0, 0, 512, 512, 'black', WindowHandle)
set_display_font (WindowHandle, 14, 'mono', 'true', 'false')
Message := 'Inspect the backside of a blister'
Message[1] := 'using photometric stereo. In this case four'
Message[2] := 'different light orientations were used.'
disp_message (WindowHandle, Message, 'window', 12, 12, 'black', 'true')
disp_continue_message (WindowHandle, 'black', 'true')
stop ()
*
* Show input images with different illumination
* 1 读图像,依次读取多张图像
* 下面的for循环,依次显示4张从不同角度拍摄的药片包装的背面图像
read_image (Images, 'photometric_stereo/blister_back_0' + [1:4])
for I := 1 to 4 by 1
    Message := 'Acquire image ' + I + ' of 4'
    select_obj (Images, ObjectSelected, I)
    dev_display (ObjectSelected)
    disp_message (WindowHandle, Message, 'window', 12, 12, 'black', 'true')
    wait_seconds (0.5)
endfor
*
* Apply photometric stereo to determine the albedo
* and the surface gradient.
* 2. 应用光度立体得到反照率图像和表面梯度图像

* 描述了从图像中心指向右侧的方向与投射到平面中的光的方向之间的角度。
* 也就是说,当观察图像(或相应的场景)时,倾斜角度为0表示光线来自右侧,
* 倾斜角度为90表示光线来自顶部,倾斜角度为180表示 光是从左边来的
Tilts := [6.1,95.0,-176.1,-86.8]
* 物平面与照明方向之间的角度
Slants := [41.4,42.6,41.7,40.9]
ResultType := ['gradient','albedo']
* 该算子得到反照率图像和表面梯度图像
photometric_stereo (Images, HeightField, Gradient, Albedo, Slants, Tilts, ResultType, 'poisson', [], [])
*
* Display the albedo image
* 显示反照率图像
dev_display (Albedo)
disp_message (WindowHandle, 'Albedo image', 'window', 12, 12, 'black', 'true')
disp_continue_message (WindowHandle, 'black', 'true')
stop ()
*
* Calculate the gaussian curvature of the surface
* using the gradient field as input for the operator
* 3. 使用之前得到的表面梯度,计算表面的高斯曲率,得到高斯曲率图像
* derivate_vector_field.
* Defects are usually easy to detect in the curvature image.
* 在曲率图像上能更容易的进行检测
* 该算子通过之前得到的表面梯度得到高斯曲率图像
derivate_vector_field (Gradient, GaussCurvature, 1, 'gauss_curvature')
*
* Detect defects
* 检测缺陷
*
* Segment the tablet areas in the curvature image
* 4. 对高斯曲率图像进行预处理和Blob分析,从而得到缺陷区域
* 在曲率图像中,我们先分开各个药片区域
regiongrowing (GaussCurvature, Regions, 1, 1, 0.001, 250)
* 通过宽和高的特征,进行特征选择
select_shape (Regions, TabletRegions, ['width','height'], 'and', [150,150], [200,200])
* 凸性形状转换,针对区域
shape_trans (TabletRegions, TabletRegions, 'convex')
* 区域联合
union1 (TabletRegions, TabletRegions)
* 腐蚀
erosion_circle (TabletRegions, TabletRegions, 3.5)
* Search for defects inside the tablet areas
* 在药片区域搜寻缺陷
* 抠图
reduce_domain (GaussCurvature, TabletRegions, ImageReduced)
* 计算图像各个像素的绝对值,存在此次处理的原因是:高斯曲率图像存在负值
* 缺陷处,高斯曲率会比较大
abs_image (ImageReduced, ImageAbs)
* 二值化 ,灰度直方图
threshold (ImageAbs, Region, 0.03, 255)
* 闭运算
closing_circle (Region, RegionClosing, 10.5)
* 断开得到连通域
connection (RegionClosing, ConnectedRegions)
* 通过面积特征,进行特征选择
select_shape (ConnectedRegions, Defects, 'area', 'and', 10, 99999)
* 获得缺陷区域的中心点行列坐标
area_center (Defects, Area, Row, Column)
* 生成圆形区域
gen_circle (Circle, Row, Column, gen_tuple_const(|Row|,20.5))
* Display the defects in curvature image
* 5. 接下来在高斯曲率图像中标记缺陷区域
dev_set_draw ('margin')
dev_set_color ('red')
dev_set_line_width (2)
dev_display (GaussCurvature)
dev_display (Circle)
Message := 'The defect can easily be detected'
Message[1] := 'in the surface curvature image'
disp_message (WindowHandle, Message, 'window', 12, 12, 'black', 'true')
stop ()
* Display the defects in the albedo image
* 6. 在反照率图像中标记出缺陷
dev_set_draw ('margin')
dev_set_color ('red')
dev_display (Albedo)
dev_display (Circle)
disp_message (WindowHandle, 'Defect in albedo image', 'window', 12, 12, 'black', 'true')
ex1:
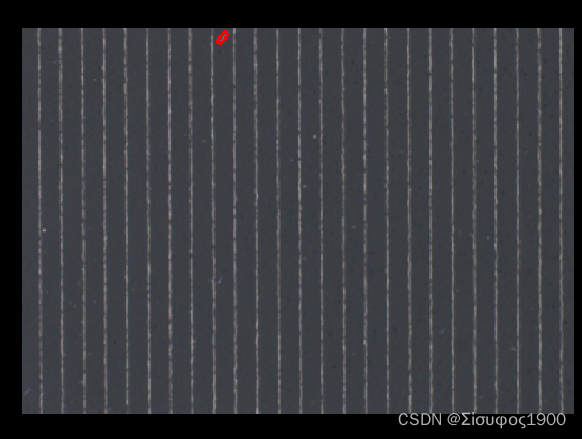
Halcon 缺陷检测 金属拉丝表面缺陷检测(乘法增强、傅里叶变换与卷积、纹理过滤、动态阈值)_halcon 卷积_廷益--飞鸟的博客-CSDN博客


* 1.读取图片并显示 ****************************
dev_close_window ()
read_image (Image, './4.png')
get_image_size (Image, Width, Height)
dev_open_window_fit_image (Image, 0, 0, Width, Height, WindowHandle)

dev_display (Image)

* 2.图片对比度增强 ****************************
* 转换为灰度图片
rgb1_to_gray (Image, GrayImage)
* 图片取反
invert_image (GrayImage, ImageInvert)
* 图片增强(乘法)
mult_image (ImageInvert, ImageInvert, ImageResult, 0.01, 0)

* 3.傅里叶变换 ****************************
* 生成正弦卷积 滤波图片
gen_sin_bandpass (ImageBandpass, 0.6, 'none', 'rft', Width, Height)

* 傅里叶 图片转到 频域
rft_generic (ImageResult, ImageFFT, 'to_freq', 'none', 'complex', Width)
* 卷积处理
convol_fft (ImageFFT, ImageBandpass, ImageConvol)
* 傅里叶 频域转到图片
rft_generic (ImageConvol, ImageBase, 'from_freq', 'n', 'byte', Width)

* 4.纹理过滤与动态阈值 ****************************
* 纹理过滤器
texture_laws (ImageBase, ImageTexture, 'el', 3, 5)
* 动态阈值
mean_image (ImageTexture, ImageMean, 5, 10)
dyn_threshold (ImageTexture, ImageMean, RegionDynThresh, 10, 'light')
* 连通域分析
connection (RegionDynThresh, ConnectedRegions)
* 区域筛选
select_shape (ConnectedRegions, SelectedRegions, 'area', 'and', 44, 487)

* 链接缺陷区域
union1 (SelectedRegions, RegionUnion)
closing_circle (RegionUnion, RegionClosing, 6)

* 区域骨骼化处理
skeleton (RegionClosing, Skeleton)

* 5.结果显示 ****************************
dev_clear_window ()
dev_display(Image)
dev_set_color ('red')
dev_display(Skeleton)
stop() https://libaineu2004.blog.csdn.net/article/details/103883788https://libaineu2004.blog.csdn.net/article/details/105366681![]() https://libaineu2004.blog.csdn.net/article/details/105366681
https://libaineu2004.blog.csdn.net/article/details/105366681

*1采集图像
read_image (Image66, './5.png')
rgb1_to_gray (Image66, GrayImage)

*2预处理之拉开对比度(这里采用频域,频域到空间域的常用算子有三个fft_iamge,rft_generic,fft_generic
fft_generic (GrayImage, ImageFFT, 'to_freq', -1, 'sqrt', 'dc_center', 'complex')

*注意一般在频域里就是选择你想要的频段而已,被称为滤波,这个手法在halcon中有三个,
*一个是直接手画,然后paint_region
*一个是涉及滤波器,然后进行滤波,这个对于初学者有点难度,先掌握常见滤波器。
*第三个就是调用power_real,对其进行blob解析。
*这里用的直接手动paint_region,选择对应的频段
gen_rectangle1 (ROI_0, 200.855, 3.85433, 273.273, 1101.15)
paint_region (ROI_0, ImageFFT, ImageResult, 0, 'fill')

*注意这里又回到了空间,频域和空间是同等重要地位,只是看问题的角度不一样,这也符合唯物辩证法法
fft_generic (ImageResult, ImageFFT1, 'from_freq', 1, 'sqrt', 'dc_center', 'byte')
*接下来就是一个blob提取而已,当然这里方法可以根据情况变化多端,比如你可以分水领域法,
*然后调用select_gray,对每个区域对应灰度值特征进行筛选,当然您也可以用共生矩阵
emphasize (ImageFFT1, ImageEmphasize, 7, 7, 1)
threshold (ImageEmphasize, Regions, 44, 101)
dilation_circle (Regions, RegionDilation, 3.5)
connection (RegionDilation, ConnectedRegions)
select_shape (ConnectedRegions, SelectedRegions, 'area', 'and', 78.88, 190.87)
*这里就是显示而已
dev_display (Image66)
dev_display (SelectedRegions)
eg3:


*清空当前窗口
dev_close_window ()
*读取测试图像
read_image (Image,'./1.png')
*获取图像的宽
get_image_size (Image, Width, Height)
*创建显示窗口,并设置窗口及绘制参数
dev_open_window_fit_size (0, 0, Width, Height, -1, -1, WindowHandle)
dev_display (Image)
dev_set_draw ('margin')
dev_set_line_width (3)
dev_set_color ('red')
*创建一个高斯滤波器,用于将傅里叶转换后的图像进行滤波
gen_gauss_filter (GaussFilter, 3.0, 3.0, 0.0, 'none', 'rft', Width, Height)
*开始检测
*将测试图像转化为单通道的灰度图像
rgb1_to_gray (Image, ImageGray)
*对灰度图像进行颜色反转
invert_image (ImageGray, ImageInvert)
*对反转后的图像进行傅里叶变换
rft_generic (ImageInvert, ImageFFT, 'to_freq', 'none', 'complex', Width)
*对傅里叶图像做卷积,使用之前创建的高斯滤波器作为卷积核
convol_fft (ImageFFT, GaussFilter, ImageConvol)
*将卷积后的傅里叶图像还原为空间域图像。可见图像的突变部分得到了增强
rft_generic (ImageConvol, ImageFiltered, 'from_freq', 'n', 'real', Width)
*设置提取线条的参数
calculate_lines_gauss_parameters (17, [25,3], Sigma, Low, High)
*将图像中的有灰度差异的线条提取出来
lines_gauss (ImageFiltered, Lines, Sigma, Low, High, 'dark', 'true', 'gaussian', 'true')
*将提取出的结果显示出来
dev_display (Image)
dev_display (Lines)
eg4:


dev_update_off ()
dev_close_window ()
* 读图像
read_image (Image, './2.png')
*彩色转灰度图
count_channels (Image, Channels)
if (Channels == 3 or Channels == 4)
    rgb1_to_gray (Image, Image)
endif
* 翻转图像,亮变暗  暗变量
invert_image (Image, ImageInverted)
* 获取图像宽高
get_image_size (Image, Width, Height)
* dev_open_window (0, 0, Width, Height, 'black', WindowHandle)
dev_open_window_fit_image (Image, 0, 0, -1, -1, WindowHandle)
set_display_font (WindowHandle, 16, 'mono', 'true', 'false')
dev_display (Image)
*
* Optimize the speed of the fast fourier transform
* 优化快速傅里叶变换的速度
* Enhance the scratches by filtering in the frequency domain
* 通过在频域中滤波来增强划痕

* 生成具有正弦形状的带通滤波器
gen_sin_bandpass (ImageBandpass, 0.4, 'none', 'rft', Width, Height)
* 对一幅图片的实部进行快速傅里叶变换的计算,将图像转为傅里叶图像
* 参数为'to_freq',输出图像为复数形式
* ImageInverted:输入的图片(输入图像需要为背景为暗,前景为亮的图像,一般需要先要将原始图像反转)
* ImageFFT:傅里叶变换后输出的图片
* 'to_freq':变换方向,傅里叶变换
* 'none':变换因子的规范
* 'complex':输出图片的数据类型,输出图像为复数形式
* Width: 图像的宽
rft_generic (ImageInverted, ImageFFT, 'to_freq', 'none', 'complex', Width)
* 对图片用滤波器在频域进行卷积运算
* ImageFFT: 输入的图片
* ImageBandpass:频域滤波器
* ImageConvol:计算后的输出图像
convol_fft (ImageFFT, ImageBandpass, ImageConvol)
* 对滤波后的图片进行傅里叶反变换
* 参数为'from_freq',输入图像为复数形式
rft_generic (ImageConvol, Lines, 'from_freq', 'n', 'byte', Width)
*
* Segment the scratches by using morphology
* 使用形态分割划痕

* 二值化
threshold (Lines, Region, 5, 255)
* 获得连通域
connection (Region, ConnectedRegions)
* 特征直方图,按照面积特征选择区域
select_shape (ConnectedRegions, SelectedRegions, 'area', 'and', 5, 5000)
* 膨胀
dilation_circle (SelectedRegions, RegionDilation, 5.5)
* 区域联合成一个区域
union1 (RegionDilation, RegionUnion)
* 抠图
reduce_domain (Image, RegionUnion, ImageReduced)
* 检测线条及其宽度
* 输出亚像素直线轮廓
lines_gauss (ImageReduced, LinesXLD, 0.8, 3, 5, 'dark', 'false', 'bar-shaped', 'false')
* 联合直线亚像素轮廓
union_collinear_contours_xld (LinesXLD, UnionContours, 40, 3, 3, 0.2, 'attr_keep')
* 按照轮廓的总长度来选择亚像素轮廓
select_shape_xld (UnionContours, SelectedXLD, 'contlength', 'and', 15, 1000)
* 由亚像素轮廓生成区域
gen_region_contour_xld (SelectedXLD, RegionXLD, 'filled')
* 区域联合
union1 (RegionXLD, RegionUnion)
* 膨胀
dilation_circle (RegionUnion, RegionScratches, 10.5)
*
* Display the results
* 显示标记出来的的直线划痕
dev_set_draw ('margin')
dev_set_line_width (3)
dev_set_colored (12)
dev_display (Image)
dev_display (RegionScratches)
eg5:


*http://www.ihalcon.com/read-13031-1.html
*缺陷检测,将木板的划痕提取出来
dev_update_off ()
dev_close_window ()
read_image (Image, './3.png')
*彩色转灰度图
count_channels (Image, Channels)
if (Channels == 3 or Channels == 4)
    rgb1_to_gray (Image, Image)
endif
get_image_size (Image, Width, Height)
dev_open_window_fit_size (0, 0, Width, Height, -1, -1, WindowHandle)
dev_display (Image)
*傅里叶变换去背景
fft_generic (Image, ImageFFT, 'to_freq', -1, 'sqrt', 'dc_center', 'complex')
gen_rectangle2 (Rectangle1, 360.5, 176.56, rad(-0), 179.4, 7.725)
gen_rectangle2 (Rectangle2, 360.955, 216, rad(-90), 180.765, 4.68)
union2 (Rectangle1, Rectangle2, UnionRectangle)
paint_region (UnionRectangle, ImageFFT, ImageResult, 0, 'fill')
fft_generic (ImageResult, ImageFFT1, 'from_freq', 1, 'sqrt', 'dc_center', 'byte')
*提取划痕
threshold (ImageFFT1, Regions, 6, 239)
closing_circle (Regions, RegionClosing, 2.5)
connection (RegionClosing, ConnectedRegions)
select_shape (ConnectedRegions, SelectedRegions, 'area', 'and', 110, 99999)
union1 (SelectedRegions, RegionUnion)
closing_circle (RegionUnion, RegionClosing1, 3.5)
connection (RegionClosing1, ConnectedRegions1)
select_shape (ConnectedRegions1, SelectedRegions1, ['width','height','area'], 'and', [25,20,140], [400,400,900])
dilation_rectangle1 (SelectedRegions1, RegionDilation1, 15, 15)
union1 (RegionDilation1, RegionUnion2)
connection (RegionUnion2, ConnectedRegions2)
select_shape (ConnectedRegions2, SelectedRegions2, 'area', 'and', 1250, 99999)
union1 (SelectedRegions2, RegionUnion1)
skeleton (RegionUnion1, Skeleton)
*显示
dev_set_color ('red')
dev_display (Image)
dev_display (Skeleton)