弁言
本文作为学习Jetpack的第二篇, 将对 dataBinding 进行介绍, 学习。
本文将细节讲解 dataBinding 的使用, 以及部分坑点会着重指出。
本文所用开发环境以及SDK版本如下,读者应该使用不低于本文所使用的开发环境.
Android Studio 4.0.1
minSdkVersion 21
targetSdkVersion 30
开启 dataBinding
相信各位对于前面的文章 viewBinding的开启方法还有印象。
对于 dataBinding 的开启与前文一模一样, 我们再次找到 app 模块中的 build.gradle
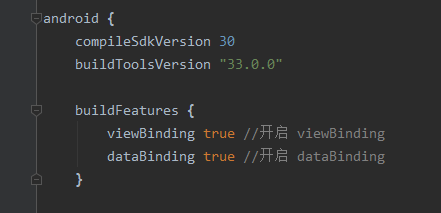
添加如上代码并且sync, 接来下就开始 dataBinding
正文
dataBinding模式下xml的书写格式, 如果使用数据绑定, 那么需要将对应的layout书写为以下样式的特定格式。
<?xml version="1.0" encoding="utf-8"?>
<layout xmlns:android="http://schemas.android.com/apk/res/android"
    xmlns:app="http://schemas.android.com/apk/res-auto">

    <!-- 数据模型 -->
    <data>
        ...
    </data>

    <!-- UI 布局 -->
    <androidx.constraintlayout.widget.ConstraintLayout
        android:layout_width="match_parent"
        android:layout_height="match_parent">

        ...

    </androidx.constraintlayout.widget.ConstraintLayout>
</layout>
如上所述, 需要将原本的UI布局通过layout标签节点包裹起来, 并且所有的xmlns都写在该标签下。
dataBinding的基本使用
<data>...</data>标签是干什么的? 什么又叫数据模型?
首先, 创建一个bean亦或者是entity类来充当数据模型, 这里就叫做User。
data class User(
    var name: String,  //用户名
    var age: Int,  //年龄
    var member: Boolean  //团员否
)
接下来就要对上面的layout进行改写, 如下:
<?xml version="1.0" encoding="utf-8"?>
<layout xmlns:android="http://schemas.android.com/apk/res/android"
    xmlns:app="http://schemas.android.com/apk/res-auto">

    <!-- 数据模型 -->
    <data>
        <variable name="user" type="com.example.databinding.bean.User" />
    </data>

    <!-- UI 布局 -->
    <androidx.constraintlayout.widget.ConstraintLayout
        android:layout_width="match_parent"
        android:layout_height="match_parent">

        <TextView
            android:id="@+id/userName"
            android:layout_width="wrap_content"
            android:layout_height="wrap_content"
            android:text="@{user.name}"
            app:layout_constraintBottom_toBottomOf="parent"
            app:layout_constraintEnd_toEndOf="parent"
            app:layout_constraintStart_toStartOf="parent"
            app:layout_constraintTop_toTopOf="parent" />


        <TextView
            android:id="@+id/userAge"
            android:layout_width="wrap_content"
            android:layout_height="wrap_content"
            android:text="@{Integer.toString(user.age)}"
            app:layout_constraintEnd_toEndOf="parent"
            app:layout_constraintStart_toStartOf="parent"
            app:layout_constraintTop_toBottomOf="@id/userName" />

        <CheckBox
            android:id="@+id/userMember"
            android:layout_width="wrap_content"
            android:layout_height="wrap_content"
            android:checked="@{user.member}"
            android:text="团员否"
            app:layout_constraintEnd_toEndOf="parent"
            app:layout_constraintStart_toStartOf="parent"
            app:layout_constraintTop_toBottomOf="@id/userAge" />

    </androidx.constraintlayout.widget.ConstraintLayout>
</layout>
看不懂没关系, 先照着敲下来, 一点一点讲解。
layout中也能写变量?
首先看到<data>...</data>标签下的东西。
    ...
    <!-- 数据模型 -->
    <data>
        <variable name="user" type="com.example.databinding.bean.User" />
    </data>
    ...
variable直译过来就是变量的意思, 对于这里的name="user"就表示变量名是user, 而后面的type="com.example.databinding.bean.User"则表示user变量的类型是User类。
不过, 值得注意的是type是需要写上全类名的(即: 包名.类名)。
layout中的变量如何使用呢?
行文至此, 变量user就与layout绑定在一起了。
接下来就是变量user如何在layout中使用:
我们继续来看 UI 布局下面的东西。
    ...
    <!-- UI 布局 -->
    <androidx.constraintlayout.widget.ConstraintLayout
        android:layout_width="match_parent"
        android:layout_height="match_parent">

        <TextView
            android:id="@+id/userName"
            android:layout_width="wrap_content"
            android:layout_height="wrap_content"
            android:text="@{user.name}"
            app:layout_constraintBottom_toBottomOf="parent"
            app:layout_constraintEnd_toEndOf="parent"
            app:layout_constraintStart_toStartOf="parent"
            app:layout_constraintTop_toTopOf="parent" />


        <TextView
            android:id="@+id/userAge"
            android:layout_width="wrap_content"
            android:layout_height="wrap_content"
            android:text="@{Integer.toString(user.age)}"
            app:layout_constraintEnd_toEndOf="parent"
            app:layout_constraintStart_toStartOf="parent"
            app:layout_constraintTop_toBottomOf="@id/userName" />

        <CheckBox
            android:id="@+id/userMember"
            android:layout_width="wrap_content"
            android:layout_height="wrap_content"
            android:checked="@{user.member}"
            android:text="团员否"
            app:layout_constraintEnd_toEndOf="parent"
            app:layout_constraintStart_toStartOf="parent"
            app:layout_constraintTop_toBottomOf="@id/userAge" />

    </androidx.constraintlayout.widget.ConstraintLayout>
    ...
可以发现上述代码中出现了一个诸如: @{user.name}``@{Integer.toString(user.age)} @{user.member}这样的东西, 相信各位已经知道了这个是干啥的了。
@{...}称为布局表达式, 省略号可以替换成任意简单的表达式, 以下就举几个简单的例子:
    android:visibility="@{user.age > 13 ? View.GONE : View.VISIBLE}"

    android:text="@{user.age >= 18 ? `成年` : `未成年`}"
需要注意的是@{}只支持简单的表达式(更多自己可以尝试写写), 不支持以下操作:
- this
- super
- new
- 显示的泛型调用
layout中变量的设置
上文中已经将layout的布局变量user定义成功, 并且已经通过@{}对变量进行使用, 变量虽然成功定义并且使用了, 变量的值从何而来呢?
class MainActivity : AppCompatActivity() {


    private lateinit var binding: ActivityMainBinding

    override fun onCreate(savedInstanceState: Bundle?) {


        super.onCreate(savedInstanceState)
        // 通过DataBindingUtil来设置layout布局
        binding = DataBindingUtil.setContentView(this, R.layout.activity_main)
        //为user变量设置值
        binding.user = User("张三", 18, true)
    }

    override fun onDestroy() {


        super.onDestroy()
        binding.unbind()
    }
}
这里的binding对应的就是res/layout/activity_main,xml这是在上一篇就已经提到的内容了。
至此, dataBinding的基本使用就已经结束了, 我们跑一遍看看结果。

dataBinding的事件处理
上面我们介绍了通过dataBinding给对应的layout绑定变量, 接下来将介绍如何绑定操作事件。
    <!-- 数据模型 -->
    <data>
        <variable name="user" type="com.example.databinding.bean.User" />
        <variable name="presenter" type="com.example.databinding.event.MainEventPresenter" />
    </data>
现在, 在<data>...</data>标签中添加一个事件变量, 用作事件操作MainEventPresenter类结构如下:
class MainEventPresenter {


    fun onClick(view: View) {


        Toast.makeText(view.context, "点击: $view", Toast.LENGTH_LONG).show()
    }

    fun testClick(view: View, user: User) {


        Toast.makeText(view.context, "点击: ${

      user.name}", Toast.LENGTH_LONG).show()
    }
}
接着在UI布局中添加一个Button
    <!-- UI 布局 -->
    <androidx.constraintlayout.widget.ConstraintLayout
        android:layout_width="match_parent"
        android:layout_height="match_parent">

        ...

        <Button
            android:id="@+id/presenterBtn"
            android:layout_width="wrap_content"
            android:layout_height="wrap_content"
            android:onClick="@{presenter::onClick}"
            android:text="按钮"
            app:layout_constraintBottom_toBottomOf="userMember"
            app:layout_constraintLeft_toLeftOf="parent"
            app:layout_constraintRight_toRightOf="parent"
            app:layout_constraintTop_toBottomOf="@id/userMember" />

    </androidx.constraintlayout.widget.ConstraintLayout>
然后在MainActivity中为presenter设置变量值
    ...
    binding.user = User("张三", 18, true)
    binding.presenter = MainEventPresenter()
    ...
亦或者你可以这么写
    ...
    binding.apply {


        user = User("张三", 18, true)
        presenter = MainEventPresenter()
    }
    ...
跑一遍, 看结果。

值得注意的是:
@{presenter::onClick}中的onClick是没有括号的哦
dataBinding事件处理与lambda匿名函数
上述就是dataBinding中事件的绑定方式, 那么接下来还有一点…
我们前面说到@{}是支持简单表达式的,同时在kotlin中又有一个lambda写法, 所以我们可以尝试一下:
    android:onClick="@{(view)-> presenter.testClick(view)}"
    或
    android:onClick="@{(view)-> presenter.testClick(view, user)}"
至此, dataBinding事件处理的基本使用就结束了。
dataBinding中使用include
在 Android 开发中, include -> layout 是经常干的事情, 一般来说, 被 include 引入的layout都是作为主layout的一部分(下称子布局)。
dataBinding考虑到了这一点, 因此专门提供了一个bind:子布局变量名="被传递的变量名"来将现有变量直接传递到子布局之中。
我们来写一个子布局res/layout/layout_part1_main.xml
<?xml version="1.0" encoding="utf-8"?>
<layout xmlns:android="http://schemas.android.com/apk/res/android">

    <data>
        <variable name="user" type="com.example.databinding.bean.User" />
    </data>

    <RelativeLayout
        android:layout_width="match_parent"
        android:layout_height="wrap_content">

        <TextView
            android:layout_width="wrap_content"
            android:layout_height="wrap_content"
            android:layout_centerHorizontal="true"
            android:text="@{`include: ` + user.name}" />

    </RelativeLayout>
</layout>
然后在主布局中引入它:
<?xml version="1.0" encoding="utf-8"?>
<layout ...
    xmlns:bind="http://schemas.android.com/tools">

    ...

    <!-- UI 布局 -->
    <androidx.constraintlayout.widget.ConstraintLayout
        android:layout_width="match_parent"
        android:layout_height="match_parent">

        ...

        <include
            layout="@layout/layout_part1_main"
            bind:user="@{user}" />

    </androidx.constraintlayout.widget.ConstraintLayout>
</layout>
注意
xmlns:bind="http://schemas.android.com/tools"是必须添加的。
然后我们来跑一遍, 看结果。
这里的include布局被放到顶部显示了, 不过结果还是在意料之中的…
dataBinding中使用import
说到import应该都不陌生了, dataBinding为…标签提供了
就像前面说的, dataBinding不支持new对象, 使用标签导入的使用类一般都是工具类, 而能够直接使用的也都是:
静态成员属性, 静态方法
例如:
<?xml version="1.0" encoding="utf-8"?>
<layout xmlns:android="http://schemas.android.com/apk/res/android"
    ...>

    <!-- 数据模型 -->
    <data>
        <import type="android.text.TextUtils" />
        ...
    </data>

    <!-- UI 布局 -->
    <androidx.constraintlayout.widget.ConstraintLayout
        android:layout_width="match_parent"
        android:layout_height="match_parent">

        ...

        <TextView
            android:id="@+id/testDate"
            android:layout_width="wrap_content"
            android:layout_height="wrap_content"
            android:text="@{TextUtils.getReverse(`Hello World!`, 0, `Hello World!`.length())}"
            app:layout_constraintLeft_toLeftOf="parent"
            app:layout_constraintRight_toRightOf="parent"
            app:layout_constraintTop_toBottomOf="@id/presenterBtn" />

            ...

    </androidx.constraintlayout.widget.ConstraintLayout>
</layout>
上述表达式实现的功能是将字符串反转, 来看结果。

同类名, 可以使用alias指定别名。
例:
    <import type="com.example.databinding.view.View" alias="MView" />
    <import type="android.view.View" />
至此, dataBinding就暂时告一段落, 后面我们将继续Observable的介绍、使用。
源码已经打包至 github 需要可自行下载查看运行。