概述
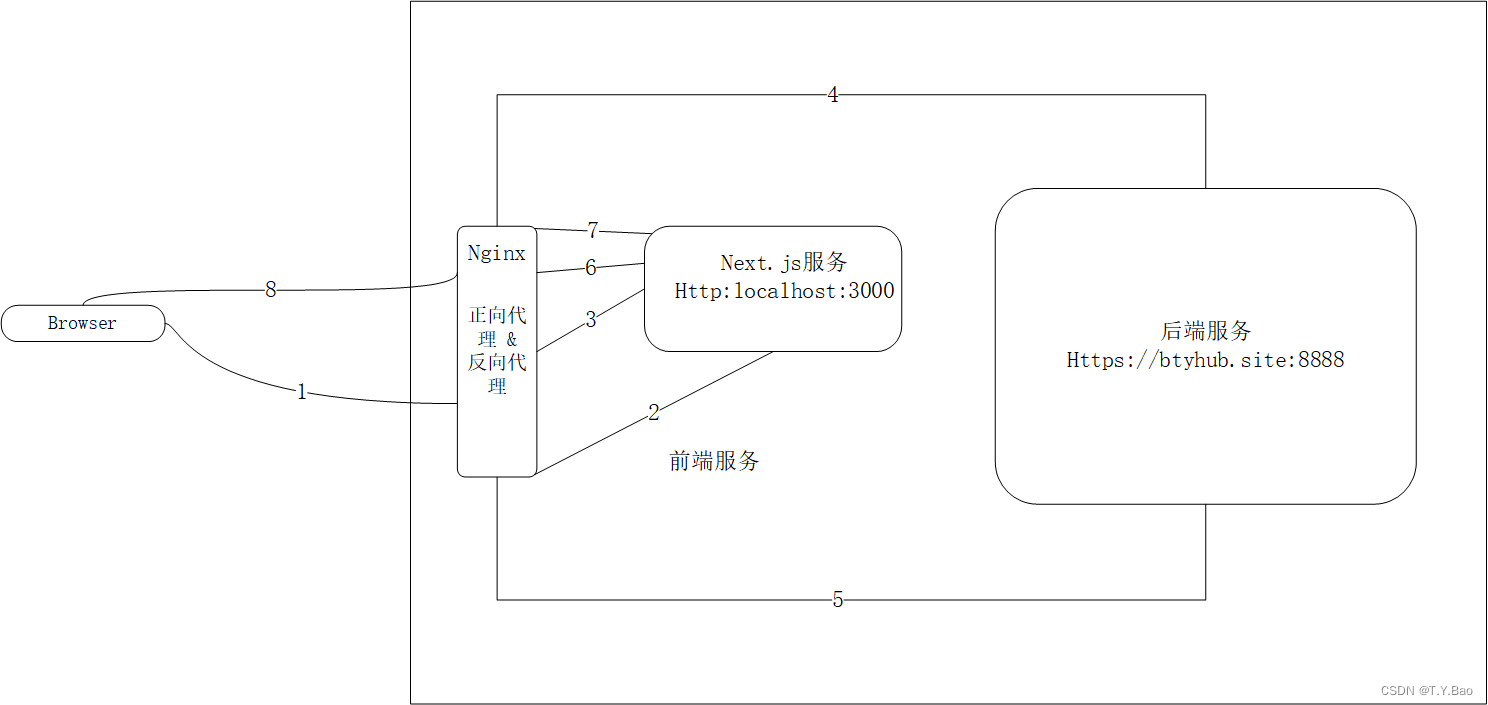
只有一台服务器,所以上图服务都都在一个云服务器上。其中Nginx 分别在用户和Next服务之间代理、在Next和后台之间代理。
常规的前台页面不需要这样做,例如Vue中直接把build之后的dist文件拷贝到nginx的html目录并配置nginx指向即可,但是Next可以做到服务端渲染(SSR)所以Next的前台页面实际上是一个nodejs服务,所以nginx在这里是代理用户请求,proxy_pass到这个nodejs服务上。
而前后台之间的nginx代理属于反向代理,一般也通过proxy_pass去rewrite路径进行代理,我没配置这个。
Next.js配置
在需要SSR的page中需要添加 getStaticProps(getStaticProps这些function只能写在page文件夹中,不可以在components中用),注意可以设置revalidate定时重新build页面,这样页面也可以定期更新,如下:
export async function getStaticProps() {


	//后台取数据
    const result = await queryTimelineList()
    // console.log(result)
    return {


        props: {


            timelineData: result.data,
        },
        // 重新绘制页面时长 1200 ,单位秒
        revalidate: 1200
    };
}
另外,注意在动态路由的page中,需要设置fallback为true,且页面中要增加对fallback为false的处理,否则build的时候会报错,如下 一个名为 [postId].js的page:
const PostId = ({

     postId, postDetail, recentPosts,curTags}) => {


    const router = useRouter()
	// 注意,这里要处理
    if (router.isFallback) {


        return <div>Loading...</div>
    }
    ...
}


// Fetch data at build time
export async function getStaticProps(context) {


    const postId = context.params.postId

    const
        [postDetailResult,
            recentPostsResult,
            curPostTagsResult] = await Promise.all([
                queryPostDetailByPostId(postId),
                queryRecentPostList(),
                queryTagListByPostId(postId)
            ]
        )
    return {


        props: {


            postId: postId,
            postDetail: postDetailResult?.data,
            recentPosts: recentPostsResult?.data,
            curTags: curPostTagsResult?.data
        },
        revalidate: 300
    };
}

// Specify dynamic routes to pre-render pages based on data.
// The HTML is generated at build time and will be reused on each request.
export async function getStaticPaths() {


    const postIdsResult = await queryPostIdList();
    const postIdList = postIdsResult.data

    return {


        paths: postIdList.map((postId) => {


        	// 这里如果传的是数字会报错,必须转为字符串
            return {

    params: {

    postId: postId.toString()}}
        }),
        // 设置为true
        fallback: true,
    };
}
Nginx配置
完整的nginx.conf配置文件如下:
#user  nobody;
worker_processes  1;

#error_log  logs/error.log;
#error_log  logs/error.log  notice;
#error_log  logs/error.log  info;

#pid        logs/nginx.pid;


events {


    worker_connections  1024;
}


http {


    include       mime.types;
    default_type  application/octet-stream;

    #log_format  main  '$remote_addr - $remote_user [$time_local] "$request" '
    #                  '$status $body_bytes_sent "$http_referer" '
    #                  '"$http_user_agent" "$http_x_forwarded_for"';

    #access_log  logs/access.log  main;

    sendfile        on;
    #tcp_nopush     on;

    #keepalive_timeout  0;
    keepalive_timeout  65;

    #gzip  on;


    # HTTPS server
    #
    server {


        listen       443 ssl;
        server_name  btyhub.site, www.btyhub.site;
		# ssl两个文件,放在 nginx的conf目录中
        ssl_certificate      btyhub.site_bundle.pem;
        ssl_certificate_key  btyhub.site.key;

        ssl_session_cache    shared:SSL:1m;
        ssl_session_timeout  5m;

        ssl_ciphers  HIGH:!aNULL:!MD5;
        ssl_prefer_server_ciphers  on;
		# 代理到Next的服务,默认3000端口,也可以在start的时候指定
        location / {


            proxy_pass    http://127.0.0.1:3000/;
        }

    }
    # 监听普通http请求,重写至https
	server{


		listen 80;
		server_name btyhub.site, www.btyhub.site;
		rewrite ^(.*)$ https://$host$1 permanent;
	}

}
pm2启动
ps:除了使用pm2启动Next服务外,也可以npm run build之后直接nohup npm run start。
pm2官网文档
首先要安装node环境,安装完了将命令添加到全局bin中:
# /usr/local/node是我的node安装目录
ln -s /usr/local/node/bin/npm /usr/local/bin/
ln -s /usr/local/node/bin/npx /usr/local/bin/
ln -s /usr/local/node/bin/node /usr/local/bin/
其次,全局安装pm2 并加入全局bin:
npm install -g pm2
ln -s /usr/local/node/bin/pm2 /usr/local/bin/
测试,是否安装成功:
pm2 -version
运行next服务
-
需要将项目源文件上传至云服务器:
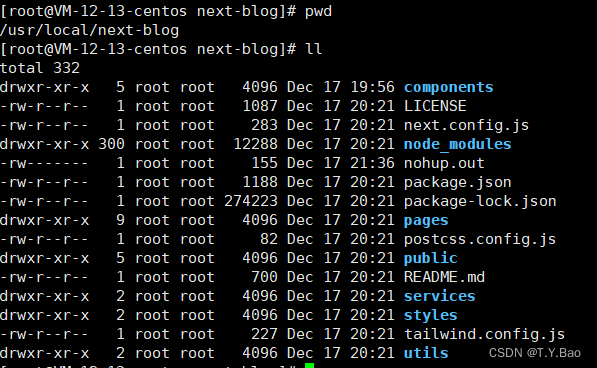
-
运行
npm run build -
运行
pm2 start --name yourappname npm -- start
后记:
域名配置完要隔几天才可以给网站备案,备案之后才可以通过域名访问,在这之前可以先用ip地址测试。