上篇文章介绍了SpringBoot项目的搭建和一些基础注解,发布消息的方式,现在开始配置数据库,使后端程序可以操作数据库,达成小程序后台初步目的
配置数据库
在IDEA左侧有“Database”字样的一栏,点开可以看到数据库目录,点击➕配置本机数据库
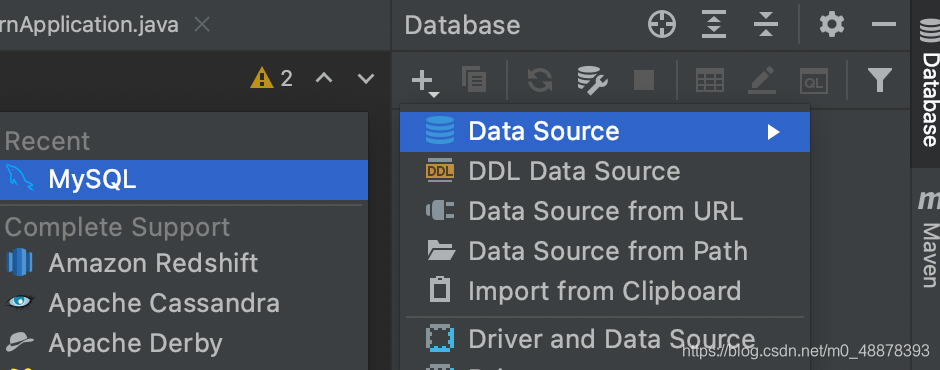
按要求输入数据库端口和用户名密码,默认用户名为root,即最高管理员,测试连接成功后点击“apply”完成连接,之后便可在Database框内看到已有数据库

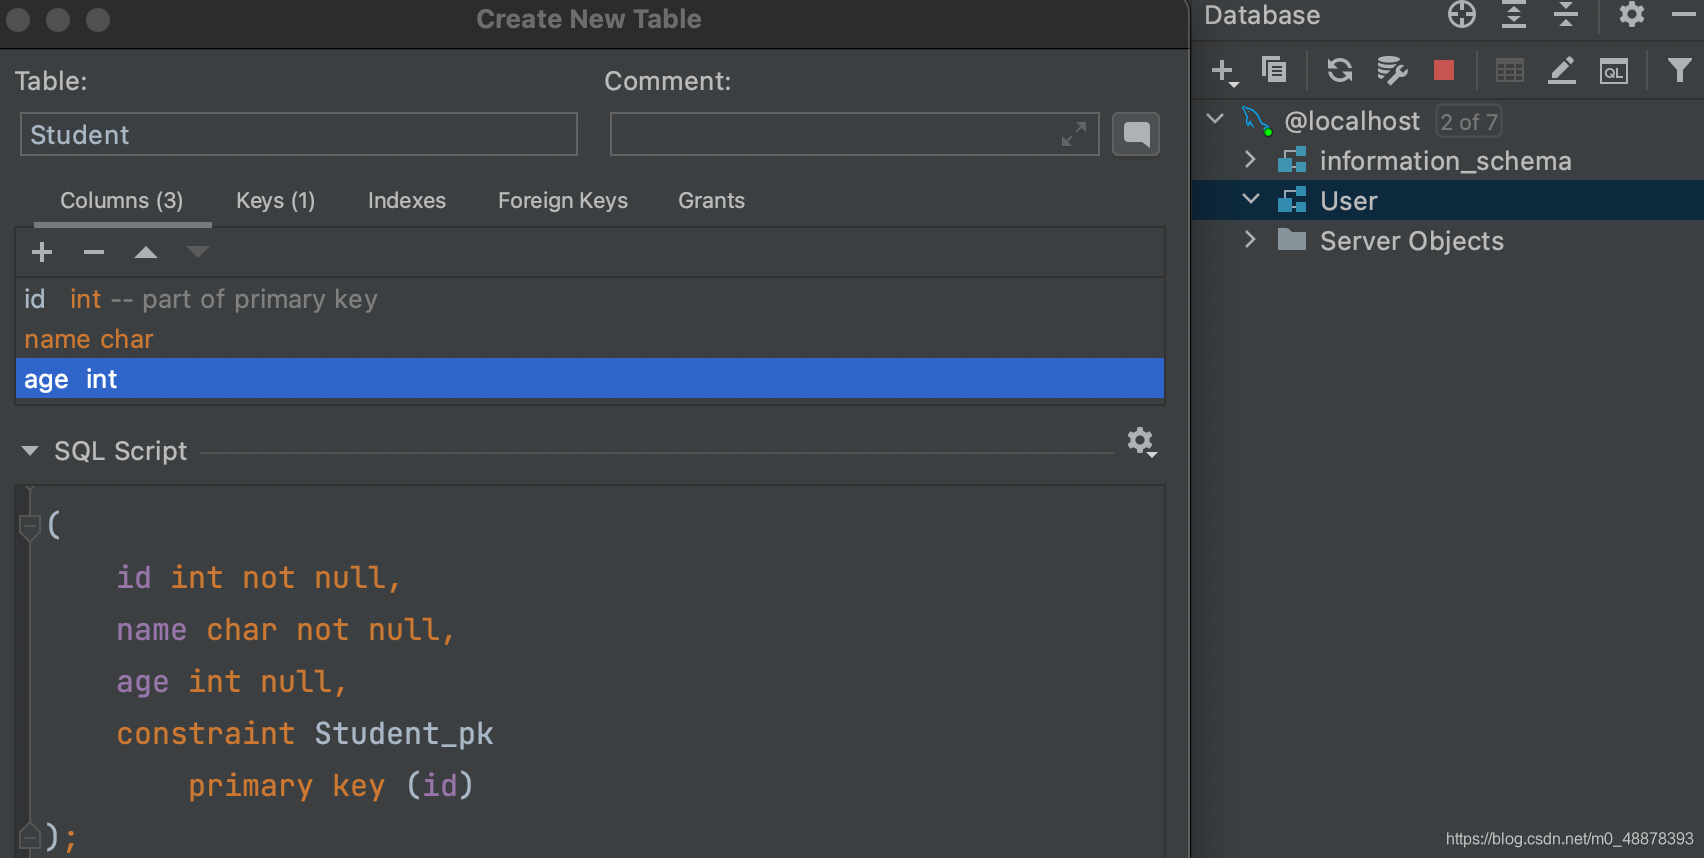
在localhost处右键添加scheme,可以添加数据库,数据库处右键可以添加数据表,此处建了个User库和一个Student表,如图,有三个属性,作为主键的id,姓名非空和年龄,注意char类型字段要设置长度
后端配置
在pom.xml中加入用于连接mysql的依赖,注意加入的依赖要放在dependencies依赖集内
<!--mysql-->
<dependency>
	<groupId>mysql</groupId>
    <artifactId>mysql-connector-java</artifactId>
    <scope>runtime</scope>
    <version>8.0.25</version>
</dependency>
现在可以在application.properties中配置数据库连接
# 链接数据库,配置编码格式
spring.datasource.url=jdbc:mysql://localhost:3306/User?useUnicode=true&characterEncoding=UTF-8&useSSL=false
# 数据库用户名和密码
spring.datasource.username=root
spring.datasource.password=12345678
# 设置数据库连接驱动
spring.datasource.driver-class-name=com.mysql.jdbc.Driver
# 设置更新模式,每次启动项目时同步更新
spring.jpa.properties.hibernate.hbm2ddl.auto=update
连接数据库配置中spring.datasource.url接数据库端口地址,User为数据库名称(笔者命名为User,根据自己的命名更改),useUnicode=true&characterEncoding=UTF-8表示使用unicode编码,并采用UTF-8,避免中文乱码,而useSSL表示使用SSL协议
可能遇到的问题:
1.若使用的mysql 5版本,在重启后可能会出现时区错误的问题,这时需要设置时区,在命令行界面登陆mysql后,输入get global time_zone='+8:00';用于设置时区,然后输入flush privileges;刷新设置即可
2.若使用的mysql 8.0以上版本,mysql重启后可能启动项目可能会提示com.mysql.jdbc.exceptions.jdbc4.MySQLNonTransientConnectionException: Public Key Retrieval is not allowed意为不能检索公共键,可在spring.datasource.url后加上allowPublicKeyRetrieval=true意为设置允许使用
SSL协议:
- 认证用户服务器,确保数据发送到正确的服务器
- 加密数据,防止数据传输途中被窃取使用
- 维护数据完整性,验证数据在传输过程中是否丢失
数据库驱动要选择自己使用的数据库类型,否则无法完成连接
设置同步更新可以让我们编写的实体类与数据库映射
到此数据库基本配置和IDEA内的可视化基本完成
编写操作模块
根据SpringMVC模式,Springboot分有Service层、Controller层、Dao层、Entity层,分别控制实现不同功能,具体的一个web项目中是:Controller层调用了Service层的具体功能方法,Service层调用Dao层的方法,其中调用的参数是使用Entity层进行传递的
- Service层:业务层,在Service层调用接口进行业务逻辑应用的处理
- Controller层:控制层,调用Service层里面的接口来控制具体的业务流程
- Dao层:持久层,创建Dao接口,接着就可以在配置文件中定义该接口的实现类;然后就可以在模块中调用Dao的接口进行数据业务的处理
- Entity层:实体层,定义与数据库对象应的属性,提供get/set方法,toString方法,有参无参构造函数。
下面首先编写Entity层,实体类中的属性要与数据库内定义的属性一一对应(属性名,类型),并具有标识id(主键),用于映射数据库,并编写get,set方法,给controller层提供发布接收消息的方法
在pom.xml中添加jpa注解
<dependency>
	<groupId>org.springframework.boot</groupId>
    <artifactId>spring-boot-starter-data-jpa</artifactId>
</dependency>
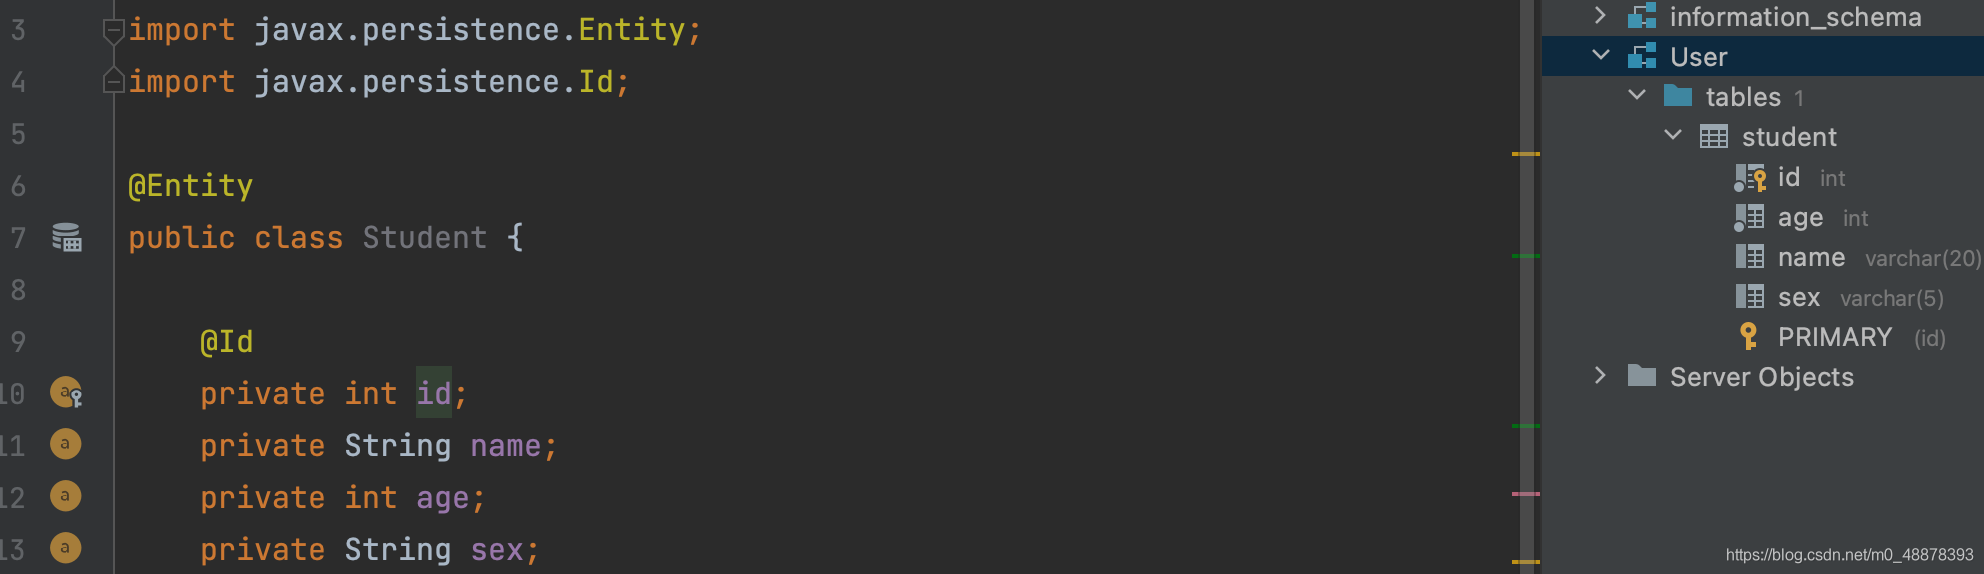
创建Student类,@Entity表明这是一个实体类,@Id表示该属性为主键
@Entity
public class Student {


    @Id
    private int id;
    private String name;
    private int age;
}
将属性全部选中右键可以快速生成get,set方法,此时运行,该类已经可以与数据库对应
可以再添加一个sex属性和get,set方法,运行后观察表中是否出现sex属性,测试是否映射成功
接下来编写Dao层,继承Jpa接口用于操作数据库,使用Jpa提供的方法可以省去编写sql语句的繁琐
继承JpaRepository接口,后接的是用于哪个类,主键的类型
package com.example.demo;

import org.springframework.data.jpa.repository.JpaRepository;

public interface StudentDao extends JpaRepository<Student,Integer> {


}
现在可以编写Controller层,提供访问的接口,定义操作数据库的方法(增删改查)
首先实例化Dao层对象,用于提供数据库操作方法,并添加@Autowired注解
,为自动导入依赖的bean
@RestController
public class StudentController {


    @Autowired
    StudentDao studentDao;

}
插入数据方法
// http://localhost:8080/insert?id=1&name=Carol&age=19&sex=man
    @GetMapping("/insert")
    public Student insert(@RequestParam("id")int id,
                          @RequestParam("name")String name,
                          @RequestParam("age")int age,
                          @RequestParam("sex")String sex){


        Student student=new Student();
        student.setId(id);
        student.setName(name);
        student.setAge(age);
        student.setSex(sex);
        Student save=studentDao.save(student);
        return save;
    }
删除数据方法
// http://localhost:8080/delete
    @GetMapping("/delete")
    public String detele(@RequestParam("id")int id){


        studentDao.deleteById(id);
        return "Success";
    }
更新数据方法,通过id修改其他数据,在@RequestParam注解里设置参数为非必需,先获取该id的对象,再对参数中有更改的属性进行赋值,完成修改操作
注意使用dao层的getById方法时,因数据转化json格式时无法兼容,需要在实体类上添加注解
@JsonIgnoreProperties(value = { “hibernateLazyInitializer”})
// http://localhost:8080/update
    @GetMapping("/update")
    public Student update(@RequestParam("id")int id,
                          @RequestParam(value = "name",required = false)String name,
                          @RequestParam(value = "age",required = false)String age,
                          @RequestParam(value = "sex",required = false)String sex){


        Student student=studentDao.getById(id);
        if(name!=null)
        student.setName(name);
        if(age!=null)
        student.setAge(age);
        if(sex!=null)
        student.setSex(sex);
        studentDao.save(student);
        return student;
    }
查询方法
// http://localhost:8080/get
    @GetMapping("get")
    public Student get(@RequestParam("id")int id){


        return studentDao.getById(id);
    }

    // http://localhost:8080/getAll
    @GetMapping("getAll")
    public List getAll(){


        List list=studentDao.findAll();
        return list;
    }
到此后端的数据库操作方法基本完成,后期可以根据需求添加其他方法