由于网络环境等情况的限制,我们可能在项目中需要使用离线地图进行展示、打点等操作;
我们的步骤是:
- 下载百度瓦片地图,把下载好的瓦片放在服务器上;
- 下载离线资源 bmap_offline_demo
- 配置完成后在项目中引入使用
1.下载瓦片
可以选择在望远网上下载,确定好下载的区域,不要随意变动下载的文件夹;
⚠️不同地图的坐标类型也不尽相同,所以这里必须选择百度地图瓦片,具体原因和详解可以自行了解地图坐标系大全:常用地图坐标系详解与转换指南_腾讯地图坐标系_言之兮兮的博客-CSDN博客
2.下载离线资源
百度网盘链接: https://pan.baidu.com/s/1sDPmF9n17GGEwaa-lUr5rA?pwd=iqke 提取码: iqke
这是百度离线地图的加载方法和模块,另外我放了下载的少量的瓦片,以做测试使用;
3.项目配置
1.将下载的离线资源放在public/static/下,其中titles是地图瓦片;

2.打开 public/static/bmap_offline_demo/map_load.js ,其中"tiles_dir",就是要请求的瓦片的地址;
//卫星瓦片地图

// console.log(process.env.VITE_BASE_URL_MAP);
var bmapcfg = {
  'imgext': '.jpg',   //瓦片图的后缀 ------ 根据需要修改,一般是 .png .jpg
//这里我直接用的路径是/static/bmap_offline_demo/tiles,如果瓦片数量较大,可改为瓦片服务的地址
  'tiles_dir': '/static/bmap_offline_demo/tiles',       //普通瓦片图的地址,为空默认在 offlinemap/tiles/ 目录
  // 'tiles_dir': import.meta.env.VITE_BASE_URL_MAP,
  // 'tiles_dir': 'http://localhost',
  'tiles_hybrid': '',       //卫星瓦片图的地址,为空默认在 offlinemap/tiles_hybrid/ 目录
  'tiles_self': ''        //自定义图层的地址,为空默认在 offlinemap/tiles_self/ 目录
};

//下面的保持不动///
var scripts = document.getElementsByTagName("script");
var JS__FILE__ = scripts[scripts.length - 1].getAttribute("src");  //获得当前js文件路径
bmapcfg.home = JS__FILE__.substr(0, JS__FILE__.lastIndexOf("/") + 1); //地图API主目录
(function () {
  window.BMap_loadScriptTime = (new Date).getTime();
  //加载地图API主文件
  document.write('<script type="text/javascript" src="' + bmapcfg.home + 'bmap_offline_api_v3.0_min.js"></script>');
  //加载扩展函数
  document.write('<script type="text/javascript" src="' + bmapcfg.home + 'map_plus.js"></script>');
  //加载城市坐标
  document.write('<script type="text/javascript" src="' + bmapcfg.home + 'map_city.js"></script>');
})();
///
3.配置完成后,需要将其引入到项目中,我是使用vite 创建的项目,直接下载 'vite-plugin-html' 插件,再vite.config.ts 中配置即可;
注解:vite-plugin-html 的作用是动态的去控制index.html文件的内容
import {defineConfig} from 'vite'
import vue from '@vitejs/plugin-vue'
import {createHtmlPlugin} from 'vite-plugin-html';

// https://vitejs.dev/config/
export default defineConfig({
    plugins: [
        vue(),
        createHtmlPlugin({
            inject: {
                data: {
                    injectMapScript: `<script src="/static/bmap_offline_demo/map_load.js"></script>`,
                },
            },
            minify: true,
        }),
    ]


})
4.在组件中直接使用即可
<template>
  <input type="text" />
  <div id="map" ref="mapRef"></div>
</template>
<script lang="ts" setup>
import { nextTick, onMounted } from "vue";

const initMap = () => {
  let Bmap = window.BMap || {};
  console.log(window)
  let map = new Bmap.Map("map");

  map.centerAndZoom(new Bmap.Point(116.404844, 39.913385), 3); // 创建中心点坐标 初始化地图,设置中心点坐标和地图级别
  map.setCurrentCity('北京'); // 设置地图显示的城市 此项是必须设置的
  map.enableScrollWheelZoom(); //开启鼠标滚轮缩放
};
onMounted(() => {
  nextTick(() => {
    initMap()
  })
})

</script>

<style scoped>
#map {
  width: 100%;
  height: 1000px;
}
</style>
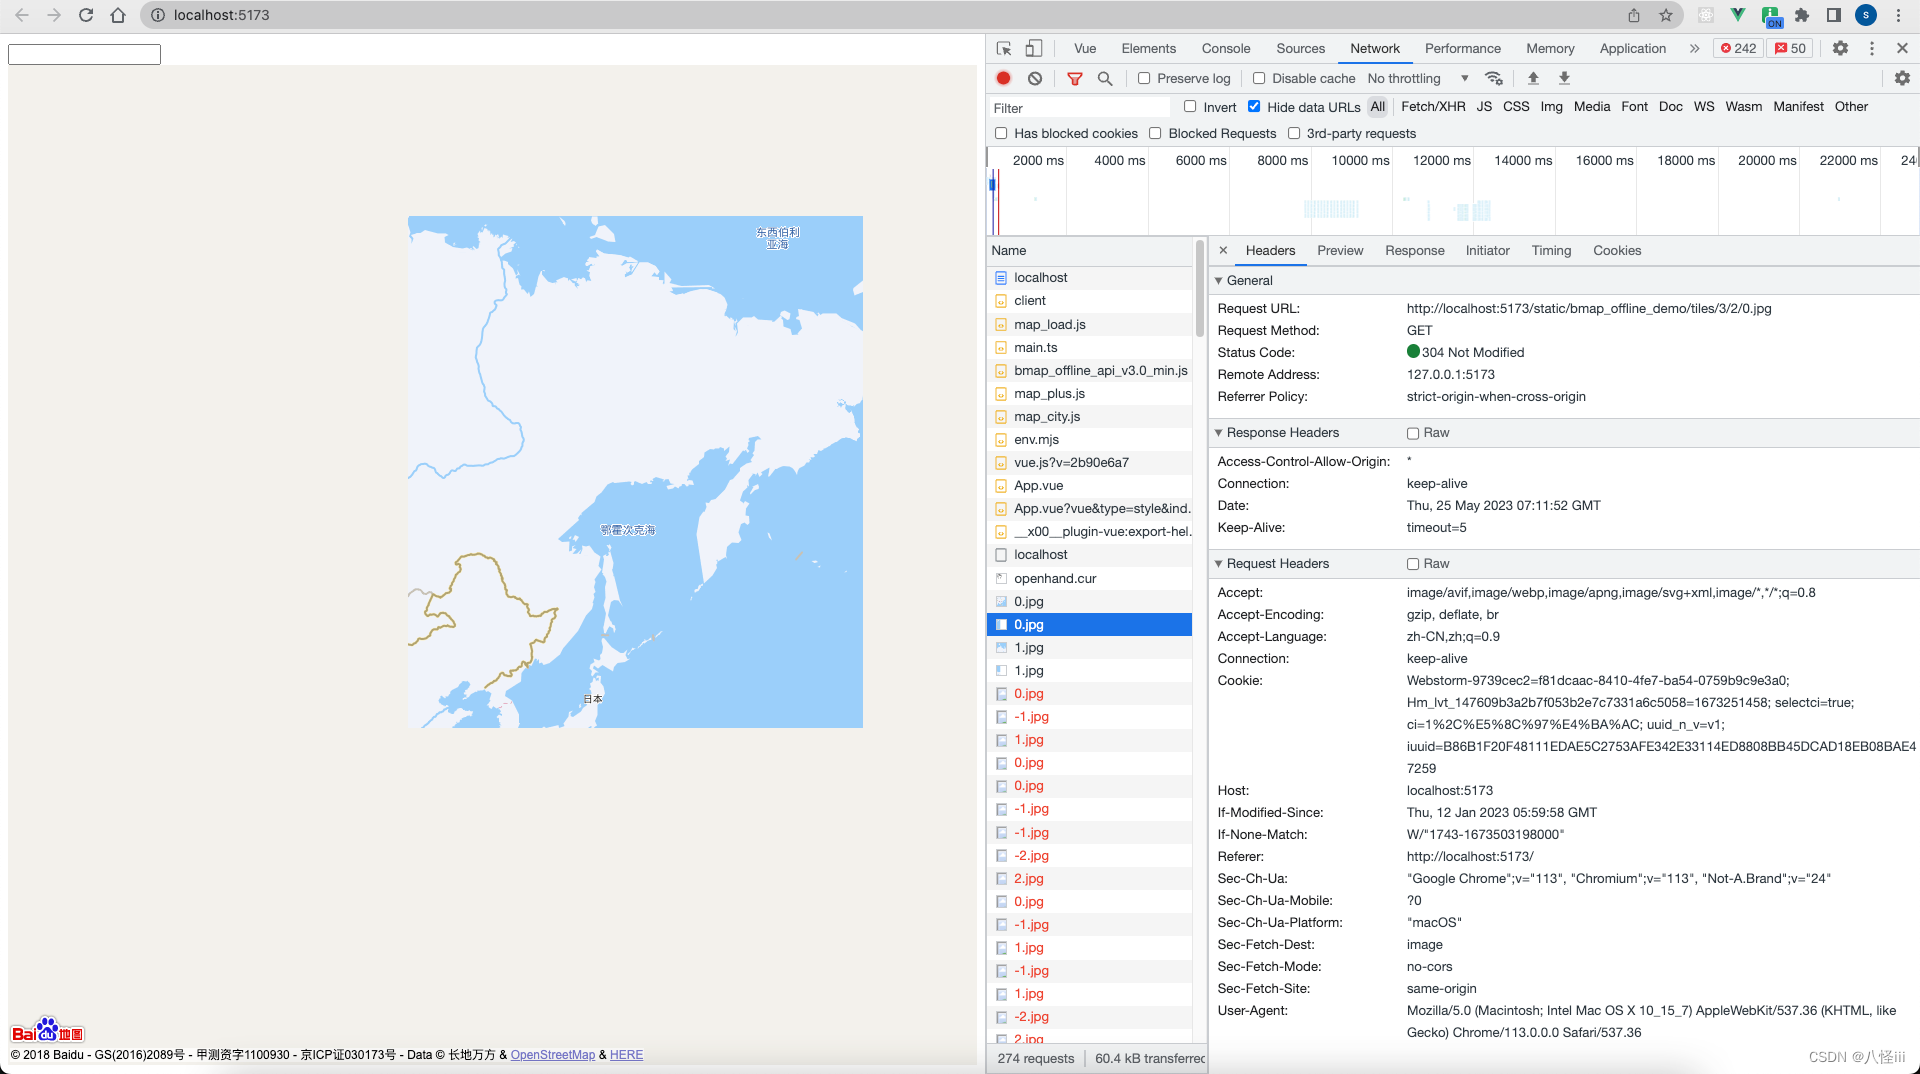
5.结果展示