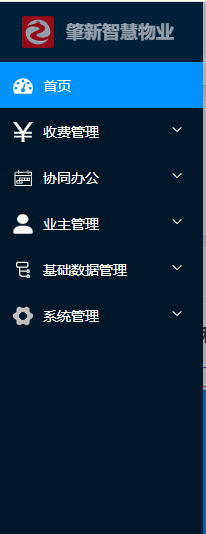
完成效果
1.登录----根据用户登录获取当前用户的菜单2.开始发送ajax 获取菜单3.菜单解析为路由相关配置4.添加到路由配置当中5.动态路由实现完成
第一步:配置静态路由
//main.ts
import { createApp } from "vue";
import "./style.css";
import App from "./App.vue";
import "element-plus/theme-chalk/index.css";
//导入
import router from "./router/index";
//将路由关联到vue3 项目
createApp(App).use(router).mount("#app");
路由模块文件
index.ts
import { createRouter, createWebHistory } from "vue-router";
import routes from "./routes";
const router = createRouter({
history: createWebHistory(),
routes,
scrollBehavior(to, from, savePosiation) {
if (savePosiation) {
return savePosiation;
}
return { left: 0, top: 0 };
},
});
export default router;
//静态路由配置文件
//路由配置
//引入组件
import Index from "@/views/Index.vue";
import Login from "@/views/Login.vue";
import NotFound from "@/views/Not-found.vue";
export default [
{
path: "/",
component: Index,
name: "admin",
},
{
path: "/login",
component: Login,
},
{
path: "/not-found",
component: NotFound,
},
{
path: "/:pathMatch(.*)*", //vue2 * vue3 改为正则
redirect: "/not-found",
},
];第二步实现登录和安全守卫
//守卫
let whiteList = ["/login", "/not-found"];
router.beforeEach((to, from) => {
//读取token
let token = localStorage.getItem("_token");

//未登录
if (!token) {
if (whiteList.indexOf(to.path) == -1) {
return { path: "/login" };
}
} else {
if (to.path == "/login") {
return { path: "/" };
}
}
});
第三步:发送请求获取用户动态菜单
1.获取用户菜单接口
//用户模块

import { get } from "../utils/request";

//获取用户菜单
export const getUserMenu = () => {
return get("/getRouters");
};
2.在守卫中发送请求获取menu
//守卫
let whiteList = ["/login", "/not-found"];
//定义菜单
let Menu: any = null;
router.beforeEach(async (to, from) => {
//读取token
let token = localStorage.getItem("_token");
//未登录
if (!token) {
if (whiteList.indexOf(to.path) == -1) {
return { path: "/login" };
}
} else {
if (to.path == "/login") {
return { path: "/" };
}
//能检测到登录完成
if (!Menu) {
//发送请求
let res = await getUserMenu();
console.log(res.data.data);
}
}
});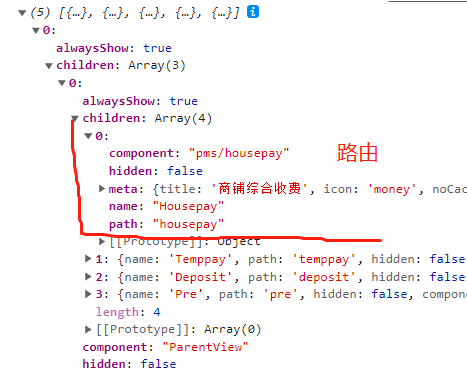
3.封装一个递归方法解析菜单
//解析菜单
function CompilerMenu(arr: Array<any>) {
if (!arr.length) {
return;
}
arr.forEach((item) => {
//定义对象
let rts = {
name: item.name,
path: item.path,
meta: item.meta,
component: item.component,
};
//如果存在子集进行递归解析
if (item.children && item.children.length) {
CompilerMenu(item.children);
}
console.log(rts);
});
4.针对解析的数据 进行组件懒加载
vite工具
import.meta.glob()
//使用vite懒加载
let Module = import.meta.glob("@/views/**/*.vue");
console.log("====================================");
console.log(Module);
console.log("====================================");
5.将item.component 解析为组件动态
//如果没有子集 证明为路由层
if (!item.children) {
//实现组件懒加载
let paths = loadComponent(item.component);
console.log(paths);
}

//懒加载组件
function loadComponent(url: string) {
let path = Module[`/src/views/${url}.vue`];
return path;
}
6.调用addRouter实现动态路由添加
//如果没有子集 证明为路由层
if (!item.children) {
//实现组件懒加载
let paths = loadComponent(item.component);
rts.component = paths;
console.log(rts);
//添加动态路由
router.addRoute("admin", rts);
}
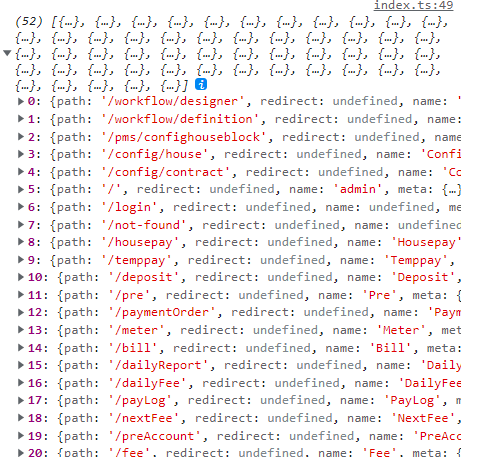
});7.检测动态路由添加//检测动态路由console.log(router.getRoutes(), router.hasRoute("Housepay"));
第四步测试动态路由
配置二级动态
<script setup lang="ts"></script>
<template>
admin
<router-link to="/housepay">商铺综合收费</router-link>
<router-link to="/temppay">临时收费</router-link>
<!-- 二级出口 -->
<RouterView></RouterView>
</template>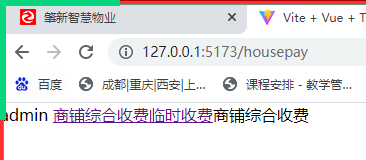
刷新导致动态路由匹配不到 直接 404
刷新 使用动态路径匹配的时候在路由中没有对应的路由 直接匹配到*路由 重定向到404
守卫添加以下代码
//手动添加404相关处理
router.addRoute({
path: "/not-found",
component: NotFound,
});
router.addRoute({
path: "/:pathMatch(.*)*", //vue2 * vue3 改为正则
redirect: "/not-found",
});
console.log(router.getRoutes());
//处理
return { path: to.path };
静态配置中404 *路由删除 采用手动配置。
第五步设置菜单数据缓存
//设置菜单数据缓存
localStorage.setItem("_menu", JSON.stringify(Menu));

组件中进行递归
<script setup lang="ts">
interface propType {
children: Array<any>;
}
defineProps<propType>();
</script>
<template>
<template v-for="(item, index) in children">
<template v-if="!item.children">
<el-menu-item index="1-3">{

   { item.meta.title }}</el-menu-item>
</template>
<template v-else>
<!-- 当前级是否存在子集 -->
<el-sub-menu index="1-4">
<template #title>{

   { item.meta.title }}</template>
//组件递归
<MenuItem :children="item.children"></MenuItem>
</el-sub-menu>
</template>
</template>
</template>
最后实现最终效果
