(作者:陈玓玏)
Cube Studio目前包含了传统机器学习模板,400+AI模型,欢迎私信了解哇!

在使用cube studio进行模型训练或推理的过程中,我们有时会发现没有符合自己要求的模板,此时我们就需要自己创建模板,并构建pipeline,以便今后在相似的建模或监控场景中直接使用,方便复用和调度。
以下就以构建random forest建模的pipeline为例,记录一下如何用cube studio构建pipeline。
1. 代码构建
写好random forest建模的代码,和平时的建模不一样的地方在于,这里的代码需要带输入参数,这个是为了和我们的模板串起来,因为模板需要输入参数才能更好地运行起来。代码这里不展示,这些大家都会的,只是展示一下和平时建模不太一样的输入参数部分。
if __name__ == "__main__":
    arg_parser = argparse.ArgumentParser("train lr launcher")
    arg_parser.add_argument('--train_dataset', type=str, help="训练数据集来源", default='')
    arg_parser.add_argument('--val_dataset', type=str, help="评估数据集名称", default='')
    arg_parser.add_argument('--feature_columns', type=str, help="特征列", default='')
    arg_parser.add_argument('--label_columns', type=str, help="标签列", default='')
    arg_parser.add_argument('--save_model_dir', type=str, help="模型地址", default='')
    arg_parser.add_argument('--save_val_dir', type=str, help="模型训练集和测试集评估结果地址", default='')
    arg_parser.add_argument('--inference_dataset', type=str, help="推理数据集名称", default='')
    arg_parser.add_argument('--result_path', type=str, help="推理结果保存地址", default='')
训练过程该如何就如何,关键是这些输入参数,需要在设计模板之初就考虑清楚,这个模板需要传入哪些参数,需要输出哪些结果。
在notebook中运行通过,就可以进行下一步了。
2. 镜像构建
1. git clone cube studio项目;
2. 在cube-studio/job-template/job/文件夹下,新建一个randomforest文件夹,把py文件放到这个文件夹下,命名为launcher.py;
3. 在同上的文件夹下,再构建另外三个文件,build.sh,Dockerfile,README.md。

其中build.sh是构建并推送镜像
#!/bin/bash

set -ex

docker build -t ccr.ccs.tencentyun.com/cube-studio/lightgbm:20230428 -f job/lightgbm/Dockerfile .
docker push ccr.ccs.tencentyun.com/cube-studio/lightgbm:20230428
Dockerfile也是因人而异的,主要改的是你需要装哪些包,使用哪个文件夹下的launcher.py
FROM python:3.9

ENV TZ Asia/Shanghai
ENV DEBIAN_FRONTEND noninteractive

RUN /usr/local/bin/python -m pip install --upgrade pip

RUN pip install pysnooper psutil requests numpy scikit-learn pandas pyinstaller tinyaes joblib argparse
#-i https://pypi.tuna.tsinghua.edu.cn/simple/
#http://pypi.douban.com/simple/ --trusted-host pypi.douban.com


COPY job/random_forest/launcher.py /app/

WORKDIR /app
ENV PYTHONPATH=/app:$PYTHONPATH

RUN pyinstaller --onefile --key=kaiqiao launcher.py && cp dist/launcher ./ && rm -rf launcher.py launcher.spec build dist

ENTRYPOINT ["./launcher"]
README.md是用来写输入参数的,用于设置模板的前端显示
# randomforest 模板
镜像:ccr.ccs.tencentyun.com/cube-studio/randomforest:20230427

参数
```bash
{
    "训练相关参数": {
      "--train_dataset": {
        "type": "str",
        "item_type": "str",
        "label": "训练数据集",
        "require": 0,
        "choice": [],
        "range": "",
        "default": "",
        "placeholder": "",
        "describe": "训练数据集",
        "editable": 1,
        "condition": "",
        "sub_args": {}
      },
      "--save_val_dir": {
        "type": "str",
        "item_type": "str",
        "label": "训练集和测试集acc输出文件地址",
        "require": 0,
        "choice": [],
        "range": "",
        "default": "",
        "placeholder": "",
        "describe": "训练集和测试集acc输出文件地址,txt文件",
        "editable": 1,
        "condition": "",
        "sub_args": {}
      },
      "--label_columns": {
        "type": "str",
        "item_type": "str",
        "label": "标签列",
        "require": 0,
        "choice": [],
        "range": "",
        "default": "",
        "placeholder": "",
        "describe": "标签列,逗号分割",
        "editable": 1,
        "condition": "",
        "sub_args": {}
      },
      "--save_model_dir": {
        "type": "str",
        "item_type": "str",
        "label": "模型保存目录",
        "require": 1,
        "choice": [],
        "range": "",
        "default": "",
        "placeholder": "",
        "describe": "模型保存目录",
        "editable": 1,
        "condition": "",
        "sub_args": {}
      } ,
      "--feature_columns": {
        "type": "str",
        "item_type": "str",
        "label": "特征列,逗号分隔",
        "require": 0,
        "choice": [],
        "range": "",
        "default": "",
        "placeholder": "",
        "describe": "特征列,逗号分隔",
        "editable": 1,
        "condition": "",
        "sub_args": {}
      }
    },
    "推理相关参数": {
      "--result_path": {
        "type": "str",
        "item_type": "str",
        "label": "推理结果保存路径",
        "require": 0,
        "choice": [],
        "range": "",
        "default": "",
        "placeholder": "",
        "describe": "推理结果保存路径",
        "editable": 1,
        "condition": "",
        "sub_args": {}
      },
      "--inference_dataset": {
        "type": "str",
        "item_type": "str",
        "label": "推理数据集",
        "require": 0,
        "choice": [],
        "range": "",
        "default": "",
        "placeholder": "",
        "describe": "推理数据集",
        "editable": 1,
        "condition": "",
        "sub_args": {}
      },
      "--save_model_dir": {
        "type": "str",
        "item_type": "str",
        "label": "模型保存目录",
        "require": 1,
        "choice": [],
        "range": "",
        "default": "",
        "placeholder": "",
        "describe": "模型保存目录",
        "editable": 1,
        "condition": "",
        "sub_args": {}
      },
      "--label_columns": {
        "type": "str",
        "item_type": "str",
        "label": "标签列",
        "require": 0,
        "choice": [],
        "range": "",
        "default": "",
        "placeholder": "",
        "describe": "标签列,逗号分割",
        "editable": 1,
        "condition": "",
        "sub_args": {}
      },
      "--feature_columns": {
        "type": "str",
        "item_type": "str",
        "label": "特征列,逗号分隔",
        "require": 0,
        "choice": [],
        "range": "",
        "default": "",
        "placeholder": "",
        "describe": "特征列,逗号分隔",
        "editable": 1,
        "condition": "",
        "sub_args": {}
      }
    },
    "验证相关参数": {
      "--val_dataset": {
        "type": "str",
        "item_type": "str",
        "label": "验证数据集",
        "require": 0,
        "choice": [],
        "range": "",
        "default": "",
        "placeholder": "",
        "describe": "验证数据集",
        "editable": 1,
        "condition": "",
        "sub_args": {}
      },
      "--save_model_dir": {
        "type": "str",
        "item_type": "str",
        "label": "模型保存目录",
        "require": 1,
        "choice": [],
        "range": "",
        "default": "",
        "placeholder": "",
        "describe": "模型保存目录",
        "editable": 1,
        "condition": "",
        "sub_args": {}
      },
      "--label_columns": {
        "type": "str",
        "item_type": "str",
        "label": "标签列",
        "require": 0,
        "choice": [],
        "range": "",
        "default": "",
        "placeholder": "",
        "describe": "标签列,逗号分割",
        "editable": 1,
        "condition": "",
        "sub_args": {}
      },
      "--feature_columns": {
        "type": "str",
        "item_type": "str",
        "label": "特征列,逗号分隔",
        "require": 0,
        "choice": [],
        "range": "",
        "default": "",
        "placeholder": "",
        "describe": "特征列,逗号分隔",
        "editable": 1,
        "condition": "",
        "sub_args": {}
      }
    }
}
```
4. 安装Docker,并执行以下操作
cd /data/k8s/kubeflow/pipeline/workspace/admin/cube-studio/job-template
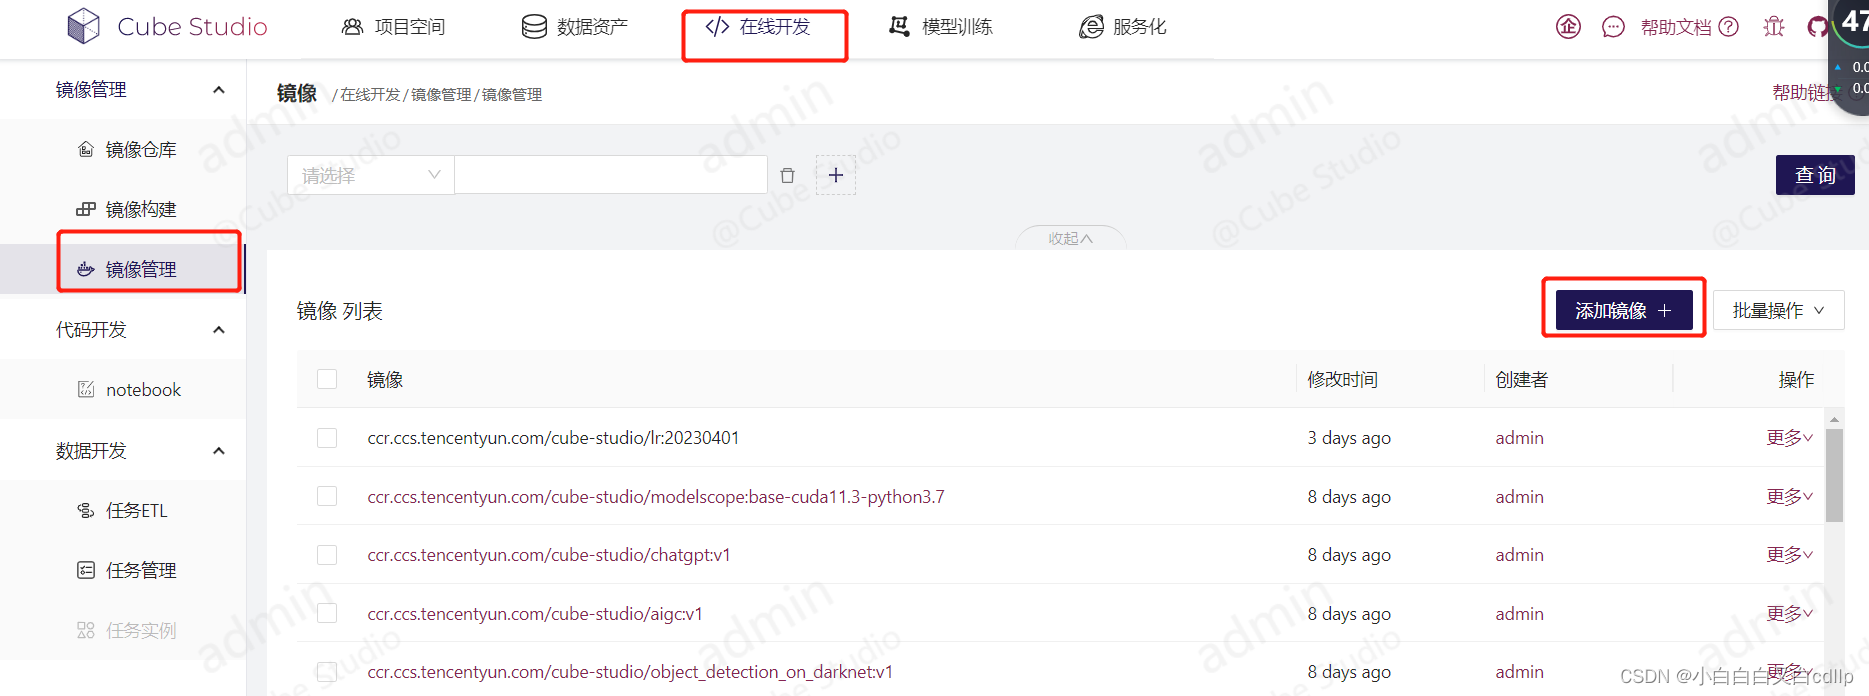
sh job/random_forest/build.sh3. 镜像管理
把刚才成功生成的镜像,添加到镜像管理中,镜像名就是build.sh中那个镜像名。
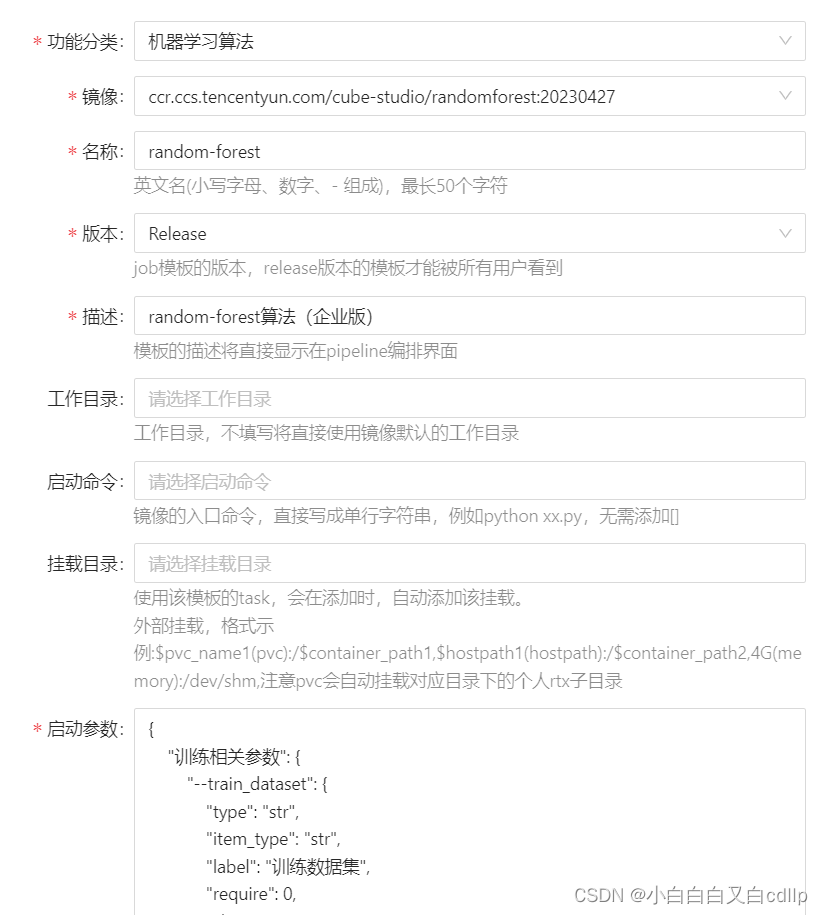
4. 模板添加
在模型训练中添加任务模板
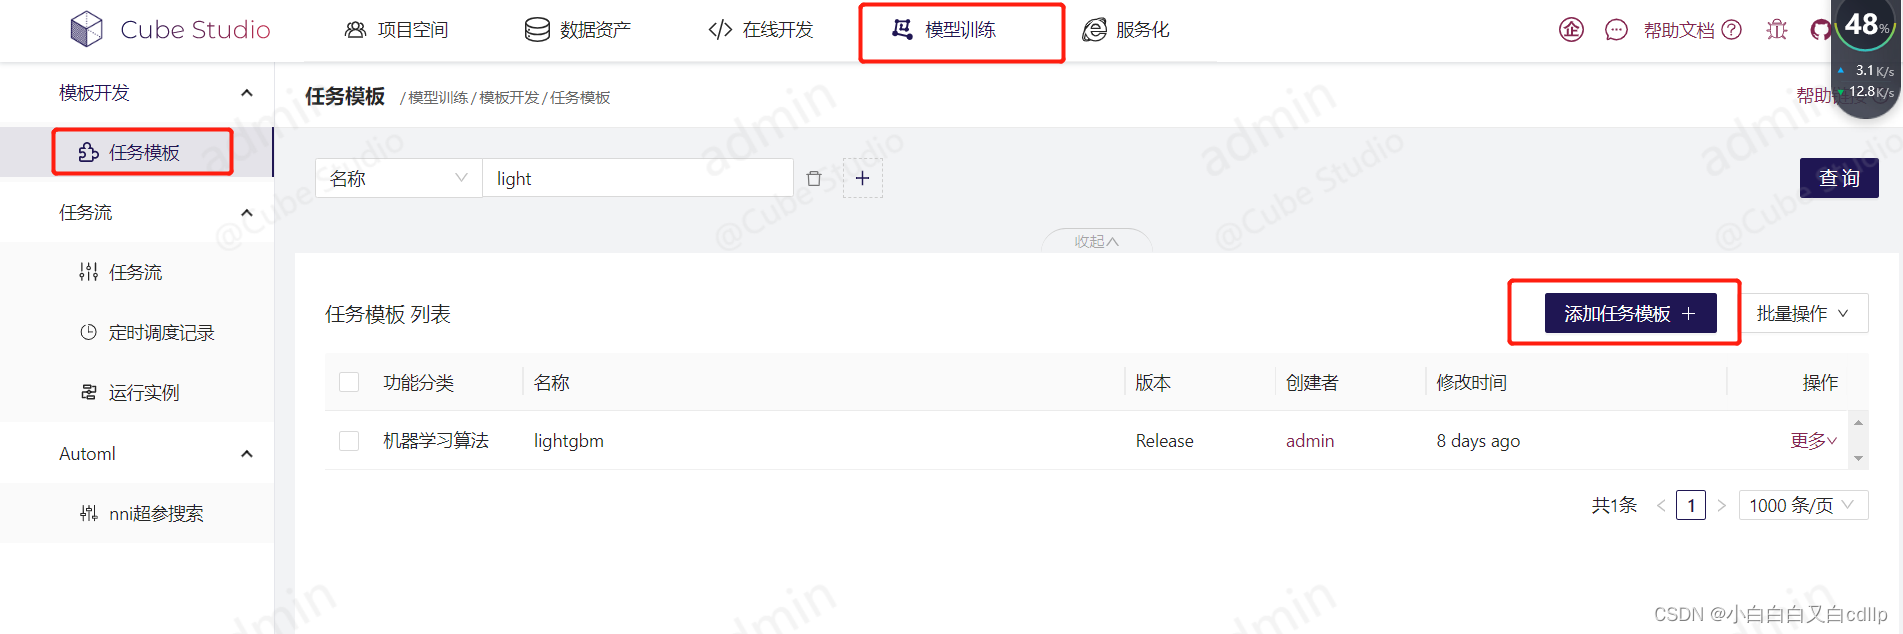
主要是选择镜像,以及设置模板的启动参数,也就是README.md中设置的那一堆参数
5. 建立pipeline
进入页面首页,选择新建流水线
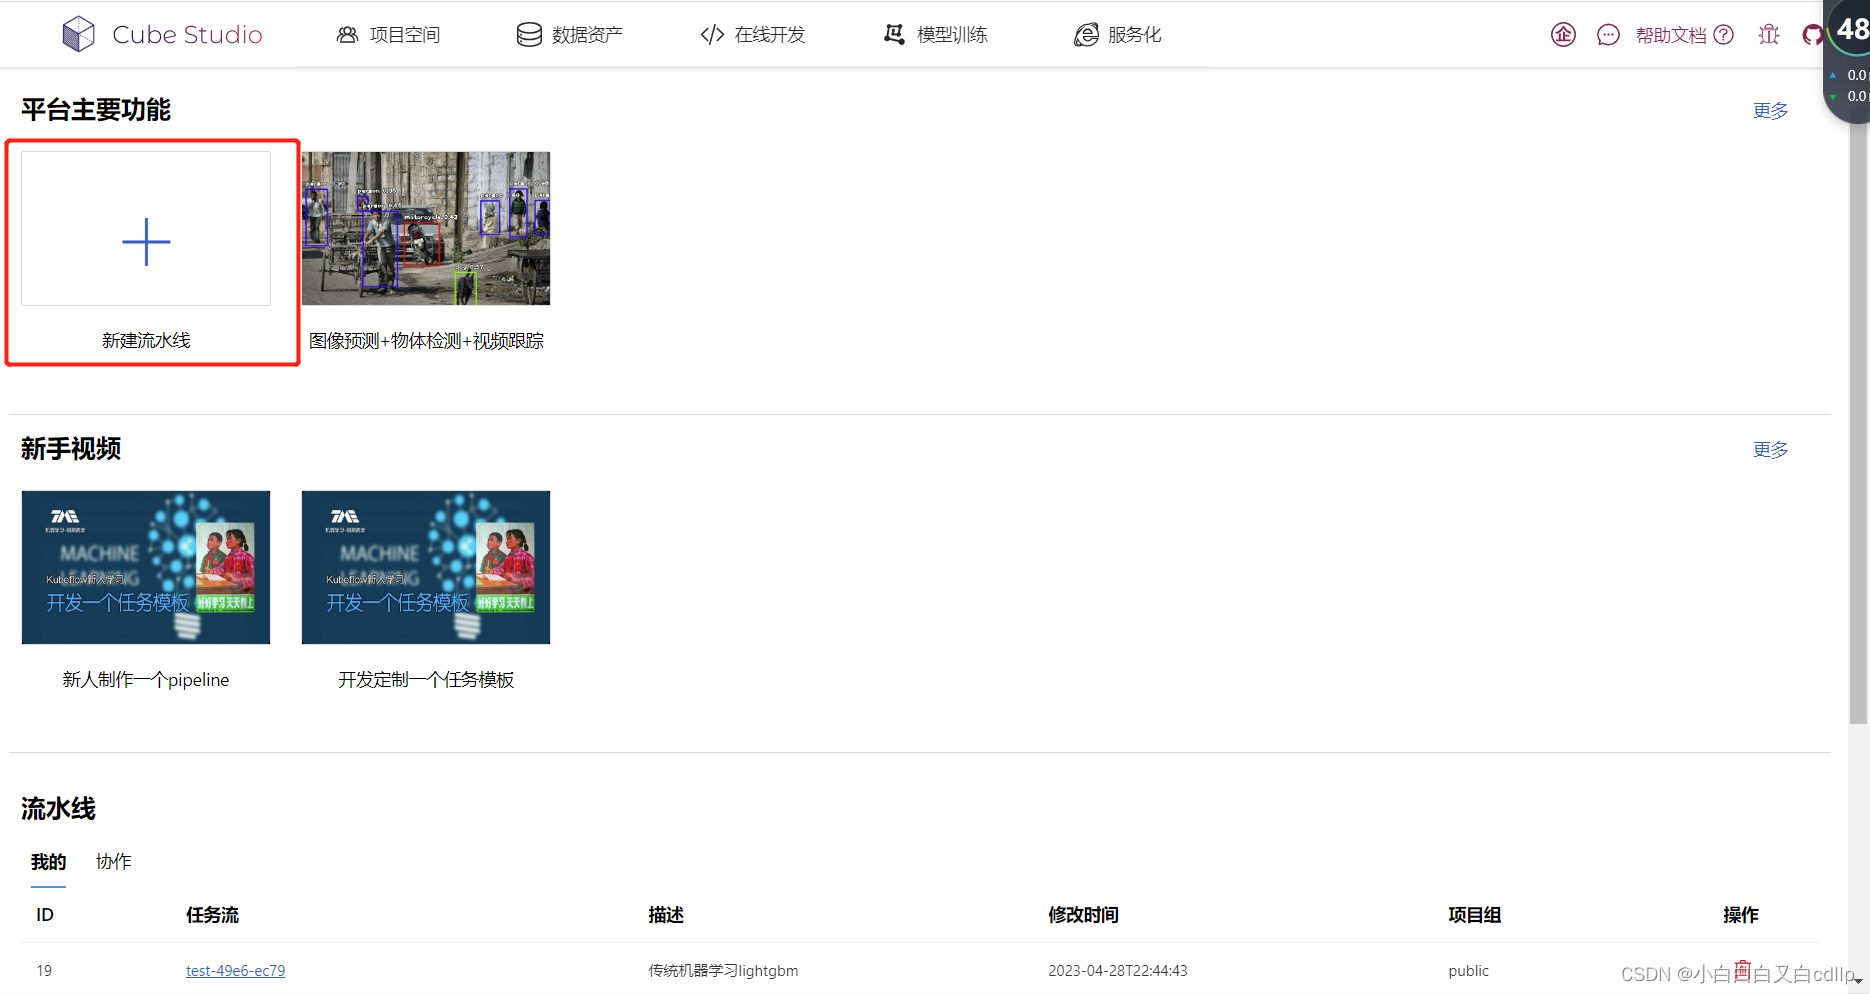
对左侧的模板,按照需求进行拖拉拽,并单击任务节点,设置运行参数,就可以运行啦

运行起来是这个样子滴

如果出了bug,单击节点还可以查看日志,排查问题
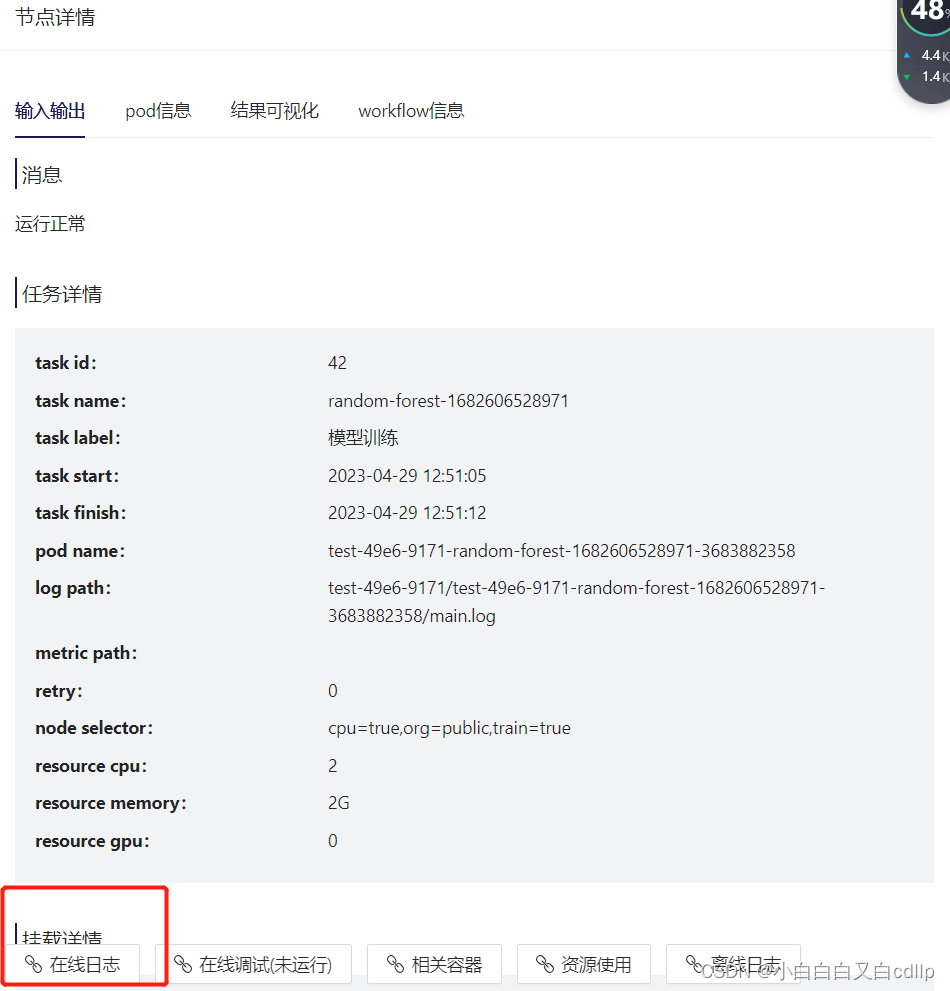
到此就结束啦!