目录
Vue简介:
Vue是一套用于构建用户界面的渐进式的js框架,发布于2014年2月。与其它大型框架不同的是,Vue被设计为可以自底向上逐层应用。Vue的核心库只关注视图层,不仅易于上手,还便于与第三方库( 如: vue-router,vue-resource,vuex)或既有项目整合。
MVVM模式的实现者--双向数据绑定
- Model:模型层,在这里表示JavaScript对象
- View:视图层,在这里表示DOM(HTML操作的元素)
- ViewModel:连接视图和数据的中间件,Vue.js就是MVVM中的ViewModel层的实现者

在MVVM架构中,是不允许数据和视图直接通信的,只能通过ViewModel来通信,而ViewModel就是定义了Observe观察者
- ViewModel能够观察到数据的变化,并对视图下对应的内容进行更新
- ViewModel能够监听到视图的变化,并且能够通知数据的变化
至此,我们就明白了,Vue.js就是一个MVVM的实现者,他的核心就是实现DOM监听与数据绑定
其他MVVM实现者
AngularJS
AngularJS诞生于2o09年,由Misko Hevery等人创建,后为Google所收购。是一款优秀的前端JS框架,已经被用于Google的多款产品当中。AngularJS有着诸多特性,最为核心的是:MWM、模块化、自动化双向数据绑定、语义化标签、依赖注入等等
ReactJS
React引入了虚拟DOM(Virtual DOM)的机制:在浏览器端用Javascript实现了一套DOMAPI。基于React进行开发时所有的DOM构造都是通过虚拟DOM进行,每当数据变化时,React都会重新构建整个DOM树,然后React将当前整个DOM树和上一次的DOM树进行对比,得到DOM结构的区别,然后仅仅将需要变化的部分进行实际的浏览器DOM更新。
微信小程序
微信小程序的视图层和数据层就是通过MWVM进行绑定的。
为什么要使用Vue.js
- 轻量级,体积小是一个重要指标。Vue.js压缩后有只有203 3 kb(Angular压缩后56 kb+,React压缩后44 kb+)
- 移动优先。更适合移动端,比如移动端的Touch事件
- 易上手,学习曲线平稳,文档齐全
- 吸取了Angular(模块化)和React(虚拟DOM)的长处,并拥有自己独特的功能,如:计算属性
- 开源,社区活跃度高
Vue.js的两大核心要素
数据驱动
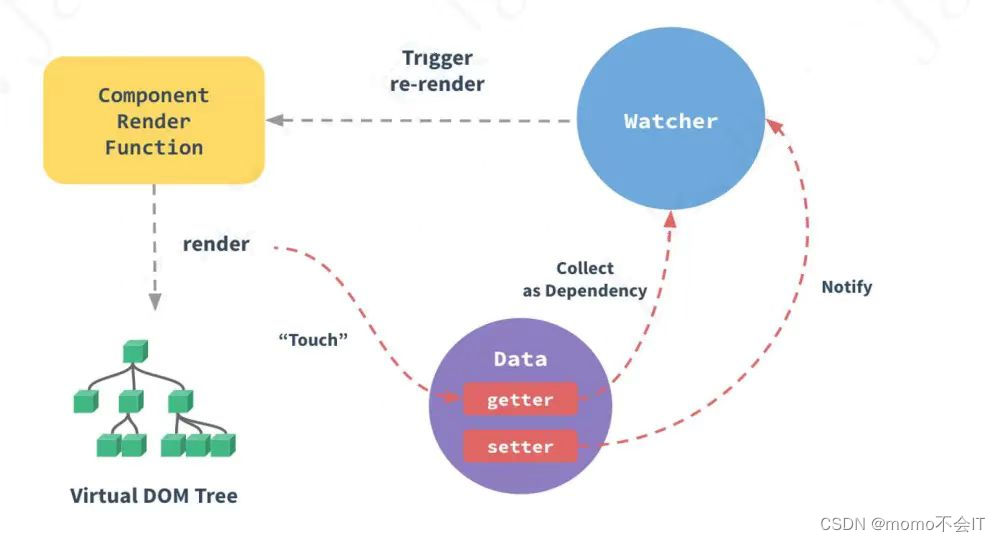
- 当你把一个普通的JavaScript对象传给Vue实例的data选项,Vue将遍历此对象所有的属性,并使用Object.defineProperty把这些属性全部转为getter/setter。Object.defineProperty是ES5中一个无法shim的特性,这也就是为什么Vue不支持IE8以及更低版本浏览器。
- 这些getter/setter对用户来说是不可见的,但是在内部它们让Vue追踪依赖,在属性被访问和修改时通知变化。这里需要注意的问题是浏览器控制台在打印数据对象时getter/setter的格式化并不同,所以你可能需要安装vue-devtools来获取更加友好的检查接口。
- 每个组件实例都有相应的watcher实例对象,它会在组件渲染的过程中把属性记录为依赖,之后当依赖项的setter被调用时,会通知watcher重新计算,从而致使它关联的组件得以更新。
组件化
- 页面上每个独立的可交互的区域视为一个组件
- 每个组件对应一个工程目录,组件所需的各种资源在这个目录下就近维护
- 页面不过是组件的容器,组件可以嵌套自由组合(复用)形成完整的页面
搭建Vue开发环境

在这里我们选择开发版本进行下载,开发版本里面包含了完整的警告和调试模式,千万不想使用生产版本进行学习,生产版本只是说你的项目已经做好了,想让Vue这个框架的体积更小时使用。
新建两个文件夹一个存放html,一个存放我们下载的Vue.
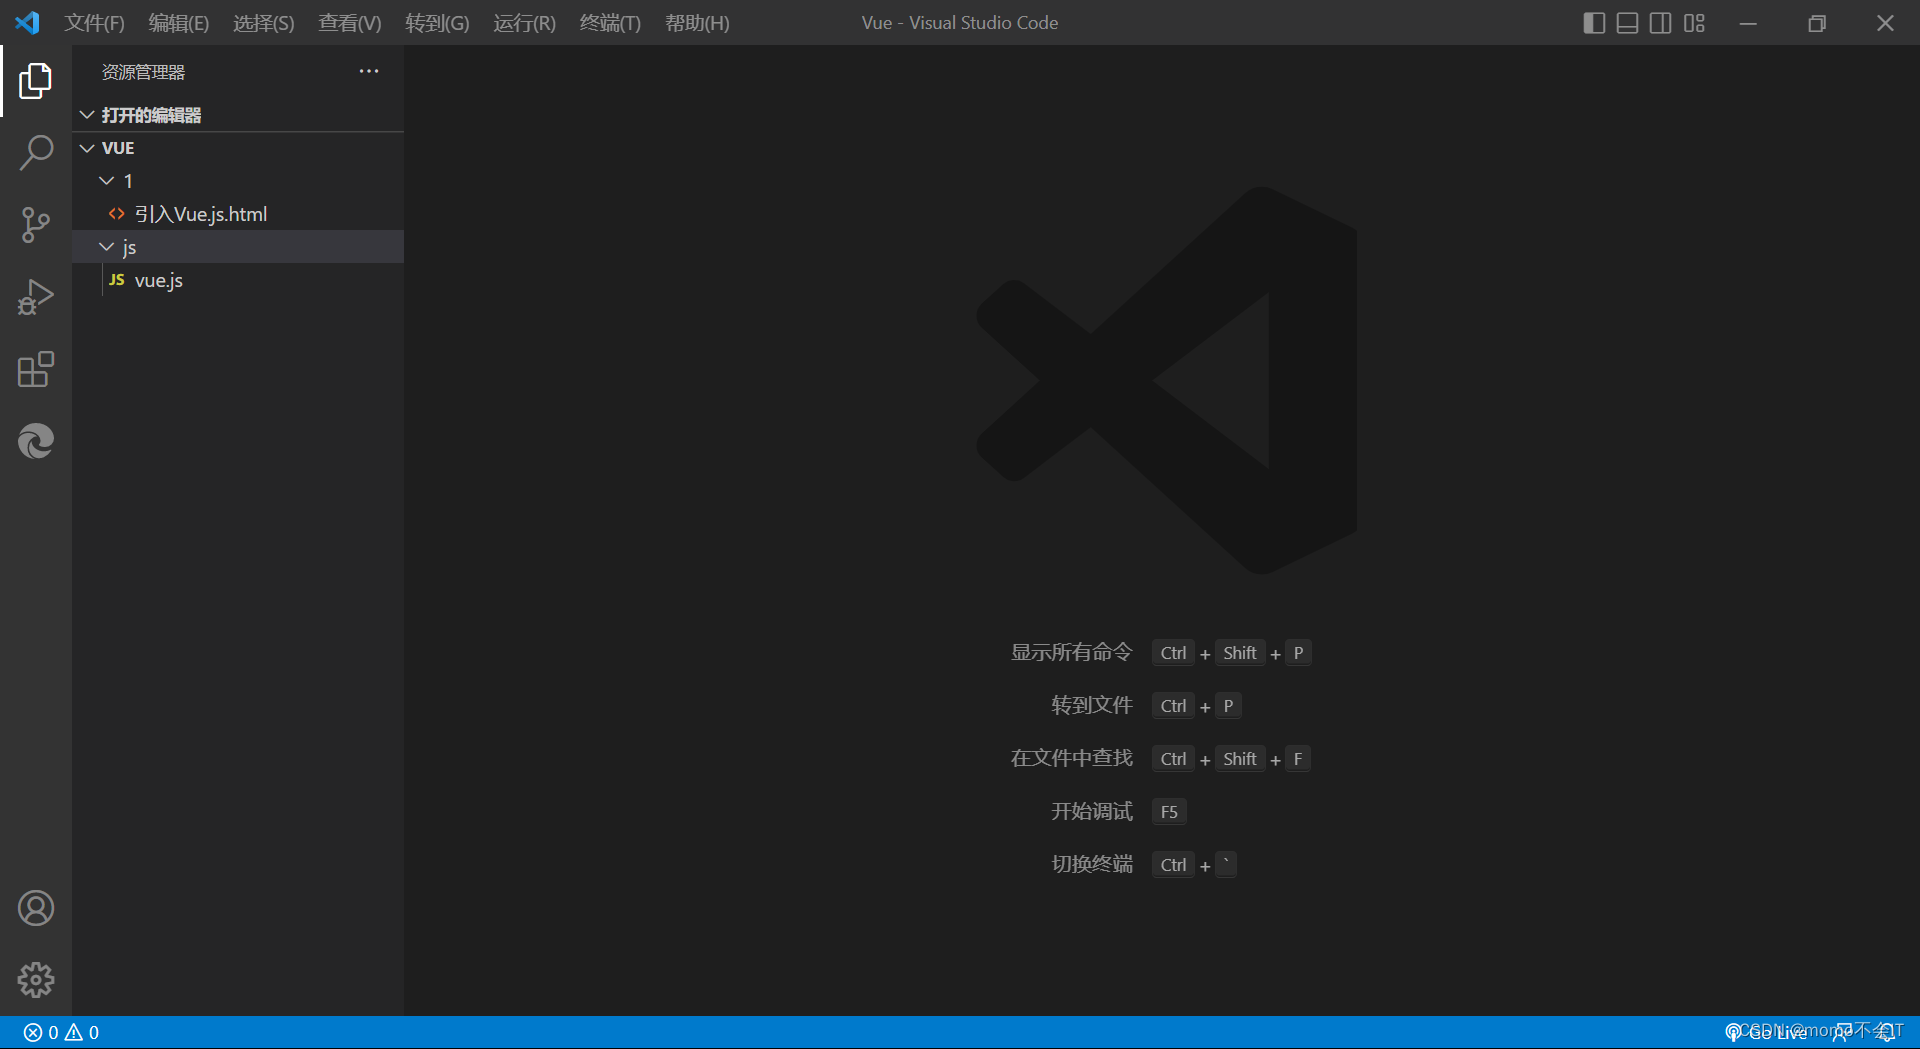
在html文件中引入Vue.js
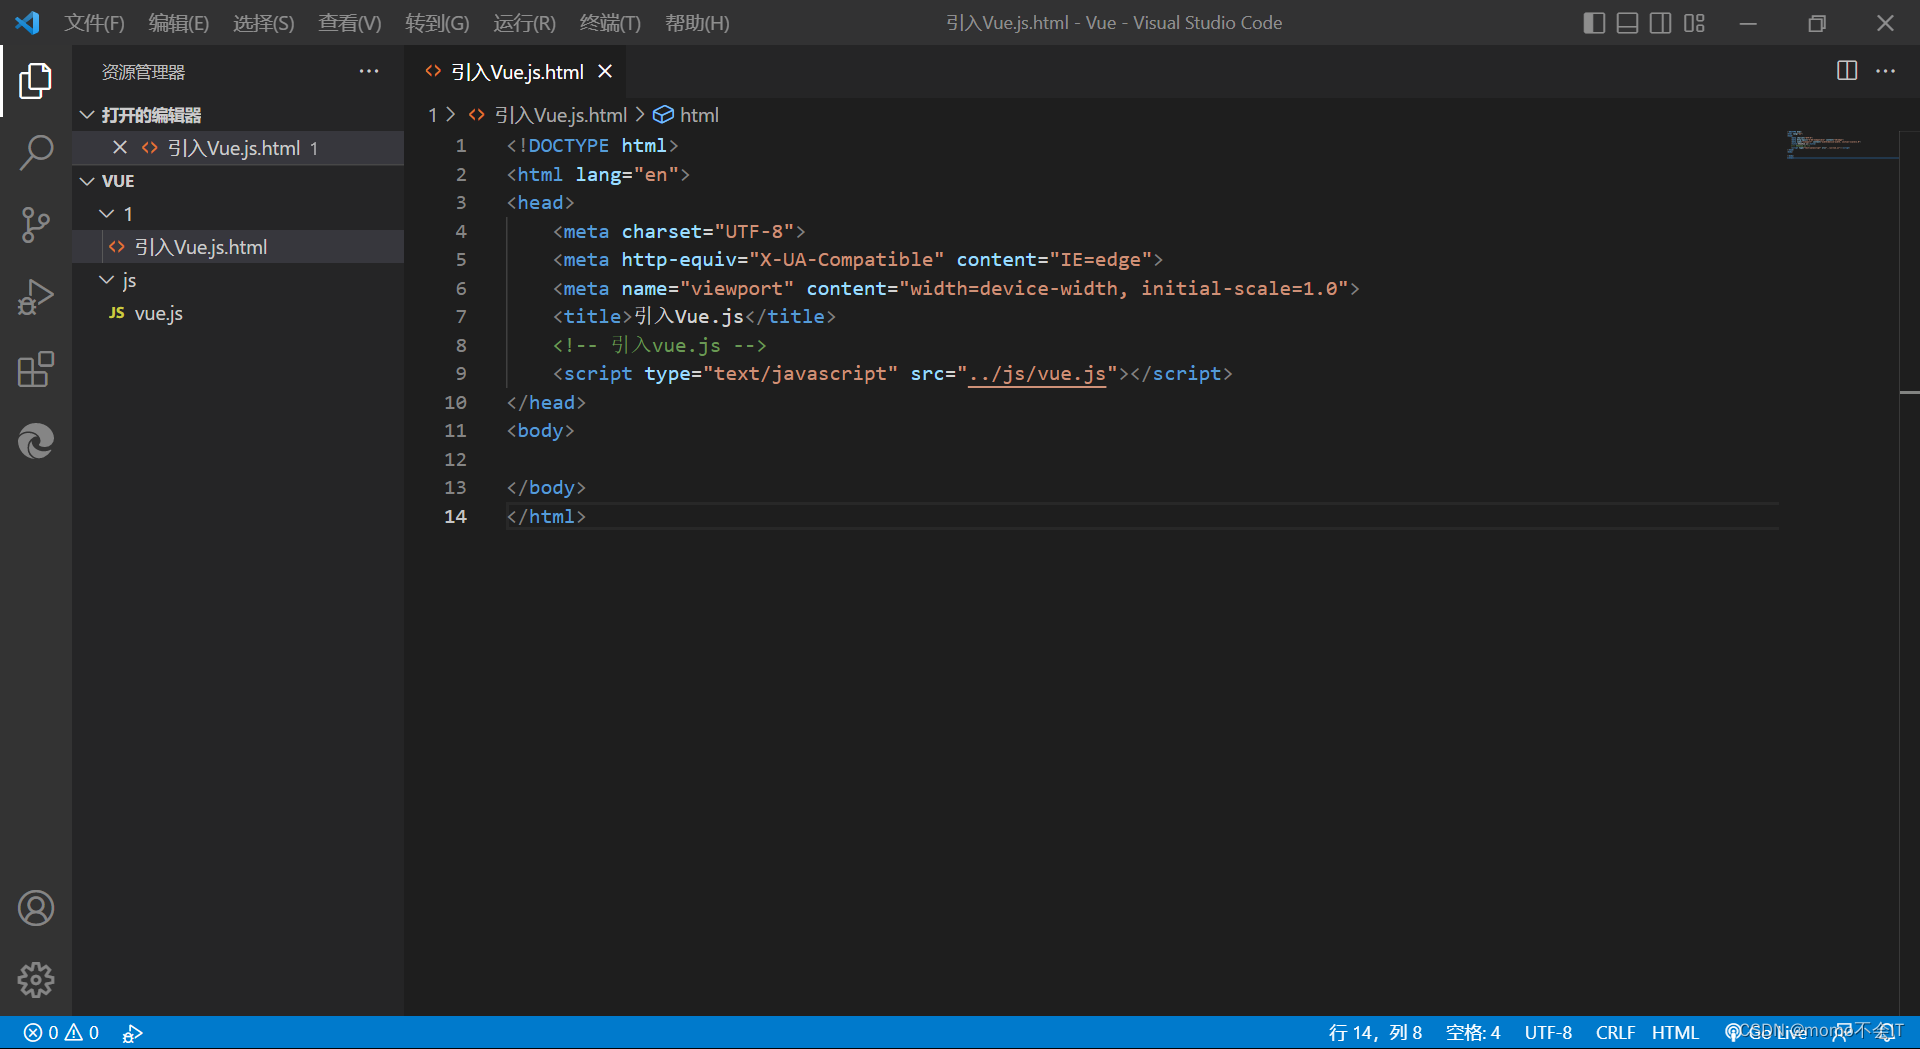
启动调试,在操控台中会出现两条提示
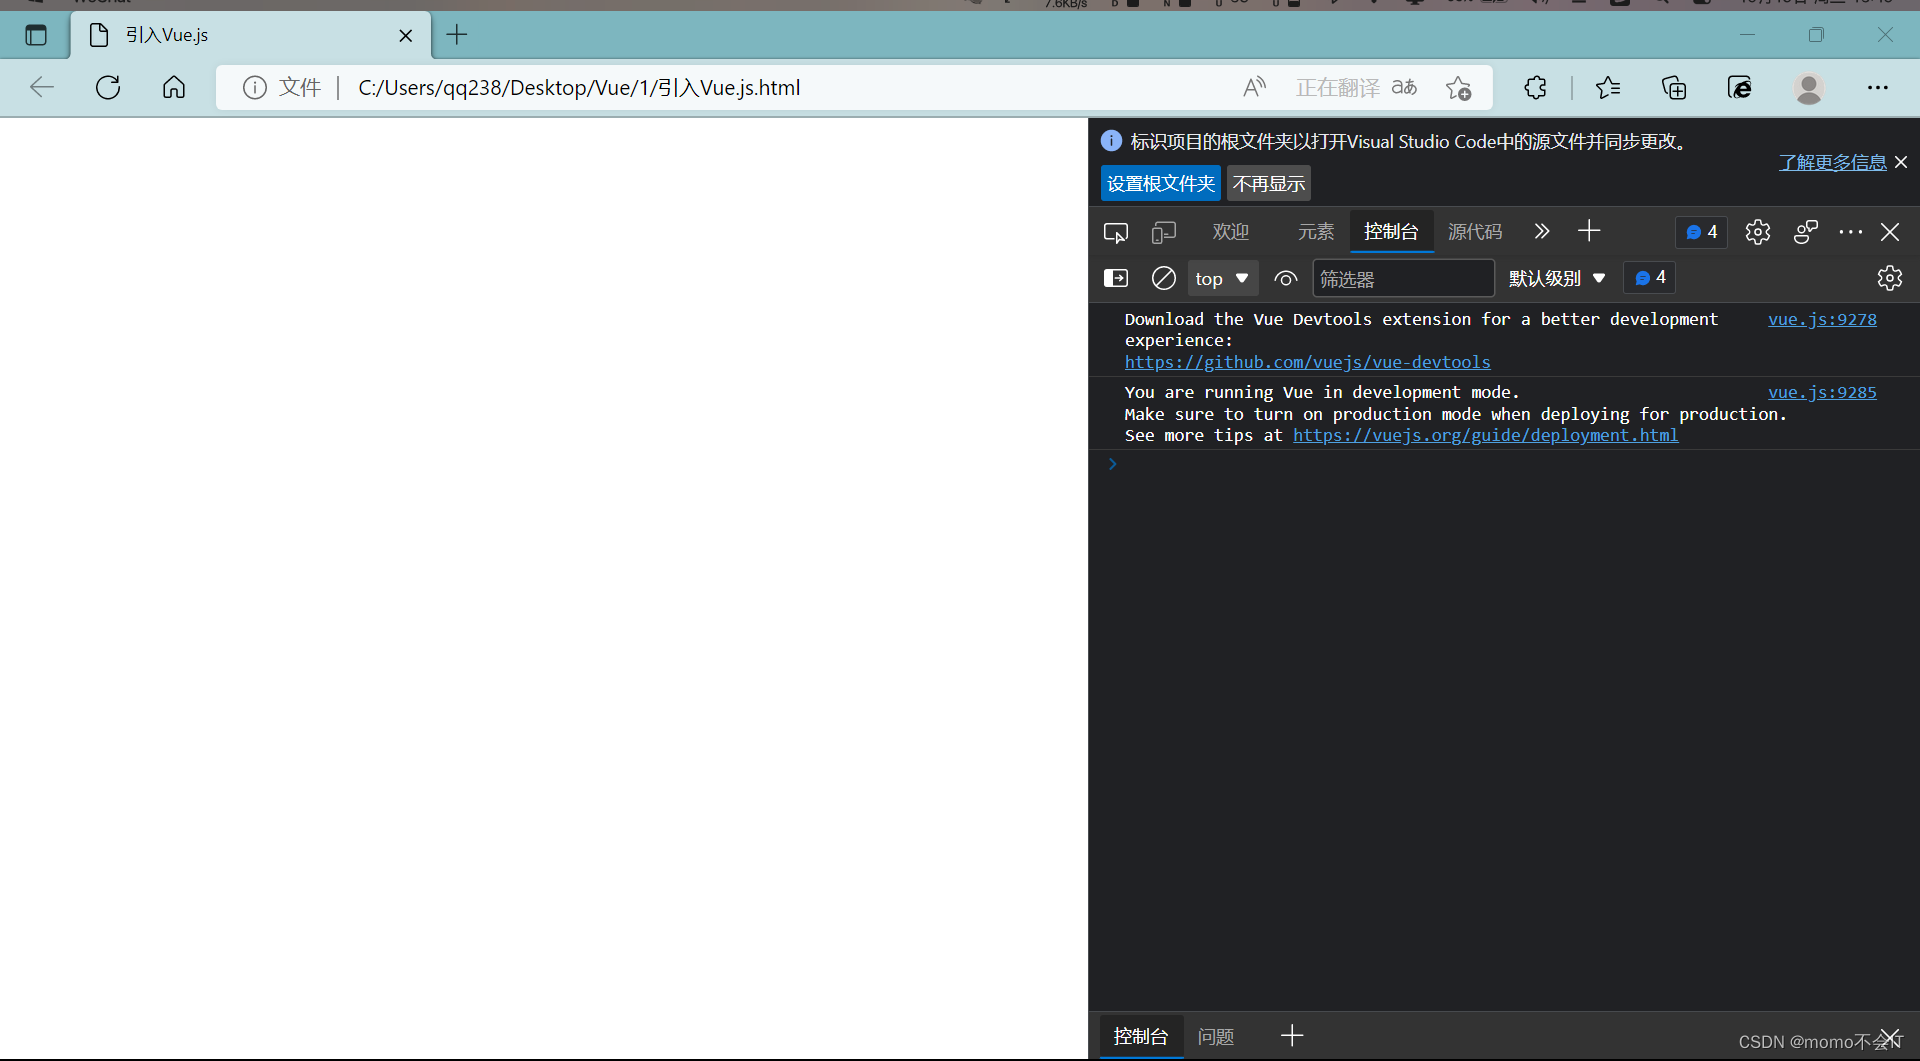
第一条提示是要你在浏览器中安装Vue开发者工具
第二条提示是生产工具的提示
解决方法:
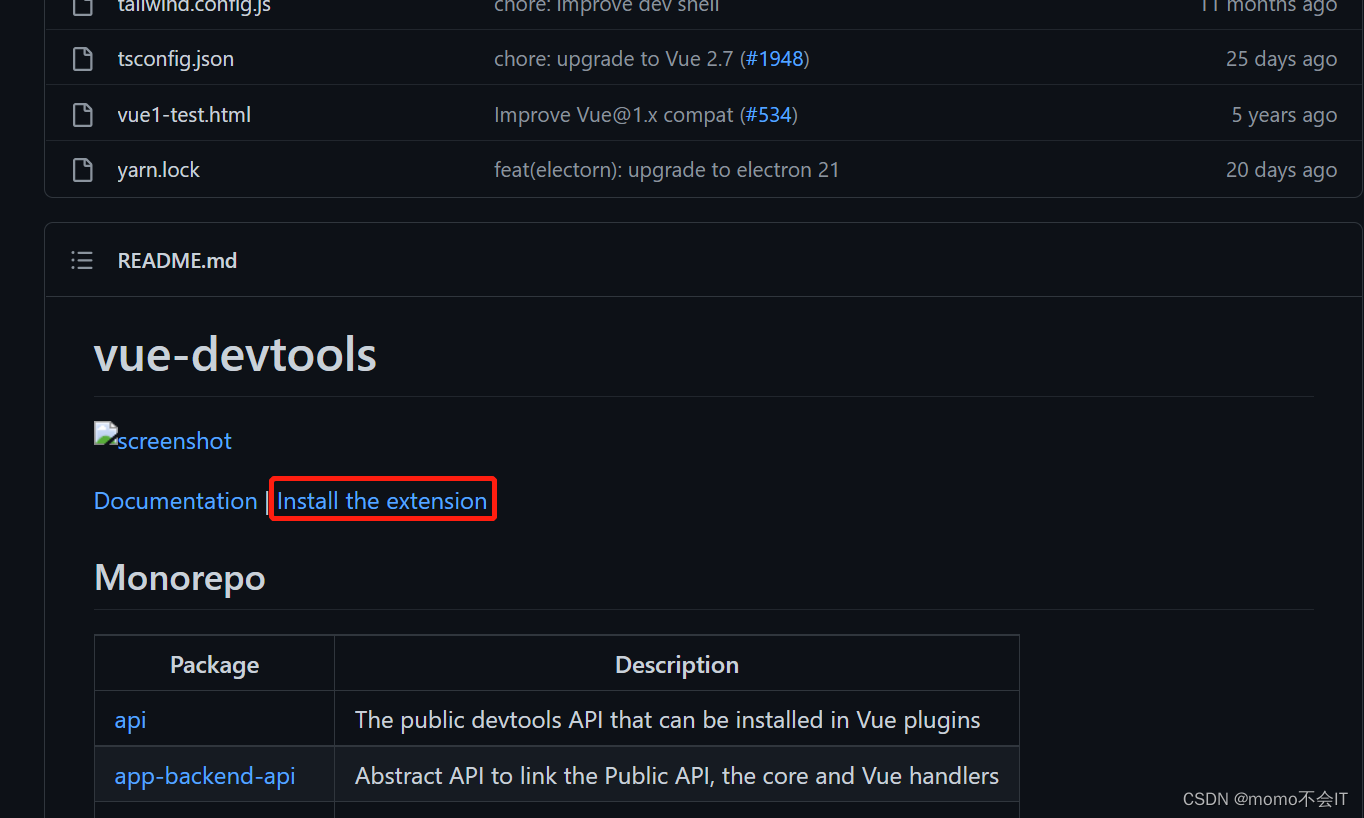
官方文档:Vue Devtools,点击Vue Devtools会转跳到GitHub页面

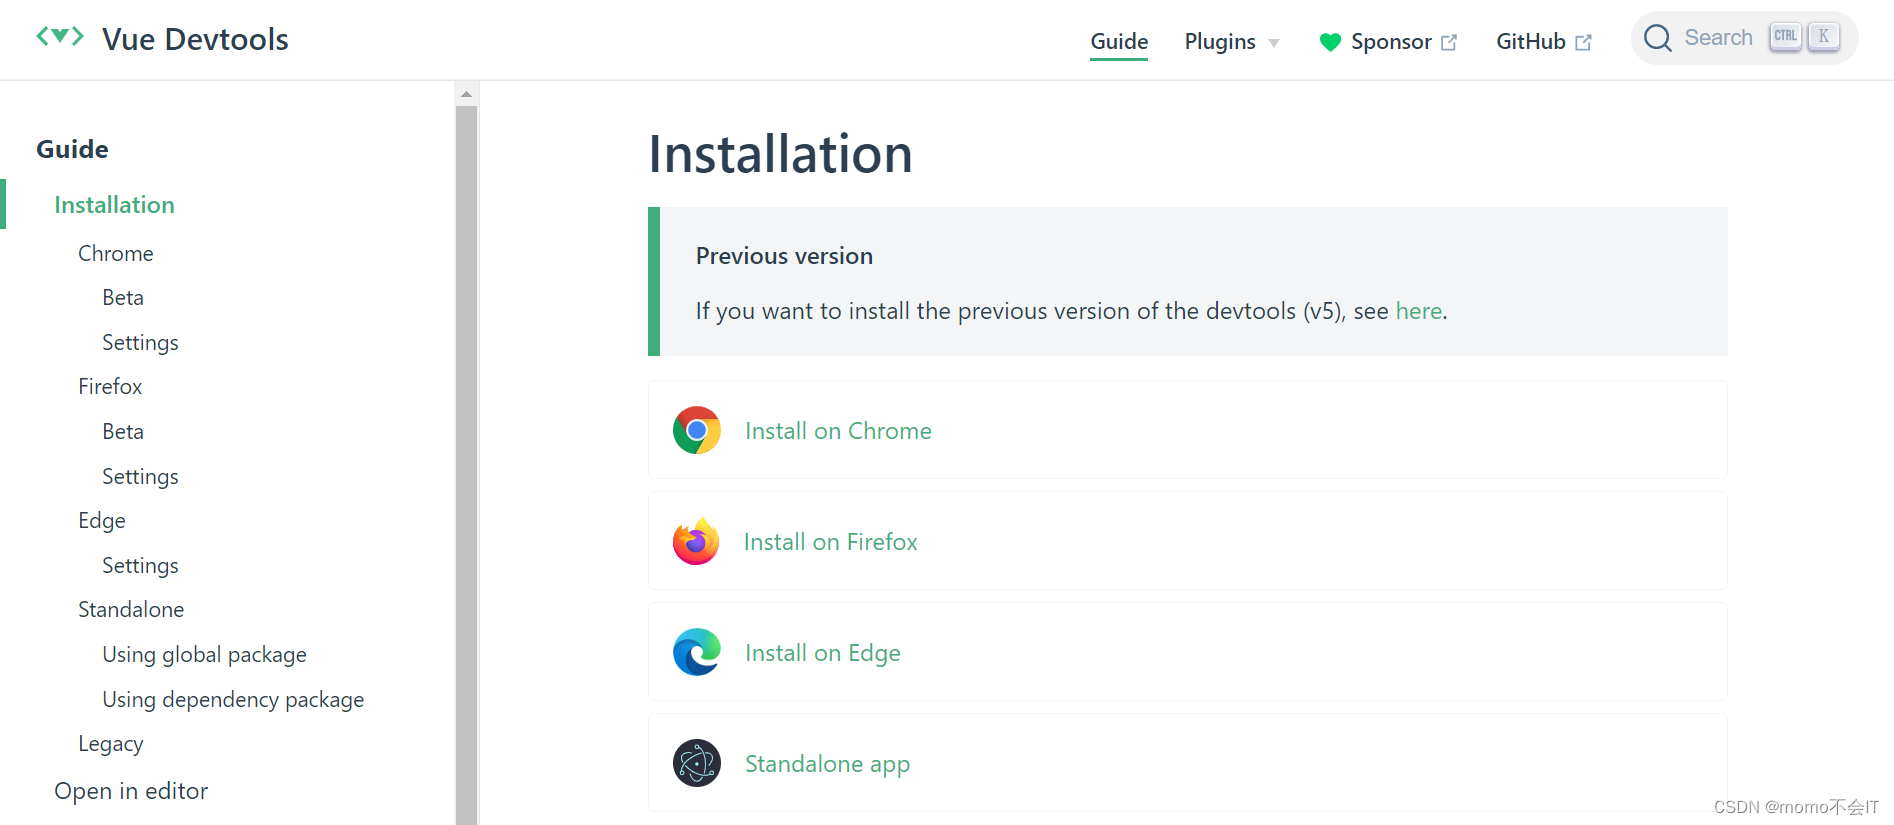
 选择相应的浏览器进行下载
若你的浏览器是谷歌,安装完后必须把以下的勾选了

IE浏览器

安装成功后重新运行

并且在控制台中会多出了一个Vue的控制台

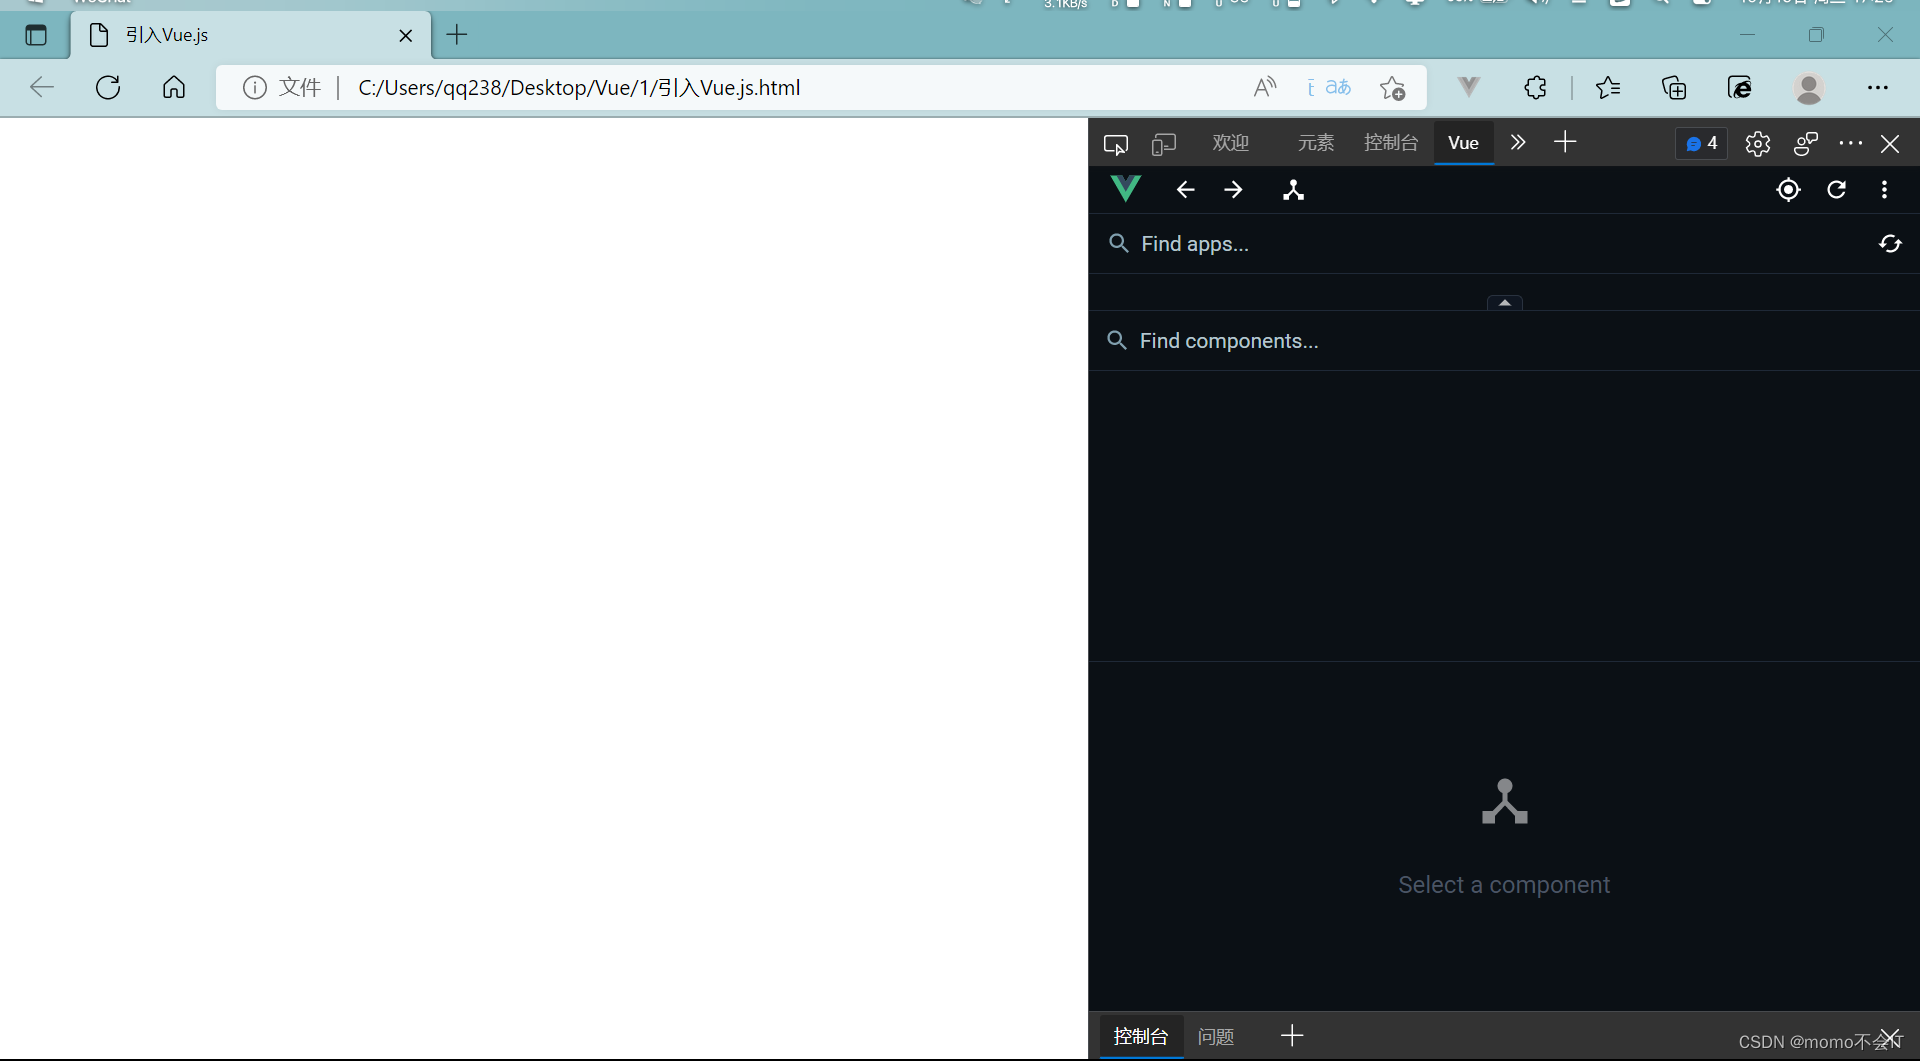
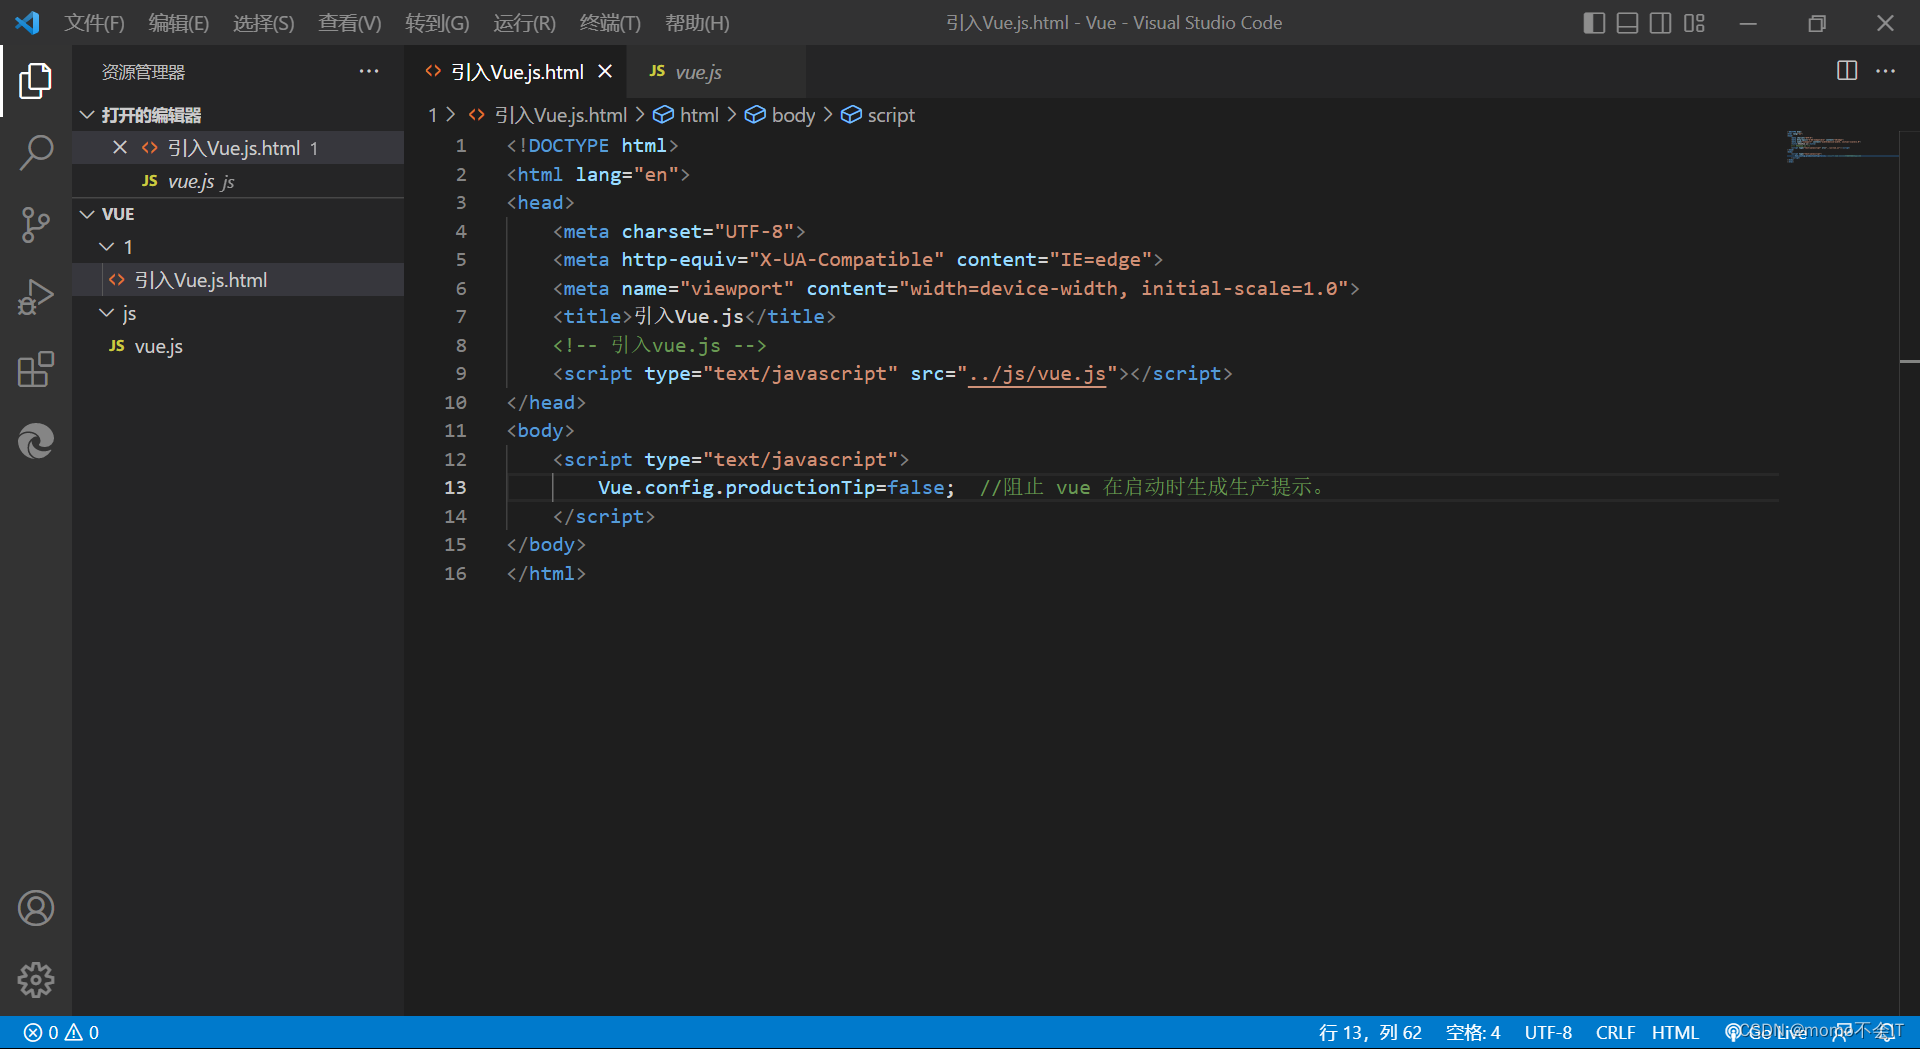
生产提示关闭:
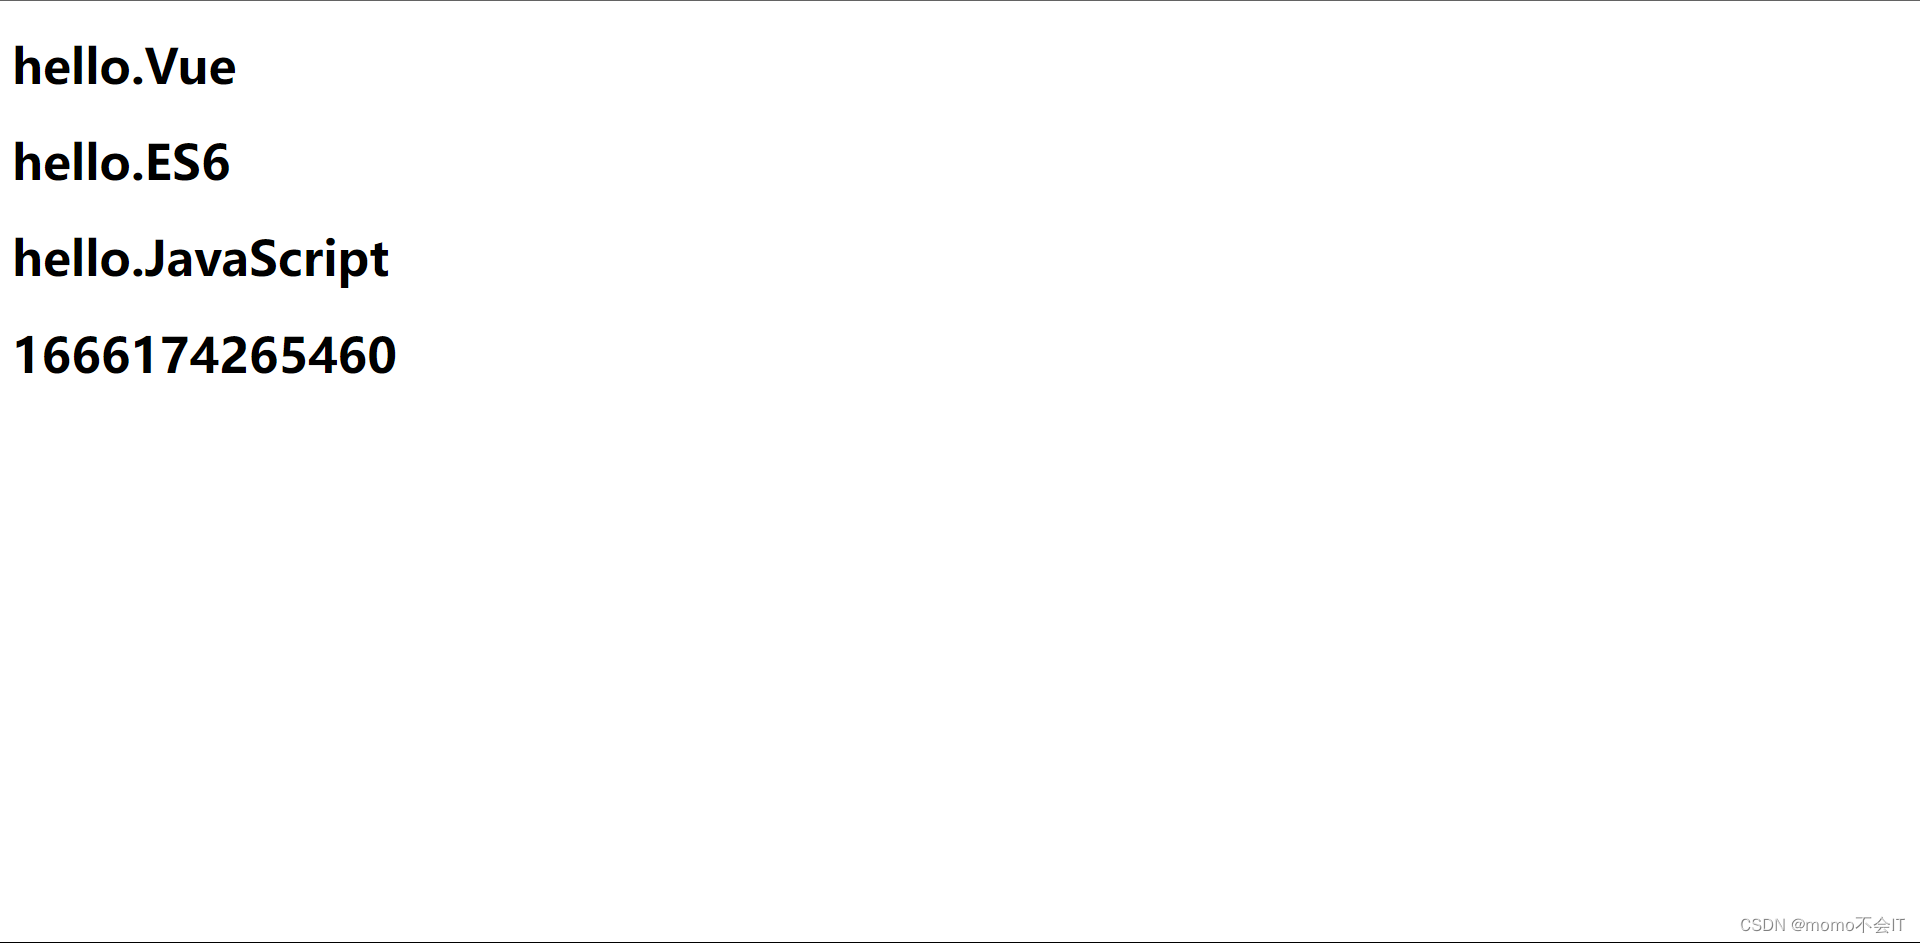
认识Vue
Vue的模板语法
<!DOCTYPE html>
<html lang="en">
<head>
    <meta charset="UTF-8">
    <meta http-equiv="X-UA-Compatible" content="IE=edge">
    <meta name="viewport" content="width=device-width, initial-scale=1.0">
    <title>模板语法</title>
    <!-- 引入vue -->
    <script type="text/javascript" src="../js/vue.js"></script>
</head>
<body>
    <!-- 准备好一个容器  -->
    <div id="root">
        <h1>插值语法</h1>
        <h3>你好,{

   {name}}</h3>
        <hr/>
        <h1>指令语法</h1>
        <a v-bind:href="url">百度1</a>
        <!-- 简写 -->
        <a :href="url">百度2</a>
    </div>
</body>

<script type="text/javascript">
    Vue.config.productionTip = false;  //阻止 vue 在启动时生成生产提示。


    new Vue({
        el:'#root',
        data:{
            name:'jack',
            url:'http://www.baidu.com',
        }
    });

</script>
</html>
<!-- 总结 -->
<!--
    Vue模板语法有两大类:
      1.插值语法:
           功能:用于解析标签体内容
           写法:{

   {xxx}}  xxx是js表达式,而且可以直接读取带data中的所有属性
      2.指令语法:
           功能:用于解析标签(包括:标签属性、标签体内容、绑定事件...)
           举例:v-bind:href="xxx" 或 简写为  :href="xxx", xxx同样要写js表达式,且可以直接读取到data中的所有属性
           备注:Vue中有很多的命令,且形式都是:v-??? 此处拿v-bind举例子
 -->
Vue的数据绑定
<!DOCTYPE html>
<html lang="en">
<head>
    <meta charset="UTF-8">
    <meta http-equiv="X-UA-Compatible" content="IE=edge">
    <meta name="viewport" content="width=device-width, initial-scale=1.0">
    <title>数据绑定</title>
    <script type="text/javascript" src="../js/vue.js"></script>
</head>
<body>
    <!-- 准备好一个盒子 -->
    <div id="root">
        <!-- 普通写法 -->
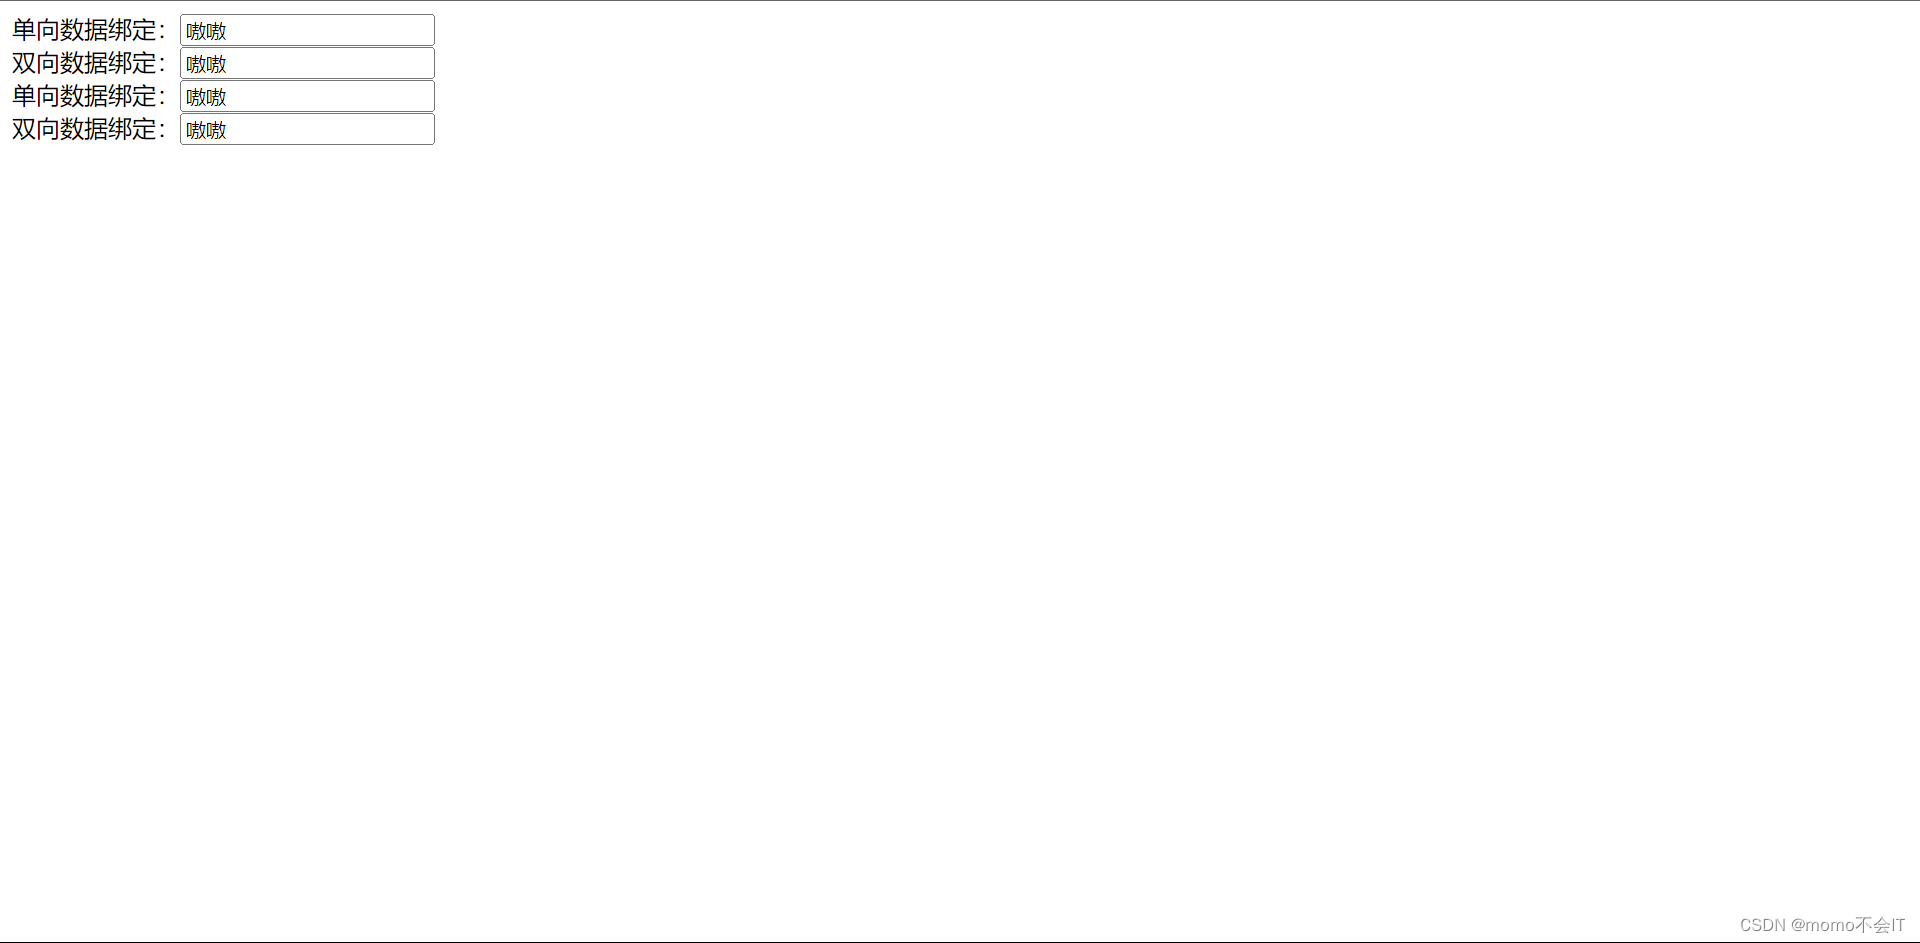
        单向数据绑定:<input type="text" v-bind:value="name"></br>
        双向数据绑定:<input type="text" v-model:value="name"></br>

        <!-- 简写 -->
        单向数据绑定:<input type="text" :value="name"></br>
        双向数据绑定:<input type="text" v-model="name"></br>

        <!-- 如下代码是错误的,因为v-mode只能应用在表单类元素(输入类元素) -->
        <!-- <h2 v-mobel:x="name">你好</h2> -->
    </div>
</body>
<script type="text/javascript">
    Vue.config.productionTip = false;  //阻止 vue 在启动时生成生产提示。

    new Vue({
        el:'#root',
        data:{
            name:'嗷嗷',
        }
    });

</script>
</html>
<!-- 总结 -->
<!--
    Vue中有两种数据绑定的方式:
         1.单向绑定(v-bind):数据只能从data流向页面
         2.双向绑定(v-model):数据不能能从data流向页面,还可从页面流向data
             备注:
                  1.双向绑定一般都应用在表单类元素上(如:input、select等)
                  2.v-model:value 可以简写为v-model ,因为v-model默认收集的就是value值
 -->
el和data的两种写法
<!DOCTYPE html>
<html lang="en">
<head>
    <meta charset="UTF-8">
    <meta http-equiv="X-UA-Compatible" content="IE=edge">
    <meta name="viewport" content="width=device-width, initial-scale=1.0">
    <title>el和data的两种写法</title>
    <script type="text/javascript" src="../js/vue.js"></script>
</head>
<body>
    <!-- 准备好一个盒子 -->
    <div id="root">
        <h1>你好,{

   {name}}</h1>
    </div>
</body>
<script type="text/javascript">
    Vue.config.productionTip = false;  //阻止 vue 在启动时生成生产提示。

    //el的两种写法
    // const vm = new Vue({
    //     // el:'#root',    //第一种写法
    //     data:{
    //         name:'嗷嗷'
    //     }
    // })
    // console.log(vm);
    // v.$mount('#root');   //第二种写法

    // 定时器
    // setTimeout(() => {
    //     vm.$mount('#root');
    // }, 4000);


    // data的两种写法
    new Vue({
        el:'#root',
        // data的第一种写法:对象式
        // data:{
        //     name:'嗷嗷'
        // }

        // data的第二种写法:函数式
        data(){
            console.log('@@@',this);  //此处的this是Vue实例对象
            return{
                name:'嗷嗷'
            }
        }
    })

</script>
</html>
<!-- 总结 -->
<!--
    el和data的两种写法
        1.el的两种写法:
             (1)new Vue时候配置el属性
             (2)先创建Vue实例,随后再通过vm.$mount('#root')指定el的值
        2.data有两种写法:
             (1)对象式
             (2)函数式
             如何选择:目前写哪种都可以,以后学习到组件时,data必须使用函数式,否则会报错
        3.一个重要的原则:
             由Vue管理的函数,一定不要写箭头函数,一旦写了箭头函数,this就不再是Vue实例了
             函数:1.data:funtion(){}   2.data(){}
             箭头函数:data:()=>{}

 -->
MVVM模型
<!DOCTYPE html>
<html lang="en">
<head>
    <meta charset="UTF-8">
    <meta http-equiv="X-UA-Compatible" content="IE=edge">
    <meta name="viewport" content="width=device-width, initial-scale=1.0">
    <title>MVVM模型</title>
    <!--
        MVVM模型
            1.M:模型(model):对应data中的数据
            2.V:视图(View):模板
            3.VM:视图模型(ViewModel):Vue实例对象
        观察发现:
            1.data中所有的属性,最后都出行在vm身上
            2.vm身上的所有属性 及 Vue原型上所有的属性,在Vue模板中都可以直接使用
     -->
     <script type="text/javascript" src="../js/vue.js"></script>
</head>
<body>
    <!-- 准备好一个盒子 -->
    <div id="root">
        <h1>你好,{

   {name}}</h1>
        <h1>再见,{

   {namee}}</h1>
        <!-- <h1>测试1:{

   {$options}}</h1>
        <h1>测试2:{

   {$mount}}</h1>
        <h1>测试3:{

   {_c}}</h1> -->
    </div>
</body>
<script type="text/javascript">
        Vue.config.productionTip = false;  //阻止 vue 在启动时生成生产提示。

        const vm = new Vue({
            el:'#root',
            data:{
                name:'aoao',
                namee:'嗷嗷',
            }
        })
        console.log(vm);

</script>
</html>
数据代理
Object.defineProperty方法
<!DOCTYPE html>
<html lang="en">
<head>
    <meta charset="UTF-8">
    <meta http-equiv="X-UA-Compatible" content="IE=edge">
    <meta name="viewport" content="width=device-width, initial-scale=1.0">
    <title>Object.defineProperty方法</title>
</head>
<body>
    <script type="text/javascript">
        let number = 18;
        let person = {
            name:'嘟嘟',
            sex:'男',
        }

        Object.defineProperty(person,'age',{
            // value:18,
            // enumerable:true,
            // writable:true,
            // configurable:true,

            // 当读取person的age属性时,get函数(getter)就会被调用,且返回值就是age值
            get(){
                console.log('读取age属性')
                return(number)
            },

            // 当修改person的age属性时,set函数(setter)就会被调用,且会收到修改的具体值
            set(value){
                console.log('修改了age属性,值为',value)
            }
        })
        console.log(person);
    </script>

</body>
</html>
何为数据代理
<!DOCTYPE html>
<html lang="en">
<head>
    <meta charset="UTF-8">
    <meta http-equiv="X-UA-Compatible" content="IE=edge">
    <meta name="viewport" content="width=device-width, initial-scale=1.0">
    <title>何为数据代理</title>
</head>
<body>
    <!-- 数据代理:就是通过一个对象代理对另一个对象属性的操作(读/写) -->
    <script type="text/javascript">
        let obj  = {x:100}
        let obj2 = {y:200}

        Object.defineProperty(obj2,'x',{
            get(){
                return obj.x;
            },
            set(value){
                obj.x = value;
            }
        })
        console.log(obj2);

    </script>

</body>
</html>
Vue中的数据代理
<!DOCTYPE html>
<html lang="en">
<head>
    <meta charset="UTF-8">
    <meta http-equiv="X-UA-Compatible" content="IE=edge">
    <meta name="viewport" content="width=device-width, initial-scale=1.0">
    <title>Vue中的数据代理</title>
    <script type="text/javascript" src="../js/vue.js"></script>
</head>
<body>
    <!-- 准备好一个盒子 -->
    <div id="root">
        <h2>名字:{

   {name}}</h2>
        <h2>性别:{

   {sex}}</h2>
    </div>
</body>
<script type="text/javascript">
        Vue.config.productionTip = false;  //阻止 vue 在启动时生成生产提示。

        const vm = new Vue({
            el:'#root',
            data:{
                name:'嘟嘟',
                sex:'男',
            }
        })
</script>
</html>
<!-- 总结 -->
<!--
    1.Vue中的数据代理:
         通过vm对象来处理data对象中的属性的操作(读/写)
    2.Vue中数据代理的好处:
         更加方便地操作data中的数据
    3.基本原理:
         通过Object.defineProperty()把data对象中的所有属性添加到vm上
         为每一个添加到vm上的属性,都指定一个getter/setter
         在getter/setter内部去操作(读/写)data中相应的属性
 -->
事件处理
事件的基本使用
<!DOCTYPE html>
<html lang="en">
<head>
    <meta charset="UTF-8">
    <meta http-equiv="X-UA-Compatible" content="IE=edge">
    <meta name="viewport" content="width=device-width, initial-scale=1.0">
    <title>事件的基本使用</title>
    <script type="text/javascript" src="../js/vue.js"></script>
</head>
<body>
    <!-- 准备好一个盒子 -->
    <div id="root">
        <h1>{

   {name}}学习</h1>
        <button @click="showInfo1">点击提示信息1(不传参)</button>
        <button @click="showInfo2(66,$event)">点击提示信息2(传参)</button>

    </div>
</body>
<script type="text/javascript">
    Vue.config.productionTip = false;  //阻止 vue 在启动时生成生产提示。

    const vm = new Vue({
        el:'#root',
        data:{
            name:'Vue',
        },
        methods:{
            showInfo1(event){
                console.log(event.target.innerText);
                console.log(this);//此处的this是vm
                alert('你好!');
            },
            showInfo2(number,event){
                console.log(number,event);
                console.log(this);//此处的this是vm
                alert('你好!!!');
            }
        }
    })
</script>
</html>
<!-- 总结 -->
<!--
    事件的基本使用:
         1.使用v-on:xxx 或 @xxx 绑定事件,其中xxx是文件名
         2.事件的回调需要配置在methods对象中,最终会在vm上
         3.methods中配置的函数,不要用箭头函数!否则this就不是vm的this了
         4.methods中配置的函数,都是被Vue所管理的函数,this的指向是vm 或 组件实例对象
         5.@click="demo" 和 @click="demo($event)" 效果一样,但后者可以传参
 -->
事件修饰符
<!DOCTYPE html>
<html lang="en">
<head>
    <meta charset="UTF-8">
    <meta http-equiv="X-UA-Compatible" content="IE=edge">
    <meta name="viewport" content="width=device-width, initial-scale=1.0">
    <title>事件修饰符</title>
    <script type="text/javascript" src="../js/vue.js"></script>
    <style type="text/css">
        *{
            margin-top: 10px;
        }
        .demo1{
            height: 50px;
            background-color: skyblue;
        }
        .box1{
            padding: 5px;
            background-color: skyblue;
        }
        .box2{
            padding: 5px;
            background-color: orange;
        }
        .list{
            width: 200px;
            height: 200px;
            background-color: yellow;
            overflow: auto;
        }
        li{
            height: 100px;
        }

    </style>
</head>
<body>
    <!-- 准备好一个盒子 -->
    <div id="root">
        <h1>{

   {name}}学习</h1>
        <!-- 阻止默认事件(常用) -->
        <a href="http://www.baidu.com" @click.prevent="showInfo">点击提示信息1</a>
        <!-- 阻止事件冒泡 -->
        <div class="demo1" @click="showInfo">
            <button @click.stop="showInfo">点击提示信息2</button>
            <!-- 修饰符可以连续写 -->
            <!-- <a href="http://www.baidu.com"n @click.stop.prevent="showInfo">点击提示信息2</a> -->
        </div>
        <!-- 事件只触发一次(常用) -->
        <button @click.once="showInfo">事件只触发一次</button>
        <!-- 使用事件的捕获模式 -->
        <div class="box1" @click.capture="showMag(1)">
            div1
            <div class="box2" @click="showMag(2)">
                div2
            </div>
        </div>
        <!-- 只有event.target是当前操作的元素时才触发事件 -->
        <div class="demo1" @click.self="showInfo">
            <button @click="showInfo">点击提示信息</button>
        </div>

        <!-- 事件的默认行为立即执行,无需等待事件回调执行完毕 -->
        <!-- wheel -->
        <ul @wheel.passive="demo" class="list">
            <li>1</li>
            <li>2</li>
            <li>3</li>
            <li>4</li>
        </ul>

    </div>
</body>
<script type="text/javascript">
        Vue.config.productionTip = false;  //阻止 vue 在启动时生成生产提示。

        const vm = new Vue({
            el:'#root',
            data:{
                name:'Vue',
            },
            methods:{
                showInfo(e){
                    alert('hello!');
                    // console.log(e.target)
                },
                showMag(msg){
                    console.log(msg);
                },
                demo(){
                    // console.log('@');
                    for (let i = 0; i < 10000; i++) {
                        console.log('#');
                    }
                    console.log('嘟嘟');
                }
            }
        })
</script>
</html>
<!-- 总结 -->
<!--
    Vue中的事件修饰符:
         1.prevent:阻止默认事件(常用)
         2.stop:阻止事件冒泡(常用)
         3.once:事件只触发一次(常用)
         4.capture:使用事件的捕获模式
         5.self:只有event.target是当前操作的元素时才触发事件
         6.passive:事件的默认行为立即执行,无需等待事件回调执行完毕
 -->
键盘事件
<!DOCTYPE html>
<html lang="en">
<head>
    <meta charset="UTF-8">
    <meta http-equiv="X-UA-Compatible" content="IE=edge">
    <meta name="viewport" content="width=device-width, initial-scale=1.0">
    <title>Document</title>
    <script type="text/javascript" src="../js/vue.js"></script>
</head>
<body>
    <!-- 准备好一个盒子 -->
    <div id="root">
        <h1>{

   {name}}学习</h1>
        <input type="text" placeholder="按下回车提示消息" @keyup.ctrl.y="showInfo">
    </div>
</body>
<script type="text/javascript">
    Vue.config.productionTip = false;  //阻止 vue 在启动时生成生产提示。

    const vm = new Vue({
        el:'#root',
        data:{
            name:'Vue',
            showInfo(e){
                // if(e.keyCode !== 13) return
                console.log(e.target.value);
            }
        }
    })

</script>
</html>
<!-- 总结 -->
<!--
    1.Vue中常用的按键别名:
         回车 => enter
         删除 => delete(捕获"删除"和"退格"键)
         退出 => esc
         空格 => space
         换行 => tab(特殊,必须配合keydowm去使用)
         上 => up
         下 => down
         左 => left
         右 => right

    2.Vue未提供别名的按键,可以使用按键原始的key值去绑定,但注意转为kebab-case(短横线命名)

    3.系统修饰键(用特殊法)ctrl、alt、shift、meta
         (1)配合keyup使用:按下修饰键的同时,再按下其他键,随后释放其他键,事件才被处罚
         (2)配合keydown使用:正常触发事件

    4.也可以使用ketCodes去指定具体的按键(不推荐)

    5.Vue.config.keyCodes.自定义名 = 键码,可以定制按键别名
 -->
计算属性
插值语法实现
<!DOCTYPE html>
<html lang="en">
<head>
    <meta charset="UTF-8">
    <meta http-equiv="X-UA-Compatible" content="IE=edge">
    <meta name="viewport" content="width=device-width, initial-scale=1.0">
    <title>姓名案例_插值语法实现</title>
    <script type="text/javascript" src="../js/vue.js"></script>
</head>
<body>
    <!-- 准备好一个盒子 -->
    <div id="root">
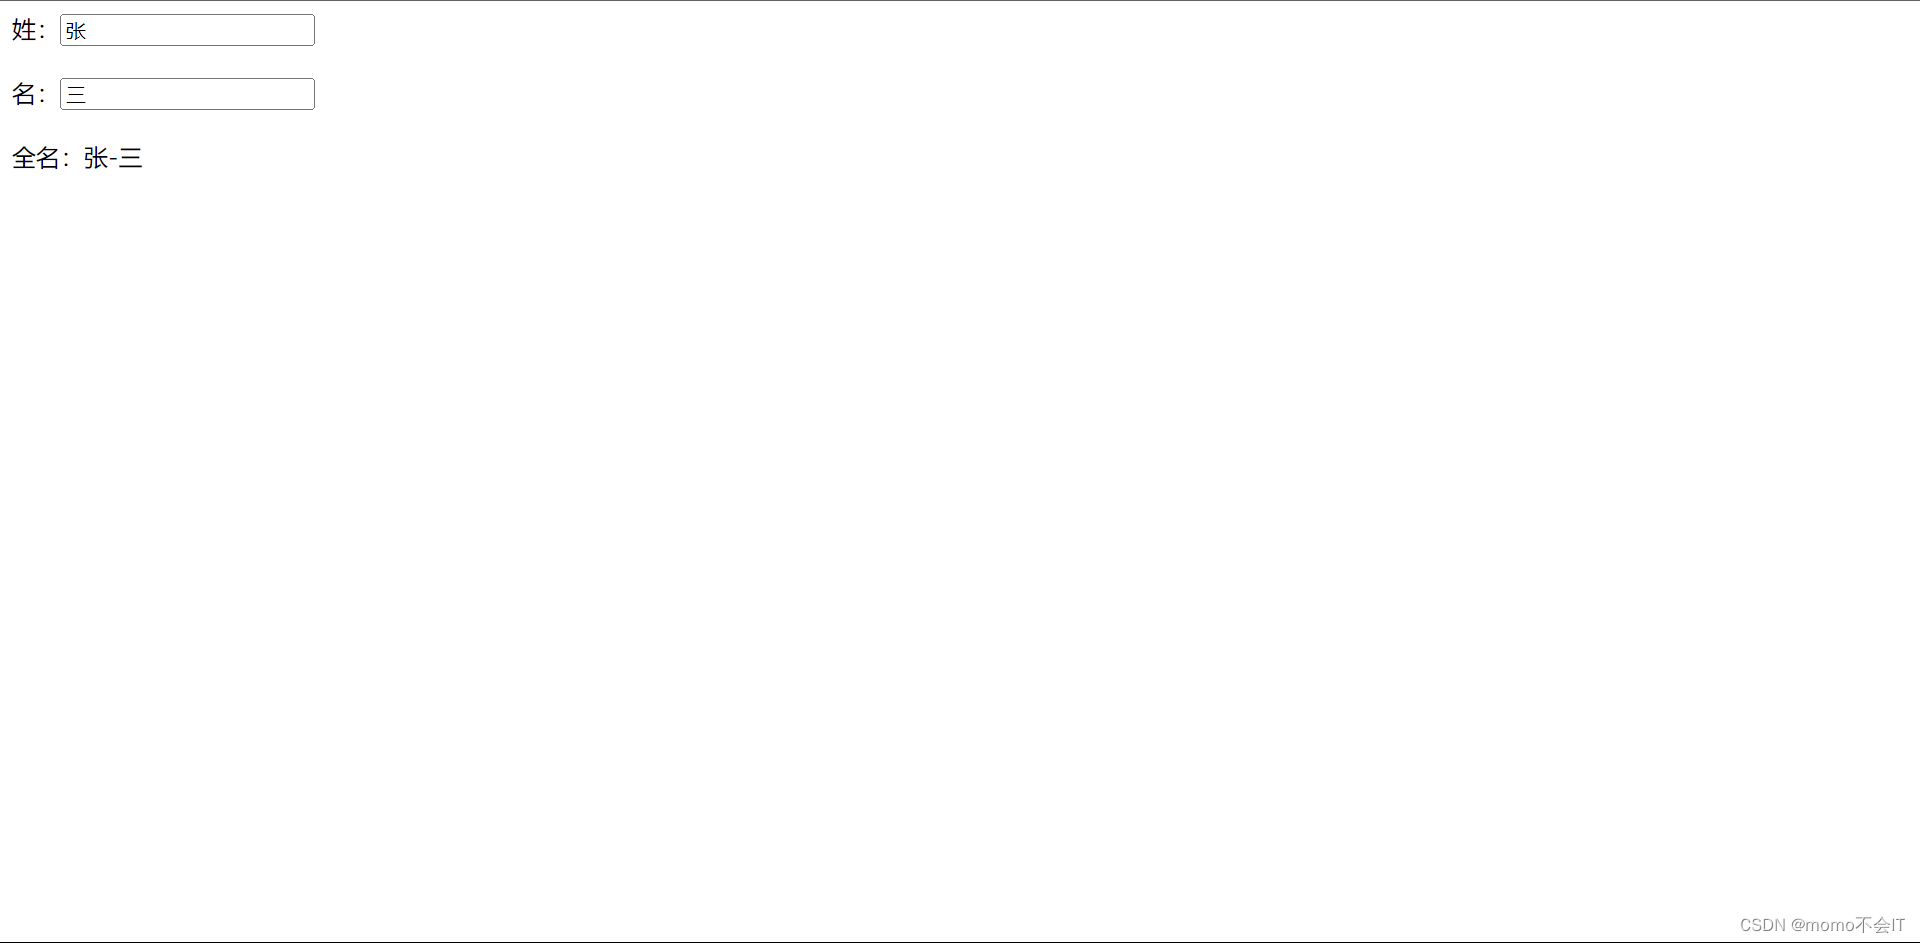
        姓:<input type="text" v-model="firstName"></br></br>
        名:<input type="text" v-model="lastName"></br></br>
        全名:<span>{

   {firstName}}-{

   {lastName}}</span>
    </div>
</body>
<script type="text/javascript">
    Vue.config.productionTip = false;  //阻止 vue 在启动时生成生产提示。

    const vm = new Vue({
        el:'#root',
        data:{
            firstName:'张',
            lastName:'三',
        },
    })
</script>
</html>
methods实现
<!DOCTYPE html>
<html lang="en">
<head>
    <meta charset="UTF-8">
    <meta http-equiv="X-UA-Compatible" content="IE=edge">
    <meta name="viewport" content="width=device-width, initial-scale=1.0">
    <title>姓名案例.methods实现</title>
    <script type="text/javascript" src="../js/vue.js"></script>
</head>
<body>
    <!-- 准备好一个盒子 -->
    <div id="root">
        姓:<input type="text" v-model="firstName"></br></br>
        名:<input type="text" v-model="lastName"></br></br>
        全名:<span>{

   {fullName()}}</span>
    </div>
</body>
<script type="text/javascript">
    Vue.config.productionTip = false;  //阻止 vue 在启动时生成生产提示。

    const vm = new Vue({
        el:'#root',
        data:{
            firstName:'张',
            lastName:'三',
        },
        methods:{
            fullName(){
                return this.firstName + '-' + this.lastName;
            }
        }
    })
</script>
</html>
计算属性实现
<!DOCTYPE html>
<html lang="en">
<head>
    <meta charset="UTF-8">
    <meta http-equiv="X-UA-Compatible" content="IE=edge">
    <meta name="viewport" content="width=device-width, initial-scale=1.0">
    <title>姓名案例.计算属性实现</title>
    <script type="text/javascript" src="../js/vue.js"></script>
</head>
<body>
    <!-- 准备好一个盒子 -->
    <div id="root">
        姓:<input type="text" v-model="firstName"></br></br>
        名:<input type="text" v-model="lastName"></br></br>
        全名:<span>{

   {fullName}}</span></br></br>
        <!-- 全名:<span>{

   {fullName}}</span></br></br>
        全名:<span>{

   {fullName}}</span></br></br>
        全名:<span>{

   {fullName}}</span></br></br>
        全名:<span>{

   {fullName}}</span></br></br>
        全名:<span>{

   {fullName}}</span></br></br> -->
    </div>
</body>
<script type="text/javascript">
    Vue.config.productionTip = false;  //阻止 vue 在启动时生成生产提示。

    const vm = new Vue({
        el:'#root',
        data:{
            firstName:'张',
            lastName:'三',
            x:'你好',
        },
        computed:{
            fullName:{
                // get有什么作用?当有人读取fullName时,get就会被调用,且返回值就作为fullName的值
                // get什么时候调用?1.初次读取fullName时  2.所依赖的数据发生变化时
                get(){
                    console.log('get被调用了');
                    // console.log(this);   //此处的this是vm
                    return this.firstName + '-' + this.lastName;
                 },
                 // set什么时候调用?当fullName被修改时
                 set(value){
                    console.log('set',value);
                    const arr = value.split('-');
                    this.firstName = arr[0];
                    this.lastName = arr[1];
                 }
            }
        }
    })
</script>
</html>
<!-- 总结 -->
<!--
    计算属性:
         1.定义:要用的属性不存在,要通过已有属性计算得来
         2.原理:底层借助了Object.defineproperty方法提供的getter和setter
         3.get函数什么时候执行?
              (1)初次读取时会执行一次
              (2)当依赖的数据发生改变时会再次被调用
         4.优势:与methods实现相比,内部有缓存机制(复用),效率更高,调试方便
         5.备注:
              1.计算属性最终会出现在vm上,直接读取使用即可
              2.如果计算属性要被修改,那必须写set函数去响应修改,且set中要引起计算时依赖的数据发生变化
 -->
计算属性简写
<!DOCTYPE html>
<html lang="en">
<head>
    <meta charset="UTF-8">
    <meta http-equiv="X-UA-Compatible" content="IE=edge">
    <meta name="viewport" content="width=device-width, initial-scale=1.0">
    <title>姓名案例_计算属性简写</title>
    <script type="text/javascript" src="../js/vue.js"></script>
</head>
<body>
    <div id="root">
        姓:<input type="text" v-model="firstName"></br></br>
        名:<input type="text" v-model="lastName"></br></br>
        全名:<span>{

   {fullName}}</span></br></br>
    </div>
</body>
<script type="text/javascript">
    Vue.config.productionTip = false;  //阻止 vue 在启动时生成生产提示。

    const vm = new Vue({
        el:'#root',
        data:{
            firstName:'张',
            lastName:'三',
            x:'你好',
        },
        computed:{
            // 完整写法:
            // fullName:{
            //     get(){
            //         console.log('get被调用了');
            //         return this.firstName + '-' + this.lastName;
            //      },
            //      set(value){
            //         console.log('set',value);
            //         const arr = value.split('-');
            //         this.firstName = arr[0];
            //         this.lastName = arr[1];
            //      }
            // }

            // 简写:
            fullName(){
                console.log('get被调用了');
                return this.firstName + '-' + this.lastName;
            }//只考虑读,不考虑修改的时候才能用
        }
    })
</script>
</html>
监视属性
天气案例
<!DOCTYPE html>
<html lang="en">
<head>
    <meta charset="UTF-8">
    <meta http-equiv="X-UA-Compatible" content="IE=edge">
    <meta name="viewport" content="width=device-width, initial-scale=1.0">
    <title>天气案例</title>
    <script type="text/javascript" src="../js/vue.js"></script>
</head>
<body>
    <div id="root">
        <h2>今天天气很{

   {info}}</h2>
        <button @click="changeWeather">切换天气</button>
        <!-- 绑定事件的时候:@xxx=yyy yyy可以写一些简单的语句 -->
        <!-- <button @click="isHot = !isHot">切换天气</button> -->
    </div>
</body>
<script type="text/javascript">
    Vue.config.productionTip = false;  //阻止 vue 在启动时生成生产提示。

    const vm = new Vue({
        el:'#root',
        data:{
            isHot:true,
        },
        computed:{
            info(){
                return this.isHot? '炎热' : '凉爽';
            }
        },
        methods: {
            changeWeather(){
                this.isHot = !this.isHot;
            }
        },
    })
</script>
</html>
天气案例_监视属性
<!DOCTYPE html>
<html lang="en">
<head>
    <meta charset="UTF-8">
    <meta http-equiv="X-UA-Compatible" content="IE=edge">
    <meta name="viewport" content="width=device-width, initial-scale=1.0">
    <title>天气案例_监视属性</title>
    <script type="text/javascript" src="../js/vue.js"></script>
</head>
<body>
    <div id="root">
        <h2>今天天气很{

   {info}}</h2>
        <button @click="changeWeather">切换天气</button>
        <!-- 绑定事件的时候:@xxx=yyy yyy可以写一些简单的语句 -->
        <!-- <button @click="isHot = !isHot">切换天气</button> -->
    </div>
</body>
<script type="text/javascript">
    Vue.config.productionTip = false;  //阻止 vue 在启动时生成生产提示。

    const vm = new Vue({
        el:'#root',
        data:{
            isHot:true,
        },
        computed:{
            info(){
                return this.isHot? '炎热' : '凉爽';
            }
        },
        methods: {
            changeWeather(){
                this.isHot = !this.isHot;
            }
        },
        // watch:{
        //     isHot:{
        //         immediate:true,//初始化时让handler调用一下
        //         // handler什么时候调用?当isHot发生改变时
        //         handler(newValue,oldValue){
        //             console.log('isHot被修改了',newValue,oldValue);
        //         }
        //     }
        // },
    })

    vm.$watch('isHot',{
        immediate:true,//初始化时让handler调用一下
        // handler什么时候调用?当isHot发生改变时
         handler(newValue,oldValue){
            console.log('isHot被修改了',newValue,oldValue);
         }
    })
</script>
</html>
<!-- 总结 -->
<!--
    监视属性watch:
         1.当被监视的属性变化时,回调函数自动调用,进行相关操作
         2.监视的属性必须存在,才能进行监视!!
         3.监视的两种写法:
              (1)new.Vue时传入watch配置
              (2)通过 vm.$watch监视
 -->
天气案例_深度监视
<!DOCTYPE html>
<html lang="en">
<head>
    <meta charset="UTF-8">
    <meta http-equiv="X-UA-Compatible" content="IE=edge">
    <meta name="viewport" content="width=device-width, initial-scale=1.0">
    <title>天气案例_深度监视</title>
    <script type="text/javascript" src="../js/vue.js"></script>
</head>
<body>
    <div id="root">
        <h2>今天天气很{

   {info}}</h2>
        <button @click="changeWeather">切换天气</button>
        </hr>
        <h3>a的值是:{

   {numbers.a}}</h3>
        <button @click="numbers.a++">点击a+1</button>
        <h3>b的值是:{

   {numbers.b}}</h3>
        <button @click="numbers.b++">点击b+1</button>
        <button @click="numbers = {a:800,b:300}">彻底替换numbers</button>
    </div>
</body>
<script type="text/javascript">
    Vue.config.productionTip = false;  //阻止 vue 在启动时生成生产提示。

    const vm = new Vue({
        el:'#root',
        data:{
            isHot:true,
            numbers:{
                a:1,
                b:1,
            }
        },
        computed:{
            info(){
                return this.isHot? '炎热' : '凉爽';
            }
        },
        methods: {
            changeWeather(){
                this.isHot = !this.isHot;
            }
        },
        watch:{
            isHot:{
                // immediate:true,//初始化时让handler调用一下
                // handler什么时候调用?当isHot发生改变时
                handler(newValue,oldValue){
                    console.log('isHot被修改了',newValue,oldValue);
                }
            },
            // 监视多级结构中某个属性的改变
            // 'numbers.a':{
            //     handler(){
            //         console.log('a被改变了');
            //     }
            // }

            // 监视多级结构中所有属性的改变
            'numbers':{
                deep:true,
                handler(){
                    console.log('numbers被改变了');
                }
            }
        },
    })

</script>
</html>
<!-- 总结 -->
<!--
    深度监视:
         (1)Vue中的watch默认不检测对象内部值的改变(一层)
         (2)配置deep:ture可以检测对象内部值改变(多层)
    备注:
         (1)Vue自身可以检测对象内部值的改变,但Vue提供的watch默认不可以!
         (2)使用watch时根据数据的具体结构,决定是否采用深度检测
 -->
天气案例_监视属性_简写
<!DOCTYPE html>
<html lang="en">
<head>
    <meta charset="UTF-8">
    <meta http-equiv="X-UA-Compatible" content="IE=edge">
    <meta name="viewport" content="width=device-width, initial-scale=1.0">
    <title>天气案例_监视属性_简写</title>
    <script type="text/javascript" src="../js/vue.js"></script>
</head>
<body>
    <div id="root">
        <h2>今天天气很{

   {info}}</h2>
        <button @click="changeWeather">切换天气</button>
    </div>
</body>
<script type="text/javascript">
    Vue.config.productionTip = false;  //阻止 vue 在启动时生成生产提示。

    const vm = new Vue({
        el:'#root',
        data:{
            isHot:true,
        },
        computed:{
            info(){
                return this.isHot? '炎热' : '凉爽';
            }
        },
        methods: {
            changeWeather(){
                this.isHot = !this.isHot;
            }
        },
        watch:{
            // 正常写法
            // isHot:{
            //     // immediate:true,//初始化时让handler调用一下
            //     // deep:ture,//深度监视
            //     handler(newValue,oldValue){
            //         console.log('isHot被修改了',newValue,oldValue);
            //     }
            // }

            //简写
            // isHot(newValue,oldValue){
            //     console.log('isHot被修改了',newValue,oldValue);
            // }
        },
    })

    // // 正常写法
    // vm.$watch('isHot',{
    //     immediate:true,//初始化时让handler调用一下
    //     deep:ture,//深度监视
    //     handler(newValue,oldValue){
    //         console.log('isHot被修改了',newValue,oldValue);
    //     }
    // })

    //简写
    vm.$watch('isHot',function(newValue,oldValue){
        console.log('isHot被修改了',newValue,oldValue);
    })

</script>
</html>
<!--
    当不使用mmediate或deep 这两个属性时才可以进行简写
 -->
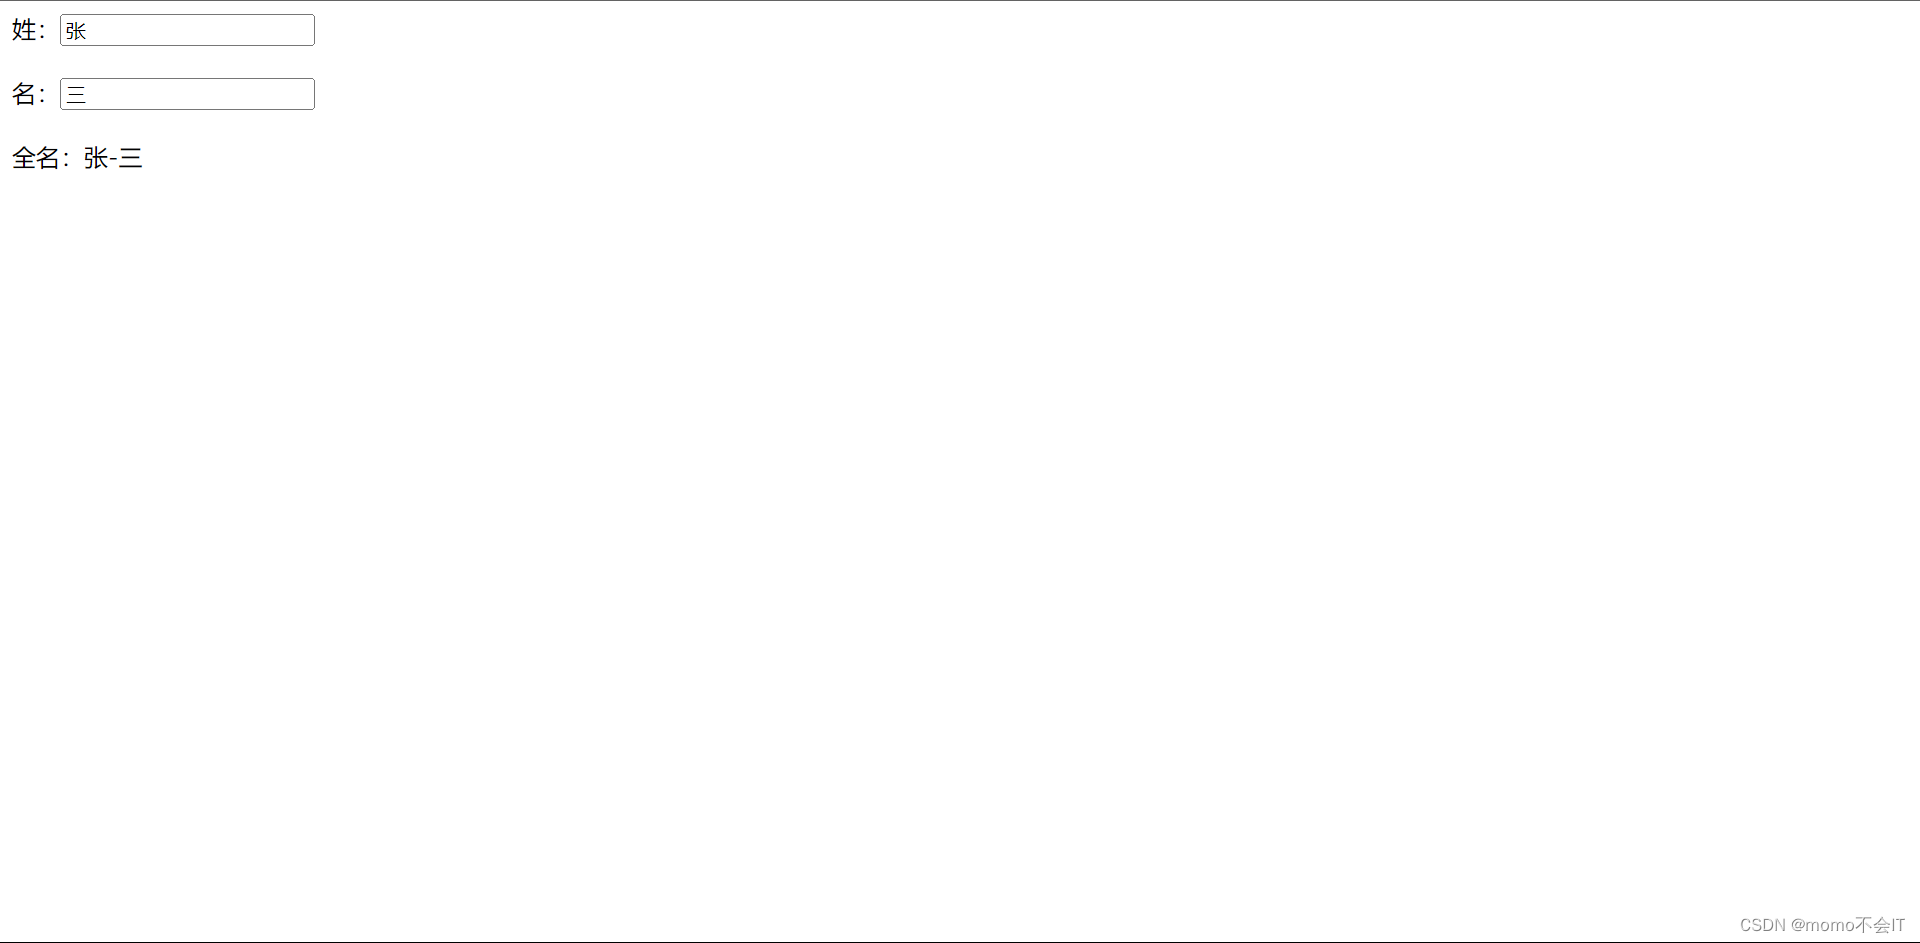
姓名案例_watch实现
<!DOCTYPE html>
<html lang="en">
<head>
    <meta charset="UTF-8">
    <meta http-equiv="X-UA-Compatible" content="IE=edge">
    <meta name="viewport" content="width=device-width, initial-scale=1.0">
    <title>姓名案例_watch实现</title>
    <script type="text/javascript" src="../js/vue.js"></script>
</head>
<body>
    <div id="root">
        姓:<input type="text" v-model="firstName"></br></br>
        名:<input type="text" v-model="lastName"></br></br>
        全名:<span>{

   {fullName}}</span></br></br>
    </div>
</body>
<script type="text/javascript">
    Vue.config.productionTip = false;  //阻止 vue 在启动时生成生产提示。

    const vm = new Vue({
        el:'#root',
        data:{
            firstName:'张',
            lastName:'三',
            fullName:'张-三'
        },
        watch:{
            firstName(val){
                setInterval(() => {                               //定时器,延迟4秒出现
                this.fullName = val + '-' + this.lastName;
                }, 4000);
            },
            lastName(val){
                this.fullName = this.firstName + '-' + val;
            }
        }
    })
</script>
</html>
<!-- 总结 -->
<!--
    computed和watch之间的区别:
         1.computed能完成的功能,watch也可以完成
         2.watch能完成的功能,computed不一定能完成,例如:watch可以进行异步操作
    两个重要的小原则:
         1.所被Vue管理的函数,最好写成普通函数这样this的指向才是vm 或 组件实例对象
         2.所有不被Vue管理的函数(定时器的回调函数,ajax的回调函数,promise的回调函数等),最好写成箭头函数,
           这样this的指向才是vm 或组件实例对象
 -->
样式绑定
<!DOCTYPE html>
<html lang="en">
<head>
    <meta charset="UTF-8">
    <meta http-equiv="X-UA-Compatible" content="IE=edge">
    <meta name="viewport" content="width=device-width, initial-scale=1.0">
    <title>绑定样式</title>
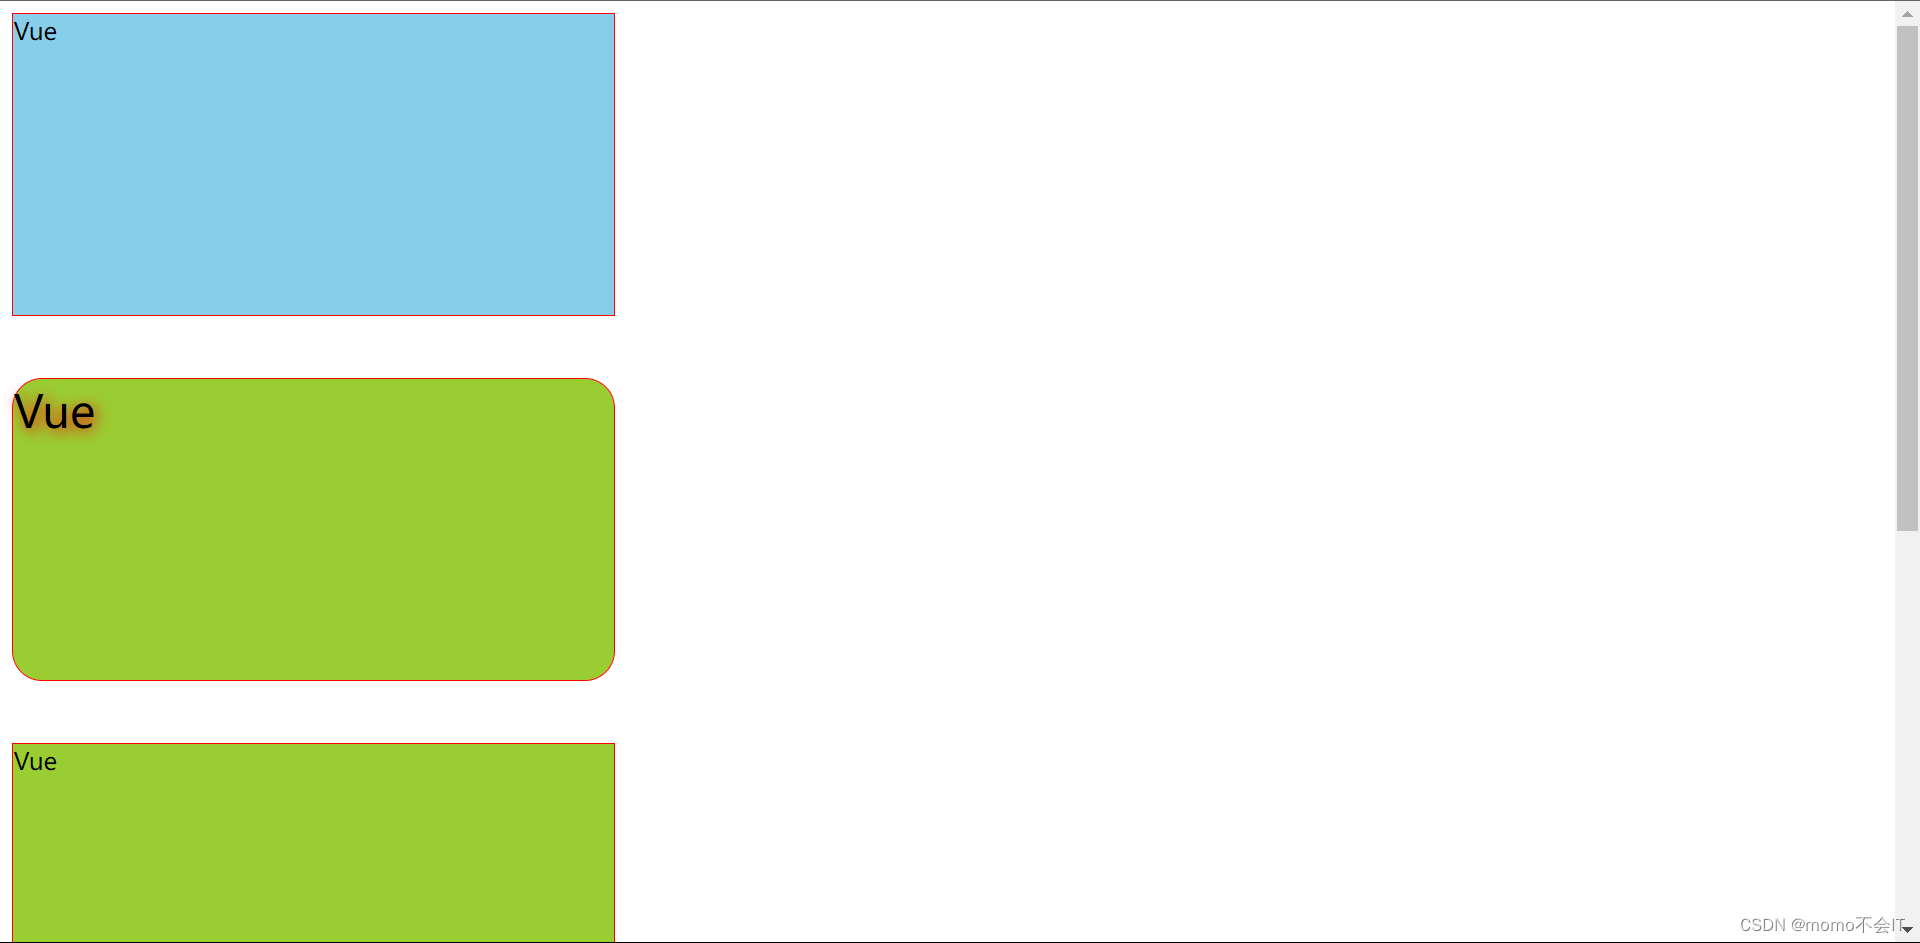
    <style>
        .basic{
            width: 400px;
            height: 200px;
            border: 1px solid red;
        }
        .happy{
            background-color: plum;
        }
        .sad{
            background-color: gray;
        }
        .normal{
            background-color: skyblue;
        }
        .e1{
            background-color: yellowgreen;
        }
        .e2{
            font-size: 30px;
            text-shadow: 2px 2px 10px red;
        }
        .e3{
            border-radius: 20px;
        }
    </style>
    <script type="text/javascript" src="../js/vue.js"></script>
</head>
<body>
    <!-- 准备好一个盒子 -->
    <div id="root">
        <!-- 绑定class样式--字符串写法,适用于:样式的类名不确定,需要动态指定 -->
        <div class="basic" :class="mood" @click="changeMood">{

   {name}}</div><br/><br/>

        <!-- 绑定class样式--数组写法,适用于:要绑定样式个数不确定、名字也不确定 -->
        <div class="basic" :class="classArr">{

   {name}}</div><br/><br/>

        <!-- 绑定class样式--对象写法,适用于:要绑定样式个数确定、名字也确定,但动态决定用不用 -->
        <div class="basic" :class="classObj">{

   {name}}</div>

        <!-- 绑定style样式--对象写法 -->
        <div class="basic" :style="styleObj">{

   {name}}</div>
        <!-- 绑定style样式--数组写法 -->
        <div class="basic" :style="styleArr">{

   {name}}</div>
    </div>
</body>
<script type="text/javascript">
    Vue.config.productionTip = false;  //阻止 vue 在启动时生成生产提示。

    const vm = new Vue({
        el:'#root',
        data:{
            name:'Vue',
            mood:'normal',
            classArr:['e1','e2','e3'],
            classObj:{
                e1:true,
                e2:false
            },
            styleObj:{
                fontSize:'40px'
            },
            styleArr:[
                {
                    fontSize:'40px',
                    color:'red',
                },
                {
                    backgroundColor:'yellow',
                }
            ]
        },
        methods: {
            changeMood(){
                const arr = ['happy','sad','normal'];
                const index = Math.floor(Math.random()*3)
                this.mood =arr[index];
            }
        },
    })
</script>
</html>
<!-- 总结 -->
<!--
    绑定样式:
         1.class样式:
              写法:calss="xxx" xxx可以是字符串、对象、数组
              字符串写法适用于:类名不确定,要动态获取
              对象写法适用于:要绑定多个样式,个数不确定,名字也不确定
              数组写法适用于:要绑定多个样式,个数确定,名字也确定,但不确定用不用
         2.style样式:
              :style="{fontSize: xxx}" 其中xxx是动态值
              :style="[a,b]" 其中a、b是样式对象
 -->
条件渲染
<!DOCTYPE html>
<html lang="en">
<head>
    <meta charset="UTF-8">
    <meta http-equiv="X-UA-Compatible" content="IE=edge">
    <meta name="viewport" content="width=device-width, initial-scale=1.0">
    <title>条件渲染</title>
    <script type="text/javascript" src="../js/vue.js"></script>
</head>
<body>
    <!-- 准备好一个盒子 -->
    <div id="root">
        <!-- 适用v-show做条件渲染 -->
        <!-- <h2 v-show="flase">{

   {name}}</h2>
        <h2 v-show=" 1 === 1 ">{

   {name}}</h2> -->

        <!-- 适用v-if做条件渲染 -->
        <!-- <h2 v-if="flase">{

   {name}}</h2>
        <h2 v-if=" 1 === 1 ">{

   {name}}</h2> -->

        <h2>当前的n值为:{

   {n}}</h2>
        <button @click="n++">点击n+1</button>

        <!-- v-show -->
        <!-- <div v-show=" n === 1 ">Angular</div>
        <div v-show=" n === 2 ">React</div>
        <div v-show=" n === 3 ">Vue</div> -->

        <!-- v-if -->
        <!-- <div v-if=" n === 1 ">Angular</div>
        <div v-if=" n === 2 ">React</div>
        <div v-if=" n === 3 ">Vue</div> -->

        <!-- v-else-if -->
        <!-- <div v-if=" n === 1 ">Angular</div>
        <div v-else-if=" n === 2 ">React</div>
        <div v-else-if=" n === 3 ">Vue</div> -->

        <!-- v-else -->
        <!-- <div v-if=" n === 1 ">Angular</div>
        <div v-else-if=" n === 2 ">React</div>
        <div v-else-if=" n === 3 ">Vue</div>
        <div v-else>javascript</div> -->


        <!-- v-if与template的配合使用 -->
        <template v-if=" n === 1 ">
            <h2>1</h2>
            <h2>2</h2>
            <h2>3</h2>
        </template>
    </div>
</body>
<script type="text/javascript">
    Vue.config.productionTip = false;  //阻止 vue 在启动时生成生产提示。

    const vm = new Vue({
        el:'#root',
        data:{
            name:'Vue',
            n:0,
        },
    })
</script>
</html>
<!-- 总结 -->
<!--
    条件渲染:
         1.v-if
              写法:
                   (1)v-if="表达式"
                   (2)v-else-if="表达式"
                   (3)v-else="表达式"
              适用于:切换频率较低的场景
              特点:不展示的DOM元素直接被移除
              注意:v-if可以和v-else-if、v-else一起使用,但要求结构不能被"打断 "

         2.v-show
              写法:v-show="表达式"
              适用于:切换频率较高的场景
              特点:不展示的DOM元素未被移除,仅仅是使用样式隐藏掉
         3.备注:使用v-if时,语速可能无法获取到,而使用v-show一定可以获取到
 -->
列表渲染
基本列表
<!DOCTYPE html>
<html lang="en">
<head>
    <meta charset="UTF-8">
    <meta http-equiv="X-UA-Compatible" content="IE=edge">
    <meta name="viewport" content="width=device-width, initial-scale=1.0">
    <title>基本列表</title>
    <script type="text/javascript" src="../js/vue.js"></script>
</head>
<body>
    <!-- 准备好一个盒子 -->
    <div id="root">
        <!-- 遍历数组 -->
        <h2>人员列表(遍历数组)</h2>
        <ul>
            <li  v-for="(p,index) in presonals" :key="p.id"> <!-- <li v-for="p of presonals" :key="p.id"> -->
                {

   {p.name}}-{

   {p.age}}
            </li>
        </ul>

         <!-- 遍历对象 -->
         <h2>汽车信息(遍历对象)</h2>
         <ul>
             <li  v-for="(k,value) in car" :key="value">
                 {

   {k}}-{

   {value}}
             </li>
         </ul>

         <!-- 遍历字符串 -->
         <h2>测试遍历字符串</h2>
         <ul>
             <li  v-for="(char,index) in str" :key="index">
                 {

   {char}}-{

   {index}}
             </li>
         </ul>

          <!-- 遍历指定次数 -->
          <h2>测试遍历指定次数(用得少)</h2>
          <ul>
              <li  v-for="(number,index) in 5" :key="index">
                  {

   {number}}-{

   {index}}
              </li>
          </ul>

    </div>
</body>
<script type="text/javascript">
    Vue.config.productionTip = false;  //阻止 vue 在启动时生成生产提示。

    const vm = new Vue({
        el:'#root',
        data:{
            presonals:[
                {id:'001',name:'张三',age:18},
                {id:'002',name:'李四',age:19},
                {id:'003',name:'王五',age:20}
            ],
            car:{
                name:'奥迪',
                price:'80w',
                color:'black'
            },
            str:'hello'
        },
    })
</script>
</html>
<!-- 总结 -->
<!--
    v-for指令:
         1.用于展示列表数据
         2.语法:v-if:"(item,index) in xxx" :key:"yyy"
         3.可遍历:数组、对象、字符串(用得很少)、指定次数(用得很少)
 -->
key的原理
<!DOCTYPE html>
<html lang="en">
<head>
    <meta charset="UTF-8">
    <meta http-equiv="X-UA-Compatible" content="IE=edge">
    <meta name="viewport" content="width=device-width, initial-scale=1.0">
    <title>key的原理</title>
    <script type="text/javascript" src="../js/vue.js"></script>
</head>
<body>
    <!-- 准备好一个盒子 -->
    <div id="root">
        <!-- 遍历数组 -->
        <h2>人员列表(遍历数组)</h2>
        <button @click.once="add">添加一个老刘</button>
        <ul>
            <li  v-for="(p,index) in presonals" :key="p.id"> <!-- <li v-for="p of presonals" :key="p.id"> -->
                {

   {p.name}}-{

   {p.age}}
                <input type="text">
            </li>
        </ul>
    </div>
</body>
<script type="text/javascript">
    Vue.config.productionTip = false;  //阻止 vue 在启动时生成生产提示。

    const vm = new Vue({
        el:'#root',
        data:{
            presonals:[
                {id:'001',name:'张三',age:18},
                {id:'002',name:'李四',age:19},
                {id:'003',name:'王五',age:20}
            ]
        },
        methods: {
            add(){
                const p={id:004,name:'老刘',age:40}
                this.presonals.unshift(p);
            }
        },
    })
</script>
</html>
<!-- 总结 -->
<!--
    面试题:react、Vue中的key、用什么用?(key的内部原理)

         1.虚拟DOM中key的作用:
                   key是虚拟DOM对象的标识,当数据发生变化时,Vue会根据【新数据】生成【新的虚拟DOM】,
                   随后Vue进行【新虚拟DOM】和【旧虚拟DOM】的差异比较,比较规则如下:

         2.对比规则:
                   (1)旧虚拟DOM中找到了与新虚拟DOM相同的key:
                        (1)若虚拟DOM中内容没变,直接使用之前的真实DOM!
                        (2)若虚拟DOM中内容变了,则生成新的真实DOM,随后替换掉页面中之前的真实DOM

                   (2)旧虚拟DOM中未找到ui新虚拟DOM相同的key
                        创建新的真实DOM,随货渲染到页面

         3.用index作为key可能会引起的问题:
                   1. 若对数据进行:逆序添加、逆序删除等破坏顺序操作:
                        会产生没有必要的真实DOM更新==>界面效果没问题,但效率低

                   2.如果结构中还包含输入类的DOM:
                        会产生错误DOM更新 ==> 界面有问题
         4.开发中如何选择key?
                   1.最好使用每条数据的唯一标识作为key,比如id、手机号、身份证号、学号等唯一值
                   2.如果不存在对数据的逆序添加、逆序删除等破坏顺序操作,仅用于渲染列表用于展示,
                   使用index作为key是没有问题的。
 -->
列表过滤
<!DOCTYPE html>
<html lang="en">
<head>
    <meta charset="UTF-8">
    <meta http-equiv="X-UA-Compatible" content="IE=edge">
    <meta name="viewport" content="width=device-width, initial-scale=1.0">
    <title>列表过滤</title>
    <script type="text/javascript" src="../js/vue.js"></script>
</head>
<body>
    <!-- 准备好一个盒子 -->
    <div id="root">
        <!-- 遍历数组 -->
        <h2>人员列表</h2>
        <input type="text" placeholder="请输入名字" v-model="keyWord">
        <ul>
            <li  v-for="(p,index) in filPresonals" :key="index">
                {

   {p.name}}-{

   {p.age}}-{

   {p.sex}}
            </li>
        </ul>
    </div>
</body>
<script type="text/javascript">
    Vue.config.productionTip = false;  //阻止 vue 在启动时生成生产提示。

    // 用watch实现
    // #region
    // const vm = new Vue({
    //     el:'#root',
    //     data:{
    //         keyWord:'',
    //         presonals:[
    //             {id:'001',name:'马冬梅',age:36,sex:'女'},
    //             {id:'002',name:'周冬雨',age:30,sex:'女'},
    //             {id:'003',name:'周杰伦',age:44,sex:'男'},
    //             {id:'004',name:'温兆伦',age:58,sex:'男'}
    //             ],
    //         filPresonals:[],
    //     },
    //     watch:{
    //         keyWord:{
    //             immediate:true,
    //             handler(val){
    //                 this.filPresonals = this.presonals.filter((p)=>{
    //                     return p.name.indexOf(val) !== -1;
    //                 })
    //             }
    //         }
    //     }
    // })
    // #endregion


    // // 用computed实现
    const vm = new Vue({
        el:'#root',
        data:{
            keyWord:'',
            presonals:[
                {id:'001',name:'马冬梅',age:36,sex:'女'},
                {id:'002',name:'周冬雨',age:30,sex:'女'},
                {id:'003',name:'周杰伦',age:44,sex:'男'},
                {id:'004',name:'温兆伦',age:58,sex:'男'}
                ],
        },
        computed:{
            filPresonals(){
                return this.presonals.filter((p)=>{                  //filter过滤器
                    return p.name.indexOf(this.keyWord) !== -1
                })
            }
        }
    })
</script>
</html>
列表排序
<!DOCTYPE html>
<html lang="en">
<head>
    <meta charset="UTF-8">
    <meta http-equiv="X-UA-Compatible" content="IE=edge">
    <meta name="viewport" content="width=device-width, initial-scale=1.0">
    <title>列表排序</title>
    <script type="text/javascript" src="../js/vue.js"></script>
</head>
<body>
    <!-- 准备好一个盒子 -->
    <div id="root">
        <!-- 遍历数组 -->
        <h2>人员列表</h2>
        <input type="text" placeholder="请输入名字" v-model="keyWord">
        <button @click="sortType = 2">年龄升序</button>
        <button @click="sortType = 1">年龄降序</button>
        <button @click="sortType = 0">原顺序</button>
        <ul>
            <li  v-for="(p,index) in filPresonals" :key="p.id"> <!-- <li v-for="p of filPresonals" :key="p.id"> -->
                {

   {p.name}}-{

   {p.age}}-{

   {p.sex}} <input type="text">
            </li>
        </ul>
    </div>
</body>
<script type="text/javascript">
    Vue.config.productionTip = false;  //阻止 vue 在启动时生成生产提示。

    // 用watch实现
    // #region
    // const vm = new Vue({
    //     el:'#root',
    //     data:{
    //         keyWord:'',
    //         presonals:[
    //             {id:'001',name:'马冬梅',age:36,sex:'女'},
    //             {id:'002',name:'周冬雨',age:30,sex:'女'},
    //             {id:'003',name:'周杰伦',age:44,sex:'男'},
    //             {id:'004',name:'温兆伦',age:58,sex:'男'}
    //             ],
    //         filPresonals:[],
    //     },
    //     watch:{
    //         keyWord:{
    //             immediate:true,
    //             handler(val){
    //                 this.filPresonals = this.presonals.filter((p)=>{
    //                     return p.name.indexOf(val) !== -1;
    //                 })
    //             }
    //         }
    //     }
    // })
    // #endregion


    // // 用computed实现
    const vm = new Vue({
        el:'#root',
        data:{
            keyWord:'',
            sortType:'0',//0原序,1降序,2升序
            presonals:[
                {id:'001',name:'马冬梅',age:36,sex:'女'},
                {id:'002',name:'周冬雨',age:30,sex:'女'},
                {id:'003',name:'周杰伦',age:44,sex:'男'},
                {id:'004',name:'温兆伦',age:58,sex:'男'}
                ]
        },
        computed:{
            filPresonals(){
                const arr = this.presonals.filter((p)=>{                   //filter()过滤器
                    return p.name.indexOf(this.keyWord) !== -1
                })
                if(this.sortType){
                    arr.sort((p1,p2)=>{            //sort()用来排序的函数
                        return this.sortType === 1 ? p2.age-p1.age : p1.age-p2.age
                    })
                }
                return arr;
            }
        }
    })
</script>
</html>
更新时的一个问题
<!DOCTYPE html>
<html lang="en">
<head>
    <meta charset="UTF-8">
    <meta http-equiv="X-UA-Compatible" content="IE=edge">
    <meta name="viewport" content="width=device-width, initial-scale=1.0">
    <title>更新时的一个问题</title>
    <script type="text/javascript" src="../js/vue.js"></script>
</head>
<body>
    <!-- 准备好一个盒子 -->
    <div id="root">
        <ul>
            <button @click="updataMei">点击修改马冬梅的信息</button>
            <li  v-for="(p,index) in presonals" :key="p.id"> <!-- <li v-for="p of presonals" :key="p.id"> -->
                {

   {p.name}}-{

   {p.age}}-{

   {p.sex}} <input type="text">
            </li>
        </ul>
    </div>
</body>
<script type="text/javascript">
    Vue.config.productionTip = false;  //阻止 vue 在启动时生成生产提示。


    const vm = new Vue({
        el:'#root',
        data:{
            presonals:[
                {id:'001',name:'马冬梅',age:36,sex:'女'},
                {id:'002',name:'周冬雨',age:30,sex:'女'},
                {id:'003',name:'周杰伦',age:44,sex:'男'},
                {id:'004',name:'温兆伦',age:58,sex:'男'}
                ]
        },
        methods: {
            updataMei(){
                // this.presonals[0].name = 'momo',//奏效
                // this.presonals[0].age = 22,//奏效
                // this.presonals[0].sex = '男'//奏效
                // this.presonals[0] = {id:'001',name:'momo',age:22,sex:'男'} //不奏效
                this.presonals.splice(0,1,{id:'001',name:'momo',age:22,sex:'男'})
            }
        },
    })
</script>
</html>
Vue检测数据改变的原理
<!DOCTYPE html>
<html lang="en">
<head>
    <meta charset="UTF-8">
    <meta http-equiv="X-UA-Compatible" content="IE=edge">
    <meta name="viewport" content="width=device-width, initial-scale=1.0">
    <title>Vue检测数据改变的原理</title>
    <script type="text/javascript" src="../js/vue.js"></script>
</head>
<body>
    <!-- 准备好一个盒子 -->
    <div id="root">
        <ul>
            <button @click="updataMei">点击修改马冬梅的信息</button>
            <li  v-for="(p,index) in presonals" :key="p.id"> <!-- <li v-for="p of presonals" :key="p.id"> -->
                {

   {p.name}}-{

   {p.age}}-{

   {p.sex}} <input type="text">
            </li>
        </ul>
    </div>
</body>
<script type="text/javascript">
    Vue.config.productionTip = false;  //阻止 vue 在启动时生成生产提示。


    const vm = new Vue({
        el:'#root',
        data:{
            presonals:[
                {id:'001',name:'马冬梅',age:36,sex:'女'},
                {id:'002',name:'周冬雨',age:30,sex:'女'},
                {id:'003',name:'周杰伦',age:44,sex:'男'},
                {id:'004',name:'温兆伦',age:58,sex:'男'}
                ]
        },
        methods: {
            updataMei(){
                // this.presonals[0].name = 'momo',//奏效
                // this.presonals[0].age = 22,//奏效
                // this.presonals[0].sex = '男'//奏效
                this.presonals[0] = {id:'001',name:'momo',age:22,sex:'男'}
            }
        },
    })
</script>
</html>
模拟一个数据检测
<!DOCTYPE html>
<html lang="en">
<head>
    <meta charset="UTF-8">
    <meta http-equiv="X-UA-Compatible" content="IE=edge">
    <meta name="viewport" content="width=device-width, initial-scale=1.0">
    <title>模拟一个数据检测</title>
    <script type="text/javascript" src="../js/vue.js"></script>
</head>
<body>
    <!-- 准备好一个盒子 -->
    <div id="root">
        <ul>
            <button @click="updataMei">点击修改马冬梅的信息</button>
            <li  v-for="(p,index) in presonals" :key="p.id"> <!-- <li v-for="p of presonals" :key="p.id"> -->
                {

   {p.name}}-{

   {p.age}}-{

   {p.sex}} <input type="text">
            </li>
        </ul>
    </div>
</body>
<script type="text/javascript">
    Vue.config.productionTip = false;  //阻止 vue 在启动时生成生产提示。


    const vm = new Vue({
        el:'#root',
        data:{
            presonals:[
                {id:'001',name:'马冬梅',age:36,sex:'女'},
                {id:'002',name:'周冬雨',age:30,sex:'女'},
                {id:'003',name:'周杰伦',age:44,sex:'男'},
                {id:'004',name:'温兆伦',age:58,sex:'男'}
                ]
        },
        methods: {
            updataMei(){
                // this.presonals[0].name = 'momo',//奏效
                // this.presonals[0].age = 22,//奏效
                // this.presonals[0].sex = '男'//奏效
                this.presonals[0] = {id:'001',name:'momo',age:22,sex:'男'}
            }
        },
    })
</script>
</html>
Vue.set的应用
<!DOCTYPE html>
<html lang="en">
<head>
    <meta charset="UTF-8">
    <meta http-equiv="X-UA-Compatible" content="IE=edge">
    <meta name="viewport" content="width=device-width, initial-scale=1.0">
    <title>Vue.set的应用</title>
    <script type="text/javascript" src="../js/vue.js"></script>
</head>
<body>
    <!-- 准备好一个盒子 -->
    <div id="root">
        <h1>学习内容</h1>
        <h2>{

   {name}}学习</h2>
        <h2>{

   {days}}</h2>

        <h1>学生基本信息</h1>
        <button @click="addSex">点击添加性别,默认为男</button>
        <h2>姓名:{

   {student.studentName}}</h2>
        <h2 v-if="student.sex">性别:{

   {student.sex}}</h2>
        <h2>年龄(对外):{

   {student.age.sAge}}</h2>
        <h2>年龄(真实):{

   {student.age.rAge}}</h2>

        <h1>朋友们:</h1>
        <ul>
            <li v-for="(f,index) in student.friend" ::key="index">
                {

   {f.fName}}-{

   {f.age}}
            </li>
        </ul>

    </div>
</body>
<script type="text/javascript">
    Vue.config.productionTip = false;  //阻止 vue 在启动时生成生产提示。

    const vm = new Vue({
        el:'#root',
        data:{
            name:'Vue',
            days:'all day',
            student:{
                studentName:'momo',
                age:{
                    rAge:22,
                    sAge:21
                },
                friend:[
                    {fName:'jojo',age:21},
                    {fName:'maomao',age:22}
                ]
            }
        },
        methods: {
            addSex(){
                // Vue.set(this.student,'sex','男')
                this.$set(this.student,'sex','男')
            }
        },
    })
</script>
</html>
Vue检测数据改变的原理_数组
<!DOCTYPE html>
<html lang="en">
<head>
    <meta charset="UTF-8">
    <meta http-equiv="X-UA-Compatible" content="IE=edge">
    <meta name="viewport" content="width=device-width, initial-scale=1.0">
    <title>Vue检测数据改变的原理_数组</title>
    <script type="text/javascript" src="../js/vue.js"></script>
</head>
<body>
    <!-- 准备好一个盒子 -->
    <div id="root">
        <h1>学习内容</h1>
        <h2>{

   {name}}学习</h2>
        <h2>{

   {days}}</h2>

        <h1>学生基本信息</h1>
        <button @click="addSex">点击添加性别,默认为男</button>
        <h2>姓名:{

   {student.studentName}}</h2>
        <h2 v-if="student.sex">性别:{

   {student.sex}}</h2>
        <h2>年龄(对外):{

   {student.age.sAge}}</h2>
        <h2>年龄(真实):{

   {student.age.rAge}}</h2>

        <h1>朋友们:</h1>
        <ul>
            <li v-for="(f,index) in student.friend" ::key="index">
                {

   {f.fName}}-{

   {f.age}}
            </li>
        </ul>

    </div>
</body>
<script type="text/javascript">
    Vue.config.productionTip = false;  //阻止 vue 在启动时生成生产提示。

    const vm = new Vue({
        el:'#root',
        data:{
            name:'Vue',
            days:'all day',
            student:{
                studentName:'momo',
                age:{
                    rAge:22,
                    sAge:21
                },
                friend:[
                    {fName:'jojo',age:21},
                    {fName:'maomao',age:22}
                ]
            }
        },
        methods: {
            addSex(){
                // Vue.set(this.student,'sex','男')
                this.$set(this.student,'sex','男')
            }
        },
    })
</script>
</html>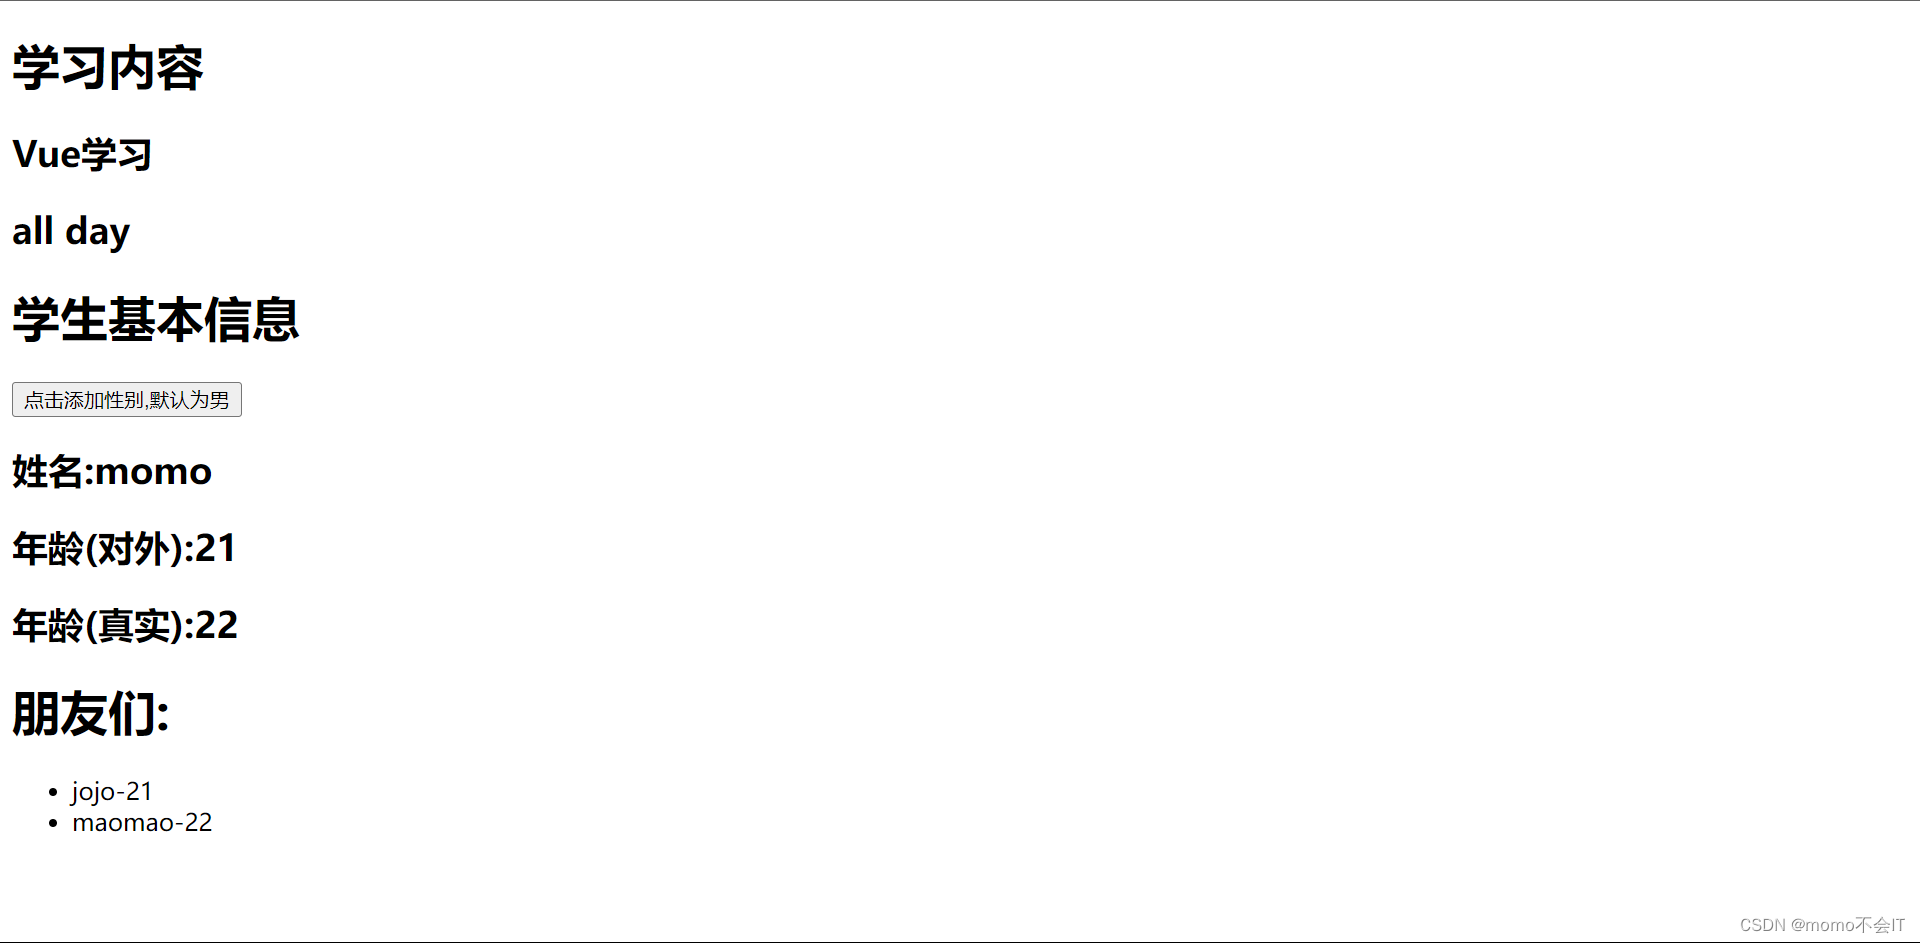
总结Vue数据监测
<!DOCTYPE html>
<html lang="en">
<head>
    <meta charset="UTF-8">
    <meta http-equiv="X-UA-Compatible" content="IE=edge">
    <meta name="viewport" content="width=device-width, initial-scale=1.0">
    <title>总结Vue数据监测</title>
    <script type="text/javascript" src="../js/vue.js"></script>
</head>
<body>
    <!-- 准备好一个盒子 -->
    <div id="root">
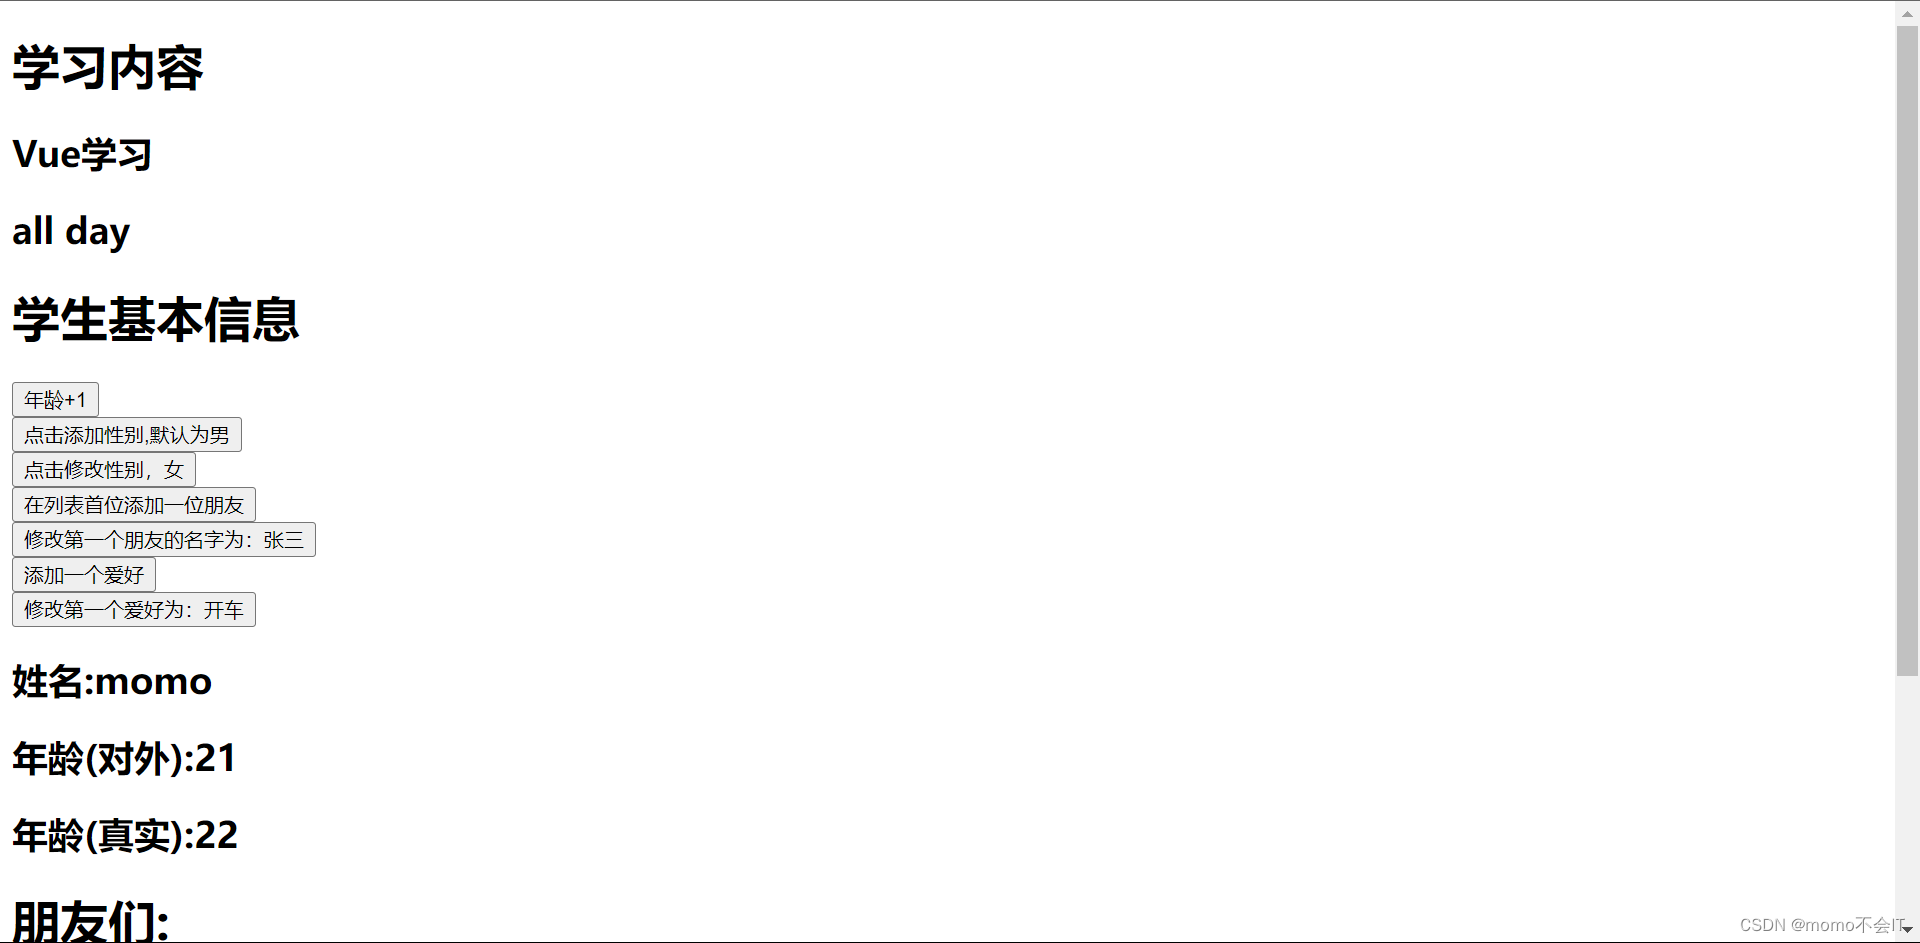
        <h1>学习内容</h1>
        <h2>{

   {name}}学习</h2>
        <h2>{

   {days}}</h2>

        <h1>学生基本信息</h1>

        <button @click="student.age.rAge++,student.age.sAge++">年龄+1</button><br/>
        <button @click="addSex">点击添加性别,默认为男</button><br/>
        <button @click=" student.sex = '女' ">点击修改性别,女</button><br/>
        <button @click="addFriend">在列表首位添加一位朋友</button><br/>
        <button @click="updateFirstFriendName">修改第一个朋友的名字为:张三</button><br/>
        <button @click="addHobby">添加一个爱好</button><br/>
        <button @click="updaFirstHobby">修改第一个爱好为:开车</button><br/>

        <h2>姓名:{

   {student.studentName}}</h2>
        <h2 v-if="student.sex">性别:{

   {student.sex}}</h2>
        <h2>年龄(对外):{

   {student.age.sAge}}</h2>
        <h2>年龄(真实):{

   {student.age.rAge}}</h2>

        <h1>朋友们:</h1>
        <ul>
            <li v-for="(f,index) in student.friend" ::key="index">
                {

   {f.fName}}-{

   {f.age}}
            </li>
        </ul>

        <h1>爱好:</h1>
        <ul>
            <li v-for="(h,index) in student.hobby" ::key="index">
                {

   {h}}
            </li>
        </ul>
    </div>
</body>
<script type="text/javascript">
    Vue.config.productionTip = false;  //阻止 vue 在启动时生成生产提示。

    const vm = new Vue({
        el:'#root',
        data:{
            name:'Vue',
            days:'all day',
            student:{
                studentName:'momo',
                age:{
                    rAge:22,
                    sAge:21
                },
                friend:[
                    {fName:'jojo',age:21},
                    {fName:'maomao',age:22}
                ],
                hobby:['抽烟','喝酒','烫头']
            }
        },
        methods: {
            addSex(){
                // Vue.set(this.student,'sex','男')
                this.$set(this.student,'sex','男')
            },
            addFriend(){
                this.student.friend.unshift({fName:'bobo',age:22})
            },
            updateFirstFriendName(){
                this.student.friend[0].fName = 'popo'
                this.student.friend[0].age = 60
            },
            addHobby(){
                this.student.hobby.push('打代码')
            },
            updaFirstHobby(){
                // this.student.hobby.splice(0,1,'开车')
                // Vue.set(this.student.hobby,0,'开车')
                this.$set(this.student.hobby,0,'开车')
            }
        },
    })
</script>
</html>
<!-- 总结 -->
<!--
    Vue检测数据的原理:
            1.Vue会监视data中所有层次的数据

            2.如何检测对象中的数据?
                    通过setter实现监视,且要在new Vue时就传入要监测的数据。
                        (1)对象中后追加的属性,Vue默认不做响应式处理
                        (2)如需给后添加的属性做响应式,请使用一下API:
                                Vue.set(target.propertyName/index,value)或
                                this.$set(target.propertyName/index,value)

            3.如何检测数组中的数据?
                    通过包裹数组更新元素的方法实现,本质就是做了两件事:
                        (1)调用原生对应的方法对数组进行更新。
                        (2)重新解析模板,进而更新页面。

            4.在Vue修改数组中的某个元素一定要用如下方法:
                    1.使用这些API:push()、pop()、shift()、unshift()、splice()、sort()、reverse()
                    2.Vue.set() 或 vm.$set()

            特别注意:Vue.set() 和 vm.$set() 不能给vm 或 vm的根数据对象 添加属性!!!

 -->
收集表单数据
<!DOCTYPE html>
<html lang="en">
<head>
    <meta charset="UTF-8">
    <meta http-equiv="X-UA-Compatible" content="IE=edge">
    <meta name="viewport" content="width=device-width, initial-scale=1.0">
    <title>收集表单数据</title>
    <script type="text/javascript" src="../js/vue.js"></script>
</head>
<body>
    <!-- 准备好一个盒子 -->
    <div id="root">
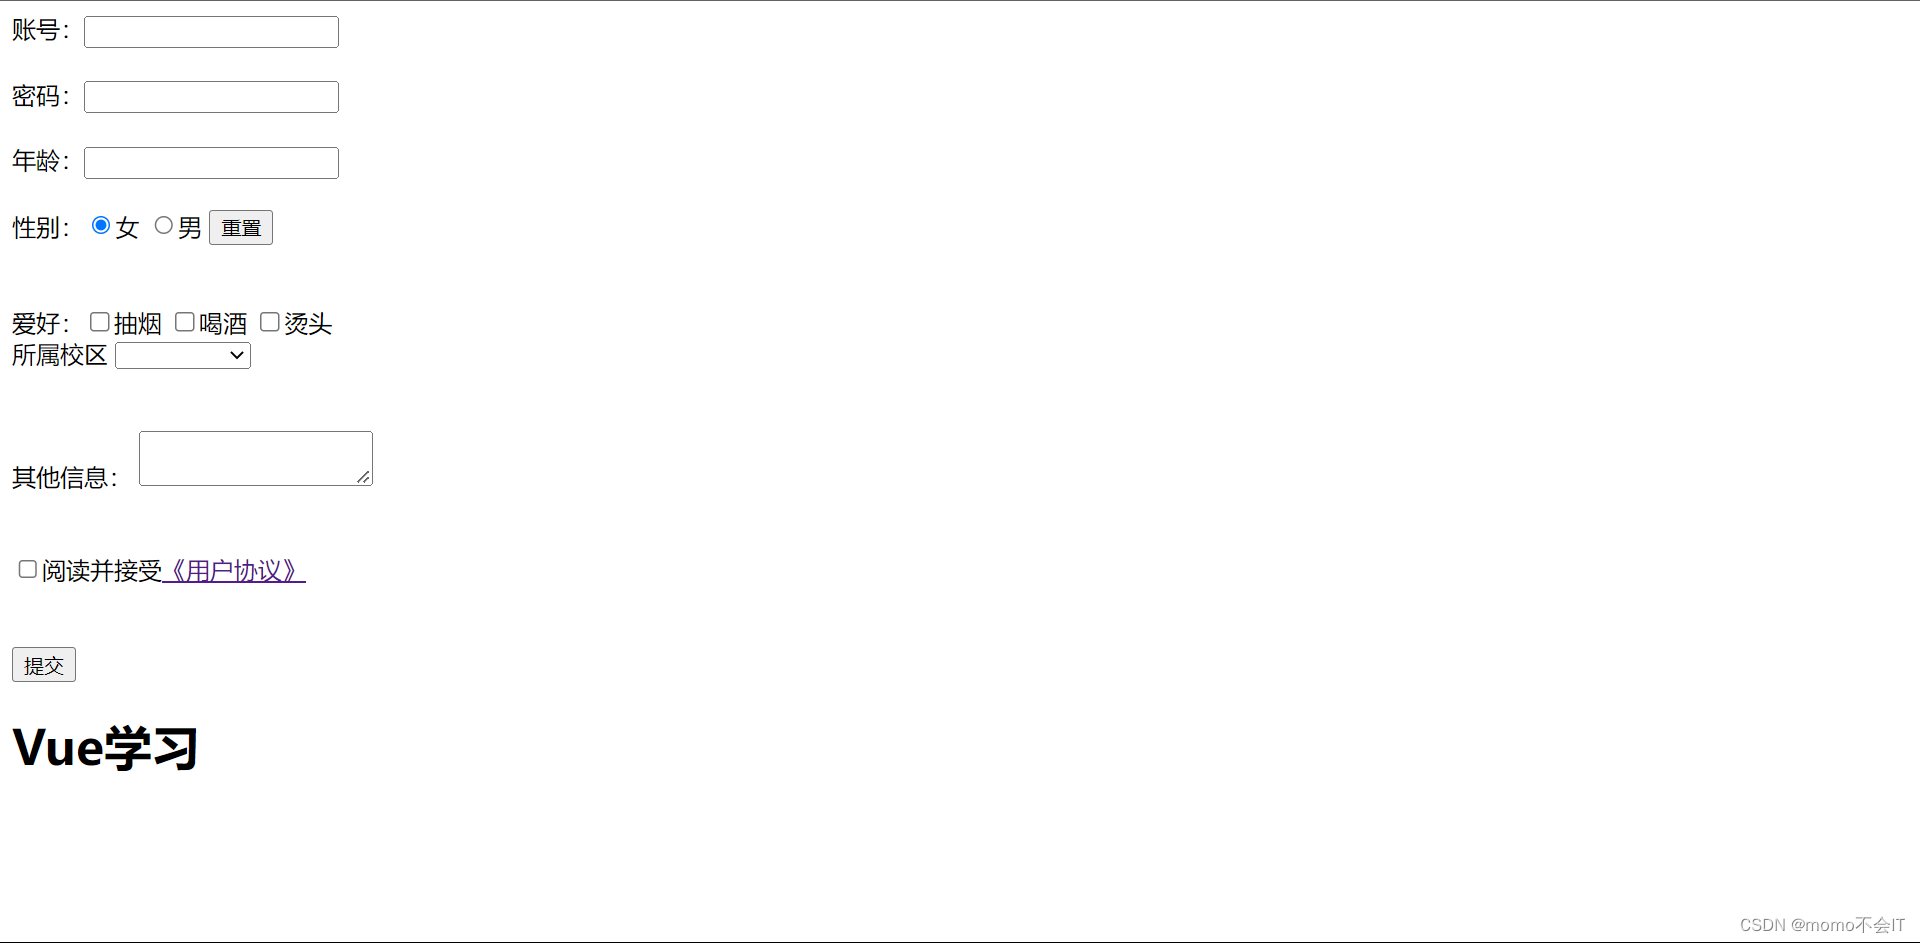
        <form @submit.prevent="demo">
        <label>账号:<input type="text" v-model.trim="userInfo.account"></label><br/><br/>
        <label>密码:<input type="password" v-model="userInfo.password"></label><br/><br/>
        <label>年龄:<input type="number" v-model.number="userInfo.age"></label><br/><br/>

        <form action="" method="post" name="formName">
            性别:<input type="radio" name="sex" checked v-model="userInfo.sex" value="女">女
            <input type="radio" name="sex" checked v-model="userInfo.sex" value="男">男
            <button type="reset">重置</button>


            <form action="" method="post" name="formName"><br/><br/><br/>
        爱好:<input type="checkbox" name="hobby" v-model="userInfo.hobby" value="抽烟">抽烟
                <input type="checkbox" name="hobby" v-model="userInfo.hobby" value="喝酒">喝酒
                <input type="checkbox" name="hobby" v-model="userInfo.hobby" value="烫头">烫头
     </form>

     所属校区
     <select v-model="userInfo.city">
        <option>请选择校区</option>
        <option>西校区</option>
        <option>北校区</option>
     </select><br/><br/><br/>

     其他信息:
     <textarea v-model.lazy="userInfo.other"></textarea><br/><br/><br/>

     <input type="checkbox" v-model="userInfo.agree">阅读并接受<a href="http://www.baidu.com">《用户协议》</a><br/><br/><br/>

     <button>提交</button>

        <h1>{

   {userInfo.name}}学习</h1>
    </form>
    </div>
</body>
<script type="text/javascript">
    Vue.config.productionTip = false;  //阻止 vue 在启动时生成生产提示。

    const vm = new Vue({
        el:'#root',
        data:{
            userInfo:{
            name:'Vue',
            account:'',
            password:'',
            age:'',
            sex:'女',
            hobby:[],
            city:'',
            other:'',
            agree:''
            }
        },
        methods: {
            demo(){
                console.log(JSON.stringify(this.userInfo))
            }
        },
    })
</script>
</html>
<!-- 总结 -->
<!--
    收集表单数据:
         若:<input type="text"/>,则v_model收集的是value值,用户输入的就是value值
         若:<input type="radio"/>,则v_model收集的是value值,且要给标签配置value
         若:<input type="checked"/>
                        1.没有配置input的value属性,那么收集的就是checked(勾选 or 未勾选,是布尔值)
                        2.配置input的value属性:
                            (1)v-model的初始值是非数组,那么收集的就是checked(勾选 or 未勾选,是布尔值)
                            (2)v-model的初识值是数组,那么收集的就是value组成的数组
        备注:v-model的三个修饰符:
                            lazy:失去焦点再收集数据
                            number:输入字符串转为有效数字
                            trim:输入首位空格过滤
 -->
过滤器
<!DOCTYPE html>
<html lang="en">
<head>
    <meta charset="UTF-8">
    <meta http-equiv="X-UA-Compatible" content="IE=edge">
    <meta name="viewport" content="width=device-width, initial-scale=1.0">
    <title>过滤器</title>
    <script type="text/javascript" src="../js/vue.js"></script>
    <script type="text/javascript" src="../js/dayjs.min.js"></script>  <!-- 引入dayjs -->
</head>
<body>
    <!-- 准备好一个盒子 -->
    <div id="root">
        <h1>{

   {name}}学习</h1>
        <h2>显示格式化后的时间</h2>

        <!-- 计算属性实现 -->
        <h3>现在是:{

   {fmtTime}}</h3>

        <!-- methods实现 -->
        <h3>现在是:{

   {getFmtTime()}}</h3>

        <!-- 过滤器实现 (传参) -->
        <h3>现在是:{

   {time | timeFormater}}</h3>
        <h3>现在是:{

   {time | timeFormater('YYYY-MM-DD')}}</h3>
        <h3>现在是:{

   {time | timeFormater('YYYY-MM-DD') | mySlice}}</h3>

    </div>
</body>
<script type="text/javascript">
    Vue.config.productionTip = false;  //阻止 vue 在启动时生成生产提示。

    // //全局过滤器
    // Vue.filter('mySlice',function(value){
    //     return value.slice(0,4)
    // })

    const vm = new Vue({
        el:'#root',
        data:{
            name:'Vue',
            time:1666175957000,    //时间戳
        },
        computed:{
            fmtTime(){
                return dayjs(this.time).format('YYYY-MM-DD HH:mm:ss')
            }
        },
        methods: {
            getFmtTime(){
                return dayjs(this.time).format('YYYY-MM-DD HH:mm:ss')
            }
        },

        //局部过滤器
        filters:{
            timeFormater(value,str='YYYY-MM-DD HH:mm:ss'){
                return dayjs(value).format(str)
            },
            mySlice(value){
                return value.slice(0,4)
            }
        }
    })
</script>
</html>
<!-- 总结 -->
<!--
    过滤器:
        定义:对要显示的数据进行特定格式化后再显示(适用于一些简单逻辑的处理)
        语法:
            1.注册过滤器:Vue.filter(name,callback) 或 new Vue{filter:{}}
            2.使用过滤器:{

   {xxx | 过滤器名(自己起)}} 或 v-bind:属性="xxx | 过滤器名"
        备注:
            1.过滤器也可以接收额外的参数、多个过滤器可以串联
            2.并没有改变原来的数据,是产生新的对应的数据
 -->
内置指令
text_指令
<!DOCTYPE html>
<html lang="en">
<head>
    <meta charset="UTF-8">
    <meta http-equiv="X-UA-Compatible" content="IE=edge">
    <meta name="viewport" content="width=device-width, initial-scale=1.0">
    <title>v-text_指令</title>
    <script type="text/javascript" src="../js/vue.js"></script>
</head>
<body>
    <!-- 准备好一个盒子 -->
    <div id="root">
        <h1>{

   {name}}学习</h1>
        <div v-text="name"></div>
    </div>
</body>
<script type="text/javascript">
    Vue.config.productionTip = false;  //阻止 vue 在启动时生成生产提示。

    const vm = new Vue({
        el:'#root',
        data:{
            name:'Vue',
        },
    })
</script>
</html>
<!--
    我们学过的指令:
            v-bin:单向绑定数据,可简写为  :xxx
            v-model: 双向数据绑定
            v-for  : 遍历数组/对象/字符串
            v-on   : 绑定事件监听,可简写为@
            v-if   : 条件渲染(动态控制节点是否存在)
            v-else : 条件渲染(动态控制节点是否存在)
            v-show : 条件渲染(动态控制节点是否展示)
    v-text指令:
            1.作用:向其所在的节点中渲染文本内容
            2.与插值语法的区别:v-text会替换掉节点中的内容,{

   {xxx}}则不会
 -->
v-html_指令
<!DOCTYPE html>
<html lang="en">
<head>
    <meta charset="UTF-8">
    <meta http-equiv="X-UA-Compatible" content="IE=edge">
    <meta name="viewport" content="width=device-width, initial-scale=1.0">
    <title>v-html_指令</title>
    <script type="text/javascript" src="../js/vue.js"></script>
</head>
<body>
    <!-- 准备好一个盒子 -->
    <div id="root">
        <h1>{

   {name}}学习</h1>
        <div v-text="name"></div>
        <div v-text="srt"></div>              <!-- //v-text不支持结构的解析    v-html支持结构解析 -->
        <div v-html="srt">132</div>
    </div>
</body>
<script type="text/javascript">
    Vue.config.productionTip = false;  //阻止 vue 在启动时生成生产提示。

    const vm = new Vue({
        el:'#root',
        data:{
            name:'Vue',
            srt:'<h3>Vue</h3>'
        },
    })
</script>
</html>
<!-- 总结 -->
<!--
    v-html指令:
        1.作用:向指定节点中渲染包含html结构的内容
        2.与插值语法的区别:
            1.v-html会替换掉节点的所有内容,{

   {xxx}}则不会
            2.v-html可以识别html结构
        3.严重注意:v-html有安全性问题!!!
            (1)在网站上动态渲染任意HTML是非常危险的,容易导致XSS攻击
            (2)一定要在可信的内容上使用v-html,永不要用在用户提交的内容上


    获取cookie进行登录
 -->
v-cloak_指令
<!DOCTYPE html>
<html lang="en">
<head>
    <meta charset="UTF-8">
    <meta http-equiv="X-UA-Compatible" content="IE=edge">
    <meta name="viewport" content="width=device-width, initial-scale=1.0">
    <title>v-cloak_指令</title>

</head>
<body>
    <!-- 准备好一个盒子 -->
    <div id="root">
        <h1 v-cloak>{

   {name}}学习</h1>
    </div>
    <script type="text/javascript" src="http://localhost:8080/resource/5s/vue.js"></script>
</body>
<script type="text/javascript">
    Vue.config.productionTip = false;  //阻止 vue 在启动时生成生产提示。

    const vm = new Vue({
        el:'#root',
        data:{
            name:'Vue',
        },
    })
</script>
</html>
<!-- 总结 -->
<!--
    v-cloak指令(没有值):
                1.本质是一个特殊属性,Vue实例创建完毕并接管容器后,会删除v-cloak属性
                2.使用css配合v-cloak可以解决网速慢时页面展现出{

   {xxx}}的问题
 -->
v-once_指令
<!DOCTYPE html>
<html lang="en">
<head>
    <meta charset="UTF-8">
    <meta http-equiv="X-UA-Compatible" content="IE=edge">
    <meta name="viewport" content="width=device-width, initial-scale=1.0">
    <title>v-once_指令</title>
    <script type="text/javascript" src="../js/vue.js"></script>
</head>
<body>
    <!-- 准备好一个盒子 -->
    <div id="root">
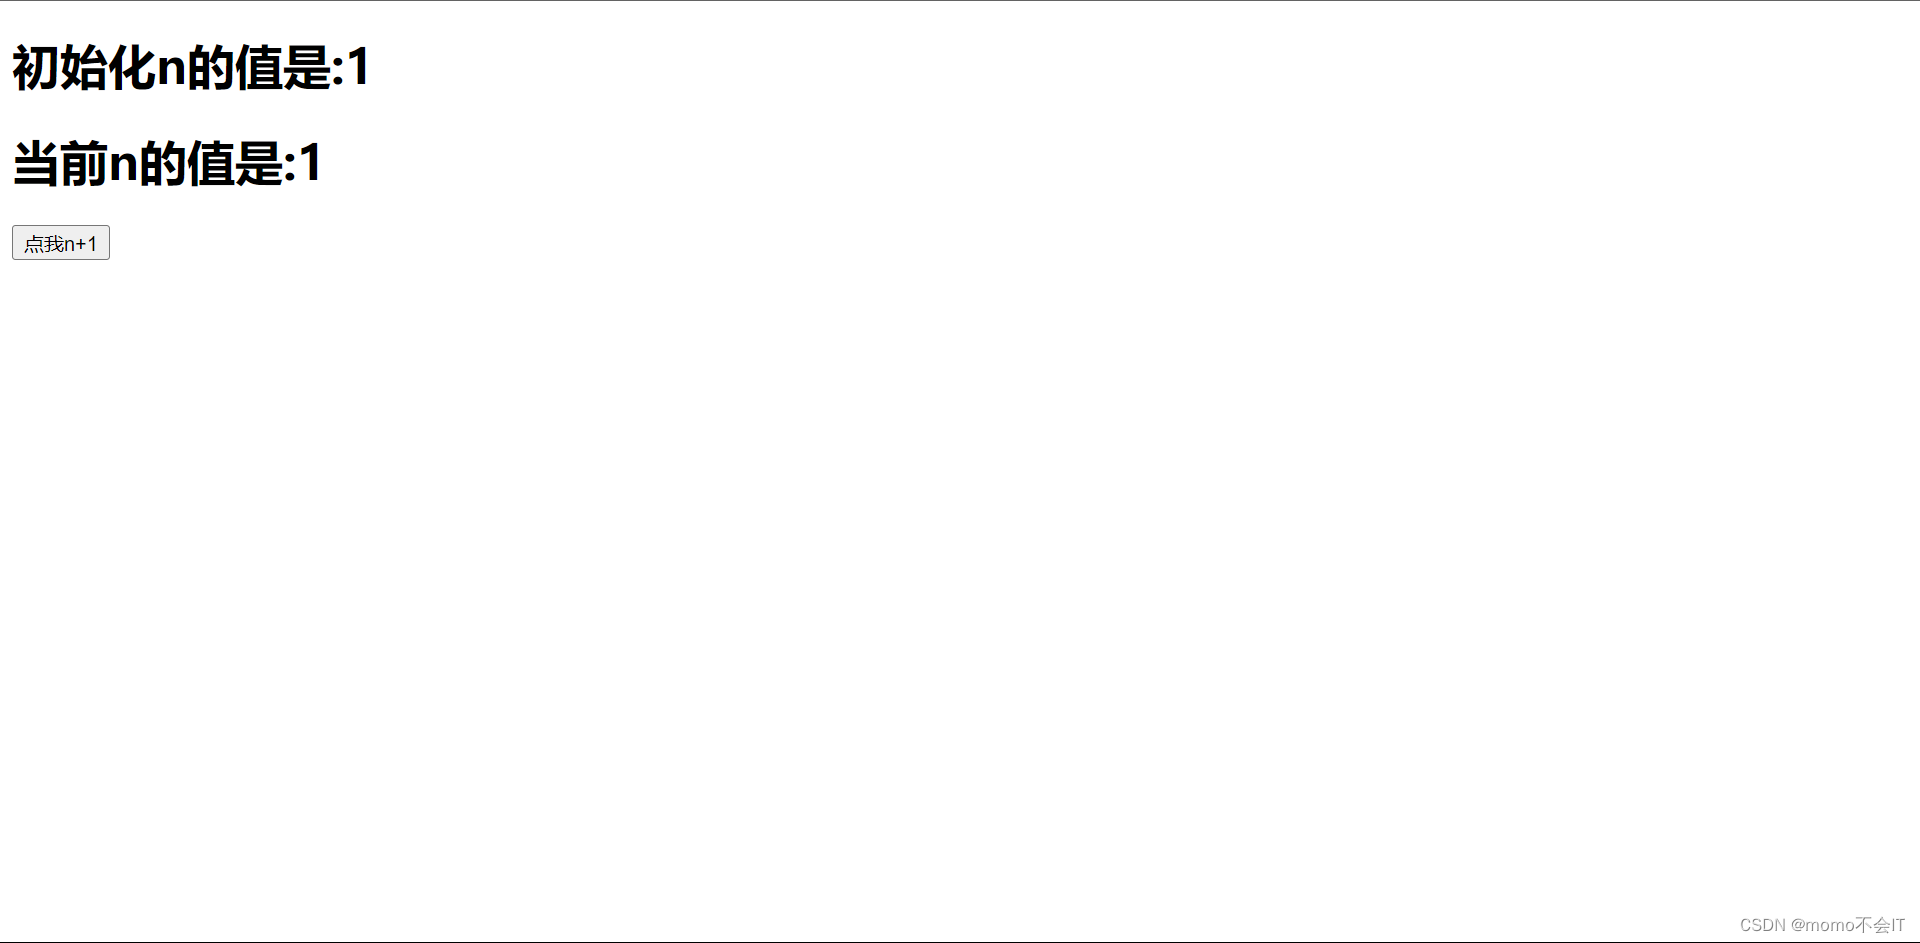
        <h1 v-once>初始化n的值是:{

   {n}}</h1>
        <h1>当前n的值是:{

   {n}}</h1>
        <button @click="n++">点我n+1</button>
    </div>
</body>
<script type="text/javascript">
    Vue.config.productionTip = false;  //阻止 vue 在启动时生成生产提示。

    const vm = new Vue({
        el:'#root',
        data:{
            n:1
        },
    })
</script>
</html>
<!-- 总结 -->
<!--
    v-once指令:
            1.v-once所在节点在初次动态渲染后,就视为静态内容了
            2.以后数据的改变不会引起v-once所在结构的更新,可以用于优化性能
 -->
v-pre_指令
<!DOCTYPE html>
<html lang="en">
<head>
    <meta charset="UTF-8">
    <meta http-equiv="X-UA-Compatible" content="IE=edge">
    <meta name="viewport" content="width=device-width, initial-scale=1.0">
    <title>v-pre_指令</title>
    <script type="text/javascript" src="../js/vue.js"></script>
</head>
<body>
    <!-- 准备好一个盒子 -->
    <div id="root">
        <h1 v-pre>初始化n的值是:{

   {n}}</h1>
        <h1 v-pre>当前n的值是:{

   {n}}</h1>
        <button v-pre @click="n++">点我n+1</button>
    </div>
</body>
<script type="text/javascript">
    Vue.config.productionTip = false;  //阻止 vue 在启动时生成生产提示。

    const vm = new Vue({
        el:'#root',
        data:{
            n:1,
        },
    })
</script>
</html>
<!-- 总结 -->
<!--
    v-pre指令:
            1.跳过其所在节点的编译过程
            2.可利用它跳过:没有使用指令语法、没有使用插值语法的节点,会加快编译
 -->
自定义指令
自定义指令
<!DOCTYPE html>
<html lang="en">
<head>
    <meta charset="UTF-8">
    <meta http-equiv="X-UA-Compatible" content="IE=edge">
    <meta name="viewport" content="width=device-width, initial-scale=1.0">
    <title>自定义指令</title>
    <script type="text/javascript" src="../js/vue.js"></script>
</head>
<body>
    <!-- 需求1:定义一个v-big指令,和v-text功能类似,但把绑定的数据放大十倍 -->
    <!-- 需求2:定义一个v-fbind指令,和v-bing功能类似,但可以让其绑定的input元素默认获取焦点 -->
    <div id="root">
        <h1>{

   {name}}</h1>
        <h1>当前的n值是: <span v-text="n"></span></h1>
        <h1>放大十倍的n值是: <span v-big="n"></span></h1>
        <button @click="n++">点我n+1</button>
        <hr/>
        <input type="text" v-fbind:value="n">
    </div>
</body>
<script type="text/javascript">
    Vue.config.productionTip = false;  //阻止 vue 在启动时生成生产提示。

    const vm = new Vue({
        el:'#root',
        data:{
            n:1,
            name:'Vue'
        },
        directives:{
            // big函数何时会被调用?1.指令与元素成功绑定时 2.指令所在模板被重新解析时
            big(element,binding){
                console.log(element)
                element.innerText = binding.value * 10
            },
            fbind:{
                bind(element,binding){
                    element.value = binding.value
                },
                insertde(element,binding){
                    element.focus()
                },
                update(element,binding){
                    element.value = binding.value
                }
            }
        }
    })
</script>
</html>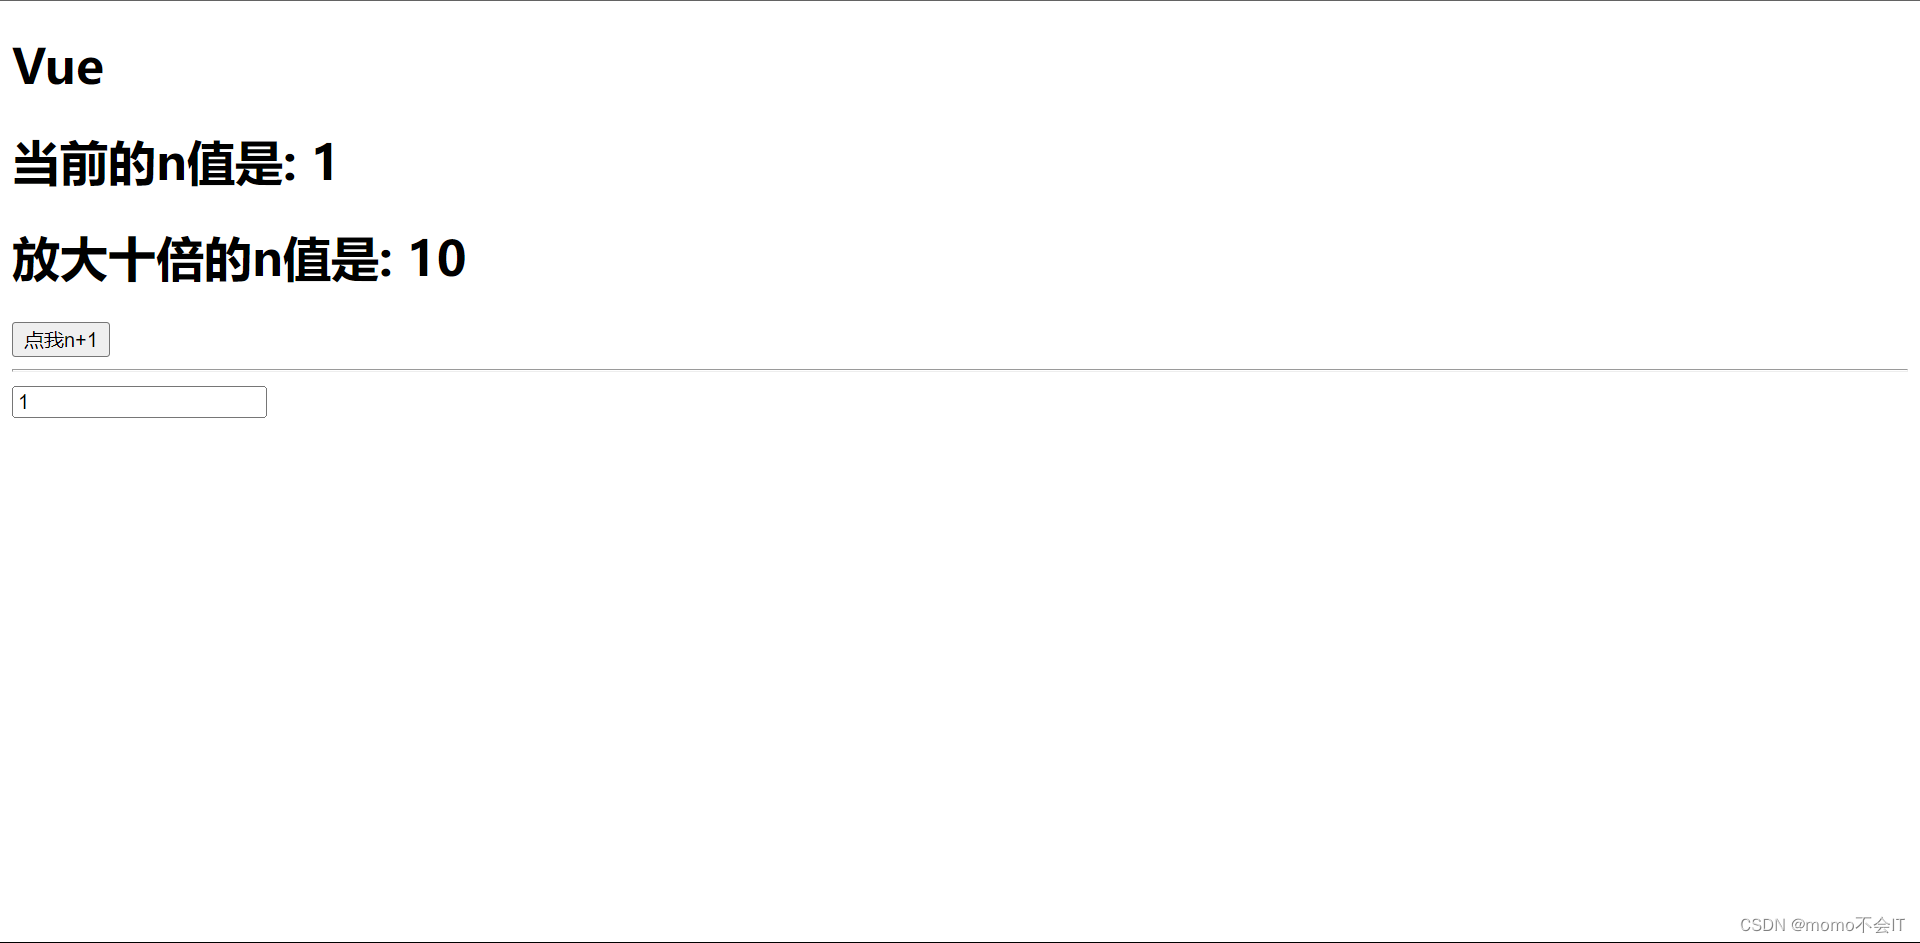
回顾一个DOM操作
<!DOCTYPE html>
<html lang="en">
<head>
    <meta charset="UTF-8">
    <meta http-equiv="X-UA-Compatible" content="IE=edge">
    <meta name="viewport" content="width=device-width, initial-scale=1.0">
    <title>回顾一个DOM操作</title>
    <style>
        .demo{
            background-color: orange;
        }
    </style>
</head>
<body>
    <button id="btn">点我创建一个输入框</button>
    <script type="text/javascript">
        const btn = document.getElementById('btn')
        btn.onclick = () =>{
            const input = document.createElement('input')

            input.className = 'demo'
            input.value = 99
            input.click = () => {alert(1)}

            document.body.appendChild(input)

            input.focus()
            input.parentElement.style.backgroundColor = 'skybule'
            // console.log(input.parentElement)
        }
    </script>
</body>
</html>
总结
<!DOCTYPE html>
<html lang="en">
<head>
    <meta charset="UTF-8">
    <meta http-equiv="X-UA-Compatible" content="IE=edge">
    <meta name="viewport" content="width=device-width, initial-scale=1.0">
    <title>总结</title>
</head>
<body>
    <!--
        自定义指令总结:
            一、定义语法:
                (1)局部指令:
                        new Vue({                                     new Vue({
                                directives:{指令名:配置对象}    或               directives(){}
                            })                                               })
                (2)全局指令:
                            Vue.directives:(指令名:配置对象)   或        Vue.directives:(指令名:回调函数)

            二、配置对象中常用的3个回调:
                (1)bind:指令与元素成功绑定时调用
                (2)inserted:指令所在元素被插入页面时调用
                (3)update:指令所在模板结构被重新解析时调用

            三、备注:
                1.指令定义时不加v-,但使用时要加v-
                2.指令名如果不是多个单词,要使用kebab-case命名方式,不要用camelCase命名
                (单词全小写,不用驼峰命名法)

     -->
</body>
</html>
生命周期
引出生命周期
<!DOCTYPE html>
<html lang="en">
<head>
    <meta charset="UTF-8">
    <meta http-equiv="X-UA-Compatible" content="IE=edge">
    <meta name="viewport" content="width=device-width, initial-scale=1.0">
    <title>引出生命周期</title>
    <script type="text/javascript" src="../js/vue.js"></script>
</head>
<body>
    <!-- 准备好一个盒子 -->
    <div id="root">
        <h1 :style="{opacity}">{

   {name}}学习</h1>
    </div>
</body>
<script type="text/javascript">
    Vue.config.productionTip = false;  //阻止 vue 在启动时生成生产提示。

    const vm = new Vue({
        el:'#root',
        data:{
            name:'Vue',
            opacity:1
        },
        methods: {

        },
        // Vue完成模板的解析并把初始的真实DOM值元素放入页面后(挂载完毕)调用mounted
        mounted() {
            console.log('mounted',this)
            setInterval(() => {
            this.opacity -= 0.2
            if(this.opacity<=0) this.opacity = 1
        }, 0.00000000000001);
        },
    })

    // setInterval(() => {
    //     vm.opacity -= 0.2
    //     if(vm.opacity<=0) vm.opacity = 1
    // }, 0.00000000000001);
</script>
</html>
<!-- 总结 -->
<!--
    生命周期:
        1.又名:生命周期回调函数、生命周期函数、生命周期钩子
        2.是什么:Vue在关键时刻帮我们调用的一些特殊名称的函数
        3.生命周期函数的名字不可更改,但函数的具体内容是程序员根据需要编写的
        4.生命周期中的this指向是vm 或 组件实例对象
 -->
分析生命周期
<!DOCTYPE html>
<html lang="en">
<head>
    <meta charset="UTF-8">
    <meta http-equiv="X-UA-Compatible" content="IE=edge">
    <meta name="viewport" content="width=device-width, initial-scale=1.0">
    <title>分析生命周期</title>
    <script type="text/javascript" src="../js/vue.js"></script>
</head>
<body>
    <!-- 准备好一个盒子 -->
    <div id="root">
        <h1 :style="{opacity}">{

   {name}}学习</h1>
    </div>
</body>
<script type="text/javascript">
    Vue.config.productionTip = false;  //阻止 vue 在启动时生成生产提示。

    const vm = new Vue({
        el:'#root',
        data:{
            name:'Vue',
            opacity:1
        },
        methods: {

        },
        beforeCreate() {
            console.log('beforeCreate')
        },
        created() {
            console.log('created')
        },
        beforeMount() {
            console.log('beforeMount')
        },
        // Vue完成模板的解析并把初始的真实DOM值元素放入页面后(挂载完毕)调用mounted
        mounted() {
            console.log('mounted',this)
            setInterval(() => {
            this.opacity -= 0.2
            if(this.opacity<=0) this.opacity = 1
        }, 0.00000000000001);
        },
        beforeUpdate() {
            console.log('beforeUpdate')
        },
        updated() {
            console.log('updated ')
        },
    })

    // setInterval(() => {
    //     vm.opacity -= 0.2
    //     if(vm.opacity<=0) vm.opacity = 1
    // }, 0.00000000000001);
</script>
</html>
<!-- 总结 -->
<!--
    常用的生命周期钩子:
            1.mounted:发送ajax请求、启动定时器、绑定自定义事件、订阅消息等【初始化操作】
            2.beforeDestroy:清除定时器、解除自定义事件、取消订阅消息等收尾工作【收尾工作】

    关于销毁Vue实例
            1.销毁后借助Vue开发者工具看不到任何消息
            2.销毁后自定义事件会失效,但原生DOM事件依然有效
            3.一般不会在beforeDestroy操作数据,因为即使操作数据,也不会在触发更新流程
 -->
非单文件组件
基本使用
<!DOCTYPE html>
<html lang="en">
<head>
    <meta charset="UTF-8">
    <meta http-equiv="X-UA-Compatible" content="IE=edge">
    <meta name="viewport" content="width=device-width, initial-scale=1.0">
    <title>基本使用</title>
    <script type="text/javascript" src="../js/vue.js"></script>
</head>
<body>
    <!-- 准备好一个盒子 -->
    <div id="root">
        <!-- 第三步:编写组件标签 -->
        <hello></hello>
        <!-- 第三步:编写组件标签 -->
        <contentss></contentss>
        <hr/>
        <!-- 第三步:编写组件标签 -->
        <tego></tego>
    </div>
    <hr/>
    <div id="root2">
        <!-- 第三步:编写组件标签 -->
        <hello>111</hello>
    </div>
</body>
<script type="text/javascript">
    Vue.config.productionTip = false;  //阻止 vue 在启动时生成生产提示。

    //第一步:创建content组件
    const contentss = Vue.extend({
        // el:'#root',  //组件定义时, 一定不要写el配置项,以为最终所有的组件都要被一个Vue管理,由Vue决定服务哪个容器
        //template只有一个根元素
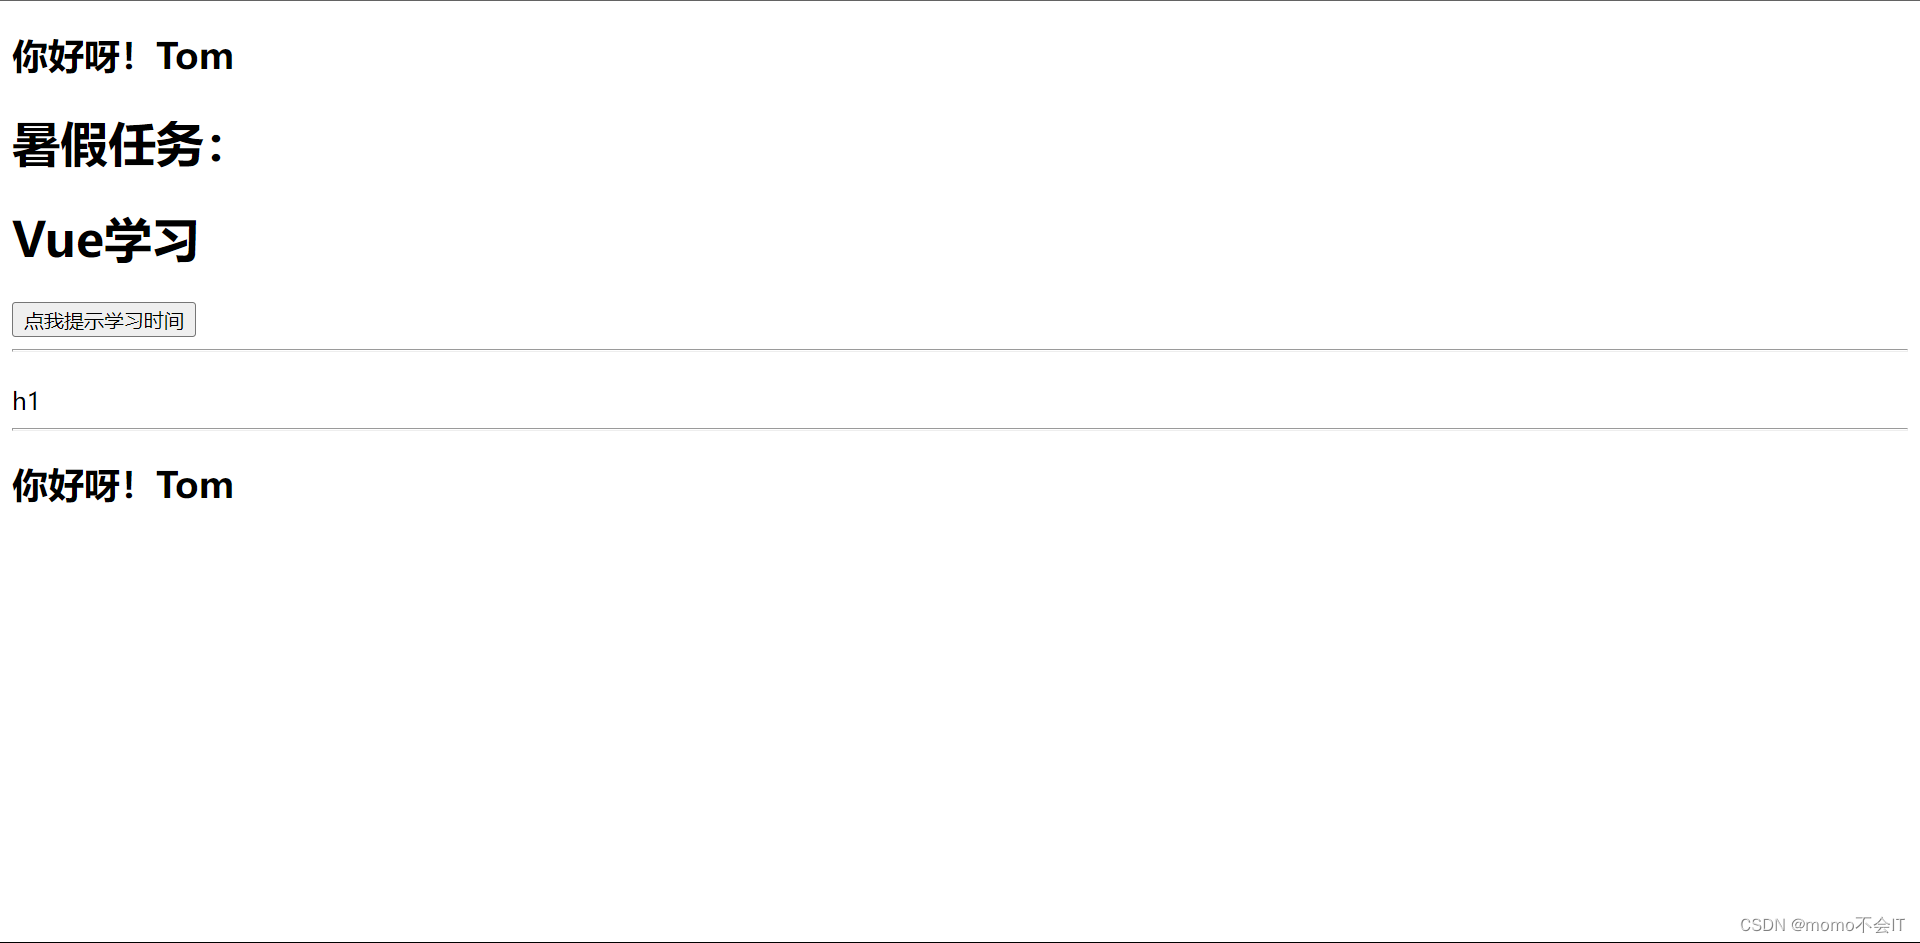
        template:`
        <div>
            <h1>{

   {summer}}任务:</h1>
            <h1>{

   {name}}学习</h1>
            <button @click='holiday'>点我提示学习时间</button>
        </div>
        `,
        data(){
            return{
                summer:'暑假',
                name:'Vue'
            }
        },
        methods: {
            holiday(){
                alert(this.summer);
            }
        },
    })

    //第一步:创建tego组件
    const tego = Vue.extend({
        template:`
        <div>
            <h1></h1>
            <h1></h1>
            h1
        </div>
        `,
        data(){
            return{
                need:'需要',
                studys:'学习'
            }
        }
    })

    //第一步:创建hello组件
    const hello = Vue.extend({
        template:`
        <div>
            <h2>你好呀!{

   {name}}</h2>
        </div>
        `,
        data(){
            return{
                name:'Tom'
            }
        }
    })

    // 第三步:全局注册组件
    Vue.component('hello',hello)

    // 创建Vue
    const vm = new Vue({
        el:'#root',
        // 第二步:注册组件(局部注册)
        components:{
            // 不同名
                // neirong:content,
                // jishu:tego
            // 同名时可以这样简写
            contentss,
            tego
        }
    })

    const vm2 =new Vue({
        el:'#root2'
    })
</script>
</html>
<!-- 总结 -->
<!--
    Vue中使用组件的三大步骤:
        1.定义组件(创建组件)
        2.注册组件
        3.使用组件(写组件标签)

    一、如何定义一个组件?
        使用Vue.extend(options)创建,其中options和new Vue(options)时传入的那个options几乎一样,但也有点区别
        区别如下:
            1.el不要写,为什么? —— 最终所有组件都要经过一个vm的管理,由vm中的el决定服务哪个容器
            2.data必须写成函数,为什么? —— 避免组件被复用时,数据存在引用关系
          备注:使用template可以配置组件结构

    二、如何注册组件?
            1.局部注册:靠new Vue的时候传入completes选项
            2.全局注册:靠Vue.complete('组件名',组件)

    三、编写组件标签
            <hello></hello>
 -->
几个注意点
<!DOCTYPE html>
<html lang="en">
<head>
    <meta charset="UTF-8">
    <meta http-equiv="X-UA-Compatible" content="IE=edge">
    <meta name="viewport" content="width=device-width, initial-scale=1.0">
    <title>几个注意点</title>
    <script type="text/javascript" src="../js/vue.js"></script>
</head>
<body>
    <!-- 准备好一个盒子 -->
    <div id="root">
        <!-- 第三步:编写组件标签 -->
        <hello></hello>
        <!-- 第三步:编写组件标签 -->
        <contentss></contentss>
        <hr/>
        <!-- 第三步:编写组件标签 -->
        <tego></tego>
    </div>
    <hr/>
    <div id="root2">
        <!-- 第三步:编写组件标签 -->
        <hello>111</hello>
    </div>
</body>
<script type="text/javascript">
    Vue.config.productionTip = false;  //阻止 vue 在启动时生成生产提示。

    //第一步:创建content组件
    const contentss = Vue.extend({
        // el:'#root',  //组件定义时, 一定不要写el配置项,以为最终所有的组件都要被一个Vue管理,由Vue决定服务哪个容器
        //template只有一个根元素
        template:`
        <div>
            <h1>{

   {summer}}任务:</h1>
            <h1>{

   {name}}学习</h1>
            <button @click='holiday'>点我提示学习时间</button>
        </div>
        `,
        data(){
            return{
                summer:'暑假',
                name:'Vue'
            }
        },
        methods: {
            holiday(){
                alert(this.summer);
            }
        },
    })

    //第一步:创建tego组件
    const tego = Vue.extend({
        template:`
        <div>
            <h1>{

   {need}}学习什么?</h1>
            <h1>要{

   {studys}}ES6</h1>
        </div>
        `,
        data(){
            return{
                need:'需要',
                studys:'学习'
            }
        }
    })

    //第一步:创建hello组件
    const hello = {
        template:`
        <div>
            <h2>你好呀!{

   {name}}</h2>
        </div>
        `,
        data(){
            return{
                name:'Tom'
            }
        }
    }

    // 第三步:全局注册组件
    Vue.component('hello',hello)

    // 创建Vue
    const vm = new Vue({
        el:'#root',
        // 第二步:注册组件(局部注册)
        components:{
            // 不同名
                // neirong:content,
                // jishu:tego
            // 同名时可以这样简写
            contentss,
            tego
        }
    })

    const vm2 =new Vue({
        el:'#root2'
    })
</script>
</html>
<!--
    几个注意点:
        1.关于组件名:
                一个单词组成:
                        第一种写法(首字母大写):School
                        第二种写法(首字母小写):school
                多个单词组成:
                        第一种写法(kebab-case命名):my-school
                        第二种写法(CamelCase命名):MySchool(需要Vue脚手架支持)
                备注:
                    (1)组件名尽可能回避HTML中已有的元素名称,例如:h2、H2都不行
                    (2)可以使用 那么配置项指定组件在开发者工具中呈现的名字

        2.关于组件标签:
                第一种写法:<school></school>
                第二种写法:</school>
                备注:不使用脚手架时,</school>会导致后续组件不能渲染

        3.一个简写方式:
                const school = Vue.extend(options) 课简写为 const school = options(具体看hello组件)
 -->
组件的嵌套
<!DOCTYPE html>
<html lang="en">
<head>
    <meta charset="UTF-8">
    <meta http-equiv="X-UA-Compatible" content="IE=edge">
    <meta name="viewport" content="width=device-width, initial-scale=1.0">
    <title>组件的嵌套</title>
    <script type="text/javascript" src="../js/vue.js"></script>
</head>
<body>
    <!-- 准备好一个盒子 -->
    <div id="root">
        <app></app>
    </div>
</body>
<script type="text/javascript">
    Vue.config.productionTip = false;  //阻止 vue 在启动时生成生产提示。

    //第一步:创建student组件
    const student = Vue.extend({
        template:`<h1>学生姓名:{

   {namee}}</h1>`,
        data(){
            return{
                namee:'jojo'
            }
        }
    })

    //第一步:创建school组件
    const school = Vue.extend({
        template:`
        <div>
            <h1>学校名称:{

   {name}}</h1>
            <student></student>
        </div>
        `,
        data(){
            return{
                name:'广东白云学院'
            }
        },
        components:{
            student
        }
    })

    //第一步:创建app组件

    const app = Vue.extend({
        template:`
        <school></school>
        `,
        components:{
            school
        }
    })

    const vm = new Vue({
        el:'#root',
        components:{
            app
        }
    })
</script>
</html>
VueComponent
<!DOCTYPE html>
<html lang="en">
<head>
    <meta charset="UTF-8">
    <meta http-equiv="X-UA-Compatible" content="IE=edge">
    <meta name="viewport" content="width=device-width, initial-scale=1.0">
    <title>VueComponent</title>
    <script type="text/javascript" src="../js/vue.js"></script>
</head>
<body>
    <!-- 准备好一个盒子 -->
    <div id="root">
        <h1>{

   {name}}学习</h1>
    </div>
</body>
<script type="text/javascript">
    Vue.config.productionTip = false;  //阻止 vue 在启动时生成生产提示。

    const vm = new Vue({
        el:'#root',
        data:{
            name:'Vue',
        },
    })
</script>
</html>
<!-- 总结 -->
<!--
    关于VueComponent
        1.school组件本质是一个名为VueComponent的构造函数,且不是程序员定义的,是Vue.extend生成的

        2.我们只需要写<school></school> 或 </school>,Vue解析时会帮我们创建school组件的实例对象,
          即Vue帮我们执行的:new VueComponent(options)

        3.特别注意:每次调用Vue.extend,返回都是一个全新的VueComponent!!!

        4.关于this指向:
            (1)组件配置:
                data函数、methods中的函数、watch中的函数、computed中的函数、它们的this均是【VueComponent实例对象】
            (2)new Vue(options)配置中:
                data函数、methods中的函数、watch中的函数、computed中的函数、它们的this均是【Vue实例对象】

        5.VueComponent的实例对象,以后简称为vc(也可以称之为:组件实例对象)
          Vue的实例对象,以后简称vm
 -->
一个重要的内置对象
<!DOCTYPE html>
<html lang="en">
<head>
    <meta charset="UTF-8">
    <meta http-equiv="X-UA-Compatible" content="IE=edge">
    <meta name="viewport" content="width=device-width, initial-scale=1.0">
    <title>一个重要的内置对象</title>
    <script type="text/javascript" src="../js/vue.js"></script>
</head>
<body>
    <!-- 准备好一个盒子 -->
    <div id="root">
        <h1>{

   {name}}学习</h1>
    </div>
</body>
<script type="text/javascript">
    Vue.config.productionTip = false;  //阻止 vue 在启动时生成生产提示。

    // // 定义一个构造函数
    // function Demo (){
    //     this.a = 1
    //     this.b = 2
    // }
    // // 创建一个Demo的实例对象
    // const d = new Demo()

    // console.log(Demo.prototype)  //显示原型属性

    // console.log(d.__proto__)  //隐式原型属性

    // console.log(Demo.prototype === d.__proto__)

    // // 程序员通过显示原型属性操作原型对象,追加一个x属性,值为99
    // Demo.prototype.x = 99

    // console.log(d)

    const vm = new Vue({
        el:'#root',
        data:{
            name:'Vue',
        },
    })
</script>
</html>
<!-- 总结 -->
<!--
    1.一个重要的内置关系:VueComponent.prototype.__proto__===Vue.prototype
      (school.prototype.__proto__===Vue.prototype)
    2.为什么要有这个关系:让组件实例对象(vc)可以访问到 Vue原型上的属性、方法
 -->
单组件文件
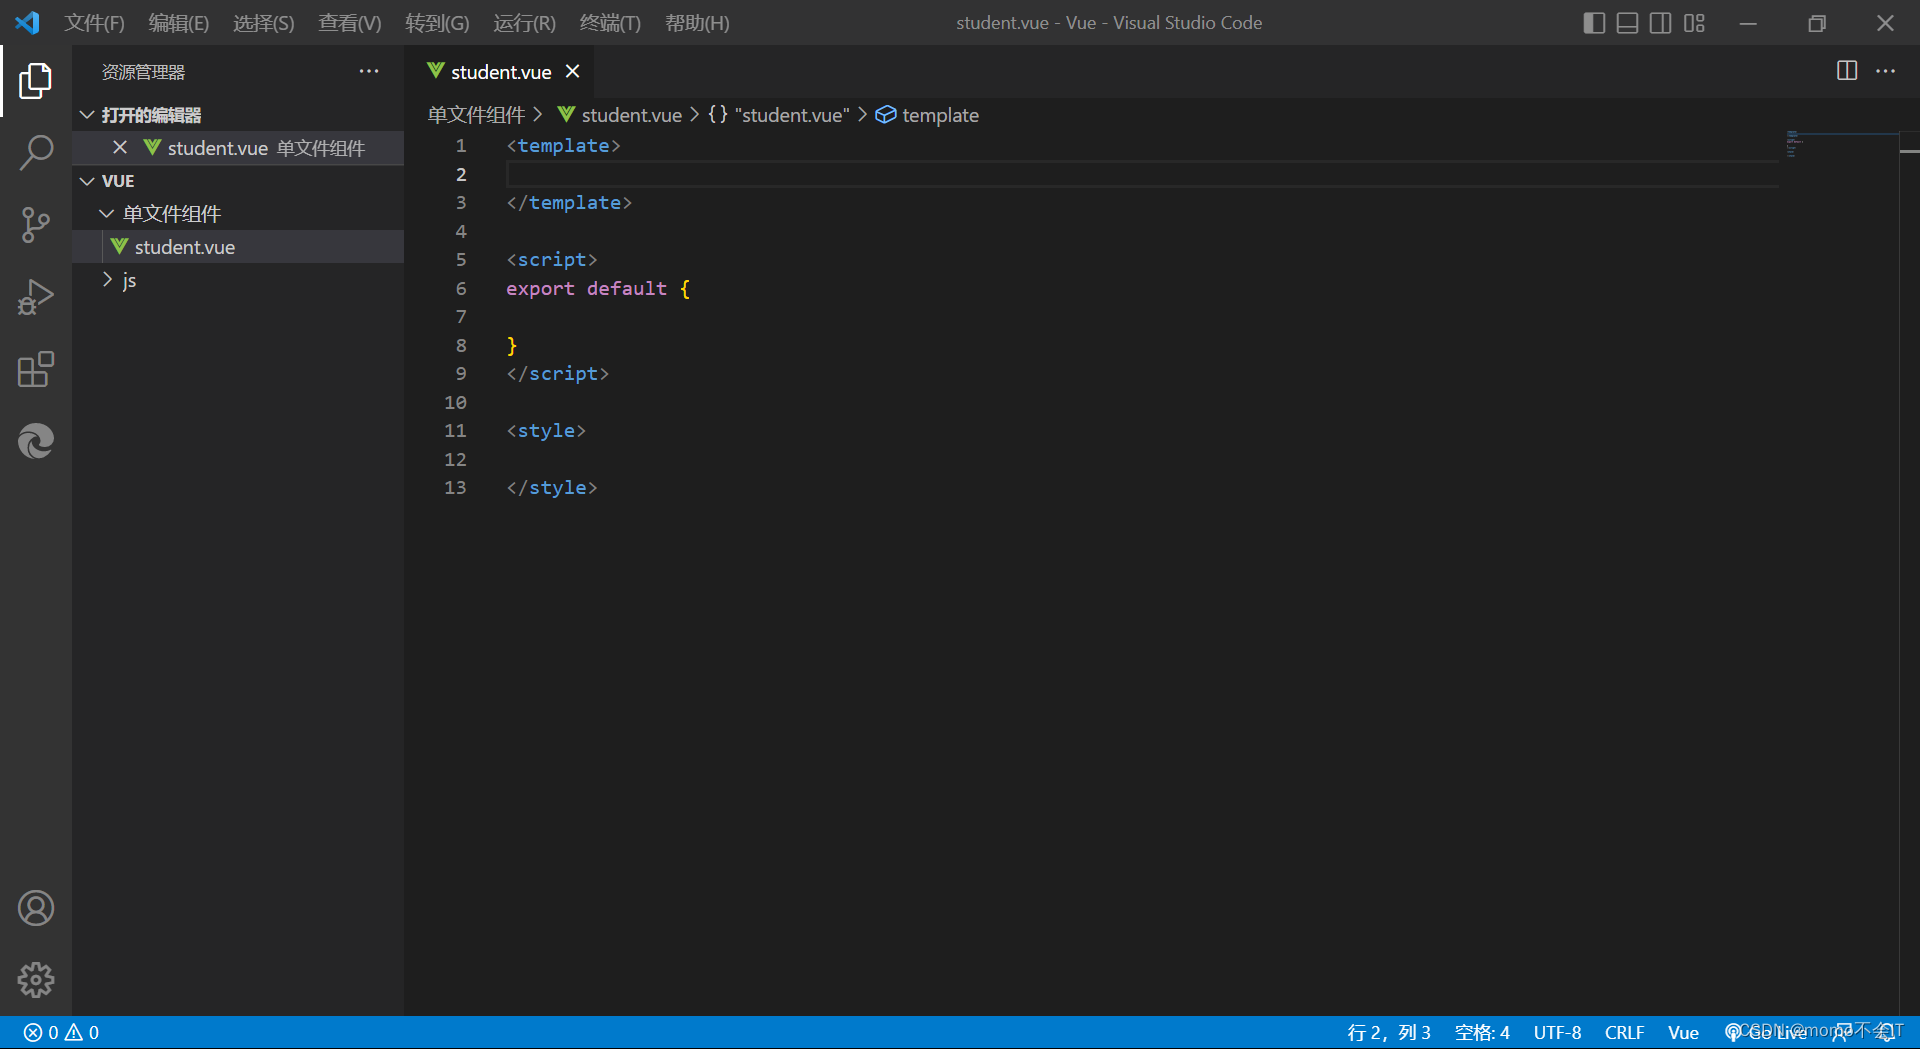
首先创建一个Vue文件

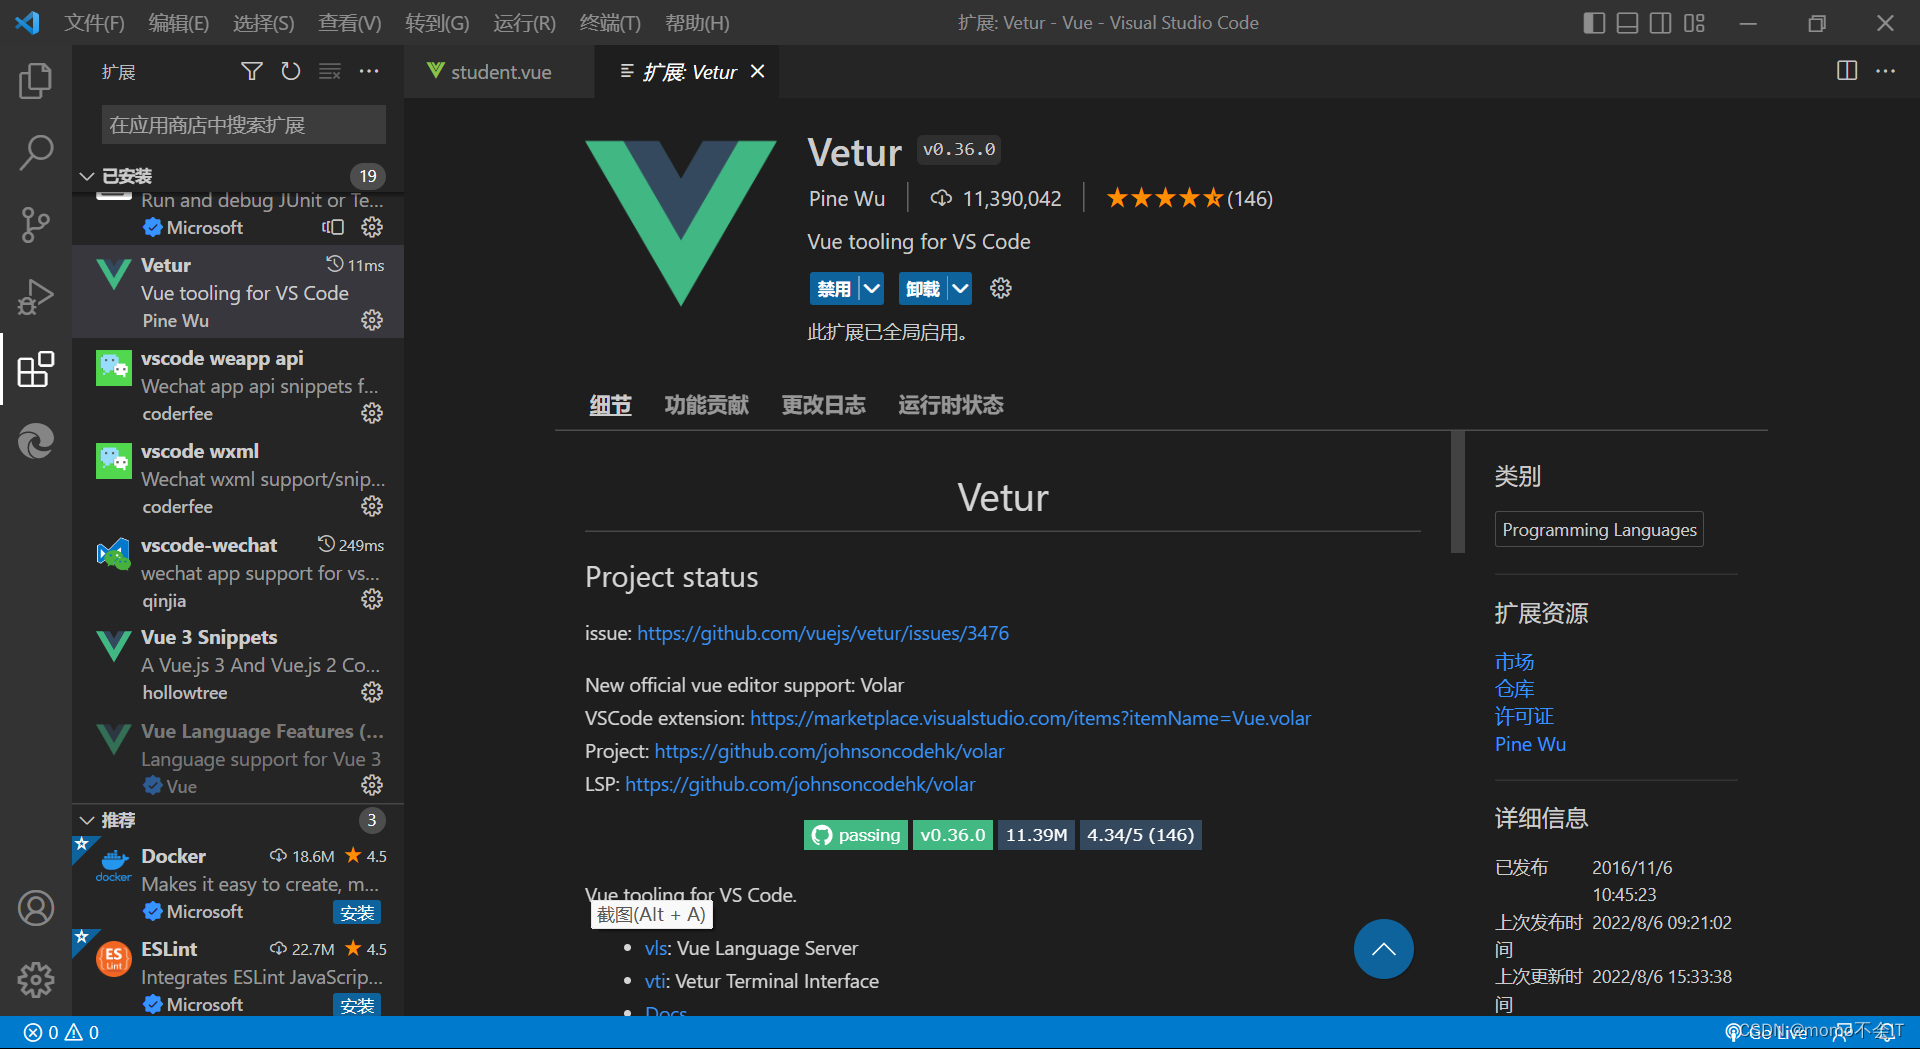
在Visual Studio Code 中安装插件
插件安装成功后只要打上一个<就可以把模板编写出来

<template>
    <!-- 组件的结构 -->
    <div>
        <h1>学生姓名:{

   {name}}</h1>
        <h1>学生年龄:{

   {age}}</h1>
        <button @click='year'>点我提示学生年龄</button>
    </div>
</template>

<script>
    // 组件交互相关的代码(数据、方法等等)
    export default {
    name:'student',
    data(){
        return{
            name:'jojo',
            age:21
        }
    },
    methods: {
        year(){
            alert(this.age);
        }
    }
  }
</script>
再创建一个school.vue文件
<template>
    <!-- 组件的结构 -->
    <div class="demo">
        <h1>{

   {summer}}任务:</h1>
        <h1>{

   {name}}学习</h1>
        <button @click='holiday'>点我提示学习时间</button>
    </div>
</template>

<script>
    // 组件交互相关的代码(数据、方法等等)
    export default {
    name:'school',
    data(){
        return{
            summer:'暑假',
            name:'Vue'
        }
    },
    methods: {
        holiday(){
            alert(this.summer);
        }
    }
  }
</script>

<style>
    /* 组件的样式 */
    .demo{
        background-color: orange;
    }
</style>
创建一个app.vue文件,简单来说app.Vue是其他的Vue文件的大哥,其他的Vue文件想使用时都要在app.vue文件中进行注册
<template>
    <div>
        <school></school>
        <student></student>
    </div>
</template>

<script>
import school from './school.vue'
    // 引入组件
    import school from './school.vue'
    import student from './student.vue'
    export default {
  components: { school,student },
        name:'app',
        comments:{
            school,
            student
        }
    }
</script>

<style>

</style>
在html中是无法直接使用Vue文件的需要将Vue文件引入在JS文件中,在html文件调用JS文件
import app from './app.vue'

new Vue({
    el:'#root',
    components:{
        app
    }
})
创建index页面
<!DOCTYPE html>
<html lang="en">
<head>
    <meta charset="UTF-8">
    <meta http-equiv="X-UA-Compatible" content="IE=edge">
    <meta name="viewport" content="width=device-width, initial-scale=1.0">
    <title>index</title>
</head>
<body>
    <div id="root">
        <app></app>
    </div>
    <script type="text/javascript" src="../js/vue.js"></script>
    <script type="text/javascript" src="./main.js"></script>
</body>
</html>
但是浏览器是无法识别Vue文件的,这时候我们就需要创建一个Vue的脚手架了
在电脑上打开命令提示符
配置npm淘宝镜像(大多数配置时下载速度比较缓慢配置淘宝镜像可以加快下载速度):npm config set registry https://registry.npm.taobao.org
配置成功后进行全局安装Vue脚手架:npm install -g @Vue/cli(下载时卡主住了可以尝试按下回车)
配置成功后使用命令提示符创建Vue脚手架
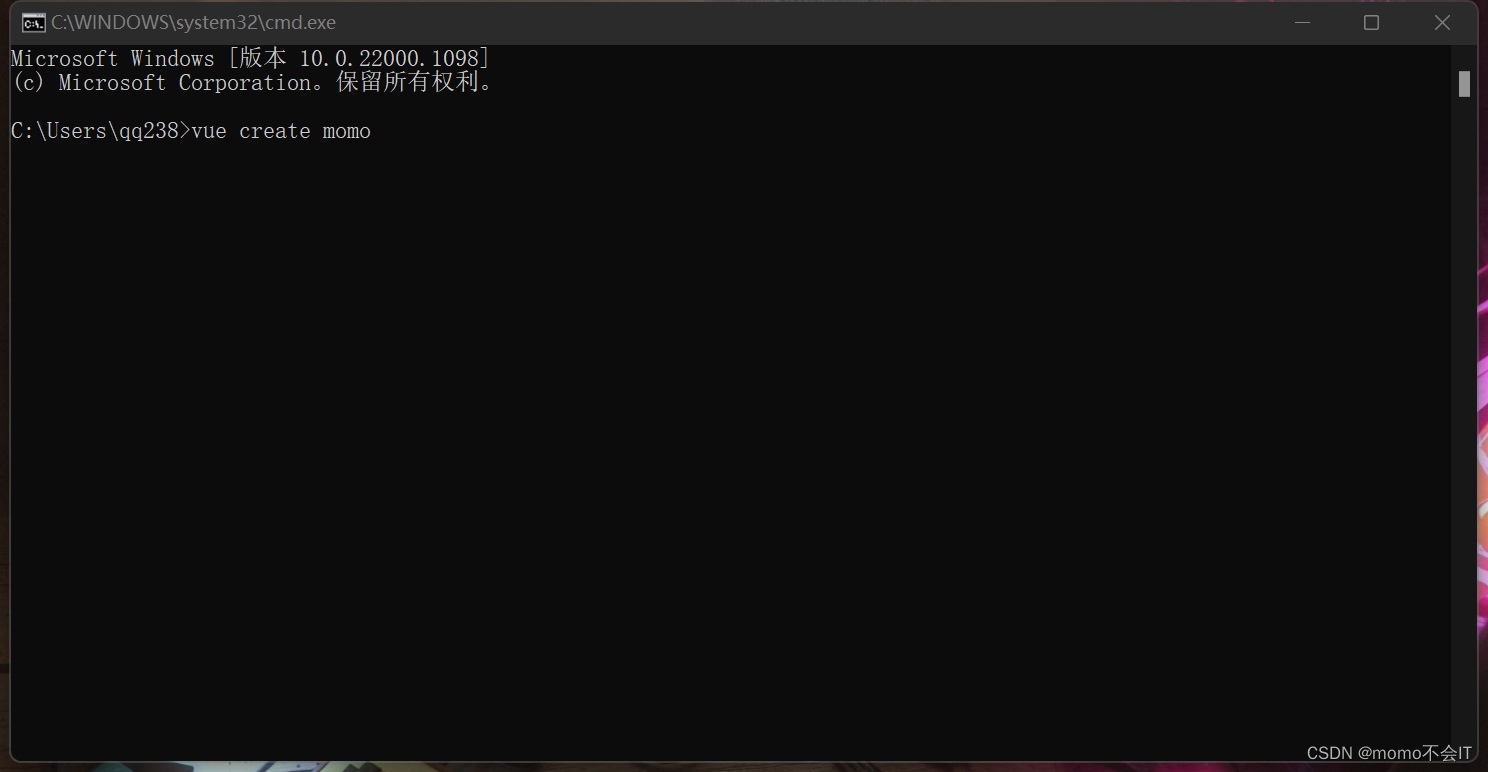


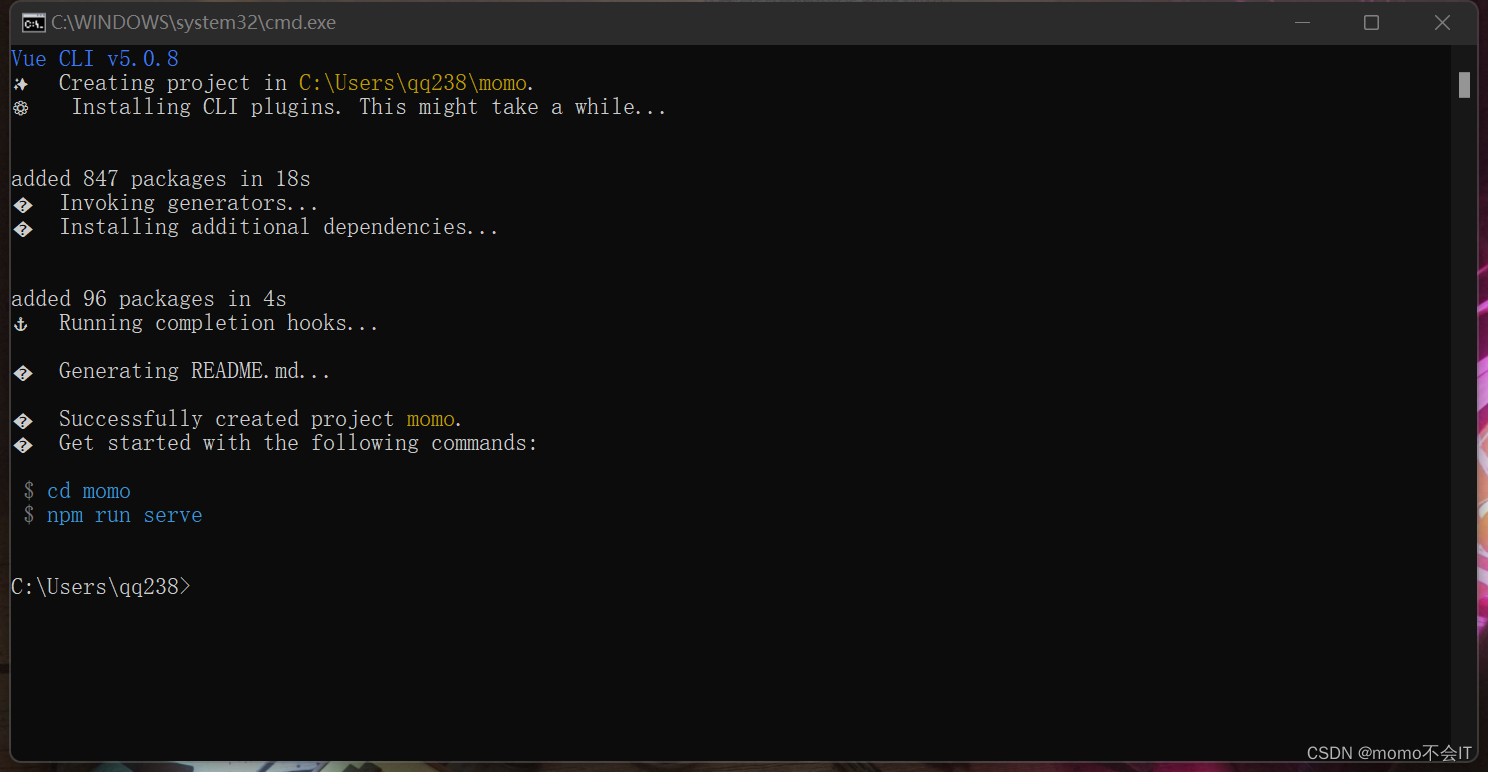
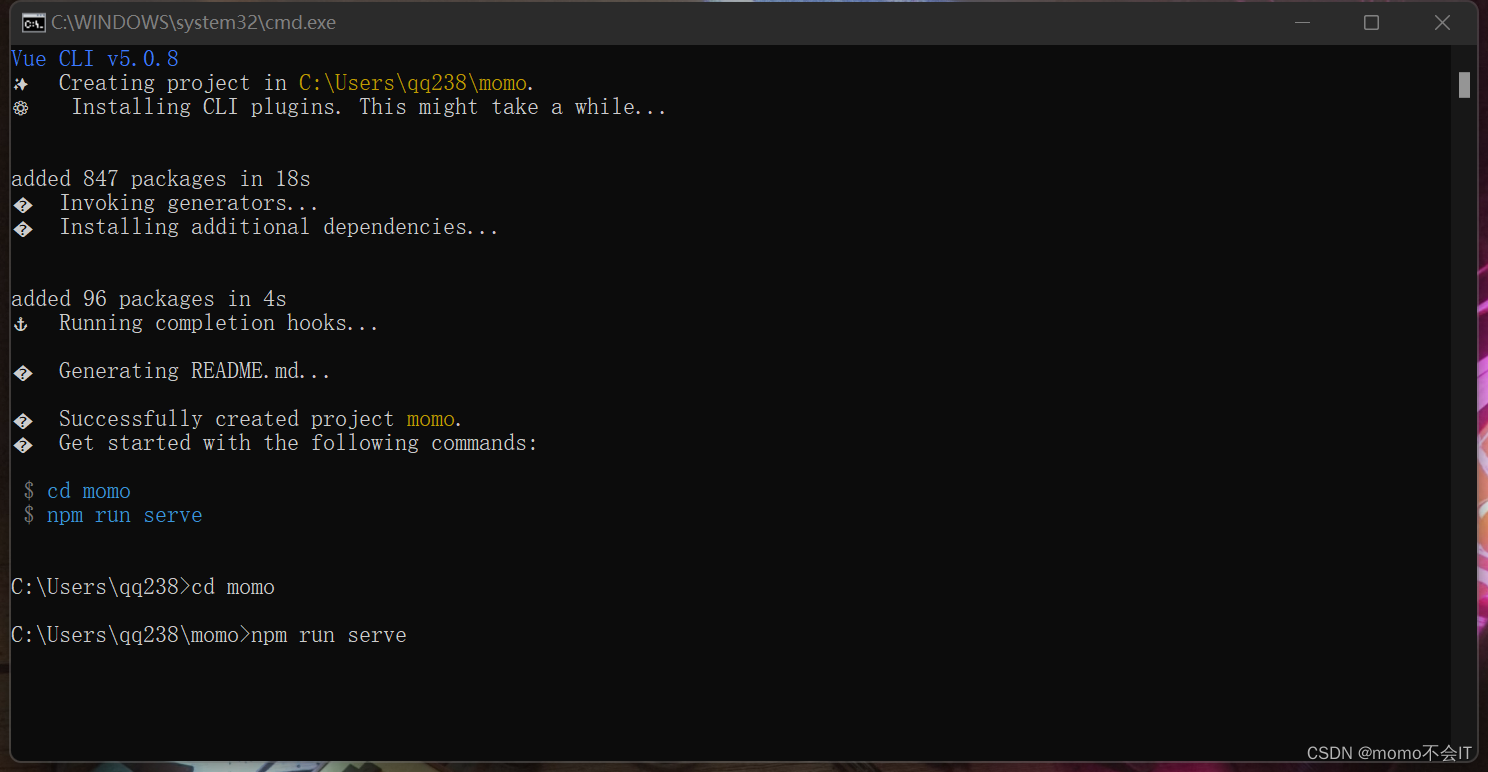

将local发网址复制到浏览器运行即可
使用Visual Studio Code将我们刚创建的文件夹打开就可以了看到刚才页面的代码

因此创建脚手架后,我们每次运行都需要在终端中使用npm run serve


node_module
public
favicon.ico:页签图标
index.html:主页面
src
assets:存放静态资源
logo.png
component:存放组件
HelloWorld.vue
App.vue:汇总所有组件
main.js:入口文件
gitignore:git版本管制忽略的配置
babel.config.js:babel的配置文件
package.json:应用包配置文件
README.md:应用描述文件
package-lock.json:包版本控制文件
关于不同版本的Vue:
- vue.js与vue.runtime.xxx.js的区别:
(1)vue.js即使完整版的Vue,包含:核心功能+模板解析器
(2)vue.runtime.xxx.js就是运行版的vue,只包含:核心功能;没有模板解析器
- 因为vue.runtime.xxx.js没有模板解析器,所所以不能使用template配置项,需要使用
render函数接收到的createElement函数去指定具体内容
vue.config.js配置文件
> 使用vue.inspect > output.js可以查看到Vue脚手架的默认配置
> 使用vue.config.js可以对脚手架进行个性化定制,详情见:http://cli.vuejs.org/zh
ref属性
components/school.vue
<template>
  <div class="xuexiao">
    <h1>学校名字:{

   {name}}</h1>
    <h1>地址:{

   {address}}</h1>
  </div>
</template>

<script>
export default {
    name:'school',
    data() {
        return {
            name:'广东白云学院',
            address:'广东省广州市白云区江高镇学苑路1号'
        }
    },
}
</script>

<style>
.xuexiao{
    background-color: grey;
}
</style>
App.vue
<template>
  <div>
    <h1 v-text="name" ref="title"></h1>
    <button @click="showDOM" ref="btn">点我输出上面的DOM元素</button>
    <school ref="sch" />
  </div>
</template>

<script>
import school from './components/school';

export default {
  name:'App',
  components:{school},
  data() {
    return {
      name:'欢迎学习Vue'
    }
  },
  methods: {
    showDOM(){
      console.log(this.$refs.title)    //真实DOM
      console.log(this.$$refs.btn)     //真实DOM
      console.log(this.$refs.sch)      //School组件实例对象(vc)

    }
  },
}
</script>

<style>

</style>
main.js
import Vue from 'vue'
import App from './App.vue'
Vue.config.productionTip = false

new Vue({
  el:'#app',
  render: h => h(App)
})
ref属性
1.被用来给元素或子组件注册引用信息(id的替代者)
2.应用在html标签上获取的是真实的DOM元素,应用在组件标签上是组件实例对象(vc)
3.使用方式:
打标识:<h1 ref="xxx">......</h1> 或 <School ref="xxx"</School>
获取:this.$ref.xxx
props配置
components/student.vue
<template>
  <div>
    <h1>{

   {msg}}</h1>
    <h2>学生名字:{

   {name}}</h2>
    <h2>年龄:{

   {age-1}}</h2>
    <h2>性别:{

   {sex}}</h2>
    <button @click="tipAge">点我提示年龄</button>
  </div>
</template>

<script>
export default {
    name:'student',
    // 简单声明接收
    props:['name','age','sex'],

    // 接收的同时对数据进行类型限制
    // props:{
    //   name:String,
    //   age:Number,
    //   sex:String
    // }

    // 接收的同时对数据:进行类型限制+默认值指定+必要性的限制
    // props:{
    //   name:{
    //     type:String,//name的类型是字符串
    //     require:true//name是必要的
    //   },
    //   age:{
    //     type:Number,
    //     default:99 //默认值
    //   },
    //   sex:{
    //     type:String,
    //     require:true
    //   }
    // },
    data() {
        return {
            msg:'欢迎学习Vue',
            myAge:this.age
        }
    },     //props优先级比data高
    methods: {
      tipAge(){
        alert(this.myAge)
      }
    },
}
</script>

<style>

</style>
App.vue
<template>
  <div>
    <student name="jojo" :age="21" sex="女" />
  </div>
</template>

<script>
import Student from './components/student'

export default {
  name:'App',
  components:{Student},
  data() {
    return {
      name:'欢迎学习Vue'
    }
  },
}
</script>

<style>

</style>
main.js
import Vue from 'vue'
import App from './App.vue'
Vue.config.productionTip = false

new Vue({
  el:'#app',
  render: h => h(App)
})
配置项props
功能:让组件接收外部传过来的数据
(1)传递数据
<Demo name="xxx"/>
(2)接收数据:
第一种方式(只接收):
props:['name']
第二种方式(限制类型):
props:{
name:Number
}
第三种方式(限制类型、限制必要性、指定默认值):
props:{
name:{
type:String,//类型
required:ture,//必要性
default:'老王'//默认值
}
}
备注:props是只读,Vue底层会检测你对props的修改,如果进行了修改,就会发出警告,
若业务需求确实需要更改,那么请复制props的内容到data中一份,然后去修改data中
的数据。
mixin混入(合)
components/school.vue
<template>
  <div>
    <h1 @click="tipName">学校:{

   {name}}</h1>
    <h1>学校地址:{

   {adress}}</h1>
  </div>
</template>

<script>
import { mixin } from '../mixin';
export default {
  name:'school',
  data() {
    return {
      name:'广东白云学院',
      adress:'广东省广州市白云区江高镇学苑路1号'
    }
  },
  mixins:[mixin]
}
</script>

<style>

</style>
components/student.vue
<template>
  <div>
    <h1 @click="tipName">学生姓名:{

   {name}}</h1>
    <h1>学生年龄:{

   {age}}</h1>
  </div>
</template>

<script>
import { mixin } from '../mixin';
export default {
  name:'student',
  data() {
    return {
      name:'jojo',
      age:22
    }
  },
  mixins:[mixin]
}
</script>

<style>

</style>
App.vue
<template>
  <div>
    <student/>
    <school/>
  </div>
</template>

<script>
import School from './components/school'
import Student from './components/student'

export default {
  name:'App',
  components:{Student,School},
  data() {
    return {
      name:'欢迎学习Vue'
    }
  },
}
</script>

<style>

</style>
main.js
import Vue from 'vue'
import App from './App.vue'
import { mixin } from "./mixin";

Vue.config.productionTip = false
Vue.mixin(mixin)

new Vue({
  el:'#app',
  render: h => h(App)
})
mixin.js
export const mixin = {
  data() {
    return {
      x:100,y:200
    }
  },
  methods: {
      tipName(){
        alert(this.name)
      }
    }
}
mixin(混入)
功能:可以把多个组件公用的配置提取一个混入的对象
使用方式:
第一步定义混合,例如:
{
data(){....},
methods:{....}
....
}
第二步使用混合,例如:
(1)全局混入:Vue.mixin(xxx) 全局在main引入
(2)局部混入:mixins:['xxx']
插件
components/school.vue
<template>
  <div>
    <h1>学校:{

   {name}}</h1>
    <h1>学校地址:{

   {adress}}</h1>
  </div>
</template>

<script>
export default {
  name:'school',
  data() {
    return {
      name:'广东白云学院',
      adress:'广东省广州市白云区江高镇学苑路1号'
    }
  },
}
</script>

<style>

</style>
components/student.vue
<template>
  <div>
    <h1>学生姓名:{

   {name}}</h1>
    <h1>学生年龄:{

   {age}}</h1>
  </div>
</template>

<script>
export default {
  name:'student',
  data() {
    return {
      name:'jojo',
      age:22
    }
  },
}
</script>

<style>

</style>
App.vue
<template>
  <div>
    <student/>
    <school/>
  </div>
</template>

<script>
import School from './components/school'
import Student from './components/student'

export default {
  name:'App',
  components:{Student,School},
  data() {
    return {
      name:'欢迎学习Vue'
    }
  },
}
</script>

<style>

</style>
main.js
// 引入vue
import Vue from 'vue'
// 引入App
import App from './App.vue'
// 引入插件
import plugins from './plugins'

// 关闭vue的生产提示
Vue.config.productionTip = false

// 应用(使用)插件
Vue.use(plugins)

// 创建vm
new Vue({
  el:'#app',
  render: h => h(App)
})
plugins.js
export default {
    install(){
        console.log('@@@install')
    }
}
插件
功能:用于增强Vue
本质:包含install方法的一个对象,install的第一个参数是Vue,第二个以后的参数是插件使用者传递的数据
定义插件:
对象.install = function(Vue,options){
//1.添加全局过滤器
Vue.filter(....)
//2.添加全局指令
Vue.mixin(....)
//3.添加实例方法
Vue.prototype.$myMethod = function(){....}
Vue.prototype.$myProperty = xxxx
}
使用插件:Vue.use()
scoped样式
components/MyFooter.vue
<template>

</template>

<script>
export default {
    name:'MyFooter',
}
</script>

<style>

</style>
components/MyHeader.vue
<template>

</template>

<script>
export default {
    name:'MyHeader',
}
</script>

<style>

</style>
components/MyList.vue
<template>
  <div>
    <my-item>
  </div>
</template>

<script>
import MyItem from './MyItem.vue'
export default {
  components: { MyItem },
    name:'MyList',
}
</script>

<style>

</style>
components/MyItem.vue
<template>

</template>

<script>
export default {
    name:'MyItem',
}
</script>

<style>

</style>
App.vue
<template>
  <div>
    <my-footer/>
    <my-header/>
    <my-list/>
  </div>
</template>

<script>
import MyFooter from './components/MyFooter '
import MyHeader from './components/MyHeader'
import MyList from './components/MyList'


export default {
  name:'App',
  components:{
    MyFooter,
    MyHeader,
    MyList

    },
  data(){
    return {
      name:'欢迎学习Vue'
    }
  },
}
</script>

<style>

</style>
main.js
// 引入vue
import Vue from 'vue'
// 引入App
import App from './App.vue'

// 关闭vue的生产提示
Vue.config.productionTip = false

// 创建vm
new Vue({
  el:'#app',
  render: h => h(App)
})
scoped样式
作用:让样式在局部生效,防止冲突
写法<style scoped>
浏览器本地存储
localStorage.html
<!DOCTYPE html>
<html lang="en">
<head>
    <meta charset="UTF-8">
    <meta http-equiv="X-UA-Compatible" content="IE=edge">
    <meta name="viewport" content="width=device-width, initial-scale=1.0">
    <title>localStorage</title>
</head>
<body>
    <h2>localStorage</h2>
    <button onclick="saveData()">点击保存数据</button>
    <button onclick="readData()">点击查看数据</button>
    <button onclick="deleteData()">点击删除数据</button>
    <button onclick="deleteAllData()">点击清空所有数据</button>

    <script type="text/javascript">
        let p = {name:'张三',age:20}

        function saveData(){
            localStorage.setItem('msg','hello!!!')
            localStorage.setItem('msg2',666)
            localStorage.setItem('person',JSON.stringify(p))
        }
        function readData(){
            console.log(localStorage.getItem('msg'))
            console.log(localStorage.getItem('msg2'))

            const result = localStorage.getItem('person')
            console.log(JSON.parse(result))

            console.log(localStorage.getItem('msg3'))
        }
        function deleteData(){
            localStorage.removeItem('msg2')
        }
        function deleteAllData(){
            localStorage.clear()
        }
    </script>
</body>
</html>
sessionSrotage.html
<!DOCTYPE html>
<html lang="en">
<head>
    <meta charset="UTF-8">
    <meta http-equiv="X-UA-Compatible" content="IE=edge">
    <meta name="viewport" content="width=device-width, initial-scale=1.0">
    <title>sessionSrotage</title>
</head>
<body>
    <h2>sessionStorage</h2>
    <button onclick="saveData()">点击保存数据</button>
    <button onclick="readData()">点击查看数据</button>
    <button onclick="deleteData()">点击删除数据</button>
    <button onclick="deleteAllData()">点击清空所有数据</button>

    <script type="text/javascript">
        let p = {name:'张三',age:20}

        function saveData(){
            sessionStorage.setItem('msg','hello!!!')
            sessionStorage.setItem('msg2',666)
            sessionStorage.setItem('person',JSON.stringify(p))
        }
        function readData(){
            console.log(sessionStorage.getItem('msg'))
            console.log(sessionStorage.getItem('msg2'))

            const result = sessionStorage.getItem('person')
            console.log(JSON.parse(result))

            console.log(sessionStorage.getItem('msg3'))
        }
        function deleteData(){
            sessionStorage.removeItem('msg2')
        }
        function deleteAllData(){
            sessionStorage.clear()
        }
    </script>
</body>
</html>
组件自定义事件
components/school.vue
<template>
  <div class="sch">
    <h1>学校:{

   {name}}</h1>
    <h1>学校地址:{

   {adress}}</h1>
    <button @click="sendSchoolName">点击获取学校名称</button>
  </div>
</template>

<script>
export default {
  name:'school',
  props:['getSchoolName'],
  data() {
    return {
      name:'广东白云学院',
      adress:'广东省广州市白云区江高镇学苑路1号'
    }
  },
  methods:{
    sendSchoolName(){
      this.getSchoolName(this.name)
    }
  }
}
</script>

<style scoped>
.sch{
  background-color: skyblue;
}
</style>
components/student.vue
<template>
  <div class="stu">
    <h2>学生姓名:{

   {name}}</h2>
    <h2>学生性别:{

   {age}}</h2>
    <h2>当前求和为:{

   {number}}</h2>
    <button @click="add">点击求和加1</button>
    <button @click="sendStudentName">点击获取学生名称</button>
    <button @click="unbind">点击解绑guangbai事件</button>
    <button @click="death">销毁当前的student组件的实例</button>
  </div>
</template>

<script>
export default {
  name:'student',
  data() {
    return {
      name:'jojo',
      age:20,
      number:0
    }
  },
  methods:{
    add(){
      console.log('add被调用了!')
      this.number++
    },
    sendStudentName(){
      // 触发Student组件实例身上的guangbai事件
      this.$emit('guangbai',this.name,666,888,999)
      this.$emit('demo')
    },
    unbind(){
      // this.$off('guangbai')  //解绑一个自定义事件
      // this.$off(['guangbai','demo'])  //解绑多个自定义事件
      this.$off()  //解绑所有自定义事件
    },
    death(){
      this.$destroy()  //销毁了当前的student组件的实例,销毁后所有的student实例的自定义事件全都不奏效
    }
  }
}
</script>

<style scoped>
.stu{
  background-color: orange;
}
</style>
App.vue
<template>
  <div class="demo">
    <h2>{

   {title}}</h2>
    <h2>学生的姓名是:{

   {studentName}}</h2>
    <!-- 通过父组件给子组件传递函数类型的props实现:子给父传递数据 -->
    <school :getSchoolName="getSchoolName"/>

    <!-- 通过父组件给子组件绑定一个自定义事件实现:子给父传递数据 (第一种写法:使用@或v-on) -->
    <!-- <student v-on:guangbai.once="getStudentName"/> -->
    <!-- <student v-on:guangbai="getStudentName" @demo="m1"/> -->

    <!-- 通过父组件给子组件绑定一个自定义事件实现:子给父传递数据 (第二种写法:使用ref) -->
    <student ref="student" @click.native="show"/>
  </div>
</template>

<script>
import School from './components/school'
import Student from './components/student'

export default {
  name:'App',
  components:{Student,School},
  data() {
    return {
      title:'欢迎学习Vue',
      studentName:''
    }
  },
  methods:{
    getSchoolName(name){
      console.log('App收到了学校名:',name)
    },
    getStudentName(name,...params){
      console.log('App收到了学生名:',name,params)
      this.studentName = name
    },
    m1(){
      console.log('demo被调用了!')
    },
    show(){
      console.log('student组件被点击了')
    }
  },
  mounted(){
    //第一种写法:
    this.$refs.student.$on('guangbai',this.getStudentName)
    //第二种写法:
    // this.$refs.student.$on('guangbai',(name,...params) => {
    //   console.log('App收到了学生名:',name,params)
    //   this.studentName = name
    // })  //绑定自定义事件
    // setTimeout(() => {
    //   this.$refs.student.$on('guangbai',this.getStudentName)
    // }, 3000);
    // this.$refs.student.$once('guangbai',this.getStudentName)   //绑定自定义事件(一次)
  },
}
</script>

<style>
  .demo{
    background-color: grey;
    margin-top: 5px;
  }
</style>
main.js
// 引入vue
import Vue from 'vue'
// 引入App
import App from './App.vue'

// 关闭vue的生产提示
Vue.config.productionTip = false

// 创建vm
new Vue({
  el:'#app',
  render: h => h(App),
  // mounted() {
  //   setInterval(() => {
  //     this.$destroy()
  //   }, 3000);
  // },
})
组件的自定义事件
1.一种组件间通信方式,适用于:子组件 ===> 父组件
2.使用场景:A是父组件,B是子组件,B想给A传数据,那么就要在A中给B绑定自定义事件(事件的回调在A中)
3.绑定自定义事件:
1.第一种方式,在父组件中:<Demo @guangbai="test"> 或 <Demo v-on:guangbai="test"/>
2.第二种方式,在父组件中:
<Demo ref="demo"/>
.....
mounted(){
this.$ref.xxx.$on('guangbai',this.test)
}
3.若想让自定义事件只能触发一次,可以使用once修饰符,或$once方法
4.触发自定义事件:this.$emit('guangbai',数据)
5.解绑自定义事件:this.$off('guangbai')
6.组件上也可以绑定原生DOM事件,需要使用native修饰符
7.注意:通过this.$refs.xxx.$on('guangbai',回调)绑定自定义事件时,回调要么配置在methods中,要么使用箭头函数,否则this指向会出问题。
全局事件总线
components/school.vue
<template>
  <div class="sch">
    <h1>学校:{

   {name}}</h1>
    <h1>学校地址:{

   {adress}}</h1>
  </div>
</template>

<script>
export default {
  name:'school',
  data() {
    return {
      name:'广东白云学院',
      adress:'广东省广州市白云区江高镇学苑路1号'
    }
  },
  mounted(){
    // console.log('school',this)
    this.$bus.$on('hello',data => {
      console.log('我是school组件,收到了数据',data)
    })
  }
}
</script>

<style scoped>
.sch{
  background-color: skyblue;
}
</style>
components/student.vue
<template>
  <div class="stu">
    <h2>学生姓名:{

   {name}}</h2>
    <h2>学生性别:{

   {sex}}</h2>
    <button @click="sentStudentName">把学生名给school组件</button>
  </div>
</template>

<script>
export default {
  name:'student',
  data() {
    return {
      name:'jojo',
      sex:20,
    }
  },
  mounted(){
    // console.log('student',this.x)
  },
  methods:{
    sentStudentName(){
      this.$bus.$emit('hello',this.name)
    }
  }
}
</script>

<style scoped>
.stu{
  background-color: orange;
}
</style>
App.vue
<template>
  <div class="demo">
    <h2>{

   {title}}</h2>
    <school/>
    <student/>
  </div>
</template>

<script>
import School from './components/school'
import Student from './components/student'

export default {
  name:'App',
  components:{Student,School},
  data() {
    return {
      title:'欢迎学习Vue'
    }
  }
}
</script>

<style>
  .demo{
    background-color: grey;
    margin-top: 5px;
  }
</style>
main.js
// 引入vue
import Vue from 'vue'
// 引入App
import App from './App.vue'
// 关闭vue的生产提示
Vue.config.productionTip = false

// 创建vm
new Vue({
  el:'#app',
  render: h => h(App),
  beforeCreate(){
    Vue.prototype.$bus = this  //安装全局事件总线
  }
})
全局事件总线(GlobalEventBus)
1.一种组件间的通讯方式,适用于任何组件间通讯
2.安装全局事件总线:
new Vue({
....
beforeCreate(){
Vue.prototype.$bus = this //安装全局事件总线,$bus就是当前应用的vm
},
....
})
3.使用事件总线:
1.接收数据:A组件想接收数据,则在A组件中给$bus绑定自定义事件,事件的回调留在A组件自身
methods(){
demo(data){...}
},
....
mounted(){
this.$bus.$on('xxx',this.demo)
}
2.提供数据:this.$bus.$emit('xxx',数据)
4.最好在beforeDestroy钩子中,用$off去解绑当前组件所用到的事件。
消息订阅与发布
components/school.vue
<template>
  <div class="sch">
    <h1>学校:{

   {name}}</h1>
    <h1>学校地址:{

   {adress}}</h1>
  </div>
</template>

<script>
import pubsub from 'pubsub-js'
export default {
  name:'school',
  data() {
    return {
      name:'广东白云学院',
      adress:'广东省广州市白云区江高镇学苑路1号'
    }
  },
  mounted(){
    // console.log('school',this)
    // this.$bus.$on('hello',data => {
    //   console.log('我是school组件,收到了数据',data)
    // })
    this.pubId = pubsub.subscribe('hello',function(msgName,data){
      console.log('有人发布了hello消息,hello消息的回调执行了',msgName,data)
    })
  },
  beforeDestroy(){
    // this.$bus.$off('hello')
    pubsub.unsubscribe(this.pubId)
  }
}
</script>

<style scoped>
.sch{
  background-color: skyblue;
}
</style>
components/student.vue
<template>
  <div class="stu">
    <h2>学生姓名:{

   {name}}</h2>
    <h2>学生性别:{

   {sex}}</h2>
    <button @click="sentStudentName">把学生名给school组件</button>
  </div>
</template>

<script>
import pubsub from 'pubsub-js'
export default {
  name:'student',
  data() {
    return {
      name:'jojo',
      sex:20,
    }
  },
  mounted(){
    // console.log('student',this.x)
  },
  methods:{
    sentStudentName(){
      // this.$bus.$emit('hello',this.name)
      pubsub.publish('hello',666)
    }
  }
}
</script>

<style scoped>
.stu{
  background-color: orange;
}
</style>
App.vue
<template>
  <div class="demo">
    <h2>{

   {title}}</h2>
    <school/>
    <student/>
  </div>
</template>

<script>
import School from './components/school'
import Student from './components/student'

export default {
  name:'App',
  components:{Student,School},
  data() {
    return {
      title:'欢迎学习Vue'
    }
  }
}
</script>

<style>
  .demo{
    background-color: grey;
    margin-top: 5px;
  }
</style>
main.js
// 引入vue
import Vue from 'vue'
// 引入App
import App from './App.vue'
// 关闭vue的生产提示
Vue.config.productionTip = false

// 创建vm
new Vue({
  el:'#app',
  render: h => h(App),
  // beforeCreate(){
  //   Vue.prototype.$bus = this  //安装全局事件总线
  // }
})
消息订阅与发布(pubsub)
1.一种组件间通讯方式,适用于任意组件间通讯
2.使用步骤:
1.安装pubsub:pubsub:npm i pubsub-js
2.引入:improt pubsub from 'pubsub-js'
3.接收数据:A组件想接收数据,则在A组件中订阅消息,订阅的回调留在A组件自身
methods(){
demo(data){....}
}
.....
mounted(){
this.pid = pubsub.subscribe('xxx',this.demo) //订阅消息
}
4.提供数据:pubsub.publish('XXX',数据)
5.最好在beforeDestroy钩子,用pubsub.unsubscirpbe(pid)去<sapn style="color:red>取消订阅</span>
Vue封装的过渡与动画
components/Test.vue
<template>
    <div>
        <button @click="isShow = !isShow">显示/隐藏</button>

        <transition name="hello" :appear="true">
            <h1 v-show="isShow">你好呀!</h1>
        </transition>

        <transition name="h2" appear>
            <h2 v-show="isShow">Vue学习</h2>
        </transition>
    </div>
</template>

<script>
export default {
    name:'Test',
    data() {
        return {
            isShow:true
        }
    },
}
</script>

<style scoped>
    h1{
        background-color: orange;
    }

    h2{
        background-color: skyblue;
    }

    .hello-enter-active{
        animation: guangbai 1s;
    }

    .hello-leave-active{
        animation: guangbai 1s reverse;
    }

    @keyframes guangbai{
        from{
            transform: translateX(100%);
        }
        to{
            transform: translateX(0px);
        }
    }

    .h2-enter-active{
        animation: h2 1s;
    }

    .h2-leave-active{
        animation: h2 1s reverse;
    }

    @keyframes h2{
        from{
            transform: translateX(100%);
        }
        to{
            transform: translateX(0px);
        }
    }
</style>>

</style>
components/Test2.vue
<template>
    <div>
        <button @click="isShow = !isShow">显示/隐藏</button>

        <transition name="hello" :appear="true">
            <h1 v-show="isShow">你好呀!</h1>
        </transition>

        <transition name="h2" appear>
            <h2 v-show="isShow">Vue学习</h2>
        </transition>
    </div>
</template>

<script>
export default {
    name:'Test',
    data() {
        return {
            isShow:true
        }
    },
}
</script>

<style scoped>
    h1{
        background-color: orange;
        /* transition: 0.5s linear; */
    }

    h2{
        background-color: skyblue;
    }

    /* 进入的起点/离开的终点 */
    .hello-enter,.hello-leave-to{
        transform: translateX(-100%);
    }

    .hello-enter-to,.hello-leave-to{
        transition: 0.75s linear;
    }

    /* 进入的终点/离开的起点 */
    .hello-enter-to,.hello-leave{
        transform: translateX(0);
    }

    /* 进入的起点/离开的终点 */
    .h2-enter,.h2-leave-to{
        transform: translateX(-100%);
    }

    .h2-enter-to,.h2-leave-to{
        transition: 0.75s linear;
    }

    /* 进入的终点/离开的起点 */
    .h2-enter-to,.h2-leave{
        transform: translateX(0);
    }
</style>
components/Test3.vue
<template>
    <div>
        <button @click="isShow = !isShow">显示/隐藏</button>

        <transition-group
         name="animate__animated animate__bounce"
         :appear="true"
         enter-active-class="animate__tada"
         leave-active-class="animate__backOutUp"
         >
            <h1 v-show="isShow" key="1">你好呀!</h1>
            <h1 v-show="isShow" key="2">微信小程序</h1>
        </transition-group>

        <transition name="h2" appear>
            <h2 v-show="isShow">Vue学习</h2>
        </transition>
    </div>
</template>

<script>
import 'animate.css'
export default {
    name:'Test',
    data() {
        return {
            isShow:true
        }
    },
}
</script>

<style scoped>
    h1{
        background-color: orange;
        /* transition: 0.5s linear; */
    }

    h2{
        background-color: skyblue;
    }
</style>
App.vue
<template>
  <div>
    <test/>
    <test-2/>
    <test-3/>
  </div>
</template>

<script>
import Test from './components/Test.vue'
import Test2 from './components/Test2.vue'
import Test3 from './components/Test3.vue'

export default {
  name:'App',
  components:{Test, Test2, Test3},
  data() {
    return {
      title:'欢迎学习Vue'
    }
  }
}
</script>

<style>

</style>
main.js
// 引入vue
import Vue from 'vue'
// 引入App
import App from './App.vue'
// 关闭vue的生产提示
Vue.config.productionTip = false

// 创建vm
new Vue({
  el:'#app',
  render: h => h(App),
  // beforeCreate(){
  //   Vue.prototype.$bus = this  //安装全局事件总线
  // }
})
Vue封装的过渡与动画
1.作用:在插入、更新或移除DOM元素时,在合适的时候给元素添加样式类名
2.图示:(参考官网)
3.写法:
1.准备好样式:
*元素进入的样式:
1.v-enter:进入的起点
2.v-enter-active:进入过程中
3.v-enter-to:进入的终点
*元素离开的样式
1.v-leave:离开的起点
2.v-leave-active:离开过程中
3.v-leave-to:离开的终点
2.使用<transition>包裹要过渡的元素,并配置name属性:
<transition name="hello">
<h1 v-show="isShow">你好呀!</h1>
</transition>
3.备注:若有多个元素需要过渡,则需要使用:<transitong-group>,且每个元素都要指定key值
配置代理服务器
方法一
在vue.cnofig.js中添加如下配置:
devServer:{
proxy:"http://localhost:5000"
}
说明:
1.优点:配置简单,请求资源时直接发给前端(8080)即可
2.缺点:不能配置多个代理,不能灵活的控制请求是否走代理
3.工作方式:若按照上述配置代理,当请求了前端不存在的资源是,那么该请求会转发给服务器(优先匹配前端资源)
方法二
编写vue.cnofig.js配置具体代理规则:
moudule.exports = {
dexServer:{
'/api1':{//匹配所有以'/api1'开头的请求路径
target:'http://localhost:5000',//代理目标的基础路径
changeOrigin:ture,
pathRewirte:{'^/api1':''}
},
'/api2':{//匹配所有以'/api2'开头的请求路径
target:'http://localhost:5001',//代理目标的基础路径
changeOrigin:ture,
pathRewirte:{'^/api2':''}
}
}
}
/*
changeOrigin设置为ture时,服务器收到的请求头中的this为:localhost:5000
changeOrigin设置为false时,服务器收到的请求头中的this为:localhost:8080
changeOrigin默认值为ture
*/
说明:
1.优点:可以配置多个代理,且可以灵活的控制请求是否走代理
2.缺点:配置略微繁琐,请求资源是必须加前缀
vue.config.js
// vue.config.js
module.exports = {
  lintOnSave:false,//关闭语法检查
  // 开启代理服务器(方法一)
  // devServer:{
  //   proxy:'https://localhost:5000'
  // },
  // 开启代理服务器(方法二)
  // devServer:{
  //   proxy:{
  //     'api':{
  //       traget:'',
  //       pathRewrite:{'^/api':''},
  //       ws: true,//用于支出websocket
  //       changeOrigin:true
  //     }
  //   }
  // }
}
插槽
具名插槽
components/Category.vue
<template>
    <div class="category">
        <h3>{

   {title}}</h3>
        <!-- 定义一个插槽(挖个坑,等着组件的使用者进行填充) -->
        <slot name="test">我是一些默认值,当使用者没有传递具体结构时,我会出现</slot>
        <slot name="text">我是一些默认值,当使用者没有传递具体结构时,我会出现</slot>
    </div>
</template>

<script>
    export default {
        name:'Category',
        props:['title']
    }
</script>

<style scope>
    .category{
        background-color: skyblue;
        width: 200px;
        height: 300px;
    }
    h3{
        text-align: center;
        background-color: orange;
    }
    video{
        width: 100%;
    }
</style>
App,vue
<template>
  <div class="container">
    <category title="美食">
      <img slot="test" src="https://s1.imagehub.cc/images/2022/05/29/94b5c7fadaf819a2aa075fb44ae888fe.png" alt="">
      <a slot="text" href="https://www.baidu.com">更多美食</a>
    </category>
    <category title="游戏">
      <ul slot="test">
        <li v-for="(g,index) in games" :key="index">{

   {g}}</li>
      </ul>
      <a slot="text" href="https://www.baidu.com">网络游戏</a>
    </category>
    <category title="电影">
      <video slot="test" controls src="http://clips.vorwaerts-gmbh.de/big_buck_bunny.mp4"></video>
      <a slot="text" href="https://www.baidu.com">更多电影</a>
    </category>
  </div>
</template>

<script>
import category from './components/Category.vue';
export default {
  name:'App',
  components:{category},
  data() {
    return {
      foods:['辣条','辣条','辣条','辣条','辣条'],
      games:['cs','cs','cs','cs','cs','cs'],
      films:['bay','bay','bay','bay','bay']
    }
  },
}
</script>

<style>
  .container{
    display: flex;
    justify-content: space-around;
  }
</style>
main.js
// 引入vue
import Vue from 'vue'
// 引入App
import App from './App.vue'
// 引入插件
import vueResource from 'vue-resource';
// 关闭vue的生产提示
Vue.config.productionTip = false
// 使用插件
Vue.use(vueResource)

// 创建vm
new Vue({
  el:'#app',
  render: h => h(App),
  // beforeCreate(){
  //   Vue.prototype.$bus = this  //安装全局事件总线
  // }
})
默认插槽
components/Category.vue
<template>
    <div class="category">
        <h3>{

   {title}}</h3>
        <!-- 定义一个插槽(挖个坑,等着组件的使用者进行填充) -->
        <slot>我是一些默认值,当使用者没有传递具体结构时,我会出现</slot>
    </div>
</template>

<script>
    export default {
        name:'Category',
        props:['title']
    }
</script>

<style scope>
    .category{
        background-color: skyblue;
        width: 200px;
        height: 300px;
    }
    h3{
        text-align: center;
        background-color: orange;
    }
    video{
        width: 100%;
    }
</style>
App.vue
<template>
  <div class="container">
    <category title="美食">
      <img src="https://s1.imagehub.cc/images/2022/05/29/94b5c7fadaf819a2aa075fb44ae888fe.png" alt="">
    </category>
    <category title="游戏">
      <ul>
        <li v-for="(g,index) in games" :key="index">{

   {g}}</li>
      </ul>
    </category>
    <category title="电影">
      <video controls src="http://clips.vorwaerts-gmbh.de/big_buck_bunny.mp4"></video>
    </category>
  </div>
</template>

<script>
import category from './components/Category.vue';
export default {
  name:'App',
  components:{category},
  data() {
    return {
      foods:['辣条','辣条','辣条','辣条','辣条'],
      games:['cs','cs','cs','cs','cs','cs'],
      films:['bay','bay','bay','bay','bay']
    }
  },
}
</script>

<style>
  .container{
    display: flex;
    justify-content: space-around;
  }
</style>
main.js
// 引入vue
import Vue from 'vue'
// 引入App
import App from './App.vue'
// 引入插件
import vueResource from 'vue-resource';
// 关闭vue的生产提示
Vue.config.productionTip = false
// 使用插件
Vue.use(vueResource)

// 创建vm
new Vue({
  el:'#app',
  render: h => h(App),
  // beforeCreate(){
  //   Vue.prototype.$bus = this  //安装全局事件总线
  // }
})
作用域插槽
components/Category.vue
<template>
    <div class="category">
        <h3>{

   {title}}分类</h3>
        <!-- 定义一个插槽(挖个坑,等着组件的使用者进行填充) -->
        <slot :game="games" msg="hello">我是一些默认值,当使用者没有传递具体结构时,我会出现</slot>
    </div>
</template>

<script>
    export default {
        name:'Category',
        props:['title'],
        data() {
        return {
            games:['cs','cs','cs','cs','cs','cs']
            }
        },
    }
</script>

<style scope>
    .category{
        background-color: skyblue;
        width: 200px;
        height: 300px;
    }
    h3{
        text-align: center;
        background-color: orange;
    }
    video{
        width: 100%;
    }
</style>
App.vue
<template>
  <div class="container">
    <category title="游戏">
        <template scope="pass">
            <ul>
                <li v-for="(g,index) in pass.games" :key="index">{

   {g}}</li>
            </ul>
        </template>
    </category>

    <category title="游戏">
        <template scope="{games}">
            <ol>
                <li v-for="(g,index) in games" :key="index">{

   {g}}</li>
            </ol>
            <h4>{

   {pass.msg}}</h4>
        </template>
    </category>

    <category title="游戏">
        <template slot-scope="{games}">
            <h4>
                <li v-for="(g,index) in games" :key="index">{

   {g}}</li>
            </h4>
        </template>
    </category>

  </div>
</template>

<script>
import category from './components/Category.vue';
export default {
  name:'App',
  components:{category},
}
</script>

<style>
  .container{
    display: flex;
    justify-content: space-around;
  }
</style>
main.js
// 引入vue
import Vue from 'vue'
// 引入App
import App from './App.vue'
// 引入插件
import vueResource from 'vue-resource';
// 关闭vue的生产提示
Vue.config.productionTip = false
// 使用插件
Vue.use(vueResource)

// 创建vm
new Vue({
  el:'#app',
  render: h => h(App),
  // beforeCreate(){
  //   Vue.prototype.$bus = this  //安装全局事件总线
  // }
})
插槽
1.作用:让父组件可以向子组件指定位置插入html结构,也是组件间的一种通信方式,适用于父组件===>子组件
2.分类:默认插槽、具名插槽、作用域插槽
3.作用域插槽:
1.理解:数据在组件的本身,但根据数据生成的结构需要组件的使用者来决定。(games数据在Category组件中,但使用数据遍历出来的结构由App组件决定)
求和案例 纯vue版
打开终端,进入当前项目所在目录,输入指令
npm install vue-resource --save
然后等待安装,安装好了以后在main.js中引用

components/count.vue
<template>
  <div>
    <h1>当前求和为:{

   {sum}}</h1>
    <select v-model.number="n">
        <option value="1">1</option>
        <option value="2">2</option>
        <option value="3">3</option>
    </select>
    <button @click="increment">+</button>
    <button @click="decrement">-</button>
    <button @click="incrementOdd">当前求和为奇数再相加</button>
    <button @click="incrementWait">等一等再加</button>
  </div>
</template>

<script>
export default {
  name:'count',
  data() {
    return {
      n:1,//用户选择的数字
      sum:0,//当前的和
    }
  },
  methods: {
    increment(){
      this.sum +=this.n
    },
    decrement(){
      this.sum -=this.n
    },
    incrementOdd(){
      if (this.sum % 2) {
        this.sum +=this.n
      }
    },
    incrementWait(){
      setTimeout(() => {
        this.sum +=this.n
      }, 300);
    }
  },
}
</script>
<style lang="css">
  button{
    margin-left: 5px;
  }
</style>
store/index.js
<template>
  <div>
    <h1>当前求和为:{

   {$store.state.sum}}</h1>
    <select v-model.number="n">
        <option value="1">1</option>
        <option value="2">2</option>
        <option value="3">3</option>
    </select>
    <button @click="increment">+</button>
    <button @click="decrement">-</button>
    <button @click="incrementOdd">当前求和为奇数再相加</button>
    <button @click="incrementWait">等一等再加</button>
  </div>
</template>

<script>
export default {
  name:'count',
  data() {
    return {
      n:1,//用户选择的数字
      sum:0//当前和
    }
  },
  methods: {
    increment(){
      this.sum += this.n
    },
    decrement(){
      this.sum -= this.n
    },
    incrementOdd(){
      if(this.sum%2){
        this.sum += this.n
      }
    },
    incrementWait(){
      setTimeout(() => {
        this.sum += this.n
      }, 300);
    }
  },
}
</script>
<style lang="css">
  button{
    margin-left: 5px;
  }
</style>
App.vue
<template>
  <div>
    <count/>
  </div>
</template>

<script>
import count from './components/count.vue';
export default {
  name:'App',
  components:{count}
}
</script>
main.js
// 引入vue
import Vue from 'vue'
// 引入App
import App from './App.vue'
// 引入插件
import vueResource from 'vue-resource';
// 引入store
import Store from './store/index';
// 关闭vue的生产提示
Vue.config.productionTip = false
// 使用插件
Vue.use(vueResource)

// 创建vm
new Vue({
  el:'#app',
  Store,
  render: h => h(App),
  // beforeCreate(){
  //   Vue.prototype.$bus = this  //安装全局事件总线
  // }
})
Vuex
vuex工作原理图:
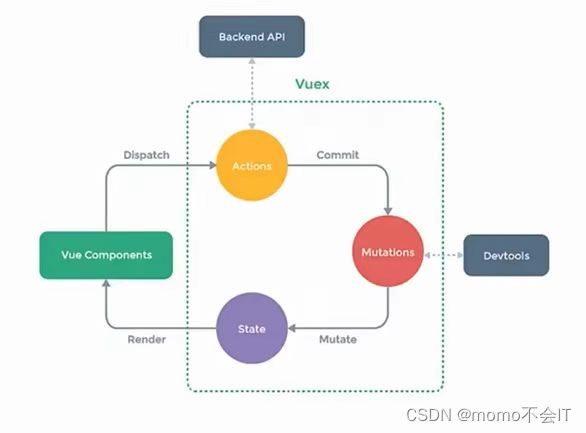
使用Vuex需要在终端中下载


若是使用npm i vuex 指令安装的就是vuex的4版本
vuex的4版本对应的就是Vue3,而我们这里目前为止只是在讲vue2,所以我们需要安装vue2所对应的vuex版本就是vuex3
求和案例_vuex版
components/count.vue
<template>
  <div>
    <h1>当前求和为:{

   {$store.state.sum}}</h1>
    <select v-model.number="n">
        <option value="1">1</option>
        <option value="2">2</option>
        <option value="3">3</option>
    </select>
    <button @click="increment">+</button>
    <button @click="decrement">-</button>
    <button @click="incrementOdd">当前求和为奇数再相加</button>
    <button @click="incrementWait">等一等再加</button>
  </div>
</template>

<script>
export default {
  name:'count',
  data() {
    return {
      n:1,//用户选择的数字
    }
  },
  methods: {
    increment(){
      this.$store.commit('JIA',this.n)
    },
    decrement(){
      this.$store.commit('JIAN',this.n)
    },
    incrementOdd(){
      this.$store.dispatch('jiaOdd',this.n)

    },
    incrementWait(){
      this.$store.dispatch('jiaWait',this.n)

    }
  },
  mounted(){
    console.log('count',this)
  }
}
</script>
<style lang="css">
  button{
    margin-left: 5px;
  }
</style>
store/index.js
// 该文件用于创建Vuex中最为核心的store

// 引入vue
import Vue from 'vue'
// 引入Vuex
import Vuex from 'vuex'
// 使用Vuex插件
Vue.use(Vuex)

// 准备actions——用于相应组件中的动作
const actions = {
    jia(context,value){
        console.log('actions中的jia被调用了')
        context.commit('JIA',value)
    },
    jian(context,value){
        console.log('actions中的jian被调用了')
        context.commit('JIAN',value)
    },
    jiaOdd(context,value){
        console.log('actions中的jiaOdd被调用了')
        if(context.state.sum % 2){
            context.commit('JIA',value)
        }
    },
    jiaWait(context,value){
        console.log('actions中的jiaWait被调用了')
        setTimeout(()=>{
            context.commit('JIA',value)
        },300)
    },
}
// 准备mutations——用于操作数据(state)
const mutations = {
    JIA(state,value){
        console.log('mutations中的JIA被调用了')
        state.sum += value
    },
    JIAN(state,value){
        console.log('mutations中的JIAN被调用了')
        state.sum -= value
    },
}
// 准备state——用于存储数据
const state = {
    sum:0//当前和
}

// 创建并暴露store
export default new Vuex.Store({
    actions,
    mutations,
    state
})
App.vue
<template>
  <div>
    <count/>
  </div>
</template>

<script>
import count from './components/count.vue';
export default {
  name:'App',
  components:{count},
  mounted(){
    console.log('App',this)
  },
}
</script>
main.js
// 引入vue
import Vue from 'vue'
// 引入App
import App from './App.vue'
// 引入插件
import vueResource from 'vue-resource';
// 引入store
import store from './store/index'

// 关闭vue的生产提示
Vue.config.productionTip = false
// 使用插件
Vue.use(vueResource)

// 创建vm
new Vue({
  el:'#app',
  render: h => h(App),
  store,
  beforeCreate(){
    Vue.prototype.$bus = this  //安装全局事件总线
  }
})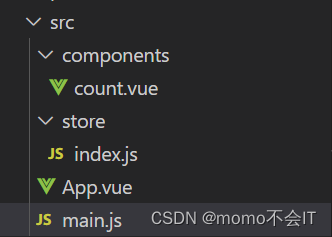
运行成功后在浏览器的控制台中可以看到store属性
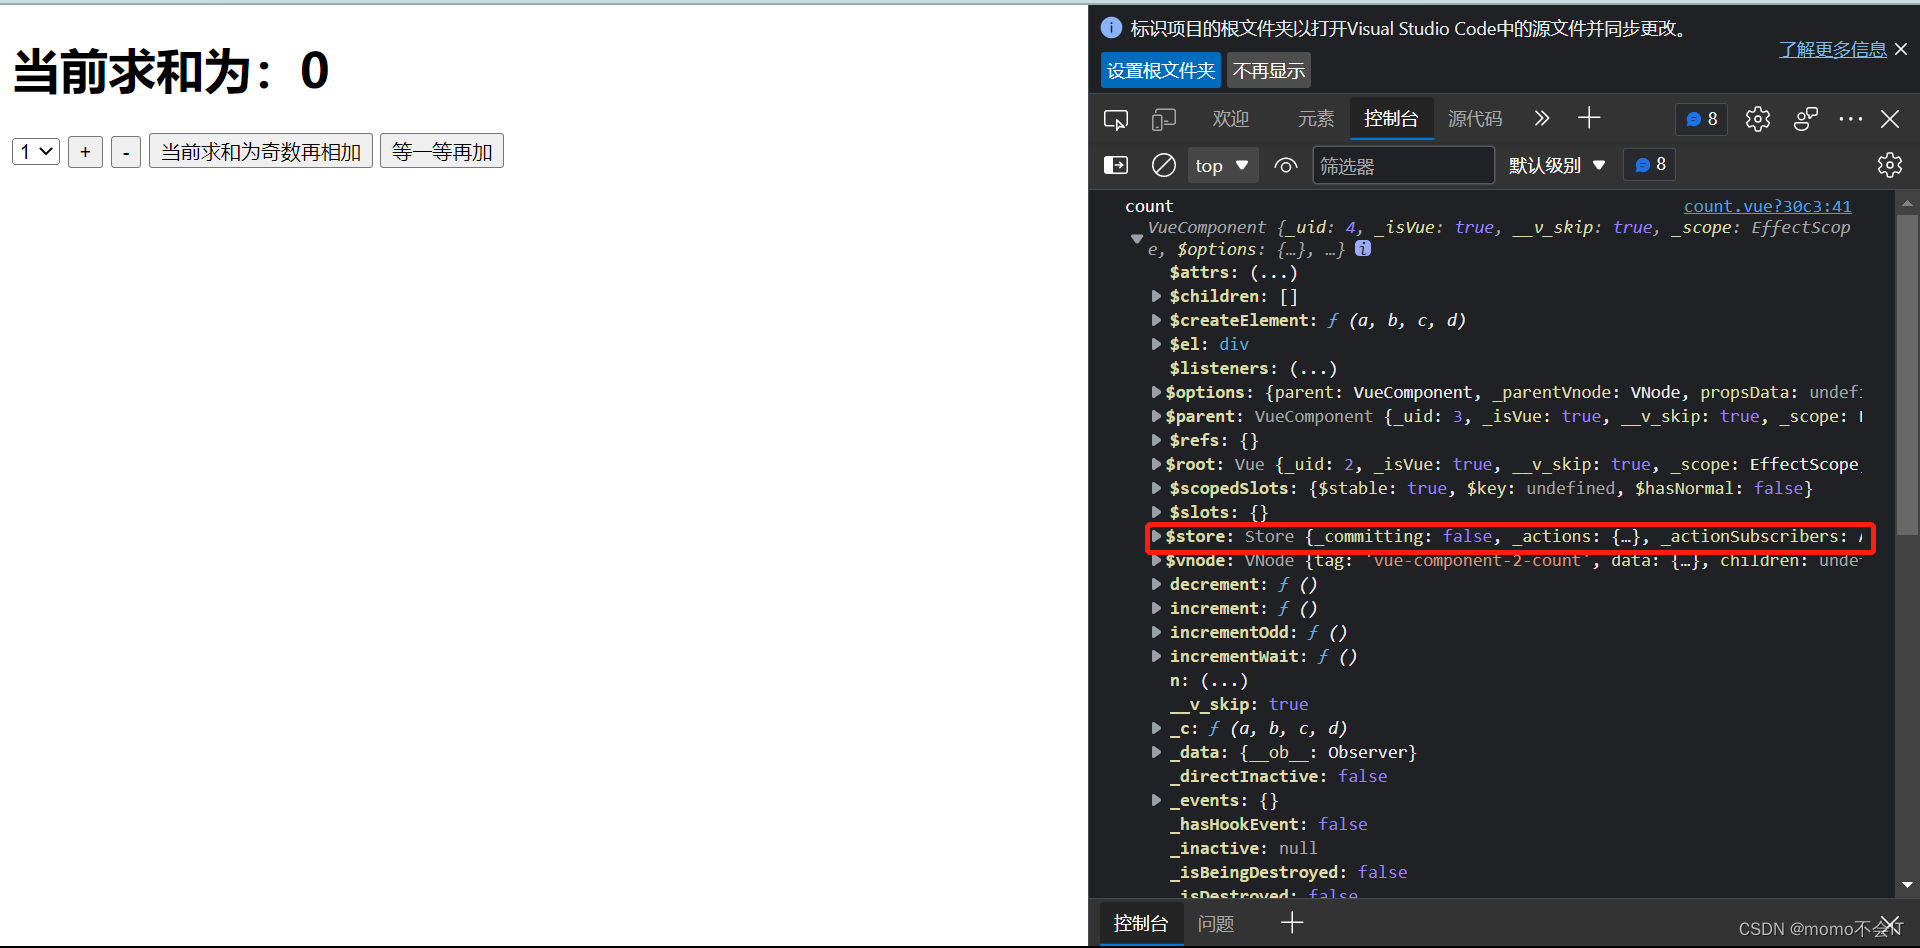
Vuex基本使用
1.初始化数据、数据actions、配置mumutations、操作文件store.js
2.组件中读取vuex中的数据:$store.state.sum
3.组件中修改vuex中的数据:$store.dispatch('actions中的方法名',数据)或$store.commit('mutations中的方法名',数据)
备注:若没有网络请求或其他业务逻辑,组件也可以超越actions,即不写dispatch,直接编写commit
getters
components/count.vue
<template>
  <div>
    <h1>当前求和为:{

   {$store.state.sum}}</h1>
    <h3>当前求和放大十倍后为:{

   {$store.getters.bigSum}}</h3>
    <select v-model.number="n">
        <option value="1">1</option>
        <option value="2">2</option>
        <option value="3">3</option>
    </select>
    <button @click="increment">+</button>
    <button @click="decrement">-</button>
    <button @click="incrementOdd">当前求和为奇数再相加</button>
    <button @click="incrementWait">等一等再加</button>
  </div>
</template>

<script>
export default {
  name:'count',
  data() {
    return {
      n:1,//用户选择的数字
    }
  },
  methods: {
    increment(){
      this.$store.commit('JIA',this.n)
    },
    decrement(){
      this.$store.commit('JIAN',this.n)
    },
    incrementOdd(){
      this.$store.dispatch('jiaOdd',this.n)

    },
    incrementWait(){
      this.$store.dispatch('jiaWait',this.n)

    }
  },
  mounted(){
    console.log('count',this)
  }
}
</script>
<style lang="css">
  button{
    margin-left: 5px;
  }
</style>
store/index.js
// 该文件用于创建Vuex中最为核心的store

// 引入vue
import Vue from 'vue'
// 引入Vuex
import Vuex from 'vuex'
// 使用Vuex插件
Vue.use(Vuex)

// 准备actions——用于相应组件中的动作
const actions = {
    jia(context,value){
        console.log('actions中的jia被调用了')
        context.commit('JIA',value)
    },
    jian(context,value){
        console.log('actions中的jian被调用了')
        context.commit('JIAN',value)
    },
    jiaOdd(context,value){
        console.log('actions中的jiaOdd被调用了')
        if(context.state.sum % 2){
            context.commit('JIA',value)
        }
    },
    jiaWait(context,value){
        console.log('actions中的jiaWait被调用了')
        setTimeout(()=>{
            context.commit('JIA',value)
        },300)
    },
}
// 准备mutations——用于操作数据(state)
const mutations = {
    JIA(state,value){
        console.log('mutations中的JIA被调用了')
        state.sum += value
    },
    JIAN(state,value){
        console.log('mutations中的JIAN被调用了')
        state.sum -= value
    },
}
// 准备state——用于存储数据
const state = {
    sum:0//当前和
}
// 准备getters——用于将state中的数据进行加工
const getters ={
    bigSum(state){
        return state.sum*10
    }
}

// 创建并暴露store
export default new Vuex.Store({
    actions,
    mutations,
    state,
    getters
})
App.vue
<template>
  <div>
    <count/>
  </div>
</template>

<script>
import count from './components/count.vue';
export default {
  name:'App',
  components:{count},
  mounted(){
    console.log('App',this)
  },
}
</script>
main.js
// 引入vue
import Vue from 'vue'
// 引入App
import App from './App.vue'
// 引入插件
import vueResource from 'vue-resource';
// 引入store
import store from './store/index'

// 关闭vue的生产提示
Vue.config.productionTip = false
// 使用插件
Vue.use(vueResource)

// 创建vm
new Vue({
  el:'#app',
  render: h => h(App),
  store,
  beforeCreate(){
    Vue.prototype.$bus = this  //安装全局事件总线
  }
})
getters的使用
1.概念:当state中的数据需要经过加工后再使用,可以使用getters加工
2.在store.js中追加getters配置
3.组件中读取数据:$store.getters.bigSum
mapState与mapGetters
components/count.vue
<template>
  <div>
    <h1>当前求和为:{

   {sum}}</h1>
    <h3>当前求和放大十倍后为:{

   {bigSum}}</h3>
    <h3>我是{

   {name}},今年{

   {age}}岁了</h3>
    <select v-model.number="n">
        <option value="1">1</option>
        <option value="2">2</option>
        <option value="3">3</option>
    </select>
    <button @click="increment">+</button>
    <button @click="decrement">-</button>
    <button @click="incrementOdd">当前求和为奇数再相加</button>
    <button @click="incrementWait">等一等再加</button>
  </div>
</template>

<script>
import {mapState,mapGetters} from 'vuex'
export default {
  name:'count',
  data() {
    return {
      n:1,//用户选择的数字
    }
  },
  computed:{
    // sum(){
    //   return this.$store.state.sum
    // },
    // name(){
    //   return this.$store.state.name
    // },
    // age(){
    //   return this.$store.state.age
    // },

    // 借助mapState生成计算属性,从state中读取属性。(对象写法)
    // ...mapState({sum:'sum',name:'name',age:'age'}),

    // 借助mapState生成计算属性,从state中读取属性。(数组写法)
    ...mapState(['sum','name','age']),

    // bigSum(){
    //   return this.$store.getters.bigSum
    // },

    // 借助mapGetters生成计算属性,从state中读取属性。(对象写法)
    // ...mapGetters({bigSum:'bigSum'}),

    // 借助mapGetters生成计算属性,从state中读取属性。(数组写法)
    ...mapGetters(['bigSum']),

  },
  methods: {
    increment(){
      this.$store.commit('JIA',this.n)
    },
    decrement(){
      this.$store.commit('JIAN',this.n)
    },
    incrementOdd(){
      this.$store.dispatch('jiaOdd',this.n)

    },
    incrementWait(){
      this.$store.dispatch('jiaWait',this.n)

    }
  },
  mounted(){
    console.log('count',this)
    const x = mapState({sum:'sum',name:'name',age:'age'})
    console.log(x)
  }
}
</script>
<style lang="css">
  button{
    margin-left: 5px;
  }
</style>
store/index.js
// 该文件用于创建Vuex中最为核心的store

// 引入vue
import Vue from 'vue'
// 引入Vuex
import Vuex from 'vuex'
// 使用Vuex插件
Vue.use(Vuex)

// 准备actions——用于相应组件中的动作
const actions = {
    jia(context,value){
        console.log('actions中的jia被调用了')
        context.commit('JIA',value)
    },
    jian(context,value){
        console.log('actions中的jian被调用了')
        context.commit('JIAN',value)
    },
    jiaOdd(context,value){
        console.log('actions中的jiaOdd被调用了')
        if(context.state.sum % 2){
            context.commit('JIA',value)
        }
    },
    jiaWait(context,value){
        console.log('actions中的jiaWait被调用了')
        setTimeout(()=>{
            context.commit('JIA',value)
        },300)
    },
}
// 准备mutations——用于操作数据(state)
const mutations = {
    JIA(state,value){
        console.log('mutations中的JIA被调用了')
        state.sum += value
    },
    JIAN(state,value){
        console.log('mutations中的JIAN被调用了')
        state.sum -= value
    },
}
// 准备state——用于存储数据
const state = {
    sum:0,//当前和
    name:"momo",
    age:21
}
// 准备getters——用于将state中的数据进行加工
const getters ={
    bigSum(state){
        return state.sum*10
    }
}

// 创建并暴露store
export default new Vuex.Store({
    actions,
    mutations,
    state,
    getters
})
Appvue
<template>
  <div>
    <count/>
  </div>
</template>

<script>
import count from './components/count.vue';
export default {
  name:'App',
  components:{count},
  mounted(){
    console.log('App',this)
  },
}
</script>
main.js
// 引入vue
import Vue from 'vue'
// 引入App
import App from './App.vue'
// 引入插件
import vueResource from 'vue-resource';
// 引入store
import store from './store/index'

// 关闭vue的生产提示
Vue.config.productionTip = false
// 使用插件
Vue.use(vueResource)

// 创建vm
new Vue({
  el:'#app',
  render: h => h(App),
  store,
  beforeCreate(){
    Vue.prototype.$bus = this  //安装全局事件总线
  }
})
mapState方法:用于帮助我们映射state中的数据为计算属性
mapGetters方法:用于帮助我们映射getters中的数据为计算属性
mapActions与mapMutations
components/count.vue
<template>
  <div>
    <h1>当前求和为:{

   {sum}}</h1>
    <h3>当前求和放大十倍后为:{

   {bigSum}}</h3>
    <h3>我是{

   {name}},今年{

   {age}}岁了</h3>
    <select v-model.number="n">
        <option value="1">1</option>
        <option value="2">2</option>
        <option value="3">3</option>
    </select>
    <button @click="increment(n)">+</button>
    <button @click="decrement(n)">-</button>
    <button @click="incrementOdd">当前求和为奇数再相加</button>
    <button @click="incrementWait">等一等再加</button>
  </div>
</template>

<script>
import {mapState,mapGetters,mapMutations,mapActions} from 'vuex'
export default {
  name:'count',
  data() {
    return {
      n:1,//用户选择的数字
    }
  },
  computed:{
    // 借助mapState生成计算属性,从state中读取属性。(对象写法)
    // ...mapState({sum:'sum',name:'name',age:'age'}),

    // 借助mapState生成计算属性,从state中读取属性。(数组写法)
    ...mapState(['sum','name','age']),

    // 借助mapGetters生成计算属性,从state中读取属性。(对象写法)
    // ...mapGetters({bigSum:'bigSum'}),

    // 借助mapGetters生成计算属性,从state中读取属性。(数组写法)
    ...mapGetters(['bigSum']),

  },
  methods: {
    // increment(){
    //   this.$store.commit('JIA',this.n)
    // },
    // decrement(){
    //   this.$store.commit('JIAN',this.n)
    // },

    // 借助mapMutations生成对应的方法,方法中会调用commit去联系mutations(对象写法)
    // ...mapMutations({increment:'JIA',decrement:'JIAN'}),

    // 借助mapMutations生成对应的方法,方法中会调用commit去联系mutations(数组写法)
    ...mapMutations(['increment','decrement']),


    // incrementOdd(){
    //   this.$store.dispatch('jiaOdd',this.n)
    // },
    // incrementWait(){
    //   this.$store.dispatch('jiaWait',this.n)

    // }

    // 借助mapMutations生成对应的方法,方法中会调用commit去联系mutations(对象写法)
    // ...mapActions({incrementOdd:'jiaOdd',incrementWait:'jiaWait'}),

    // 借助mapMutations生成对应的方法,方法中会调用commit去联系mutations(数组写法)
    ...mapActions(['incrementOdd','incrementWait']),
  },
  mounted(){
    console.log('count',this)
    const x = mapState({sum:'sum',name:'name',age:'age'})
    console.log(x)
  }
}
</script>
<style lang="css">
  button{
    margin-left: 5px;
  }
</style>
store/index.js
// 该文件用于创建Vuex中最为核心的store

// 引入vue
import Vue from 'vue'
// 引入Vuex
import Vuex from 'vuex'
// 使用Vuex插件
Vue.use(Vuex)

// 准备actions——用于相应组件中的动作
const actions = {
    jia(context,value){
        console.log('actions中的jia被调用了')
        context.commit('JIA',value)
    },
    jian(context,value){
        console.log('actions中的jian被调用了')
        context.commit('JIAN',value)
    },
    jiaOdd(context,value){
        console.log('actions中的jiaOdd被调用了')
        if(context.state.sum % 2){
            context.commit('JIA',value)
        }
    },
    jiaWait(context,value){
        console.log('actions中的jiaWait被调用了')
        setTimeout(()=>{
            context.commit('JIA',value)
        },300)
    },
}
// 准备mutations——用于操作数据(state)
const mutations = {
    JIA(state,value){
        console.log('mutations中的JIA被调用了')
        state.sum += value
    },
    JIAN(state,value){
        console.log('mutations中的JIAN被调用了')
        state.sum -= value
    },
}
// 准备state——用于存储数据
const state = {
    sum:0,//当前和
    name:"momo",
    age:21
}
// 准备getters——用于将state中的数据进行加工
const getters ={
    bigSum(state){
        return state.sum*10
    }
}

// 创建并暴露store
export default new Vuex.Store({
    actions,
    mutations,
    state,
    getters
})
App.vue
<template>
  <div>
    <count/>
  </div>
</template>

<script>
import count from './components/count.vue';
export default {
  name:'App',
  components:{count},
  mounted(){
    console.log('App',this)
  },
}
</script>
main.js
// 引入vue
import Vue from 'vue'
// 引入App
import App from './App.vue'
// 引入插件
import vueResource from 'vue-resource';
// 引入store
import store from './store/index'

// 关闭vue的生产提示
Vue.config.productionTip = false
// 使用插件
Vue.use(vueResource)

// 创建vm
new Vue({
  el:'#app',
  render: h => h(App),
  store,
  beforeCreate(){
    Vue.prototype.$bus = this  //安装全局事件总线
  }
})
mapActions方法:用于帮助我们生成与actions对话的方法,即:包含$store.dispatch(xxx)的函数
mapMutations方法:用于帮助我们生成与mutations对话的方法,即:包含$store.commit(xxx)的函数
多组件共享数据
components/count.vue
<template>
  <div>
    <h1>当前求和为:{

   {sum}}</h1>
    <h3>当前求和放大十倍后为:{

   {bigSum}}</h3>
    <h3>我是{

   {name}},今年{

   {age}}岁了</h3>
    <h3>下面组件的人数是:{

   {personList.length}}</h3>
    <select v-model.number="n">
        <option value="1">1</option>
        <option value="2">2</option>
        <option value="3">3</option>
    </select>
    <button @click="increment(n)">+</button>
    <button @click="decrement(n)">-</button>
    <button @click="incrementOdd(n)">当前求和为奇数再相加</button>
    <button @click="incrementWait(n)">等一等再加</button>
  </div>
</template>

<script>
import {mapState,mapGetters,mapMutations,mapActions} from 'vuex'
export default {
  name:'count',
  data() {
    return {
      n:1,//用户选择的数字
    }
  },
  computed:{
    // 借助mapState生成计算属性,从state中读取属性。(数组写法)
    ...mapState(['sum','name','age','personList']),
    // 借助mapGetters生成计算属性,从state中读取属性。(数组写法)
    ...mapGetters(['bigSum']),

  },
  methods: {
    // 借助mapMutations生成对应的方法,方法中会调用commit去联系mutations(对象写法)
    ...mapMutations({increment:'JIA',decrement:'JIAN'}),
    // 借助mapMutations生成对应的方法,方法中会调用commit去联系mutations(对象写法)
    ...mapActions({incrementOdd:'jiaOdd',incrementWait:'jiaWait'}),
  },
  mounted(){
    // console.log('count',this)
    // const x = mapState({sum:'sum',name:'name',age:'age'})
    // console.log(x)
  }
}
</script>
<style lang="css">
  button{
    margin-left: 5px;
  }
</style>
components/person.vue
<template>
  <div>
    <h1>表</h1>
    <h3>count组件的和为:{

   {sum}}</h3>
    <input type="text" placeholder="请输入名字" v-model="name">
    <button @click="add">添加</button>
    <ul>
        <li v-for="p in personList" :key="p.id">{

   {p.name}}</li>
    </ul>
  </div>
</template>

<script>
import {nanoid} from 'nanoid'
export default {
    name :'person',
    data(){
        return{
            name:''
        }
    },
    computed:{
        personList(){
            return this.$store.state.personList
        },
        sum(){
            return this.$store.state.sum
        }
    },
    methods:{
        add(){
            const personObj = {id:nanoid(),name:this.name}
            this.$store.commit('ADD_PERSON',personObj)
            this.name= ''
        }
    }
}
</script>

<style>

</style>
store/index.js
// 该文件用于创建Vuex中最为核心的store

// 引入vue
import Vue from 'vue'
// 引入Vuex
import Vuex from 'vuex'
// 使用Vuex插件
Vue.use(Vuex)

// 准备actions——用于相应组件中的动作
const actions = {
    jia(context,value){
        console.log('actions中的jia被调用了')
        context.commit('JIA',value)
    },
    jian(context,value){
        console.log('actions中的jian被调用了')
        context.commit('JIAN',value)
    },
    jiaOdd(context,value){
        console.log('actions中的jiaOdd被调用了')
        if(context.state.sum % 2){
            context.commit('JIA',value)
        }
    },
    jiaWait(context,value){
        console.log('actions中的jiaWait被调用了')
        setTimeout(()=>{
            context.commit('JIA',value)
        },300)
    },
}
// 准备mutations——用于操作数据(state)
const mutations = {
    JIA(state,value){
        console.log('mutations中的JIA被调用了')
        state.sum += value
    },
    JIAN(state,value){
        console.log('mutations中的JIAN被调用了')
        state.sum -= value
    },
    ADD_PERSON(state,value){
        console.log('mutations中的ADD_PERSON被调用了')
        state.personList.unshift(value)
    }
}
// 准备state——用于存储数据
const state = {
    sum:0,//当前和
    name:"momo",
    age:21,
    personList:[
        {id:'001',name:'jojo'}
    ]
}
// 准备getters——用于将state中的数据进行加工
const getters ={
    bigSum(state){
        return state.sum*10
    }
}

// 创建并暴露store
export default new Vuex.Store({
    actions,
    mutations,
    state,
    getters
})
App.vue
<template>
  <div>
    <count/>
    <hr/>
    <person/>
  </div>
</template>

<script>
import count from './components/count.vue';
import person from './components/person.vue';
export default {
  name:'App',
  components:{count,person},
  mounted(){
    console.log('App',this)
  },
}
</script>
main.js
// 引入vue
import Vue from 'vue'
// 引入App
import App from './App.vue'
// 引入插件
import vueResource from 'vue-resource';
// 引入store
import store from './store/index'

// 关闭vue的生产提示
Vue.config.productionTip = false
// 使用插件
Vue.use(vueResource)

// 创建vm
new Vue({
  el:'#app',
  render: h => h(App),
  store,
  beforeCreate(){
    Vue.prototype.$bus = this  //安装全局事件总线
  }
})
路由
理解:一个路由(route)就是一组映射关系(key-value),多个路由需要路由器(route)进行管理
前端路由:key是路径,value是组件
路由的基本使用
安装vue-router,命令:npm i vue-router


与安装Vuex时一样,vue-router最新版本为4对应vue3,学习vue2就要安装vue-router3版本
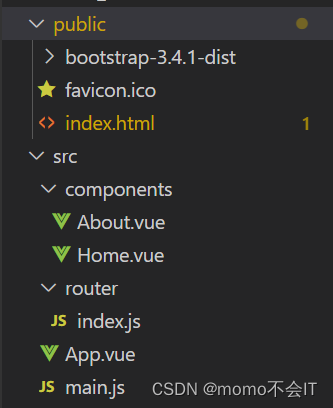
components/About.vue
<template>
  <h2>我是About的内容</h2>
</template>

<script>
    export default {
        name:'About',
    }
</script>

<style>

</style>
components/Home.vue
<template>
  <h2>我是Home的内容</h2>
</template>

<script>
    export default {
        name:'Home',
    }
</script>

<style>

</style>
router/index.js
// 该文件专门用于创建整个应用的路由器
import VueRouter from 'vue-router'
// 引入组件
import About from '../components/About'
import Home from '../components/Home'

// 创建并暴露一个路由器
export default new VueRouter({
    routes:[
        {
            path:'/about',
            component:About
        },
        {
            path:'/home',
            component:Home
        }
    ]
})
App.vue
<template>
  <div>
        <div class="row">
            <div class="col-xs-offset-2 col-xs-8">
                <div class="page-header"><h2>Vue Router Demo</h2></div>
            </div>
        </div>
        <div class="row">
            <div class="col-xs-2 col-xs-offest-2">
                <div class="list-group">
                    <!-- 原始html中我们使用a标签实现页面的跳转 -->
                    <!-- <a class="list-group-item active" href="./count.vue">About</a>
                    <a class="list-group-item active" href="./person.vue">Home</a> -->

                    <!-- Vue中借助router-link标签实现页面的转跳 -->
                    <router-link class="list-group-item" active-class="active" to="/about">About</router-link>
                    <router-link class="list-group-item" active-class="active" to="/home">Home</router-link>
                </div>
            </div>
            <div class="col-xs-6">
                <div class="panel">
                    <div class="panel-body">
                        <!-- 指定组件的呈现位置 -->
                        <router-view></router-view>
                    </div>
                </div>
            </div>
        </div>
    </div>
</template>

<script>
export default {
  name:'App',
}
</script>
main.js
// 引入vue
import Vue from 'vue'
// 引入App
import App from './App.vue'
// 引入Vuerouter
import Vuerouter from 'vue-router'
// 引入路由器
import router from './router/index'

// 关闭vue的生产提示
Vue.config.productionTip = false
// 应用插件
Vue.use(Vuerouter)

// 创建vm
new Vue({
  el:'#app',
  render: h => h(App),
  router:router
})
在这个案例中,实现单页面转跳,并且引入了Bootstrap样式
public/index.html
<!DOCTYPE html>
<html lang="">
  <head>
    <meta charset="utf-8">
    <!-- 针对IE浏览器的一个特殊配置,含义是让IE浏览器以最高的渲染级别渲染页面 -->
    <meta http-equiv="X-UA-Compatible" content="IE=edge">
    <!-- 开启移动端的理想视口 -->
    <meta name="viewport" content="width=device-width,initial-scale=1.0">
    <!-- 配置页签图标 -->
    <link rel="icon" href="<%= BASE_URL %>favicon.ico">
    <!-- 引入第三方样式 -->
    <link rel="stylesheet" href="bootstrap-3.4.1-dist/css/bootstrap.min.css">
    <!-- 配置网页标题 -->
    <title><%= htmlWebpackPlugin.options.title %></title>
  </head>
  <body>
    <!-- 当浏览器不支持JavaScript中的元素就会被渲染 -->
    <noscript>
      <strong>We're sorry but <%= htmlWebpackPlugin.options.title %> doesn't work properly without JavaScript enabled. Please enable it to continue.</strong>
    </noscript>
    <!-- 容器 -->
    <div id="app"></div>
    <!-- built files will be auto injected -->
  </body>
</html>
路由基本使用为:
1.安装vue-router,命令:npm i vue-router
2.应用插件:Vue.use(VueRouter)
3.编写router配置项
4.实现切换(active-class可配置高亮样式)
5.指定展示位置(<router-view></router-view>)
路由注意点
路由组件通常放在pages文件夹,一般组件通常放在components文件夹
通过切换,“隐藏”了的路由组件,默认是被销毁的,需要的时候再去挂载
每个组件都有自己的$router属性,里面存储着自己的路由信息
整个应用只有一个router,可以通过组件的$router属性获取到
components/Banner.vue
<template>
    <div class="col-xs-offset-2 col-xs-8">
        <div class="page-header"><h2>Vue Router Demo</h2></div>
    </div>
</template>

<script>
    export default {
        name:'Banner'
    }
</script>

<style>

</style>
pages/About.vue
<template>
  <h2>我是About的内容</h2>
</template>

<script>
    export default {
        name:'About',
    }
</script>

<style>

</style>
pages/Home.vue
<template>
  <h2>我是Home的内容</h2>
</template>

<script>
    export default {
        name:'Home',
    }
</script>

<style>

</style>
router/index.js
// 该文件专门用于创建整个应用的路由器
import VueRouter from 'vue-router'
// 引入组件
import About from '../pages/About'
import Home from '../pages/Home'

// 创建并暴露一个路由器
export default new VueRouter({
    routes:[
        {
            path:'/about',
            component:About
        },
        {
            path:'/home',
            component:Home
        }
    ]
})
App.vue
<template>
  <div>
        <div class="row">
            <Banner/>
        </div>
        <div class="row">
            <div class="col-xs-2 col-xs-offest-2">
                <div class="list-group">
                    <!-- 原始html中我们使用a标签实现页面的跳转 -->
                    <!-- <a class="list-group-item active" href="./count.vue">About</a>
                    <a class="list-group-item active" href="./person.vue">Home</a> -->

                    <!-- Vue中借助router-link标签实现页面的转跳 -->
                    <router-link class="list-group-item" active-class="active" to="/about">About</router-link>
                    <router-link class="list-group-item" active-class="active" to="/home">Home</router-link>
                </div>
            </div>
            <div class="col-xs-6">
                <div class="panel">
                    <div class="panel-body">
                        <!-- 指定组件的呈现位置 -->
                        <router-view></router-view>
                    </div>
                </div>
            </div>
        </div>
    </div>
</template>

<script>
import Banner from './components/Banner.vue'
export default {
  name:'App',
  components:{Banner}
}
</script>
main.js
// 引入vue
import Vue from 'vue'
// 引入App
import App from './App.vue'
// 引入Vuerouter
import Vuerouter from 'vue-router'
// 引入路由器
import router from './router/index'

// 关闭vue的生产提示
Vue.config.productionTip = false
// 应用插件
Vue.use(Vuerouter)

// 创建vm
new Vue({
  el:'#app',
  render: h => h(App),
  router:router
})
镶嵌路由
components/banner.vue
<template>
    <div class="col-xs-offset-2 col-xs-8">
        <div class="page-header"><h2>Vue Router Demo</h2></div>
    </div>
</template>

<script>
    export default {
        name:'Banner'
    }
</script>

<style>

</style>
pages/About.vue
<template>
  <h2>我是About的内容</h2>
</template>

<script>
    export default {
        name:'About',
    }
</script>

<style>

</style>
pages/Home.vue
<template>
  <div>
    <h2>我是Home的内容</h2>
    <div>
      <ul class="nav nav-tabs">
        <li>
          <router-link class="list-group-item" active-class="active" to="/home/news">News</router-link>
        </li>
        <li>
          <router-link class="list-group-item" active-class="active" to="/home/message">Messages</router-link>
        </li>
      </ul>
      <ul>
        <router-view></router-view>
      </ul>
    </div>
  </div>
</template>

<script>
    export default {
        name:'Home',
    }
</script>

<style>

</style>
pages/News.vue
<template>
    <div>
        <ul>
            <li>new1</li>
            <li>new2</li>
            <li>new3</li>
        </ul>
    </div>
</template>

<script>
    export default {
        name:'News'
    }
</script>
pages/Message.vue
<template>
<div>
<ul>
<li>
<a href="">message1</a>
</li>
<li>
<a href="">message2</a>
</li>
<li>
<a href="">message3</a>
</li>
</ul>
</div>
</template>
<script>
export default {
name:'Message'
}
</script>router/index.js
// 该文件专门用于创建整个应用的路由器
import VueRouter from 'vue-router'
// 引入组件
import About from '../pages/About'
import Home from '../pages/Home'
import News from '../pages/News'
import Message from '../pages/Message'

// 创建并暴露一个路由器
export default new VueRouter({
    routes:[
        {
            path:'/about',
            component:About
        },
        {
            path:'/home',
            component:Home,
            children:[
                {
                    path:'news',
                    component:News,
                },
                {
                    path:'message',
                    component:Message,
                },
            ]
        }
    ]
})
App.vue
<template>
  <div>
        <div class="row">
            <Banner/>
        </div>
        <div class="row">
            <div class="col-xs-2 col-xs-offest-2">
                <div class="list-group">
                    <!-- 原始html中我们使用a标签实现页面的跳转 -->
                    <!-- <a class="list-group-item active" href="./count.vue">About</a>
                    <a class="list-group-item active" href="./person.vue">Home</a> -->

                    <!-- Vue中借助router-link标签实现页面的转跳 -->
                    <router-link class="list-group-item" active-class="active" to="/about">About</router-link>
                    <router-link class="list-group-item" active-class="active" to="/home">Home</router-link>
                </div>
            </div>
            <div class="col-xs-6">
                <div class="panel">
                    <div class="panel-body">
                        <!-- 指定组件的呈现位置 -->
                        <router-view></router-view>
                    </div>
                </div>
            </div>
        </div>
    </div>
</template>

<script>
import Banner from './components/Banner.vue'
export default {
  name:'App',
  components:{Banner}
}
</script>
main.js
// 引入vue
import Vue from 'vue'
// 引入App
import App from './App.vue'
// 引入Vuerouter
import Vuerouter from 'vue-router'
// 引入路由器
import router from './router/index'

// 关闭vue的生产提示
Vue.config.productionTip = false
// 应用插件
Vue.use(Vuerouter)

// 创建vm
new Vue({
  el:'#app',
  render: h => h(App),
  router:router
})
query参数
components/banner.vue
<template>
    <div class="col-xs-offset-2 col-xs-8">
        <div class="page-header"><h2>Vue Router Demo</h2></div>
    </div>
</template>

<script>
    export default {
        name:'Banner'
    }
</script>

<style>

</style>
pages/About.vue
<template>
  <h2>我是About的内容</h2>
</template>

<script>
    export default {
        name:'About',
    }
</script>

<style>

</style>
pages/Home.vue
<template>
  <div>
    <h2>我是Home的内容</h2>
    <div>
      <ul class="nav nav-tabs">
        <li>
          <router-link class="list-group-item" active-class="active" to="/home/news">News</router-link>
        </li>
        <li>
          <router-link class="list-group-item" active-class="active" to="/home/message">Messages</router-link>
        </li>
      </ul>
      <ul>
        <router-view></router-view>
      </ul>
    </div>
  </div>
</template>

<script>
    export default {
        name:'Home',
    }
</script>

<style>

</style>
pages/Detail.vue
<template>
  <ul>
    <li>消息编号:{

   {$router.query.id}}</li>
    <li>消息标题:{

   {$router.query.title}}</li>
  </ul>
</template>

<script>
    export default {
        name:'Detail',
        mounted(){
            console.log(this.$router)
        }
    }
</script>

<style>

</style>
pages/Message.vue
<template>
<div>
<ul>
<li v-for="m in messageList" :key="m.id">
<!-- 转跳路由并携带query参数,to的字符串写法 -->
<!-- <router-link :to="`/home/message/detail?id=${m.id}&title=${m.title}`">{
{m.title}}</router-link> -->
<!-- 转跳路由并携带query参数,to的对象写法 -->
<router-link :to="{
path:'/home/message/detail',
query:{
id:m.id,
title:m.title
}
}">
{
{m.title}}
</router-link>
</li>
</ul>
<hr/>
<router-view></router-view>
</div>
</template>
<script>
export default {
name:'Message',
data(){
return{
messageList:[
{id:'001',title:'消息1'},
{id:'002',title:'消息2'},
{id:'003',title:'消息3'}
]
}
}
}
</script>pages/News.vue
<template>
    <div>
        <ul>
            <li>new1</li>
            <li>new2</li>
            <li>new3</li>
        </ul>
    </div>
</template>

<script>
    export default {
        name:'News'
    }
</script>
router/index.js
// 该文件专门用于创建整个应用的路由器
import VueRouter from 'vue-router'
// 引入组件
import About from '../pages/About'
import Home from '../pages/Home'
import News from '../pages/News'
import Message from '../pages/Message'
import Detail from '../pages/Detail'

// 创建并暴露一个路由器
export default new VueRouter({
    routes:[
        {
            path:'/about',
            component:About
        },
        {
            path:'/home',
            component:Home,
            children:[
                {
                    path:'news',
                    component:News,
                },
                {
                    path:'message',
                    component:Message,
                    children:[
                        {
                            path:'detail',
                            component:Detail,
                        }
                    ]
                },
            ]
        }
    ]
})
App.vue
<template>
  <div>
        <div class="row">
            <Banner/>
        </div>
        <div class="row">
            <div class="col-xs-2 col-xs-offest-2">
                <div class="list-group">
                    <!-- 原始html中我们使用a标签实现页面的跳转 -->
                    <!-- <a class="list-group-item active" href="./count.vue">About</a>
                    <a class="list-group-item active" href="./person.vue">Home</a> -->

                    <!-- Vue中借助router-link标签实现页面的转跳 -->
                    <router-link class="list-group-item" active-class="active" to="/about">About</router-link>
                    <router-link class="list-group-item" active-class="active" to="/home">Home</router-link>
                </div>
            </div>
            <div class="col-xs-6">
                <div class="panel">
                    <div class="panel-body">
                        <!-- 指定组件的呈现位置 -->
                        <router-view></router-view>
                    </div>
                </div>
            </div>
        </div>
    </div>
</template>

<script>
import Banner from './components/Banner.vue'
export default {
  name:'App',
  components:{Banner}
}
</script>
main.js
// 引入vue
import Vue from 'vue'
// 引入App
import App from './App.vue'
// 引入Vuerouter
import Vuerouter from 'vue-router'
// 引入路由器
import router from './router/index'

// 关闭vue的生产提示
Vue.config.productionTip = false
// 应用插件
Vue.use(Vuerouter)

// 创建vm
new Vue({
  el:'#app',
  render: h => h(App),
  router:router
})
params参数
components/Banner.vue
<template>
    <div class="col-xs-offset-2 col-xs-8">
        <div class="page-header"><h2>Vue Router Demo</h2></div>
    </div>
</template>

<script>
    export default {
        name:'Banner'
    }
</script>

<style>

</style>
pages/About.vue
<template>
  <h2>我是About的内容</h2>
</template>

<script>
    export default {
        name:'About',
    }
</script>

<style>

</style>
pages/Home.vue
<template>
  <div>
    <h2>我是Home的内容</h2>
    <div>
      <ul class="nav nav-tabs">
        <li>
          <router-link class="list-group-item" active-class="active" to="/home/news">News</router-link>
        </li>
        <li>
          <router-link class="list-group-item" active-class="active" to="/home/message">Messages</router-link>
        </li>
      </ul>
      <ul>
        <router-view></router-view>
      </ul>
    </div>
  </div>
</template>

<script>
    export default {
        name:'Home',
    }
</script>

<style>

</style>
pages/Detail.vue
<template>
  <ul>
    <li>消息编号:{

   {$router.params.id}}</li>
    <li>消息标题:{

   {$router.params.title}}</li>
  </ul>
</template>

<script>
    export default {
        name:'Detail',
        mounted(){
            // console.log(this.$router)
        }
    }
</script>

<style>

</style>
pages/Message.vue
<template>
<div>
<ul>
<li v-for="m in messageList" :key="m.id">
<!-- 转跳路由并携带params参数,to的字符串写法 -->
<!-- <router-link :to="`/home/message/detail/${m.id}/${m.title}`">{
{m.title}}</router-link> -->
<!-- 转跳路由并携带params参数,to的对象写法 -->
<router-link :to="{
name:'xiangxi',
params:{
id:m.id,
title:m.title
}
}">
{
{m.title}}
</router-link>
</li>
</ul>
<hr/>
<router-view></router-view>
</div>
</template>
<script>
export default {
name:'Message',
data(){
return{
messageList:[
{id:'001',title:'消息1'},
{id:'002',title:'消息2'},
{id:'003',title:'消息3'}
]
}
}
}
</script>pages/News.vue
<template>
    <div>
        <ul>
            <li>new1</li>
            <li>new2</li>
            <li>new3</li>
        </ul>
    </div>
</template>

<script>
    export default {
        name:'News'
    }
</script>
router/index.js
// 该文件专门用于创建整个应用的路由器
import VueRouter from 'vue-router'
// 引入组件
import About from '../pages/About'
import Home from '../pages/Home'
import News from '../pages/News'
import Message from '../pages/Message'
import Detail from '../pages/Detail'

// 创建并暴露一个路由器
export default new VueRouter({
    routes:[
        {
            path:'/about',
            component:About
        },
        {
            path:'/home',
            component:Home,
            children:[
                {
                    path:'news',
                    component:News,
                },
                {
                    path:'message',
                    component:Message,
                    children:[
                        {
                            name:'xiangxi',
                            path:'detail/:id/:title',
                            component:Detail,
                        }
                    ]
                },
            ]
        }
    ]
})// 该文件专门用于创建整个应用的路由器
import VueRouter from 'vue-router'
// 引入组件
import About from '../pages/About'
import Home from '../pages/Home'
import News from '../pages/News'
import Message from '../pages/Message'
import Detail from '../pages/Detail'

// 创建并暴露一个路由器
export default new VueRouter({
    routes:[
        {
            path:'/about',
            component:About
        },
        {
            path:'/home',
            component:Home,
            children:[
                {
                    path:'news',
                    component:News,
                },
                {
                    path:'message',
                    component:Message,
                    children:[
                        {
                            name:'xiangxi',
                            path:'detail/:id/:title',
                            component:Detail,
                        }
                    ]
                },
            ]
        }
    ]
})
App.vue
<template>
  <div>
        <div class="row">
            <Banner/>
        </div>
        <div class="row">
            <div class="col-xs-2 col-xs-offest-2">
                <div class="list-group">
                    <!-- 原始html中我们使用a标签实现页面的跳转 -->
                    <!-- <a class="list-group-item active" href="./count.vue">About</a>
                    <a class="list-group-item active" href="./person.vue">Home</a> -->

                    <!-- Vue中借助router-link标签实现页面的转跳 -->
                    <router-link class="list-group-item" active-class="active" to="/about">About</router-link>
                    <router-link class="list-group-item" active-class="active" to="/home">Home</router-link>
                </div>
            </div>
            <div class="col-xs-6">
                <div class="panel">
                    <div class="panel-body">
                        <!-- 指定组件的呈现位置 -->
                        <router-view></router-view>
                    </div>
                </div>
            </div>
        </div>
    </div>
</template>

<script>
import Banner from './components/Banner.vue'
export default {
  name:'App',
  components:{Banner}
}
</script>
main.js
// 引入vue
import Vue from 'vue'
// 引入App
import App from './App.vue'
// 引入Vuerouter
import Vuerouter from 'vue-router'
// 引入路由器
import router from './router/index'

// 关闭vue的生产提示
Vue.config.productionTip = false
// 应用插件
Vue.use(Vuerouter)

// 创建vm
new Vue({
  el:'#app',
  render: h => h(App),
  router:router
})
props参数
components/Banner.vue
<template>
    <div class="col-xs-offset-2 col-xs-8">
        <div class="page-header"><h2>Vue Router Demo</h2></div>
    </div>
</template>

<script>
    export default {
        name:'Banner'
    }
</script>

<style>

</style>
pages/About.vue
<template>
  <h2>我是About的内容</h2>
</template>

<script>
    export default {
        name:'About',
    }
</script>

<style>

</style>
pages/Home.vue
<template>
  <div>
    <h2>我是Home的内容</h2>
    <div>
      <ul class="nav nav-tabs">
        <li>
          <router-link class="list-group-item" active-class="active" to="/home/news">News</router-link>
        </li>
        <li>
          <router-link class="list-group-item" active-class="active" to="/home/message">Messages</router-link>
        </li>
      </ul>
      <ul>
        <router-view></router-view>
      </ul>
    </div>
  </div>
</template>

<script>
    export default {
        name:'Home',
    }
</script>

<style>

</style>
pages/Detail.vue
<template>
  <ul>
    <li>消息编号:{

   {id}}</li>
    <li>消息标题:{

   {title}}</li>
    <li>a:{

   {a}}</li>
    <li>b:{

   {b}}</li>
  </ul>
</template>

<script>
    export default {
        name:'Detail',
        // props:['a','b'],//第一种
        props:['id','title'],//第三种
        computed:{
          // id(){
          //   return this.$route.params.id
          // },
          // title(){
          //   return this.$route.params.title
          // }
        },
        mounted(){
            // console.log(this.$router)
        }
    }
</script>

<style>

</style>
pages/Message.vue
<template>
<div>
<ul>
<li v-for="m in messageList" :key="m.id">
<!-- 转跳路由并携带params参数,to的字符串写法 -->
<!-- <router-link :to="`/home/message/detail/${m.id}/${m.title}`">{
{m.title}}</router-link> -->
<!-- 转跳路由并携带params参数,to的对象写法 -->
<router-link :to="{
name:'xiangxi',
params:{
id:m.id,
title:m.title
}
}">
{
{m.title}}
</router-link>
</li>
</ul>
<hr/>
<router-view></router-view>
</div>
</template>
<script>
export default {
name:'Message',
data(){
return{
messageList:[
{id:'001',title:'消息1'},
{id:'002',title:'消息2'},
{id:'003',title:'消息3'}
]
}
}
}
</script>pages/News.vue
<template>
    <div>
        <ul>
            <li>new1</li>
            <li>new2</li>
            <li>new3</li>
        </ul>
    </div>
</template>

<script>
    export default {
        name:'News'
    }
</script>
router/index.js
// 该文件专门用于创建整个应用的路由器
import VueRouter from 'vue-router'
// 引入组件
import About from '../pages/About'
import Home from '../pages/Home'
import News from '../pages/News'
import Message from '../pages/Message'
import Detail from '../pages/Detail'

// 创建并暴露一个路由器
export default new VueRouter({
    routes:[
        {
            path:'/about',
            component:About
        },
        {
            path:'/home',
            component:Home,
            children:[
                {
                    path:'news',
                    component:News,
                },
                {
                    path:'message',
                    component:Message,
                    children:[
                        {
                            name:'xiangxi',
                            path:'detail/:id/:title',
                            component:Detail,
                            // props的第一种写法,值为对象,该对象中的所有key-value都会以props的形式传给Detail组件
                            // props:{a:10,b:'hello'}

                            // props的第二种写法,值为布尔值,若布尔值为真,就会把该路由组件收到的所有params参数,以props形式传给Detail组件
                            // props:true

                             // props的第三种写法,值为函数
                             props($route){
                                return {id:$route.query.id,title:$route.query.title}
                             }
                        }
                    ]
                },
            ]
        }
    ]
})
App.vue
<template>
  <div>
        <div class="row">
            <Banner/>
        </div>
        <div class="row">
            <div class="col-xs-2 col-xs-offest-2">
                <div class="list-group">
                    <!-- 原始html中我们使用a标签实现页面的跳转 -->
                    <!-- <a class="list-group-item active" href="./count.vue">About</a>
                    <a class="list-group-item active" href="./person.vue">Home</a> -->

                    <!-- Vue中借助router-link标签实现页面的转跳 -->
                    <router-link class="list-group-item" active-class="active" to="/about">About</router-link>
                    <router-link class="list-group-item" active-class="active" to="/home">Home</router-link>
                </div>
            </div>
            <div class="col-xs-6">
                <div class="panel">
                    <div class="panel-body">
                        <!-- 指定组件的呈现位置 -->
                        <router-view></router-view>
                    </div>
                </div>
            </div>
        </div>
    </div>
</template>

<script>
import Banner from './components/Banner.vue'
export default {
  name:'App',
  components:{Banner}
}
</script>
main.js
// 引入vue
import Vue from 'vue'
// 引入App
import App from './App.vue'
// 引入Vuerouter
import Vuerouter from 'vue-router'
// 引入路由器
import router from './router/index'

// 关闭vue的生产提示
Vue.config.productionTip = false
// 应用插件
Vue.use(Vuerouter)

// 创建vm
new Vue({
  el:'#app',
  render: h => h(App),
  router:router
})
router-link的replace属性
作用:控制路由转跳时操作浏览器历史记录的模式
浏览器的历史记录有两种写入方式:分别是push和replace,push是追加历史记录,replace是替换当前记录。路由转跳时候默认是push
如何开启replace模式:<router-link replace>News</router-link>
pages/Home.vue
<template>
  <div>
    <h2>我是Home的内容</h2>
    <div>
      <ul class="nav nav-tabs">
        <li>
          <router-link replace class="list-group-item" active-class="active" to="/home/news">News</router-link>
        </li>
        <li>
          <router-link replace class="list-group-item" active-class="active" to="/home/message">Messages</router-link>
        </li>
      </ul>
      <ul>
        <router-view></router-view>
      </ul>
    </div>
  </div>
</template>

<script>
    export default {
        name:'Home',
    }
</script>

<style>

</style>
编程式路由导航
components/Banner.vue
<template>
    <div class="col-xs-offset-2 col-xs-8">
        <div class="page-header">
            <h2>Vue Router Demo</h2>
            <button @click="back">后退</button>
            <button @click="forward">前进</button>
        </div>
    </div>
</template>

<script>
    export default {
        name:'Banner',
        methods:{
            back(){
                this.$router.back()
            },
            forward(){
                this.$router.forward()
            }
        }
    }
</script>

<style>

</style>
pages/About.vue
<template>
  <h2>我是About的内容</h2>
</template>

<script>
    export default {
        name:'About',
    }
</script>

<style>

</style>
pages/Home.vue
<template>
  <div>
    <h2>我是Home的内容</h2>
    <div>
      <ul class="nav nav-tabs">
        <li>
          <router-link class="list-group-item" active-class="active" to="/home/news">News</router-link>
        </li>
        <li>
          <router-link class="list-group-item" active-class="active" to="/home/message">Messages</router-link>
        </li>
      </ul>
      <ul>
        <router-view></router-view>
      </ul>
    </div>
  </div>
</template>

<script>
    export default {
        name:'Home',
    }
</script>

<style>

</style>
pages/Detail.vue
<template>
  <ul>
    <li>消息编号:{

   {id}}</li>
    <li>消息标题:{

   {title}}</li>
    <li>a:{

   {a}}</li>
    <li>b:{

   {b}}</li>
  </ul>
</template>

<script>
    export default {
        name:'Detail',
        // props:['a','b'],//第一种
        props:['id','title'],//第三种
        computed:{
          // id(){
          //   return this.$route.params.id
          // },
          // title(){
          //   return this.$route.params.title
          // }
        },
        mounted(){
            // console.log(this.$router)
        }
    }
</script>

<style>

</style>
pages/Message.vue
<template>
<div>
<ul>
<li v-for="m in messageList" :key="m.id">
<!-- 转跳路由并携带params参数,to的字符串写法 -->
<!-- <router-link :to="`/home/message/detail/${m.id}/${m.title}`">{
{m.title}}</router-link> -->
<!-- 转跳路由并携带params参数,to的对象写法 -->
<router-link :to="{
name:'xiangxi',
params:{
id:m.id,
title:m.title
}
}">
{
{m.title}}
</router-link>
<button @click="pushShow">push查看</button>
<button @click="replaceShow">replace查看</button>
</li>
</ul>
<hr/>
<router-view></router-view>
</div>
</template>
<script>
export default {
name:'Message',
data(){
return{
messageList:[
{id:'001',title:'消息1'},
{id:'002',title:'消息2'},
{id:'003',title:'消息3'}
]
}
},
methods:{
pushShow(m){
// console.log(this.$router)
this.$router.push({
name:'xiangxi',
params:{
id:m.id,
title:m.title
}
})
},
replaceShow(m){
this.$router.replace({
name:'xiangxi',
params:{
id:m.id,
title:m.title
}
})
}
}
}
</script>pages/News.vue
<template>
    <div>
        <ul>
            <li>new1</li>
            <li>new2</li>
            <li>new3</li>
        </ul>
    </div>
</template>

<script>
    export default {
        name:'News'
    }
</script>
router/index.js
// 该文件专门用于创建整个应用的路由器
import VueRouter from 'vue-router'
// 引入组件
import About from '../pages/About'
import Home from '../pages/Home'
import News from '../pages/News'
import Message from '../pages/Message'
import Detail from '../pages/Detail'

// 创建并暴露一个路由器
export default new VueRouter({
    routes:[
        {
            path:'/about',
            component:About
        },
        {
            path:'/home',
            component:Home,
            children:[
                {
                    path:'news',
                    component:News,
                },
                {
                    path:'message',
                    component:Message,
                    children:[
                        {
                            name:'xiangxi',
                            path:'detail/:id/:title',
                            component:Detail,
                            // props的第一种写法,值为对象,该对象中的所有key-value都会以props的形式传给Detail组件
                            // props:{a:10,b:'hello'}

                            // props的第二种写法,值为布尔值,若布尔值为真,就会把该路由组件收到的所有params参数,以props形式传给Detail组件
                            // props:true

                             // props的第三种写法,值为函数
                             props($route){
                                return {id:$route.query.id,title:$route.query.title}
                             }
                        }
                    ]
                },
            ]
        }
    ]
})
App.vue
<template>
  <div>
        <div class="row">
            <Banner/>
        </div>
        <div class="row">
            <div class="col-xs-2 col-xs-offest-2">
                <div class="list-group">
                    <!-- 原始html中我们使用a标签实现页面的跳转 -->
                    <!-- <a class="list-group-item active" href="./count.vue">About</a>
                    <a class="list-group-item active" href="./person.vue">Home</a> -->

                    <!-- Vue中借助router-link标签实现页面的转跳 -->
                    <router-link class="list-group-item" active-class="active" to="/about">About</router-link>
                    <router-link class="list-group-item" active-class="active" to="/home">Home</router-link>
                </div>
            </div>
            <div class="col-xs-6">
                <div class="panel">
                    <div class="panel-body">
                        <!-- 指定组件的呈现位置 -->
                        <router-view></router-view>
                    </div>
                </div>
            </div>
        </div>
    </div>
</template>

<script>
import Banner from './components/Banner.vue'
export default {
  name:'App',
  components:{Banner}
}
</script>
main.js
// 引入vue
import Vue from 'vue'
// 引入App
import App from './App.vue'
// 引入Vuerouter
import Vuerouter from 'vue-router'
// 引入路由器
import router from './router/index'

// 关闭vue的生产提示
Vue.config.productionTip = false
// 应用插件
Vue.use(Vuerouter)

// 创建vm
new Vue({
  el:'#app',
  render: h => h(App),
  router:router
})
缓存路由组件
components/Banner.vue
<template>
    <div class="col-xs-offset-2 col-xs-8">
        <div class="page-header">
            <h2>Vue Router Demo</h2>
            <button @click="back">后退</button>
            <button @click="forward">前进</button>
        </div>
    </div>
</template>

<script>
    export default {
        name:'Banner',
        methods:{
            back(){
                this.$router.back()
            },
            forward(){
                this.$router.forward()
            }
        }
    }
</script>

<style>

</style>
pages/About.vue
<template>
  <h2>我是About的内容</h2>
</template>

<script>
    export default {
        name:'About',
    }
</script>

<style>

</style>
pages/Home.vue
<template>
  <div>
    <h2>我是Home的内容</h2>
    <div>
      <ul class="nav nav-tabs">
        <li>
          <router-link class="list-group-item" active-class="active" to="/home/news">News</router-link>
        </li>
        <li>
          <router-link class="list-group-item" active-class="active" to="/home/message">Messages</router-link>
        </li>
      </ul>
      <keep-alive include="News">
        <router-view></router-view>
      </keep-alive>
    </div>
  </div>
</template>

<script>
    export default {
        name:'Home',
    }
</script>

<style>

</style>
pages/Detail.vue
<template>
  <ul>
    <li>消息编号:{

   {id}}</li>
    <li>消息标题:{

   {title}}</li>
    <li>a:{

   {a}}</li>
    <li>b:{

   {b}}</li>
  </ul>
</template>

<script>
    export default {
        name:'Detail',
        // props:['a','b'],//第一种
        props:['id','title'],//第三种
        computed:{
          // id(){
          //   return this.$route.params.id
          // },
          // title(){
          //   return this.$route.params.title
          // }
        },
        mounted(){
            // console.log(this.$router)
        }
    }
</script>

<style>

</style>
pages/Message.vue
<template>
<div>
<ul>
<li v-for="m in messageList" :key="m.id">
<!-- 转跳路由并携带params参数,to的字符串写法 -->
<!-- <router-link :to="`/home/message/detail/${m.id}/${m.title}`">{
{m.title}}</router-link> -->
<!-- 转跳路由并携带params参数,to的对象写法 -->
<router-link :to="{
name:'xiangxi',
params:{
id:m.id,
title:m.title
}
}">
{
{m.title}}
</router-link>
<button @click="pushShow">push查看</button>
<button @click="replaceShow">replace查看</button>
</li>
</ul>
<hr/>
<router-view></router-view>
</div>
</template>
<script>
export default {
name:'Message',
data(){
return{
messageList:[
{id:'001',title:'消息1'},
{id:'002',title:'消息2'},
{id:'003',title:'消息3'}
]
}
},
methods:{
pushShow(m){
// console.log(this.$router)
this.$router.push({
name:'xiangxi',
params:{
id:m.id,
title:m.title
}
})
},
replaceShow(m){
this.$router.replace({
name:'xiangxi',
params:{
id:m.id,
title:m.title
}
})
}
}
}
</script>pages/News.vue
<template>
    <div>
        <ul>
            <li>new1<input type="text"></li>
            <li>new2<input type="text"></li>
            <li>new3<input type="text"></li>
        </ul>
    </div>
</template>

<script>
    export default {
        name:'News'
    }
</script>
router/index.js
// 该文件专门用于创建整个应用的路由器
import VueRouter from 'vue-router'
// 引入组件
import About from '../pages/About'
import Home from '../pages/Home'
import News from '../pages/News'
import Message from '../pages/Message'
import Detail from '../pages/Detail'

// 创建并暴露一个路由器
export default new VueRouter({
    routes:[
        {
            path:'/about',
            component:About
        },
        {
            path:'/home',
            component:Home,
            children:[
                {
                    path:'news',
                    component:News,
                },
                {
                    path:'message',
                    component:Message,
                    children:[
                        {
                            name:'xiangxi',
                            path:'detail/:id/:title',
                            component:Detail,
                            // props的第一种写法,值为对象,该对象中的所有key-value都会以props的形式传给Detail组件
                            // props:{a:10,b:'hello'}

                            // props的第二种写法,值为布尔值,若布尔值为真,就会把该路由组件收到的所有params参数,以props形式传给Detail组件
                            // props:true

                             // props的第三种写法,值为函数
                             props($route){
                                return {id:$route.query.id,title:$route.query.title}
                             }
                        }
                    ]
                },
            ]
        }
    ]
})
App.vue
<template>
  <div>
        <div class="row">
            <Banner/>
        </div>
        <div class="row">
            <div class="col-xs-2 col-xs-offest-2">
                <div class="list-group">
                    <!-- 原始html中我们使用a标签实现页面的跳转 -->
                    <!-- <a class="list-group-item active" href="./count.vue">About</a>
                    <a class="list-group-item active" href="./person.vue">Home</a> -->

                    <!-- Vue中借助router-link标签实现页面的转跳 -->
                    <router-link class="list-group-item" active-class="active" to="/about">About</router-link>
                    <router-link class="list-group-item" active-class="active" to="/home">Home</router-link>
                </div>
            </div>
            <div class="col-xs-6">
                <div class="panel">
                    <div class="panel-body">
                        <!-- 指定组件的呈现位置 -->
                        <router-view></router-view>
                    </div>
                </div>
            </div>
        </div>
    </div>
</template>

<script>
import Banner from './components/Banner.vue'
export default {
  name:'App',
  components:{Banner}
}
</script>
main.js
// 引入vue
import Vue from 'vue'
// 引入App
import App from './App.vue'
// 引入Vuerouter
import Vuerouter from 'vue-router'
// 引入路由器
import router from './router/index'

// 关闭vue的生产提示
Vue.config.productionTip = false
// 应用插件
Vue.use(Vuerouter)

// 创建vm
new Vue({
  el:'#app',
  render: h => h(App),
  router:router
})
前置路由守卫
路由守卫的作用对路由进行权限管理
在Vue打开的浏览页面中配置端口的key,value值

components/Banner.vue
<template>
    <div class="col-xs-offset-2 col-xs-8">
        <div class="page-header">
            <h2>Vue Router Demo</h2>
            <button @click="back">后退</button>
            <button @click="forward">前进</button>
        </div>
    </div>
</template>

<script>
    export default {
        name:'Banner',
        methods:{
            back(){
                this.$router.back()
            },
            forward(){
                this.$router.forward()
            }
        }
    }
</script>

<style>

</style>
pages/About.vue
<template>
  <h2>我是About的内容</h2>
</template>

<script>
    export default {
        name:'About',
    }
</script>

<style>

</style>
pages/Home.vue
<template>
  <div>
    <h2>我是Home的内容</h2>
    <div>
      <ul class="nav nav-tabs">
        <li>
          <router-link class="list-group-item" active-class="active" to="/home/news">News</router-link>
        </li>
        <li>
          <router-link class="list-group-item" active-class="active" to="/home/message">Messages</router-link>
        </li>
      </ul>
      <keep-alive include="News">
        <router-view></router-view>
      </keep-alive>
    </div>
  </div>
</template>

<script>
    export default {
        name:'Home',
    }
</script>

<style>

</style>
pages/Detail.vue
<template>
  <ul>
    <li>消息编号:{

   {id}}</li>
    <li>消息标题:{

   {title}}</li>
    <li>a:{

   {a}}</li>
    <li>b:{

   {b}}</li>
  </ul>
</template>

<script>
    export default {
        name:'Detail',
        // props:['a','b'],//第一种
        props:['id','title'],//第三种
        computed:{
          // id(){
          //   return this.$route.params.id
          // },
          // title(){
          //   return this.$route.params.title
          // }
        },
        mounted(){
            // console.log(this.$router)
        }
    }
</script>

<style>

</style>
pages/Message.vue
<template>
<div>
<ul>
<li v-for="m in messageList" :key="m.id">
<!-- 转跳路由并携带params参数,to的字符串写法 -->
<!-- <router-link :to="`/home/message/detail/${m.id}/${m.title}`">{
{m.title}}</router-link> -->
<!-- 转跳路由并携带params参数,to的对象写法 -->
<router-link :to="{
name:'xiangxi',
params:{
id:m.id,
title:m.title
}
}">
{
{m.title}}
</router-link>
<button @click="pushShow">push查看</button>
<button @click="replaceShow">replace查看</button>
</li>
</ul>
<hr/>
<router-view></router-view>
</div>
</template>
<script>
export default {
name:'Message',
data(){
return{
messageList:[
{id:'001',title:'消息1'},
{id:'002',title:'消息2'},
{id:'003',title:'消息3'}
]
}
},
methods:{
pushShow(m){
// console.log(this.$router)
this.$router.push({
name:'xiangxi',
params:{
id:m.id,
title:m.title
}
})
},
replaceShow(m){
this.$router.replace({
name:'xiangxi',
params:{
id:m.id,
title:m.title
}
})
}
}
}
</script>pages/News.vue
<template>
<div>
<ul>
<li>new1<input type="text"></li>
<li>new2<input type="text"></li>
<li>new3<input type="text"></li>
</ul>
</div>
</template>
<script>
export default {
name:'News'
}
</script>router/index.js
// 该文件专门用于创建整个应用的路由器
import VueRouter from 'vue-router'
// 引入组件
import About from '../pages/About'
import Home from '../pages/Home'
import News from '../pages/News'
import Message from '../pages/Message'
import Detail from '../pages/Detail'
// 创建并暴露一个路由器
const router = new VueRouter({
routes:[
{
name:'guanyu',
path:'/about',
component:About
},
{
name:'zhuye',
path:'/home',
component:Home,
children:[
{
name:'xinwen',
path:'news',
component:News,
meta:{isAuth:ture}
},
{
name:'xiaoxi',
path:'message',
component:Message,
meta:{isAuth:ture},
children:[
{
name:'xiangxi',
path:'detail/:id/:title',
component:Detail,
// props的第一种写法,值为对象,该对象中的所有key-value都会以props的形式传给Detail组件
// props:{a:10,b:'hello'}
// props的第二种写法,值为布尔值,若布尔值为真,就会把该路由组件收到的所有params参数,以props形式传给Detail组件
// props:true
// props的第三种写法,值为函数
props($route){
return {id:$route.query.id,title:$route.query.title}
}
}
]
},
]
}
]
})
// 全局前置路由守卫——初始化的时候被调用、每次路由切换之前被调用
router.beforeEach((to,from,next)=>{
console.log(to,from)
if(to.meta.isAuth){//判断是否需要鉴权
if(localStorage.getItem('name')==='momo'){
next()
}else{
alert('没有权限查看')
}
}else{
next()
}
})
export default routerApp.vue
<template>
<div>
<div class="row">
<Banner/>
</div>
<div class="row">
<div class="col-xs-2 col-xs-offest-2">
<div class="list-group">
<!-- 原始html中我们使用a标签实现页面的跳转 -->
<!-- <a class="list-group-item active" href="./count.vue">About</a>
<a class="list-group-item active" href="./person.vue">Home</a> -->
<!-- Vue中借助router-link标签实现页面的转跳 -->
<router-link class="list-group-item" active-class="active" to="/about">About</router-link>
<router-link class="list-group-item" active-class="active" to="/home">Home</router-link>
</div>
</div>
<div class="col-xs-6">
<div class="panel">
<div class="panel-body">
<!-- 指定组件的呈现位置 -->
<router-view></router-view>
</div>
</div>
</div>
</div>
</div>
</template>
<script>
import Banner from './components/Banner.vue'
export default {
name:'App',
components:{Banner}
}
</script>
main.js
// 引入vue
import Vue from 'vue'
// 引入App
import App from './App.vue'
// 引入Vuerouter
import Vuerouter from 'vue-router'
// 引入路由器
import router from './router/index'
// 关闭vue的生产提示
Vue.config.productionTip = false
// 应用插件
Vue.use(Vuerouter)
// 创建vm
new Vue({
el:'#app',
render: h => h(App),
router:router
})后置路由
components/Banner.vue
<template>
<div class="col-xs-offset-2 col-xs-8">
<div class="page-header">
<h2>Vue Router Demo</h2>
<button @click="back">后退</button>
<button @click="forward">前进</button>
</div>
</div>
</template>
<script>
export default {
name:'Banner',
methods:{
back(){
this.$router.back()
},
forward(){
this.$router.forward()
}
}
}
</script>
<style>
</style>pages/About.vue
<template>
<h2>我是About的内容</h2>
</template>
<script>
export default {
name:'About',
}
</script>
<style>
</style>pages/Home.vue
<template>
<div>
<h2>我是Home的内容</h2>
<div>
<ul class="nav nav-tabs">
<li>
<router-link class="list-group-item" active-class="active" to="/home/news">News</router-link>
</li>
<li>
<router-link class="list-group-item" active-class="active" to="/home/message">Messages</router-link>
</li>
</ul>
<keep-alive include="News">
<router-view></router-view>
</keep-alive>
</div>
</div>
</template>
<script>
export default {
name:'Home',
}
</script>
<style>
</style>pages/Detail.vue
<template>
<ul>
<li>消息编号:{
{id}}</li>
<li>消息标题:{
{title}}</li>
<li>a:{
{a}}</li>
<li>b:{
{b}}</li>
</ul>
</template>
<script>
export default {
name:'Detail',
// props:['a','b'],//第一种
props:['id','title'],//第三种
computed:{
// id(){
// return this.$route.params.id
// },
// title(){
// return this.$route.params.title
// }
},
mounted(){
// console.log(this.$router)
}
}
</script>
<style>
</style>pages/Message.vue
<template>
<div>
<ul>
<li v-for="m in messageList" :key="m.id">
<!-- 转跳路由并携带params参数,to的字符串写法 -->
<!-- <router-link :to="`/home/message/detail/${m.id}/${m.title}`">{
{m.title}}</router-link> -->
<!-- 转跳路由并携带params参数,to的对象写法 -->
<router-link :to="{
name:'xiangxi',
params:{
id:m.id,
title:m.title
}
}">
{
{m.title}}
</router-link>
<button @click="pushShow">push查看</button>
<button @click="replaceShow">replace查看</button>
</li>
</ul>
<hr/>
<router-view></router-view>
</div>
</template>
<script>
export default {
name:'Message',
data(){
return{
messageList:[
{id:'001',title:'消息1'},
{id:'002',title:'消息2'},
{id:'003',title:'消息3'}
]
}
},
methods:{
pushShow(m){
// console.log(this.$router)
this.$router.push({
name:'xiangxi',
params:{
id:m.id,
title:m.title
}
})
},
replaceShow(m){
this.$router.replace({
name:'xiangxi',
params:{
id:m.id,
title:m.title
}
})
}
}
}
</script>pages/News.vue
<template>
<div>
<ul>
<li>new1<input type="text"></li>
<li>new2<input type="text"></li>
<li>new3<input type="text"></li>
</ul>
</div>
</template>
<script>
export default {
name:'News'
}
</script>router/index.js
// 该文件专门用于创建整个应用的路由器
import VueRouter from 'vue-router'
// 引入组件
import About from '../pages/About'
import Home from '../pages/Home'
import News from '../pages/News'
import Message from '../pages/Message'
import Detail from '../pages/Detail'
// 创建并暴露一个路由器
const router = new VueRouter({
routes:[
{
name:'guanyu',
path:'/about',
component:About,
meta:{title:'关于'}
},
{
name:'zhuye',
path:'/home',
component:Home,
meta:{title:'主页'},
children:[
{
name:'xinwen',
path:'news',
component:News,
meta:{isAuth:ture,title:'新闻'}
},
{
name:'xiaoxi',
path:'message',
component:Message,
meta:{isAuth:ture,title:'消息'},
children:[
{
name:'xiangxi',
path:'detail/:id/:title',
component:Detail,
meta:{title:'详情'},
// props的第一种写法,值为对象,该对象中的所有key-value都会以props的形式传给Detail组件
// props:{a:10,b:'hello'}
// props的第二种写法,值为布尔值,若布尔值为真,就会把该路由组件收到的所有params参数,以props形式传给Detail组件
// props:true
// props的第三种写法,值为函数
props($route){
return {id:$route.query.id,title:$route.query.title}
}
}
]
},
]
}
]
})
// 全局前置路由守卫——初始化的时候被调用、每次路由切换之前被调用
router.beforeEach((to,from,next)=>{
console.log(to,from)
if(to.meta.isAuth){//判断是否需要鉴权
if(localStorage.getItem('name')==='momo'){
next()
}else{
alert('没有权限查看')
}
}else{
next()
}
})
// 全局后置路由守卫——初始化的时候被调用、每次路由切换之前被调用
router.afterEach(()=>{
document.title = to.meta.title || '首页'
})
export default routerApp.vue
<template>
<div>
<div class="row">
<Banner/>
</div>
<div class="row">
<div class="col-xs-2 col-xs-offest-2">
<div class="list-group">
<!-- 原始html中我们使用a标签实现页面的跳转 -->
<!-- <a class="list-group-item active" href="./count.vue">About</a>
<a class="list-group-item active" href="./person.vue">Home</a> -->
<!-- Vue中借助router-link标签实现页面的转跳 -->
<router-link class="list-group-item" active-class="active" to="/about">About</router-link>
<router-link class="list-group-item" active-class="active" to="/home">Home</router-link>
</div>
</div>
<div class="col-xs-6">
<div class="panel">
<div class="panel-body">
<!-- 指定组件的呈现位置 -->
<router-view></router-view>
</div>
</div>
</div>
</div>
</div>
</template>
<script>
import Banner from './components/Banner.vue'
export default {
name:'App',
components:{Banner}
}
</script>
main.js
// 引入vue
import Vue from 'vue'
// 引入App
import App from './App.vue'
// 引入Vuerouter
import Vuerouter from 'vue-router'
// 引入路由器
import router from './router/index'
// 关闭vue的生产提示
Vue.config.productionTip = false
// 应用插件
Vue.use(Vuerouter)
// 创建vm
new Vue({
el:'#app',
render: h => h(App),
router:router
})独享路由守卫
components/Banner.vue
<template>
<div class="col-xs-offset-2 col-xs-8">
<div class="page-header">
<h2>Vue Router Demo</h2>
<button @click="back">后退</button>
<button @click="forward">前进</button>
</div>
</div>
</template>
<script>
export default {
name:'Banner',
methods:{
back(){
this.$router.back()
},
forward(){
this.$router.forward()
}
}
}
</script>
<style>
</style>pages/About.vue
<template>
<h2>我是About的内容</h2>
</template>
<script>
export default {
name:'About',
}
</script>
<style>
</style>pages/Home.vue
<template>
<div>
<h2>我是Home的内容</h2>
<div>
<ul class="nav nav-tabs">
<li>
<router-link class="list-group-item" active-class="active" to="/home/news">News</router-link>
</li>
<li>
<router-link class="list-group-item" active-class="active" to="/home/message">Messages</router-link>
</li>
</ul>
<keep-alive include="News">
<router-view></router-view>
</keep-alive>
</div>
</div>
</template>
<script>
export default {
name:'Home',
}
</script>
<style>
</style>pages/Detail.vue
<template>
<ul>
<li>消息编号:{
{id}}</li>
<li>消息标题:{
{title}}</li>
<li>a:{
{a}}</li>
<li>b:{
{b}}</li>
</ul>
</template>
<script>
export default {
name:'Detail',
// props:['a','b'],//第一种
props:['id','title'],//第三种
computed:{
// id(){
// return this.$route.params.id
// },
// title(){
// return this.$route.params.title
// }
},
mounted(){
// console.log(this.$router)
}
}
</script>
<style>
</style>pages/Message.vue
<template>
<div>
<ul>
<li v-for="m in messageList" :key="m.id">
<!-- 转跳路由并携带params参数,to的字符串写法 -->
<!-- <router-link :to="`/home/message/detail/${m.id}/${m.title}`">{
{m.title}}</router-link> -->
<!-- 转跳路由并携带params参数,to的对象写法 -->
<router-link :to="{
name:'xiangxi',
params:{
id:m.id,
title:m.title
}
}">
{
{m.title}}
</router-link>
<button @click="pushShow">push查看</button>
<button @click="replaceShow">replace查看</button>
</li>
</ul>
<hr/>
<router-view></router-view>
</div>
</template>
<script>
export default {
name:'Message',
data(){
return{
messageList:[
{id:'001',title:'消息1'},
{id:'002',title:'消息2'},
{id:'003',title:'消息3'}
]
}
},
methods:{
pushShow(m){
// console.log(this.$router)
this.$router.push({
name:'xiangxi',
params:{
id:m.id,
title:m.title
}
})
},
replaceShow(m){
this.$router.replace({
name:'xiangxi',
params:{
id:m.id,
title:m.title
}
})
}
}
}
</script>pages/News.vue
<template>
<div>
<ul>
<li>new1<input type="text"></li>
<li>new2<input type="text"></li>
<li>new3<input type="text"></li>
</ul>
</div>
</template>
<script>
export default {
name:'News'
}
</script>router/index.js
// 该文件专门用于创建整个应用的路由器
import VueRouter from 'vue-router'
// 引入组件
import About from '../pages/About'
import Home from '../pages/Home'
import News from '../pages/News'
import Message from '../pages/Message'
import Detail from '../pages/Detail'
// 创建并暴露一个路由器
const router = new VueRouter({
routes:[
{
name:'guanyu',
path:'/about',
component:About,
meta:{title:'关于'}
},
{
name:'zhuye',
path:'/home',
component:Home,
meta:{title:'主页'},
children:[
{
name:'xinwen',
path:'news',
component:News,
meta:{isAuth:ture,title:'新闻'},
beforeEnter:(to,from,next)=>{
console.log(to,from)
if(to.meta.isAuth){//判断是否需要鉴权
if(localStorage.getItem('name')==='momo'){
next()
}else{
alert('没有权限查看')
}
}else{
next()
}
}
},
{
name:'xiaoxi',
path:'message',
component:Message,
meta:{isAuth:ture,title:'消息'},
children:[
{
name:'xiangxi',
path:'detail/:id/:title',
component:Detail,
meta:{title:'详情'},
// props的第一种写法,值为对象,该对象中的所有key-value都会以props的形式传给Detail组件
// props:{a:10,b:'hello'}
// props的第二种写法,值为布尔值,若布尔值为真,就会把该路由组件收到的所有params参数,以props形式传给Detail组件
// props:true
// props的第三种写法,值为函数
props($route){
return {id:$route.query.id,title:$route.query.title}
}
}
]
},
]
}
]
})
// 全局前置路由守卫——初始化的时候被调用、每次路由切换之前被调用
// router.beforeEach((to,from,next)=>{
// console.log(to,from)
// if(to.meta.isAuth){//判断是否需要鉴权
// if(localStorage.getItem('name')==='momo'){
// next()
// }else{
// alert('没有权限查看')
// }
// }else{
// next()
// }
// })
// // 全局后置路由守卫——初始化的时候被调用、每次路由切换之前被调用
// router.afterEach(()=>{
// document.title = to.meta.title || '首页'
// })
export default routerApp.vue
<template>
<div>
<div class="row">
<Banner/>
</div>
<div class="row">
<div class="col-xs-2 col-xs-offest-2">
<div class="list-group">
<!-- 原始html中我们使用a标签实现页面的跳转 -->
<!-- <a class="list-group-item active" href="./count.vue">About</a>
<a class="list-group-item active" href="./person.vue">Home</a> -->
<!-- Vue中借助router-link标签实现页面的转跳 -->
<router-link class="list-group-item" active-class="active" to="/about">About</router-link>
<router-link class="list-group-item" active-class="active" to="/home">Home</router-link>
</div>
</div>
<div class="col-xs-6">
<div class="panel">
<div class="panel-body">
<!-- 指定组件的呈现位置 -->
<router-view></router-view>
</div>
</div>
</div>
</div>
</div>
</template>
<script>
import Banner from './components/Banner.vue'
export default {
name:'App',
components:{Banner}
}
</script>
main.js
// 引入vue
import Vue from 'vue'
// 引入App
import App from './App.vue'
// 引入Vuerouter
import Vuerouter from 'vue-router'
// 引入路由器
import router from './router/index'
// 关闭vue的生产提示
Vue.config.productionTip = false
// 应用插件
Vue.use(Vuerouter)
// 创建vm
new Vue({
el:'#app',
render: h => h(App),
router:router
})组件内路由守卫
components/Banner.vue
<template>
<div class="col-xs-offset-2 col-xs-8">
<div class="page-header">
<h2>Vue Router Demo</h2>
<button @click="back">后退</button>
<button @click="forward">前进</button>
</div>
</div>
</template>
<script>
export default {
name:'Banner',
methods:{
back(){
this.$router.back()
},
forward(){
this.$router.forward()
}
}
}
</script>
<style>
</style>pages/About.vue
<template>
<h2>我是About的内容</h2>
</template>
<script>
export default {
name:'About',
// 通过路由规则,进入该组件时被调用
beforeRouteEnter(to,from,next){
console.log(to,from)
if(to.meta.isAuth){//判断是否需要鉴权
if(localStorage.getItem('name')==='momo'){
next()
}else{
alert('没有权限查看')
}
}else{
next()
}
},
// 通过路由规则,离开该组件时被调用
beforeRouteLeave(to,from){
console.log('后置守卫',to,from)
document.title = to.meta.title || '首页'
}
}
</script>
<style>
</style>pages/Home.vue
<template>
<div>
<h2>我是Home的内容</h2>
<div>
<ul class="nav nav-tabs">
<li>
<router-link class="list-group-item" active-class="active" to="/home/news">News</router-link>
</li>
<li>
<router-link class="list-group-item" active-class="active" to="/home/message">Messages</router-link>
</li>
</ul>
<keep-alive include="News">
<router-view></router-view>
</keep-alive>
</div>
</div>
</template>
<script>
export default {
name:'Home',
}
</script>
<style>
</style>pages/Detail.vue
<template>
<ul>
<li>消息编号:{
{id}}</li>
<li>消息标题:{
{title}}</li>
<li>a:{
{a}}</li>
<li>b:{
{b}}</li>
</ul>
</template>
<script>
export default {
name:'Detail',
// props:['a','b'],//第一种
props:['id','title'],//第三种
computed:{
// id(){
// return this.$route.params.id
// },
// title(){
// return this.$route.params.title
// }
},
mounted(){
// console.log(this.$router)
}
}
</script>
<style>
</style>pages/Message.vue
<template>
<div>
<ul>
<li v-for="m in messageList" :key="m.id">
<!-- 转跳路由并携带params参数,to的字符串写法 -->
<!-- <router-link :to="`/home/message/detail/${m.id}/${m.title}`">{
{m.title}}</router-link> -->
<!-- 转跳路由并携带params参数,to的对象写法 -->
<router-link :to="{
name:'xiangxi',
params:{
id:m.id,
title:m.title
}
}">
{
{m.title}}
</router-link>
<button @click="pushShow">push查看</button>
<button @click="replaceShow">replace查看</button>
</li>
</ul>
<hr/>
<router-view></router-view>
</div>
</template>
<script>
export default {
name:'Message',
data(){
return{
messageList:[
{id:'001',title:'消息1'},
{id:'002',title:'消息2'},
{id:'003',title:'消息3'}
]
}
},
methods:{
pushShow(m){
// console.log(this.$router)
this.$router.push({
name:'xiangxi',
params:{
id:m.id,
title:m.title
}
})
},
replaceShow(m){
this.$router.replace({
name:'xiangxi',
params:{
id:m.id,
title:m.title
}
})
}
}
}
</script>pages/News.vue
<template>
<div>
<ul>
<li>new1<input type="text"></li>
<li>new2<input type="text"></li>
<li>new3<input type="text"></li>
</ul>
</div>
</template>
<script>
export default {
name:'News'
}
</script>router/index.js
// 该文件专门用于创建整个应用的路由器
import VueRouter from 'vue-router'
// 引入组件
import About from '../pages/About'
import Home from '../pages/Home'
import News from '../pages/News'
import Message from '../pages/Message'
import Detail from '../pages/Detail'
// 创建并暴露一个路由器
const router = new VueRouter({
routes:[
{
name:'guanyu',
path:'/about',
component:About,
meta:{isAuth:ture,title:'关于'}
},
{
name:'zhuye',
path:'/home',
component:Home,
meta:{title:'主页'},
children:[
{
name:'xinwen',
path:'news',
component:News,
meta:{isAuth:ture,title:'新闻'},
// beforeEnter:(to,from,next)=>{
// console.log(to,from)
// if(to.meta.isAuth){//判断是否需要鉴权
// if(localStorage.getItem('name')==='momo'){
// next()
// }else{
// alert('没有权限查看')
// }
// }else{
// next()
// }
// }
},
{
name:'xiaoxi',
path:'message',
component:Message,
meta:{isAuth:ture,title:'消息'},
children:[
{
name:'xiangxi',
path:'detail/:id/:title',
component:Detail,
meta:{title:'详情'},
// props的第一种写法,值为对象,该对象中的所有key-value都会以props的形式传给Detail组件
// props:{a:10,b:'hello'}
// props的第二种写法,值为布尔值,若布尔值为真,就会把该路由组件收到的所有params参数,以props形式传给Detail组件
// props:true
// props的第三种写法,值为函数
props($route){
return {id:$route.query.id,title:$route.query.title}
}
}
]
},
]
}
]
})
// 全局前置路由守卫——初始化的时候被调用、每次路由切换之前被调用
// router.beforeEach((to,from,next)=>{
// console.log(to,from)
// if(to.meta.isAuth){//判断是否需要鉴权
// if(localStorage.getItem('name')==='momo'){
// next()
// }else{
// alert('没有权限查看')
// }
// }else{
// next()
// }
// })
// // 全局后置路由守卫——初始化的时候被调用、每次路由切换之前被调用
// router.afterEach(()=>{
// document.title = to.meta.title || '首页'
// })
export default routerApp.vue
<template>
<div>
<div class="row">
<Banner/>
</div>
<div class="row">
<div class="col-xs-2 col-xs-offest-2">
<div class="list-group">
<!-- 原始html中我们使用a标签实现页面的跳转 -->
<!-- <a class="list-group-item active" href="./count.vue">About</a>
<a class="list-group-item active" href="./person.vue">Home</a> -->
<!-- Vue中借助router-link标签实现页面的转跳 -->
<router-link class="list-group-item" active-class="active" to="/about">About</router-link>
<router-link class="list-group-item" active-class="active" to="/home">Home</router-link>
</div>
</div>
<div class="col-xs-6">
<div class="panel">
<div class="panel-body">
<!-- 指定组件的呈现位置 -->
<router-view></router-view>
</div>
</div>
</div>
</div>
</div>
</template>
<script>
import Banner from './components/Banner.vue'
export default {
name:'App',
components:{Banner}
}
</script>
main.js
// 引入vue
import Vue from 'vue'
// 引入App
import App from './App.vue'
// 引入Vuerouter
import Vuerouter from 'vue-router'
// 引入路由器
import router from './router/index'
// 关闭vue的生产提示
Vue.config.productionTip = false
// 应用插件
Vue.use(Vuerouter)
// 创建vm
new Vue({
el:'#app',
render: h => h(App),
router:router
})ElementUI
我们学习VUE,知道它的核心思想式组件和数据驱动,但是每一个组件都需要自己编写模板,样式,添加事件,数据等是非常麻烦的,
所以饿了吗推出了基于VUE2.0的组件库,它的名称叫做element-ui,提供了丰富的PC端组件
ElementUI官网:Element - 网站快速成型工具
npm 安装
推荐使用 npm 的方式安装,它能更好地和 webpack 打包工具配合使用。
npm i element-ui -S

在main.js文件中引入 ElementUI
// 引入vue
import Vue from 'vue'
// 引入App
import App from './App.vue'
// 引入ElementUI组件库
import ElementUI from 'element-ui';
// 引入ElementUI全部样式
import 'element-ui/lib/theme-chalk/index.css';
// 关闭vue的生产提示
Vue.config.productionTip = false
// 应用ElementUI
Vue.use(ElementUI);
// 创建vm
new Vue({
el:'#app',
render: h => h(App),
})App.vue
<template>
<div>
<button>原生按钮</button>
<input type="text">
<el-row>
<el-button>默认按钮</el-button>
<el-button type="primary">主要按钮</el-button>
<el-button type="success">成功按钮</el-button>
<el-button type="info">信息按钮</el-button>
<el-button type="warning">警告按钮</el-button>
<el-button type="danger">危险按钮</el-button>
</el-row>
<el-row>
<el-button plain>朴素按钮</el-button>
<el-button type="primary" plain>主要按钮</el-button>
<el-button type="success" plain>成功按钮</el-button>
<el-button type="info" plain>信息按钮</el-button>
<el-button type="warning" plain>警告按钮</el-button>
<el-button type="danger" plain>危险按钮</el-button>
</el-row>
<el-row>
<el-button round>圆角按钮</el-button>
<el-button type="primary" round>主要按钮</el-button>
<el-button type="success" round>成功按钮</el-button>
<el-button type="info" round>信息按钮</el-button>
<el-button type="warning" round>警告按钮</el-button>
<el-button type="danger" round>危险按钮</el-button>
</el-row>
<el-row>
<el-button icon="el-icon-search" circle></el-button>
<el-button type="primary" icon="el-icon-edit" circle></el-button>
<el-button type="success" icon="el-icon-check" circle></el-button>
<el-button type="info" icon="el-icon-message" circle></el-button>
<el-button type="warning" icon="el-icon-star-off" circle></el-button>
<el-button type="danger" icon="el-icon-delete" circle></el-button>
</el-row>
<el-date-picker
v-model="value2"
align="right"
type="date"
placeholder="选择日期"
:picker-options="pickerOptions">
</el-date-picker>
</div>
</template>
<script>
export default {
name:'App',
}
</script>
参考文献:https://www.bilibili.com/video/BV1Zy4y1K7SH?p=1&vd_source=73447309f7b5ff3ce641d1c5e2f25da3

