文章目录
环境
python 3.6 必须是64位的

总的来说三个步骤
- Anaconda 开发环境管理
- 安装Tensorflow、Opencv
- 安装Jupyter Notebook
学习地址
Anaconda教程
下载和清华源设置
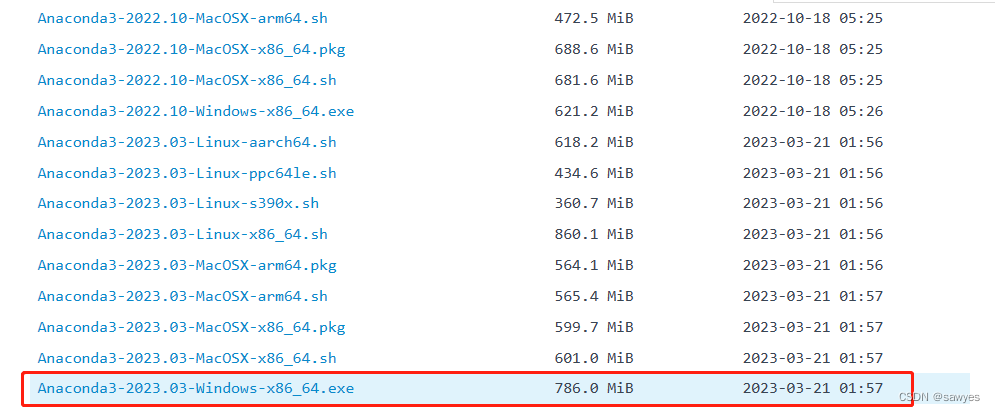
从帮助页面直接找到归档(archive)文件下载,点击我打开页面 https://mirrors.tuna.tsinghua.edu.cn/anaconda/archive/
一路“下一步”安装,直到打开软件界面
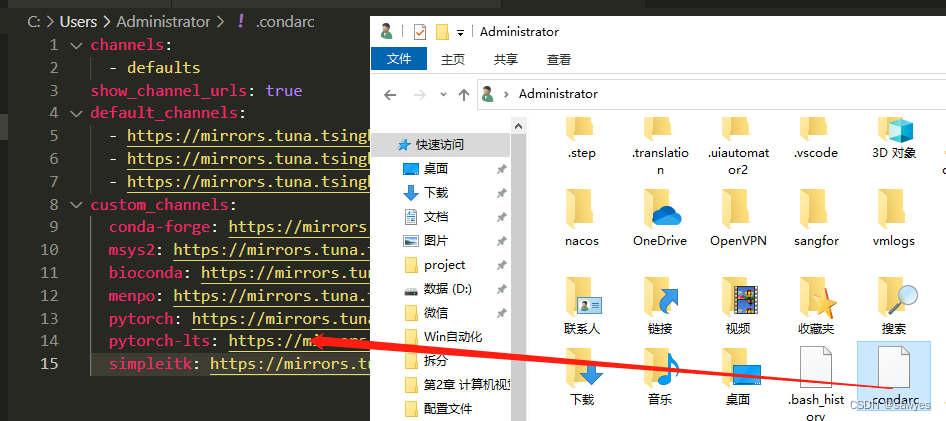
Windows 用户无法直接创建名为 .condarc 的文件,可先执行conda config --set show_channel_urls yes

根据官方教程继续,各系统都可以通过修改用户目录下的 .condarc 文件来使用 TUNA 镜像源
channels:
  - defaults
show_channel_urls: true
default_channels:
  - https://mirrors.tuna.tsinghua.edu.cn/anaconda/pkgs/main
  - https://mirrors.tuna.tsinghua.edu.cn/anaconda/pkgs/r
  - https://mirrors.tuna.tsinghua.edu.cn/anaconda/pkgs/msys2
custom_channels:
  conda-forge: https://mirrors.tuna.tsinghua.edu.cn/anaconda/cloud
  msys2: https://mirrors.tuna.tsinghua.edu.cn/anaconda/cloud
  bioconda: https://mirrors.tuna.tsinghua.edu.cn/anaconda/cloud
  menpo: https://mirrors.tuna.tsinghua.edu.cn/anaconda/cloud
  pytorch: https://mirrors.tuna.tsinghua.edu.cn/anaconda/cloud
  pytorch-lts: https://mirrors.tuna.tsinghua.edu.cn/anaconda/cloud
  simpleitk: https://mirrors.tuna.tsinghua.edu.cn/anaconda/cloud
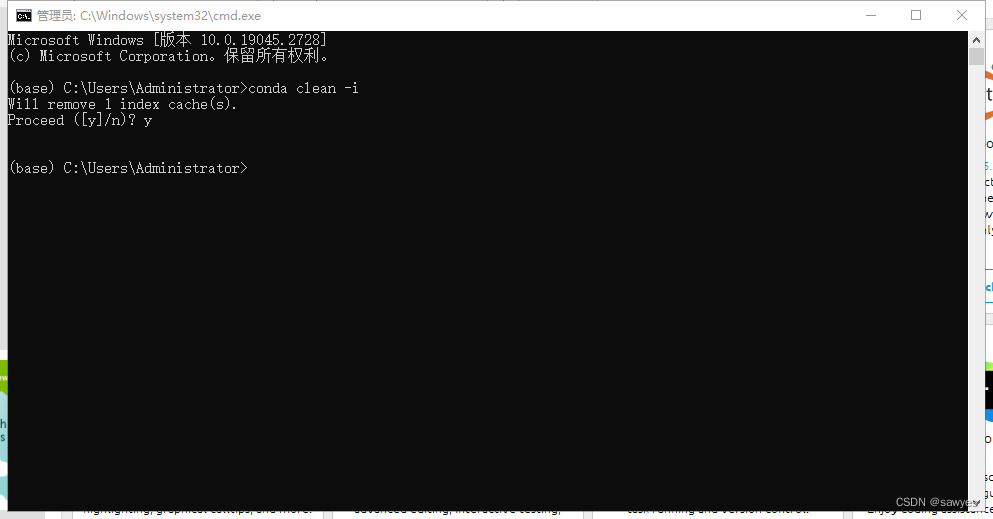
继续在命令行中执行conda clean -i
环境测试
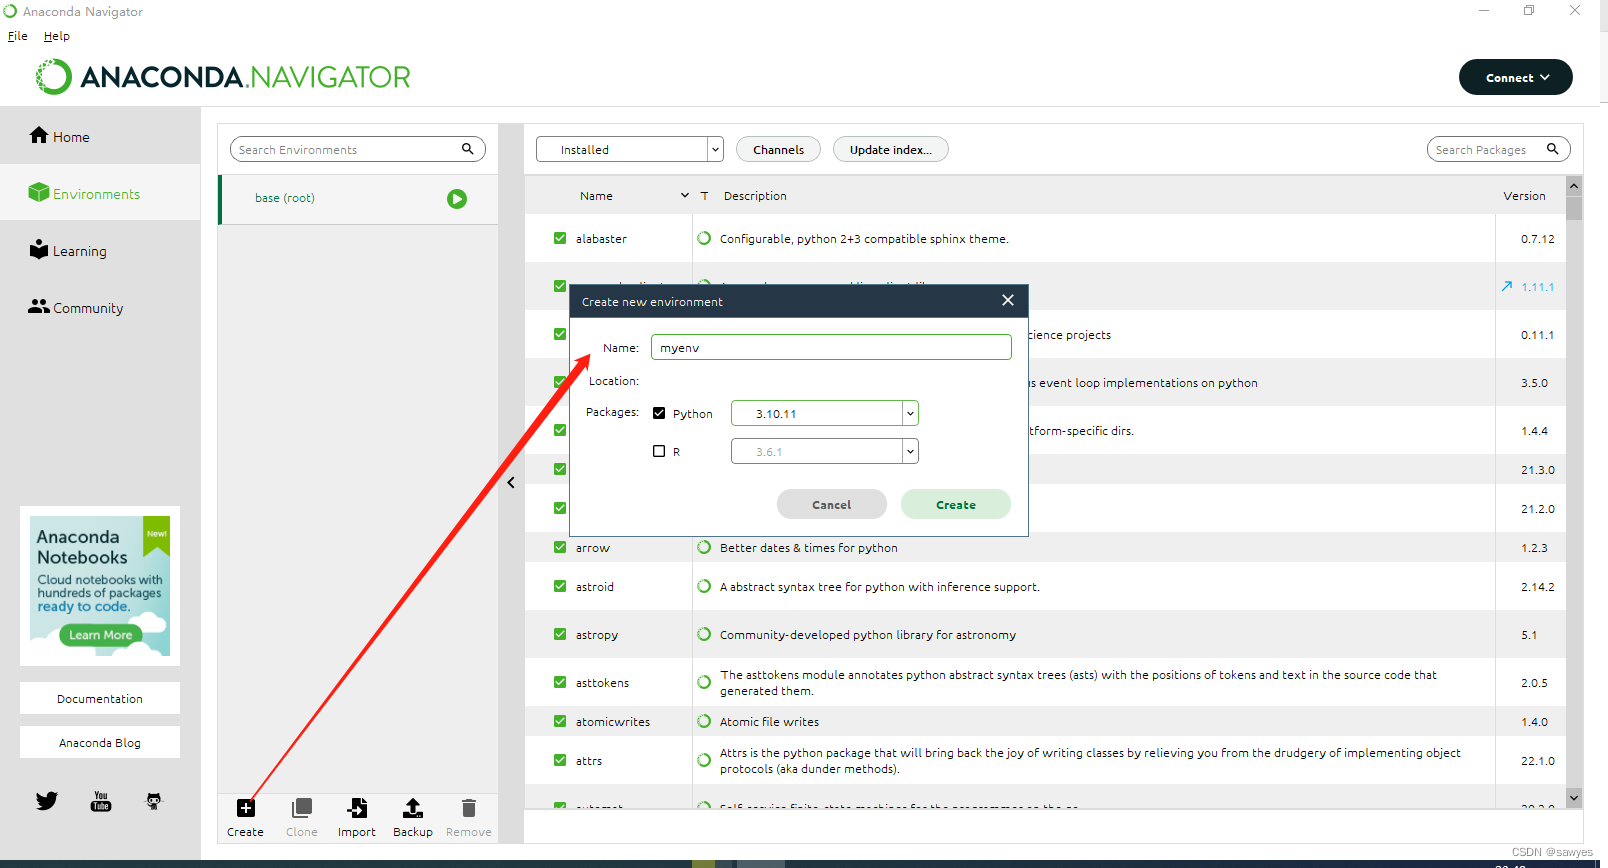
- 页面操作
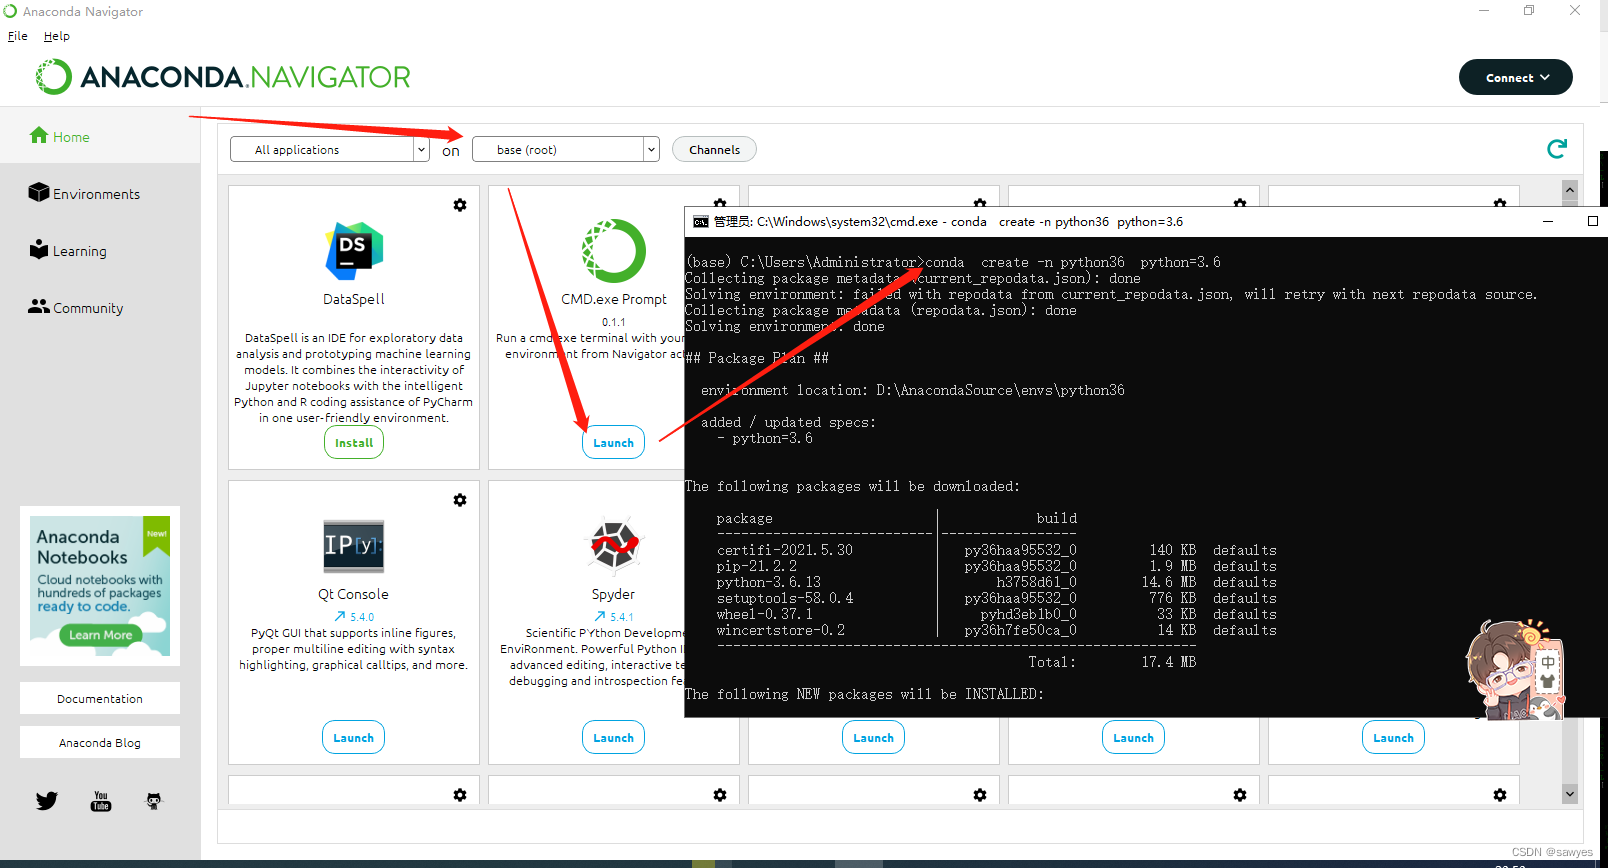
通过anaconda页面导航操作,选择创建环境名字,Python版本
- 命令行操作
conda create -n python36 python=3.6
conda的Python环境切换
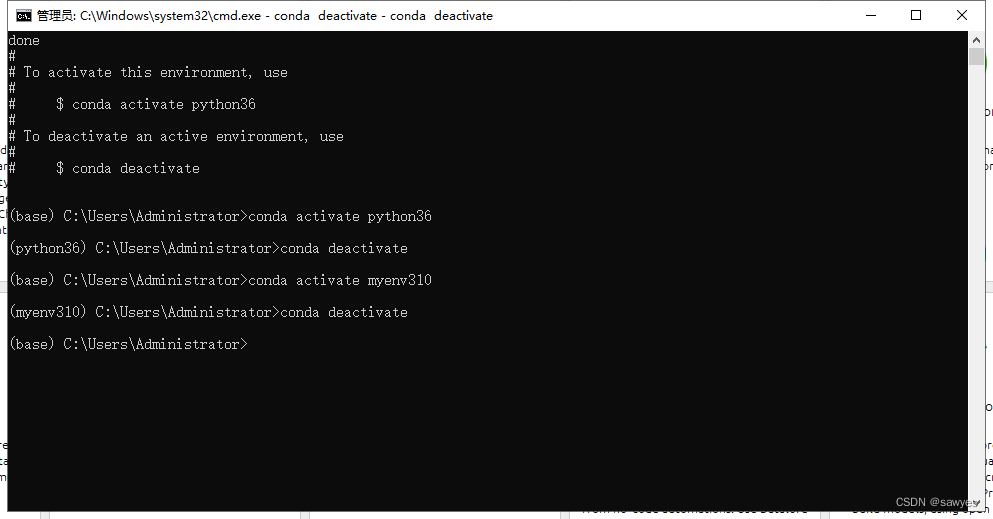
激活环境
conda activate python36
退出当前环境
conda deactivate
依赖安装
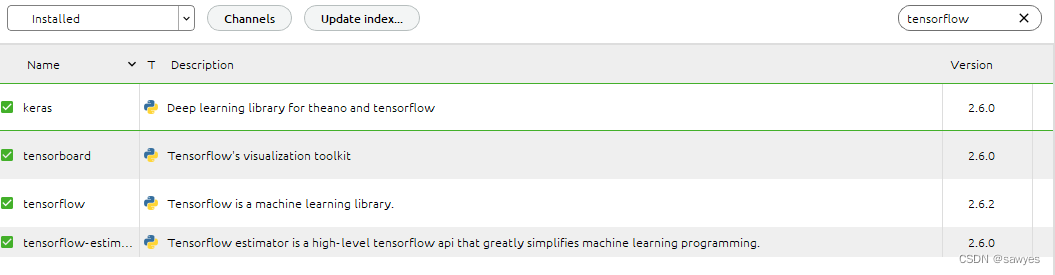
r-tensorflow 2.9.0(1.4) 暂时不理会这个依赖包
tensorflow-gpu 2.6.2(1.1.0) 在2.1后已经移除,用TensorFlow代替
opencv 3.4.2(3.6.4)
tensorflow 2.6.2(1.2.1)

Jupyter Notebook
接下来我的代码都在3.6下进行,
- 先切换环境到
python3.6, - 启动
Jupyter Notebook

测试过后发现目录不是默认想要的,需要手动设置一下
更改Jupyter Notebook默认目录
jupyter notebook --generate-config
(python36) C:\Users\Administrator>jupyter notebook --generate-config
Writing default config to: C:\Users\Administrator\.jupyter\jupyter_notebook_config.py
打开该文件找到#c.NotebookApp.notebook_dir = ''这一行, 然后手动在D盘创建目录即可
重新运行Jupyter Notebook, 就可以发现默认目录已经修改到D:\jypyter-notebook
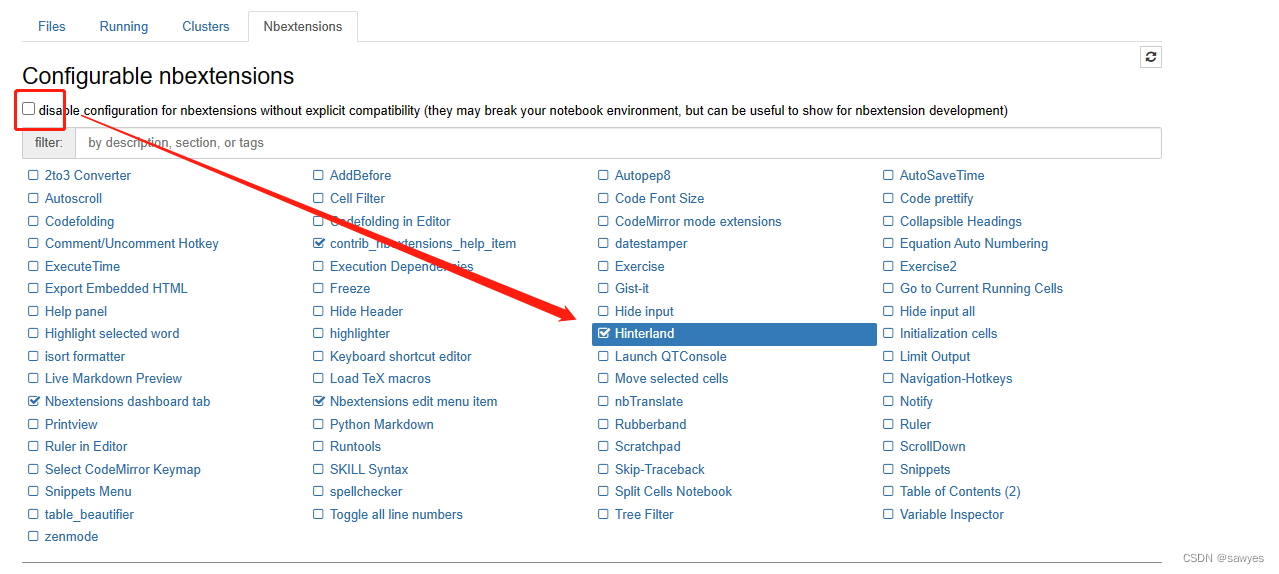
Jupyter Notebook 代码提示
命令行安装
pip install jupyter_contrib_nbextensions

jupyter contrib nbextension install --user

pip install jupyter_nbextensions_configurator

jupyter nbextensions_configurator enable --user
Hello World
import tensorflow as tf
hello = tf.constant('hello,tf')

print(hello.numpy())
b'hello,tf'
print(tf.add(1, 2).numpy())
3

# opencv
import cv2

print("hello opencv")
hello opencv
查看OpenCV等依赖包文件位置
conda config --show
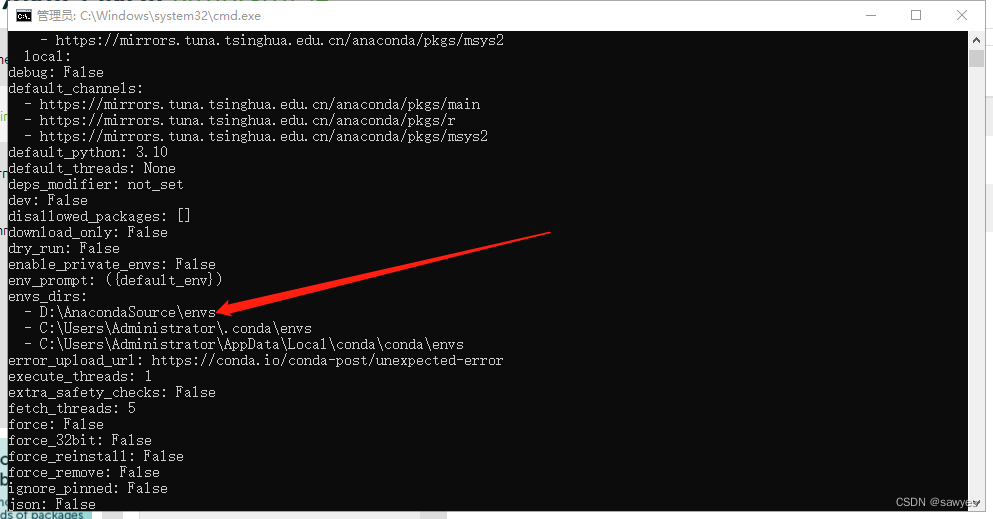
每个人的目录可能会有细微的差异
D:\AnacondaSource\envs\python36\Library\include\opencv2
格式大概如下
{install_path}\{env_name}\python36\Library\include\opencv2