1.简介
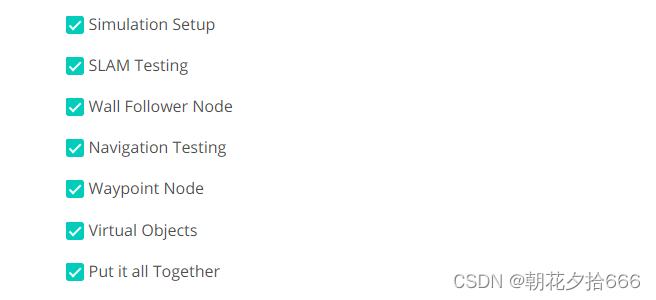
家庭服务机器人(Home Sevice Robot)项目的步骤列表如下:
2.环境设置
1)先决/依赖条件
* Gazebo >= 7.0 ROS Kinetic
* ROS navigation package
sudo apt-get install ros-kinetic-navigation* ROS map_server package
sudo apt-get install ros-kinetic-map-server* ROS move_base package
sudo apt-get install ros-kinetic-move-base* ROS amcl package
sudo apt-get install ros-kinetic-amcl(注:* make >= 4.1(mac, linux), 3.81(Windows)
* Linux: make is installed by default on most Linux distros
* Mac: [install Xcode command line tools to get make](https://developer.apple.com/xcode/features/)
* Windows: [Click here for installation instructions](http://gnuwin32.sourceforge.net/packages/make.htm)
* gcc/g++ >= 5.4
* Linux: gcc / g++ is installed by default on most Linux distros
* Mac: same deal as make - [install Xcode command line tools](https://developer.apple.com/xcode/features/)
* Windows: recommend using [MinGW](http://www.mingw.org/))
2)仿真设置
Catkin工作区
要为家庭服务机器人编程,需要将其与不同的ROS包连接。其中一些包是官方ROS包,提供了很好的工具,其他的是即将创建的包。本节的目的是准备和建立catkin工作空间。
下面是将需要获取的正式ROS包的列表,以及在项目的后续阶段中需要创建的其他包和目录。catkin_ws/src目录应该如下所示:
官方ROS包
现在导入这些包,并将它们安装到catkin工作区的src目录中,确保克隆完整的GitHub目录,而不仅仅是包本身。
- gmapping: 使用gmapping_demo.launch启动文件,可以很容易地执行SLAM,并与配备激光测距传感器或RGB-D相机的机器人构建环境地图。
- turtlebot_teleop: 用keyboard_teleop.launch启动文件,可以使用键盘命令手动控制机器人。
- turtlebot_rviz_launchers: 使用view_navigation.launch启动文件,可以加载预先配置的rviz工作空间。通过启动这个文件,将节省大量时间,因为它将自动加载机器人模型、轨迹和地图。
- turtlebot_gazebo: 使用turtlebot_world.launch,通过链接world文件,在gazebo环境中部署turtlebot。
*打开Ubuntu Bash并克隆项目存储库,在命令行上执行
sudo apt-get update && sudo apt-get upgrade -y*在命令行上执行
cd Home-Service-Robot/catkin_ws/src
git clone https://github.com/ros-perception/slam_gmapping.git
git clone https://github.com/turtlebot/turtlebot.git
git clone https://github.com/turtlebot/turtlebot_interactions.git
git clone https://github.com/turtlebot/turtlebot_simulator.git
*构建并运行代码
软件包和目录
将在整个项目过程中安装这些包并创建目录。
- map: 在这个目录中,存储gazebo world文件和SLAM生成的地图。
- scripts: 在这个目录中,存储shell脚本。
- rvizConfig: 在这个目录中,存储定制的rviz配置文件。
- pick_objects: 编写一个节点,命令机器人行驶到取货区和卸货区。
- add_markers: 编写一个节点,用rviz中的标记对对象建模。
软件包的结构应该像这样:
├──                                # Official ROS packages
    |
    ├── slam_gmapping                  # gmapping_demo.launch file
    │   ├── gmapping
    │   ├── ...
    ├── turtlebot                      # keyboard_teleop.launch file
    │   ├── turtlebot_teleop
    │   ├── ...
    ├── turtlebot_interactions         # view_navigation.launch file
    │   ├── turtlebot_rviz_launchers
    │   ├── ...
    ├── turtlebot_simulator            # turtlebot_world.launch file
    │   ├── turtlebot_gazebo
    │   ├── ...
    ├──                                # Your packages and direcotries
    |
    ├── map                          # map files
    │   ├── ...
    ├── scripts                   # shell scripts files
    │   ├── ...
    ├──rvizConfig                      # rviz configuration files
    │   ├── ...
    ├──pick_objects                    # pick_objects C++ node
    │   ├── src/pick_objects.cpp
    │   ├── ...
    ├──add_markers                     # add_marker C++ node
    │   ├── src/add_markers.cpp
    │   ├── ...
    └──
3.Shell脚本
shell脚本是一个包含一系列命令的文件,可以被执行。通常用于设置环境、运行程序等,从单个roslaunch命令启动多个ROS节点和设置参数非常方便。然而,当使用不同的软件包开发机器人软件时,跟踪不同节点产生的错误和bug可能会变得更加困难。这时shell脚本就派上用场了!在创建shell脚本文件以在单独的终端上启动一个或多个节点之后,将能够跟踪不同节点的输出,并保持运行单个命令来启动所有节点的便利性。
launch.sh脚本
让我们在工作区中创建这个launch.sh脚本开始,目标是在不同的终端中推出Gazebo和Rviz。注意,我们在脚本中使用的是xterm terminal。
#!/bin/sh
xterm  -e  " gazebo " &
sleep 5
xterm  -e  " source /opt/ros/kinetic/setup.bash; roscore" &
sleep 5
xterm  -e  " rosrun rviz rviz"
launch.sh shell脚本启动三个终端,并在每个终端中发出一个或多个命令。现在分析一下这个脚本,了解每一行的意思。
代码分解
#!/bin/sh这个语句被称为shebang。它必须包含在编写的每个shell脚本中,因为它指定了执行它的UNIX解释器的完整路径。
xterm -e " gazebo " &使用xterm -e语句,启动一个xterminal的新实例。在这个终端中,我们使用“gazebo”命令启动gazebo。然后我们添加一个&,表示xterm终端的另一个实例将在单独的语句中创建。
sleep 5使用sleep将脚本暂停5秒。
xterm -e " source /opt/ros/kinetic/setup.bash; roscore" &启动xterm终端的第二个实例。在这个终端中,获取ROS工作区并启动ROS主节点。
sleep 5将这个脚本再暂停5秒。
xterm -e " rosrun rviz rviz"启动xterm终端的第三个实例,并运行rviz。
保存脚本文件,并通过chmod +x launch.sh执行pemission。然后使用./launch.sh启动shell脚本。
启动这个脚本后,有三个打开的xterm终端,将能够跟踪发生的任何错误或错误。重述一下,这个脚本将打开第一个终端并启动gazebo;然后暂停5秒,打开第二个终端以启动ROS主机;最后再次暂停5秒,打开第三个终端以启动RVIZ。
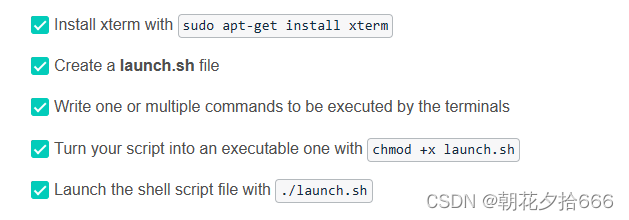
注:尝试shell脚本,按照以下步骤定制:
4.SLAM测试
这个项目的下一个任务是在Gazebo中使用Building Editor自动绘制之前设计的环境。但在解决地图构建之前,重要的是测试一下是否能够通过远程操作机器人手动执行SLAM。这一步的目标是手动测试SLAM。
编写一个shell脚本test_slam.sh,在环境中部署一个turtlebot,用键盘命令控制它,用SLAM包连接它,并在rviz中可视化地图。我们现在这个项目中使用turtlebot,但请随意使用其它个性化机器人 。
示例: test_slam.sh
#!/bin/sh

path_catkin_ws="/home/workspace/catkin_ws"

xterm  -e  " cd ${path_catkin_ws} && source devel/setup.bash && roslaunch my_robotb world.launch world_file:=${path_catkin_ws}/src/map/Robotroom1" &

sleep 10

xterm  -e  " cd ${path_catkin_ws} && source devel/setup.bash && roslaunch my_robotb gmapping_demo.launch" &

sleep 5

xterm  -e  " cd ${path_catkin_ws} && source devel/setup.bash && roslaunch turtlebot_rviz_launchers view_navigation.launch" &

sleep 5

xterm  -e  " cd ${path_catkin_ws} && source devel/setup.bash && roslaunch my_robotb teleop.launch"
SLAM测试任务列表
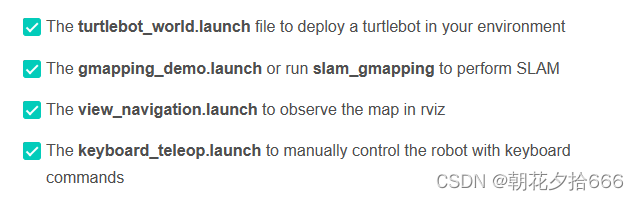
要手动测试SLAM,创建test_slam.sh shell脚本来启动这些文件:
运行和测试
启动test_slam.sh文件,搜索运行keyboard_teleopnode的xterminal,然后开始控制机器人。不需要完整绘制环境地图,只需要确保一切正常工作即可。注意到地图的质量较低,但现在不用担心。如果一切顺利,那就转到下一步!
5.定位和导航测试
这个项目的下一个任务是选择两个不同的目标,根据目标确定方向,以测试机器人达到的能力。我们将这些目标称为取货区和卸货区区域。该部分仅用于测试目的,以确保机器人能够在自主命令它向这些位置移动之前,可到达这些位置。
我们将使用ROS导航堆栈,它基于Dijkstra's-统一代价搜索算法(Uniform Cost Search algorithm)的一种变体,来规划机器人从起点到目标位置的轨迹。ROS导航堆栈允许机器人在遇到障碍时重新规划新的轨迹,从而避免其路径上的任何障碍。在使用AMCL进行定位时,已经使用过这个导航堆栈,并为机器人发送了一个特定的目标。如果打算修改ROS导航算法,或者想知道它是如何完成的,看看相关官方教程,教你如何在ROS中编写一个全局路径规划器插件。
注:导航测试任务列表
编写test_navigation.sh shell脚本来启动这些文件:

示例: test_navigation.sh
#!/bin/sh

path_catkin_ws="/home/workspace/catkin_ws"

xterm  -e  " cd ${path_catkin_ws} && source devel/setup.bash && roslaunch my_robotb world.launch world_file:=${path_catkin_ws}/src/map/Robotroom1" &

sleep 8

xterm  -e  " cd ${path_catkin_ws} && source devel/setup.bash && roslaunch my_robotb amcl.launch" &

sleep 5

xterm  -e  " cd ${path_catkin_ws} && source devel/setup.bash && roslaunch turtlebot_rviz_launchers view_navigation.launch"
测试
启动所有节点后,首先看到机器人周围的粒子,这意味着AMCL可以识别机器人的初始姿态。现在,手动指向两个不同的目标,引导机器人到达,根据目标确定自己的方向。
6.实现多个目标
之前,通过手动命令机器人在rviz中使用2D NAV目标箭头,来测试达到多个目标的能力。现在,编写一个节点,该节点将与ROS导航堆栈通信,并自动为机器人发送连续的目标。如前所述,ROS导航堆栈基于Dijkstra算法(统一代价搜索算法的一种变体)为机器人创建路径,同时避免路径上的障碍。在该项目中,使用它将机器人发送到预定义的目标。查看相关教程并查看其文档。
这是这个节点的c++代码,它发送了一个机器人要达到的目标。另外加入了注释来帮助理解:
#include <ros/ros.h>
#include <move_base_msgs/MoveBaseAction.h>
#include <actionlib/client/simple_action_client.h>

// Define a client for to send goal requests to the move_base server through a SimpleActionClient
typedef actionlib::SimpleActionClient<move_base_msgs::MoveBaseAction> MoveBaseClient;

int main(int argc, char** argv){
  // Initialize the simple_navigation_goals node
  ros::init(argc, argv, "simple_navigation_goals");

  //tell the action client that we want to spin a thread by default
  MoveBaseClient ac("move_base", true);

  // Wait 5 sec for move_base action server to come up
  while(!ac.waitForServer(ros::Duration(5.0))){
    ROS_INFO("Waiting for the move_base action server to come up");
  }

  move_base_msgs::MoveBaseGoal goal;

  // set up the frame parameters
  goal.target_pose.header.frame_id = "base_link";
  goal.target_pose.header.stamp = ros::Time::now();

  // Define a position and orientation for the robot to reach
  goal.target_pose.pose.position.x = 1.0;
  goal.target_pose.pose.orientation.w = 1.0;

   // Send the goal position and orientation for the robot to reach
  ROS_INFO("Sending goal");
  ac.sendGoal(goal);

  // Wait an infinite time for the results
  ac.waitForResult();

  // Check if the robot reached its goal
  if(ac.getState() == actionlib::SimpleClientGoalState::SUCCEEDED)
    ROS_INFO("Hooray, the base moved 1 meter forward");
  else
    ROS_INFO("The base failed to move forward 1 meter for some reason");

  return 0;
}
自定义代码
需要修改这段代码,并将其节点名称编辑为pick_objects。然后,将frame_id编辑为map,因为固定帧是map而不是base_link。然后修改代码,包括一个额外的目标位置和方向,让机器人到达。第一个目标是取货区,第二个目标是卸货区。机器人必须移动到期望的取货区域,显示它已到达目的地的消息,等待5秒,移动到期望的卸货区域,并显示它已到达卸货区域的消息。
注:实现多个目标
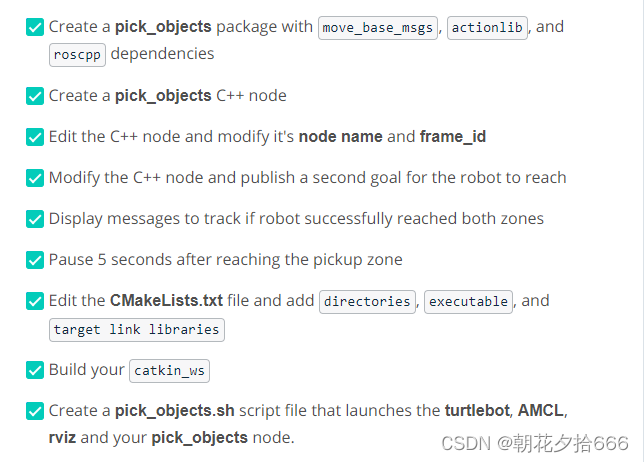
遵循以下指令,自动命令机器人前往所需的取货和卸货区域:
示例: pick_objects.cpp
#include <ros/ros.h>
#include <move_base_msgs/MoveBaseAction.h>
#include <actionlib/client/simple_action_client.h>

// Define a client for to send goal requests to the move_base server through a SimpleActionClient
typedef actionlib::SimpleActionClient<move_base_msgs::MoveBaseAction> MoveBaseClient;

int main(int argc, char** argv){
  // Initialize the simple_navigation_goals node
  ros::init(argc, argv, "simple_navigation_goals");

  //tell the action client that we want to spin a thread by default
  MoveBaseClient ac("move_base", true);

  // Wait 5 sec for move_base action server to come up
  while(!ac.waitForServer(ros::Duration(5.0))){
    ROS_INFO("Waiting for the move_base action server to come up");
  }

  move_base_msgs::MoveBaseGoal goal;

  // set up the frame parameters
  goal.target_pose.header.frame_id = "map";
  goal.target_pose.header.stamp = ros::Time::now();

  // Define a position and orientation for the robot to reach
  goal.target_pose.pose.position.x = 2.0;
  goal.target_pose.pose.position.y = 3.0;
  goal.target_pose.pose.orientation.w = 1.0;

   // Send the goal position and orientation for the robot to reach
  ROS_INFO("Sending 1st goal");
  ac.sendGoal(goal);

  // Wait an infinite time for the results
  ac.waitForResult();

  // Check if the robot reached its goal
  if(ac.getState() == actionlib::SimpleClientGoalState::SUCCEEDED)
  {
    ROS_INFO("Hooray, the base moved to the 1st Goal");
  }
  else
    ROS_INFO("The base failed to move to the 1st Goal");

  if(ac.getState() == actionlib::SimpleClientGoalState::SUCCEEDED)
  {
    ros::Duration(5).sleep();

    goal.target_pose.header.frame_id = "map";
    goal.target_pose.header.stamp = ros::Time::now();

    goal.target_pose.pose.position.x = -2.0;
    goal.target_pose.pose.position.y = 1.0;
    goal.target_pose.pose.orientation.w = 1.0;

    ROS_INFO("Sending 2nd goal");
    ac.sendGoal(goal);

    ac.waitForResult();

    if(ac.getState() == actionlib::SimpleClientGoalState::SUCCEEDED)
  {
    ROS_INFO("Hooray, the base moved to the 2nd Goal");
  }
  else
    ROS_INFO("The base failed to move to the 2nd Goal");


  }

  return 0;
}
CMakeLists .txt:
cmake_minimum_required(VERSION 2.8.3)
project(pick_objects)

## Compile as C++11, supported in ROS Kinetic and newer
# add_compile_options(-std=c++11)

## Find catkin macros and libraries
## if COMPONENTS list like find_package(catkin REQUIRED COMPONENTS xyz)
## is used, also find other catkin packages
find_package(catkin REQUIRED COMPONENTS
  actionlib
  move_base_msgs
  roscpp
)

## System dependencies are found with CMake's conventions
# find_package(Boost REQUIRED COMPONENTS system)


## Uncomment this if the package has a setup.py. This macro ensures
## modules and global scripts declared therein get installed
## See http://ros.org/doc/api/catkin/html/user_guide/setup_dot_py.html
# catkin_python_setup()

################################################
## Declare ROS messages, services and actions ##
################################################

## To declare and build messages, services or actions from within this
## package, follow these steps:
## * Let MSG_DEP_SET be the set of packages whose message types you use in
##   your messages/services/actions (e.g. std_msgs, actionlib_msgs, ...).
## * In the file package.xml:
##   * add a build_depend tag for "message_generation"
##   * add a build_depend and a exec_depend tag for each package in MSG_DEP_SET
##   * If MSG_DEP_SET isn't empty the following dependency has been pulled in
##     but can be declared for certainty nonetheless:
##     * add a exec_depend tag for "message_runtime"
## * In this file (CMakeLists.txt):
##   * add "message_generation" and every package in MSG_DEP_SET to
##     find_package(catkin REQUIRED COMPONENTS ...)
##   * add "message_runtime" and every package in MSG_DEP_SET to
##     catkin_package(CATKIN_DEPENDS ...)
##   * uncomment the add_*_files sections below as needed
##     and list every .msg/.srv/.action file to be processed
##   * uncomment the generate_messages entry below
##   * add every package in MSG_DEP_SET to generate_messages(DEPENDENCIES ...)

## Generate messages in the 'msg' folder
# add_message_files(
#   FILES
#   Message1.msg
#   Message2.msg
# )

## Generate services in the 'srv' folder
# add_service_files(
#   FILES
#   Service1.srv
#   Service2.srv
# )

## Generate actions in the 'action' folder
# add_action_files(
#   FILES
#   Action1.action
#   Action2.action
# )

## Generate added messages and services with any dependencies listed here
# generate_messages(
#   DEPENDENCIES
#   move_base_msgs
# )

################################################
## Declare ROS dynamic reconfigure parameters ##
################################################

## To declare and build dynamic reconfigure parameters within this
## package, follow these steps:
## * In the file package.xml:
##   * add a build_depend and a exec_depend tag for "dynamic_reconfigure"
## * In this file (CMakeLists.txt):
##   * add "dynamic_reconfigure" to
##     find_package(catkin REQUIRED COMPONENTS ...)
##   * uncomment the "generate_dynamic_reconfigure_options" section below
##     and list every .cfg file to be processed

## Generate dynamic reconfigure parameters in the 'cfg' folder
# generate_dynamic_reconfigure_options(
#   cfg/DynReconf1.cfg
#   cfg/DynReconf2.cfg
# )

###################################
## catkin specific configuration ##
###################################
## The catkin_package macro generates cmake config files for your package
## Declare things to be passed to dependent projects
## INCLUDE_DIRS: uncomment this if your package contains header files
## LIBRARIES: libraries you create in this project that dependent projects also need
## CATKIN_DEPENDS: catkin_packages dependent projects also need
## DEPENDS: system dependencies of this project that dependent projects also need
catkin_package(
#  INCLUDE_DIRS include
#  LIBRARIES pick_objects
#  CATKIN_DEPENDS actionlib move_base_msgs roscpp
#  DEPENDS system_lib
)

###########
## Build ##
###########

## Specify additional locations of header files
## Your package locations should be listed before other locations
include_directories(
# include
  ${catkin_INCLUDE_DIRS}
)

## Declare a C++ library
# add_library(${PROJECT_NAME}
#   src/${PROJECT_NAME}/pick_objects.cpp
# )

## Add cmake target dependencies of the library
## as an example, code may need to be generated before libraries
## either from message generation or dynamic reconfigure
# add_dependencies(${PROJECT_NAME} ${${PROJECT_NAME}_EXPORTED_TARGETS} ${catkin_EXPORTED_TARGETS})

## Declare a C++ executable
## With catkin_make all packages are built within a single CMake context
## The recommended prefix ensures that target names across packages don't collide
add_executable(${PROJECT_NAME} src/pick_objects.cpp)

## Rename C++ executable without prefix
## The above recommended prefix causes long target names, the following renames the
## target back to the shorter version for ease of user use
## e.g. "rosrun someones_pkg node" instead of "rosrun someones_pkg someones_pkg_node"
# set_target_properties(${PROJECT_NAME}_node PROPERTIES OUTPUT_NAME node PREFIX "")

## Add cmake target dependencies of the executable
## same as for the library above
# add_dependencies(${PROJECT_NAME}_node ${${PROJECT_NAME}_EXPORTED_TARGETS} ${catkin_EXPORTED_TARGETS})

## Specify libraries to link a library or executable target against
target_link_libraries(${PROJECT_NAME}
   ${catkin_LIBRARIES}
 )

#############
## Install ##
#############

# all install targets should use catkin DESTINATION variables
# See http://ros.org/doc/api/catkin/html/adv_user_guide/variables.html

## Mark executable scripts (Python etc.) for installation
## in contrast to setup.py, you can choose the destination
# install(PROGRAMS
#   scripts/my_python_script
#   DESTINATION ${CATKIN_PACKAGE_BIN_DESTINATION}
# )

## Mark executables for installation
## See http://docs.ros.org/melodic/api/catkin/html/howto/format1/building_executables.html
# install(TARGETS ${PROJECT_NAME}_node
#   RUNTIME DESTINATION ${CATKIN_PACKAGE_BIN_DESTINATION}
# )

## Mark libraries for installation
## See http://docs.ros.org/melodic/api/catkin/html/howto/format1/building_libraries.html
# install(TARGETS ${PROJECT_NAME}
#   ARCHIVE DESTINATION ${CATKIN_PACKAGE_LIB_DESTINATION}
#   LIBRARY DESTINATION ${CATKIN_PACKAGE_LIB_DESTINATION}
#   RUNTIME DESTINATION ${CATKIN_GLOBAL_BIN_DESTINATION}
# )

## Mark cpp header files for installation
# install(DIRECTORY include/${PROJECT_NAME}/
#   DESTINATION ${CATKIN_PACKAGE_INCLUDE_DESTINATION}
#   FILES_MATCHING PATTERN "*.h"
#   PATTERN ".svn" EXCLUDE
# )

## Mark other files for installation (e.g. launch and bag files, etc.)
# install(FILES
#   # myfile1
#   # myfile2
#   DESTINATION ${CATKIN_PACKAGE_SHARE_DESTINATION}
# )

#############
## Testing ##
#############

## Add gtest based cpp test target and link libraries
# catkin_add_gtest(${PROJECT_NAME}-test test/test_pick_objects.cpp)
# if(TARGET ${PROJECT_NAME}-test)
#   target_link_libraries(${PROJECT_NAME}-test ${PROJECT_NAME})
# endif()

## Add folders to be run by python nosetests
# catkin_add_nosetests(test)
pick_objects.sh :
#!/bin/sh

path_catkin_ws="/home/workspace/catkin_ws"

xterm  -e  " cd ${path_catkin_ws} && source devel/setup.bash && roslaunch my_robotb world.launch" &

sleep 8

xterm  -e  " cd ${path_catkin_ws} && source devel/setup.bash && roslaunch my_robotb amcl.launch " &

sleep 5

xterm  -e  " cd ${path_catkin_ws} && source devel/setup.bash && roslaunch turtlebot_rviz_launchers view_navigation.launch" &

sleep 5

xterm  -e  " cd ${path_catkin_ws} && source devel/setup.bash && rosrun pick_objects pick_objects"
7.虚拟物体
构建虚拟物体
这个项目的最后一个任务是用rviz中的标记模拟物体。虚拟物体是由机器人拾取并交付的对象,因此它首先应该出现在拾取区域,一旦机器人到达卸货区域,它会再次出现。
首先,让我们看看如何在rviz中绘制标记。有一个官方的ROS教程教你如何做到这一点,本教程是一个很好的参考,它包含了一个C++节点,可以在rviz中绘制箭头、立方体、圆柱体和球体等基本形状。学习如何定义一个标记、缩放它、定义它的位置和方向,并最终将它发布到rviz。教程中包含的节点将在相同的位置和方向上每秒发布一个不同的形状。查看教程(rviz/Tutorials/Markers: Basic Shapes - ROS Wiki)。
首先运行这个节点并在rviz中可视化标记,然后,修改代码并发布单个形状示例:立方体。代码遵循以下算法:
-
在取货区发布物品
-
暂停5秒
-
隐藏物品(物品消失)
-
暂停5秒
-
在卸货区发布物品
稍后,将该节点与前面编码的pick_objects节点结合起来,以模拟完整的家庭服务机器人。
示例:add_marker.sh
#!/bin/sh

path_catkin_ws="/home/workspace/catkin_ws"

xterm  -e  " cd ${path_catkin_ws} && source devel/setup.bash && roslaunch my_robotb world.launch" &

sleep 8

xterm  -e  " cd ${path_catkin_ws} && source devel/setup.bash && roslaunch my_robotb amcl.launch " &

sleep 5

xterm  -e  " cd ${path_catkin_ws} && source devel/setup.bash && roslaunch turtlebot_rviz_launchers view_navigation.launch" &

sleep 5

xterm  -e  " cd ${path_catkin_ws} && source devel/setup.bash && rosrun add_markers add_markers"
8.家庭服务机器人
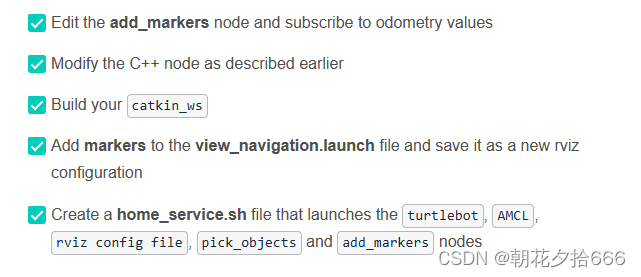
现在是时候模拟一个完整的家庭服务机器人了,它能够导航,拾取和递送虚拟物品。为此,add_markers节点和pick_objects节点应该相互通信。或者,更准确地说,add_markers节点应该订阅您的里程计来跟踪您的机器人姿态。
修改add_markers节点如下:
-
最初在取货区显示物品
-
当机器人到达拾取区域时,物品隐藏/消失
-
等待5秒模拟取货
-
当机器人到达卸货区域时,在卸货处显示物品
把所有代码放在一起,按照以下步骤模拟家庭服务机器人:
示例:add_markers.cpp
# include <ros/ros.h>
# include <visualization_msgs/Marker.h>
# include <nav_msgs/Odometry.h>
# include <math.h>

float pickup_x = 2.0;
float pickup_y = 3.0;
float dropoff_x = -2.0;
float dropoff_y = 1.0;

bool pick_up = false;
bool drop_off = false;

float tolerance = 0.6;

void odometry_cb(const nav_msgs::Odometry::ConstPtr& msg)
{
	float robot_pose_x = msg->pose.pose.position.x;
	float robot_pose_y = msg->pose.pose.position.y;

	float pickup_dis;
	float dropoff_dis;

	if(!pick_up && !drop_off)
	{
		pickup_dis = sqrt(pow((pickup_x - robot_pose_x),2) + pow((pickup_y - robot_pose_y),2));
		ROS_INFO("Distance to pickup zone = f%",pickup_dis);

		if(pickup_dis <= tolerance)
		{
			ROS_INFO("Arrived at the pickup zone");
			pick_up = true;
		}
	}
	if(pick_up && !drop_off)
	{
		dropoff_dis = sqrt(pow((dropoff_x - robot_pose_x),2) + pow((dropoff_y - robot_pose_y),2));
		ROS_INFO("Distance to dropoff zone = f%",dropoff_dis);

		if(dropoff_dis <= tolerance)
		{
			ROS_INFO("Arrived at the dropoff zone");
			drop_off = true;
		}
	}
}


int main(int argc,char** argv)
{
	ros::init(argc,argv,"add_markers");
	ros::NodeHandle n;
	ros::Rate r(1);
	ros::Publisher marker_pub = n.advertise<visualization_msgs::Marker>("visualization_marker",1);

	ros::Subscriber odometry_sub =n.subscribe("/odom",1000,odometry_cb);

	uint32_t shape = visualization_msgs::Marker::CUBE;


	visualization_msgs::Marker marker;


	marker.header.frame_id = "map";
	marker.header.stamp = ros::Time::now();

	marker.ns = "basic_shapes";
	marker.id = 0;


	marker.type = shape;

	marker.action = visualization_msgs::Marker::ADD;


	marker.scale.x = 1.0;
	marker.scale.y = 1.0;
	marker.scale.z = 1.0;


	marker.color.r = 0.0f;
	marker.color.g = 1.0f;
	marker.color.b = 0.0f;
	marker.color.a = 1.0f;


	marker.pose.position.x = pickup_x;
	marker.pose.position.y = pickup_y;
	marker.pose.position.z = 0;
	marker.pose.orientation.x = 0.0;
	marker.pose.orientation.y = 0.0;
	marker.pose.orientation.z = 0.0;
	marker.pose.orientation.w = 1.0;


	marker.lifetime = ros::Duration();


	while(ros::ok())
	{
		while(marker_pub.getNumSubscribers()<1)
		{
			if(!ros::ok())
			{
				return 0;
			}
			ROS_WARN_ONCE("Please create a subscriber to the marker");
			sleep(1);
		}

		if(pick_up)
		{
			marker.action = visualization_msgs::Marker::DELETE;
			ROS_INFO("Object was picked up");
			ros::Duration(2.0).sleep();
		}

		if(drop_off)
		{
			marker.pose.position.x = dropoff_x;
			marker.pose.position.y = dropoff_y;
			marker.action = visualization_msgs::Marker::ADD;
			ROS_INFO("Object was dropped off");
			ros::Duration(2.0).sleep();
		}

		marker_pub.publish(marker);

		ros::spinOnce();
	}

	return 0;
}
示例:home_service.sh
#!/bin/sh

path_catkin_ws="/home/workspace/catkin_ws"

xterm  -e  " cd ${path_catkin_ws} && source devel/setup.bash && roslaunch my_robotb world.launch" &

sleep 8

xterm  -e  " cd ${path_catkin_ws} && source devel/setup.bash && roslaunch my_robotb amcl.launch" &

sleep 5

xterm  -e  " cd ${path_catkin_ws} && source devel/setup.bash && roslaunch add_markers view_home_service_navigation.launch rviz_path:=${path_catkin_ws}/src/rvizConfig/home_service.rviz"&

sleep 5

xterm  -e  " cd ${path_catkin_ws} && source devel/setup.bash && rosrun add_markers add_markers"&

sleep 5

xterm  -e  " cd ${path_catkin_ws} && source devel/setup.bash && rosrun pick_objects pick_objects"
请注意
有多种方法来实现项目需求。要在机器人和物品之间建立通信,前面提到的一种方法是让add_markers节点订阅机器人里程计并跟踪机器人姿态。
此问题的其他解决方案可能是使用ROS参数,订阅AMCL姿态,甚至发布一个新变量,以表明机器人是否在取货区或落货区。可以随意用任何想要的方式来解决这个问题。
## 运行项目
* 导航到“src”文件夹,克隆必要的存储库
cd /home/workspace/catkin_ws/src
git clone https://github.com/ros-perception/slam_gmapping.git
git clone https://github.com/turtlebot/turtlebot.git
git clone https://github.com/turtlebot/turtlebot_interactions.git
git clone https://github.com/turtlebot/turtlebot_simulator.git
*打开存储库、编译代码
cd /home/workspace/catkin_ws/
catkin_make
source devel/setup.bash
*启动家庭服务机器人
./src/scripts/home_service.sh# #提示
1. 建议在运行代码之前更新和升级环境。
sudo apt-get update && sudo apt-get upgrade -y2. 如何在rviz中可视化虚拟对象
要查看标记(虚拟对象)演示,除了运行' ./add_marker.sh ',还需要在rviz中手动添加一个' marker ',步骤如下:
*找到rviz窗口
*在左下面板,点击“添加”按钮
*在“按显示类型”选项卡中,导航到“rviz”,然后是“Marker”
*点击“确定”按钮
*完成后,应该看到标记(虚拟对象)出现,消失,然后再次出现