文章目录
前言
已经有了U-net了,为什么需要linkNet?
unet见这个文章【语义分割】unet结构和代码实现:https://blog.csdn.net/weixin_40293999/article/details/129648032
它引入了resNet,主打一个RealTime,实时系统,用于自动驾驶等需要快速返回结果的领域。unet适合医疗诊断等不那么实时的地方。它也借鉴了自编码器的结构。
论文:https://arxiv.org/pdf/1707.03718.pdf 是2017年的一篇文章,才5页,值得一读。介绍了一种新的深度神经网络架构,可以高效地进行像素级语义分割,用于视觉场景理解。该网络仅使用了1150万个参数和21.2 GFLOPs,既准确又快速。
1.网络结构
1.1 网络结构示意图
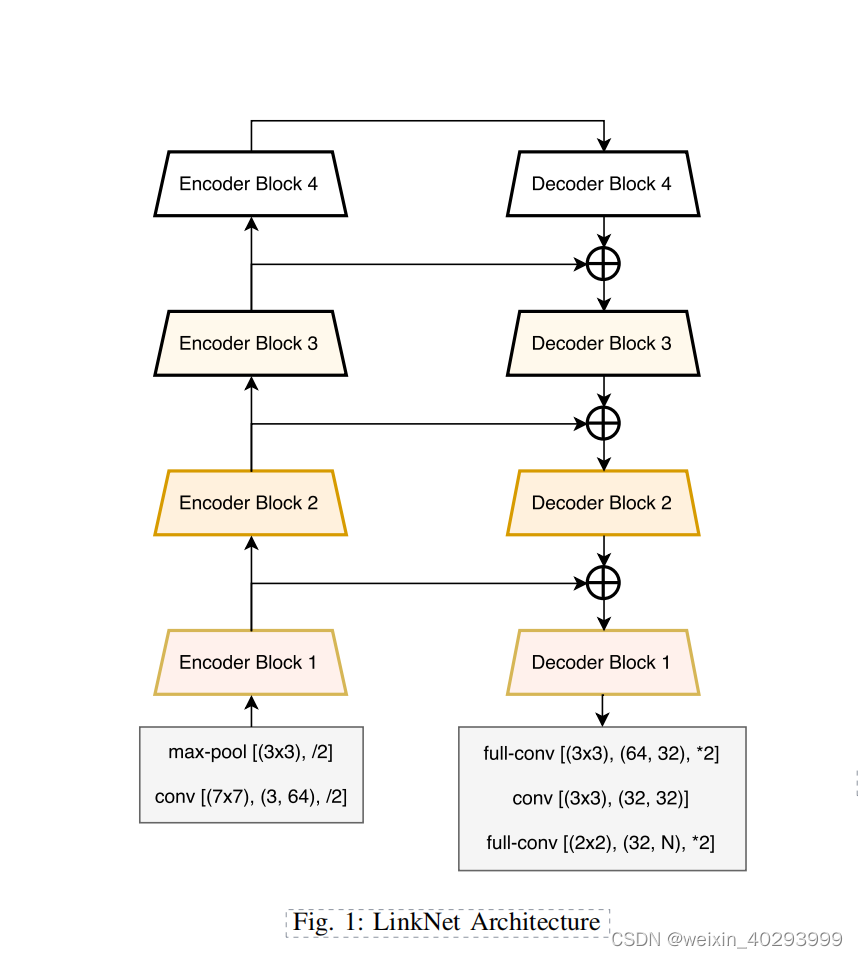
是在论文上copy的,建议直接看论文.
1.2 创建LinkNet模型
LinkNet由4个基础模块就能搭建出整个模型
1.卷积模块(卷积+BN+Activate)
2.反卷积(反卷积+BN+Activate)
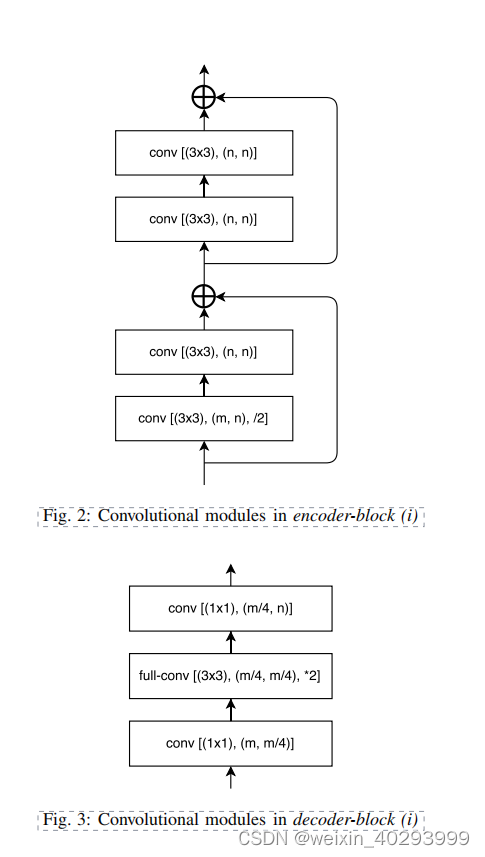
3.编码器(4个卷积模块)
4.解码器(卷积模块+反卷积模块+卷积模块)
5.实现整体网络结构(1,2,3,4搭积木即可):卷积模块+反卷积模块+编码器+解码器
2.代码
2.1 各模块搭建
2.1.1 卷积模块
卷积模块,初始化默认kernel_size=3, stride = 1, padding =1 ,也就是特征图大小原样输出。
然后呢用sequential把它们处理成一个pipline
# 卷积模块
class ConvBlock(nn.Module):
    def __init__(self, in_channels, out_channels,k_size=3,stride=1,pad=1) -> None:
        super().__init__()
        self.conv_bn_relu = nn.Sequential(
            nn.Conv2d(in_channels, out_channels,kernel_size=k_size,stride,padding=pad),
            nn.BatchNorm2d(out_channels),
            nn.ReLU(inplace=True)
            )

    def farward(self,x):
        x = self.conv_bn_relu(x)
        return x
2.1.2 反卷积模块
反卷积需要有两个padding, padding 是反卷积开始的位置, output_padding 将反卷积之后的图像的边缘部分进行填充
class DeconvBlock(nn.Module):
    def __init__(self, in_channels, out_channels,k_size=3,stride=2,padding=1,output_padding = 1) -> None:
        """
        反卷积需要有两个padding
        """
        super().__init__()
        #padding 是反卷积开始的位置, output_padding 将反卷积之后的图像的边缘部分进行填充
        self.deconv = nn.ConvTranspose2d(in_channels,out_channels,kernel_size=k_size,stride=stride,padding=padding,output_padding=output_padding)
        self.bn = nn.BatchNorm2d(out_channels)

    def farward(self,x, is_act=True):
        x = self.deconv(x)
        if is_act:
            x = torch.relu(self.bn(x))
        return x
2.1.3 编码器模块
复用卷积模块卷
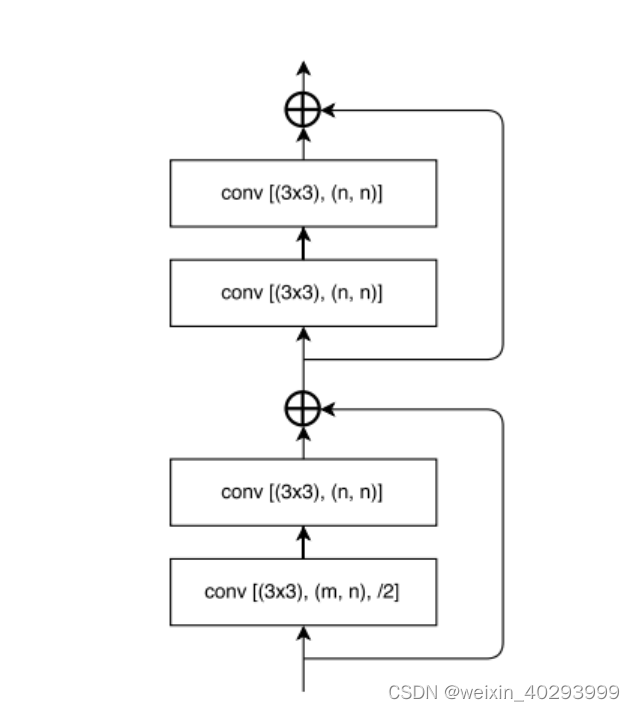
4个基础卷积块+一个shortcut块, 这里需要说明下,因为整个4个卷积中,缩放了1倍,所以shortcut也需要做相应处理,否则加不起来。
class EncodeBlock(nn.Module):
   def __init__(self, in_channels, out_channels) -> None:
       super().__init__()
       # 第一层需要对图像进行缩放
       self.conv1 = ConvBlock(in_channels,out_channels,stride=2)
       # 第2层不需要对图像进行缩放
       self.conv2 = ConvBlock(out_channels,out_channels)
       # 第三层,第四层原样输出
       self.conv3 = ConvBlock(out_channels,out_channels)
       self.conv4 = ConvBlock(out_channels,out_channels)

       self.short_cut =  ConvBlock(in_channels,out_channels,stride=2)
   def farward(self,x):
       out1 = self.conv1(x)
       out1 = self.conv2(out1)
       short_cut = self.short_cut(x)
       # 第一部分的输出和shortcut相加
       out2 = self.conv3(out1+short_cut)
       out2 = self.conv4(out2)
       return out2 + out1
2.2 编码网络结构
还是需要看一下这个网络结构图
开始搭建积木
class Net(nn.Module):
    def __init__(self) -> None:
        super().__init__()
        # 第一层
        self.input_conv = ConvBlock(3,64,stride=2,k_size=7,pad=3)
        # maxpool 原来的图像缩放2倍
        self.input_maxpool = nn.MaxPool2d(kernel_size=2)
        # 四个编码器模块,通道扩大一倍,size减小一倍
        self.encode1 = EncodeBlock(64,64)
        self.encode2 = EncodeBlock(64,128)
        self.encode3 = EncodeBlock(128,256)
        self.encode4 = EncodeBlock(256,512)
        # 四个解码模块,和encode是对应的,通道数减小,size扩大为原来的一倍
        self.decode4 = DeconvBlock(512,256)
        self.decode3 = DeconvBlock(256,128)
        self.decode2 = DeconvBlock(128,64)
        self.decode1 = DeconvBlock(64,64)
        # 输出部分,第一层走默认即可
        self.deconv_out1 = DeconvBlock(64,32)
        self.conv_out = ConvBlock(32,32)
        # stride 为2 可以不写, 一共就是2分类。kesize=2,因为论文给的是2x2的,2x2的适合 padding是不需要变化的,都是0 保证正好变为原来的2倍,因为stride正好是2
        self.deconv_out2 = DeconvBlock(32,2,k_size=2,padding=0,output_padding=0)

    def farward(self,x):
        # input 的两层
        x = self.input_conv(x)
        x = self.input_maxpool(x)
        # 后面的中间值要保留
        e1 = self.encode1(x)
        e2 = self.encode2(e1)
        e3 = self.encode3(e2)
        e4 = self.encode3(e3)
        # 到此为止,左边半拉,完成

        d4 = self.decode4(e4)
        d3 = self.decode3(d4+e3)
        d2 = self.decode2(d3+e2)
        d1 = self.decode2(d2+e1)
        f1 = self.deconv_out1(d1)
        f2 = self.conv_out(f1)
        f3 = self.deconv_out2(f2)
        return f3
初始化一下看看结构
 Output exceeds the size limit. Open the full output data in a text editor
Net(
(input_conv): ConvBlock(
  (conv_bn_relu): Sequential(
    (0): Conv2d(3, 64, kernel_size=(7, 7), stride=(1, 1), padding=(3, 3))
    (1): BatchNorm2d(64, eps=1e-05, momentum=0.1, affine=True, track_running_stats=True)
    (2): ReLU(inplace=True)
  )
)
(input_maxpool): MaxPool2d(kernel_size=2, stride=2, padding=0, dilation=1, ceil_mode=False)
(encode1): EncodeBlock(
  (conv1): ConvBlock(
    (conv_bn_relu): Sequential(
      (0): Conv2d(64, 64, kernel_size=(3, 3), stride=(1, 1), padding=(1, 1))
      (1): BatchNorm2d(64, eps=1e-05, momentum=0.1, affine=True, track_running_stats=True)
      (2): ReLU(inplace=True)
    )
  )
  (conv2): ConvBlock(
    (conv_bn_relu): Sequential(
      (0): Conv2d(64, 64, kernel_size=(3, 3), stride=(1, 1), padding=(1, 1))
      (1): BatchNorm2d(64, eps=1e-05, momentum=0.1, affine=True, track_running_stats=True)
      (2): ReLU(inplace=True)
    )
  )
  (conv3): ConvBlock(
...
(deconv_out2): DeconvBlock(
  (deconv): ConvTranspose2d(32, 2, kernel_size=(2, 2), stride=(2, 2))
  (bn): BatchNorm2d(2, eps=1e-05, momentum=0.1, affine=True, track_running_stats=True)
)
)
2.3 损失函数&训练
model = Net()
loss_fn = nn.CrossEntropyLoss()
它的训练和unet训练几乎是一模一样的,添加了IOU指标。
IOU 指标
张量与张量的除法用 torch.true_divide(tensor1,tesor2)
2.4 训练
训练起来了
Output exceeds the size limit. Open the full output data in a text editor
epoch:  0 loss:  0.072 accuracy: 0.806 IOU: 0

      test_loss:  0.071 test_accuracy: 0.81 test_iou: 0
epoch:  1 loss:  0.072 accuracy: 0.806 IOU: 0

      test_loss:  0.07 test_accuracy: 0.81 test_iou: 0
epoch:  2 loss:  0.071 accuracy: 0.807 IOU: 0

      test_loss:  0.07 test_accuracy: 0.809 test_iou: 0
epoch:  3 loss:  0.071 accuracy: 0.807 IOU: 0

      test_loss:  0.07 test_accuracy: 0.811 test_iou: 0
epoch:  4 loss:  0.071 accuracy: 0.807 IOU: 0

      test_loss:  0.071 test_accuracy: 0.81 test_iou: 0
epoch:  5 loss:  0.071 accuracy: 0.807 IOU: 0

      test_loss:  0.07 test_accuracy: 0.81 test_iou: 0
epoch:  6 loss:  0.071 accuracy: 0.808 IOU: 0

      test_loss:  0.07 test_accuracy: 0.81 test_iou: 0
epoch:  7 loss:  0.071 accuracy: 0.808 IOU: 0

      test_loss:  0.071 test_accuracy: 0.81 test_iou: 0
epoch:  8 loss:  0.071 accuracy: 0.809 IOU: 0
...
      test_loss:  0.07 test_accuracy: 0.81 test_iou: 0
epoch:  9 loss:  0.071 accuracy: 0.809 IOU: 0

      test_loss:  0.071 test_accuracy: 0.809 test_iou: 0
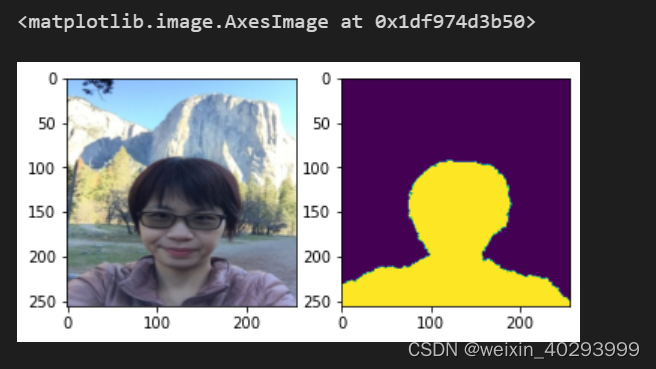
数据集一览