本文的测试环境为 Ubuntu 14.0 TP-LINK WDR4320 OpenWrt Attitude Adjustment 12.09
首先在ubuntu上安装一些东西
sudo apt-get install libncurses5-dev gawk flex build-essential qemu-user
获取Openwrt的源代码
git clone git://git.openwrt.org/openwrt.git
编译源代码,默认配置即可,不需要勾选什么
    cd openwrt
    make menuconfig
编译,耗时较长,可以忙些别的事情
nice make -j16
一切无错的情况下,会在staging_dir目录下列出三个目录
hosttarget-mips_34kc_uClibc-0.9.33.2toolchain-mips_34kc_gcc-4.8-linaro_uClibc-0.9.33.2
将toolchain加到PATH里面
    export STAGING_DIR=/path/to/openwrt/staging_dir/toolchain-mips_34kc_gcc-4.8-linaro_uClibc-0.9.33.2
    export PATH=$PATH:$STAGING_DIR/bin
编译hello.c
mips-openwrt-linux-gcc hello.c -o hello -static
直接在本机运行的话会报如下错误
    shmiluyu@:~/openwrt/src$ ./hello
    bash: ./hello: cannot execute binary file: 可执行文件格式错误
因为是为MIPS指令架构编译的,所以如果想在本机上运行,可以使用之前安装的QEMU
    shmiluyu@:~/openwrt/src$ qemu-mips hello
    hello openwrt
如果要编译MIPS64架构,只需要编译的时候加个参数
mips-openwrt-linux-gcc hello.c -o hello-mips64 -static -mips64r2
使用file命令可以看下可执行文件的信息
    shmiluyu@:~/openwrt/src$ file hello
    hello: ELF 32-bit MSB  executable, MIPS, MIPS32 rel2 version 1, statically linked, not stripped
使用SCP上传到路由器,运行即可.
http://aboutchen.org/blog/compile-c-code-for-openwrt/
=========================
1. 开放端口
$ vi /etc/config/firewall
在里面添加一段
    config rule
            option target 'ACCEPT'
            option name '9000'
            option src 'wan'
            option proto 'tcpudp'
            option dest_port '9000'
2. Aria2导致硬盘无法休眠
$ vi /etc/init.d/aria2
修改aria2_conf_path到flash本身或者其他的u盘,总之不要在休眠的硬盘上
aria2_conf_path="/www/.aria2"
3. 安装软件到U盘
    $ mkdir /mnt/sda1/packages/
    $ echo dest usb /mnt/sda1/packages/ >> /etc/opkg.conf
安装的时候需要加上--dest usb
eg:
$ opkg install xxx --dest usb
最好软链接到/user/bin
$ ln -s /mnt/sda/packages/usr/bin/python
===================
1.OpenWRT项目简介
OpenWRT是一个专用于无线路由器设备的Linux发行版。支持众多的芯片方案的路由器设备,由x86到ARM,MIPS等等。
目前稳定版本是: BARRIER BREAKER (14.07)
目前开发版本是: Chaos Calmer (trunk)
详细信息参看官方网址: https://openwrt.org
2.采用OpenWRT的智能路由器
- 极路由
- 小米路由
- 优酷路由
- 迅雷路由
- 360安全路由
- 华为荣耀立方
- 联想NewWiFi
- 其他商业WiFi广告定制路由
- …… ……
3. 采用OpenWRT的开发板
- WRTNode
- VoCore
4. 获取OpenWRT的源代码
我们可以去项目的官方网站获取其源代码,通过SVN或者Git的方式,官方开发者网站:https://dev.openwrt.org/wiki/GetSource
trunk (main development tree)
- Main repository
git clone git://git.openwrt.org/openwrt.git
14.07 branch (Barrier Breaker) - Main repository
git clone git://git.openwrt.org/14.07/openwrt.git
当然,在我们正式开始编译前我们需要把前提依赖环境和源码准备好,
打开虚拟终端,执行如下命令:
openwrt@cheetah-desktop:~$ sudo apt-get install git build-essential libncurses5-dev gawk libssl-dev subversion;
openwrt@cheetah-desktop:~$ mkdir -p $HOME/opensource;
openwrt@cheetah-desktop:~$ cd  $HOME/opensource;
openwrt@cheetah-desktop:~/opensource$ git clone git://git.openwrt.org/openwrt.git
##上面命令会克隆远程仓库到本地,根据网络环境情况需要较长时间。
待源代码克隆下来之后,我们的源码和编译环境基本就OK了。
5. OpenWRT官方固件编译
进入源码目录下面进行软件包的更新与“安装”。
openwrt@cheetah-desktop:~/opensource$ cd openwrt;
openwrt@cheetah-desktop:~/opensource/openwrt$ ./scripts/feeds update -a;
openwrt@cheetah-desktop:~/opensource/openwrt$ ./scripts/feeds install -a;
执行上面的脚本之后就可以对我们中意的设备类型进行编译设置。如下命令进入终端下面的buildroot编译配置界面:
make menuconfig;

我们教程所采用的设备的CPU芯片是MT7620系列(MT7620A/N),下面就开始为MT7620系列的设备进行最基本的配置,步骤如下: 1. Target System (Atheros AR7xxx/AR9xxx) --->回车进入下翻后空格选择Ralink RT288x/RT3xxx然后再回车后退,这时编译目标就是: Target System (Ralink RT288x/RT3xxx) --->了。 2. Subtarget (RT3x5x/RT5350 based boards) --->回车进入下翻按空格选择(X) MT7620 based boards 然后回车后退,这时编译的子目标就是:Subtarget (MT7620 based boards) ---> 了。 3. LuCI ---> 回车进去 1. Collections ---> 再回车进去再空格选择第一个<*> luci(new),然后在Exit一路后退到主菜单。 4. 在主菜单Exit退出配置并保存。
That‘s All. 基本配置就是这么简单。下面开始我们人生的“第一次”路由器固件编译了,是不是很紧张阿? What Ever. 第一次总是要经历的,那就积极面对吧。
我们用下面这个命令来进行编译固件:
make V=s
就这么一个命令就会开启整个编译构建系统,全自动的去为我们编译我们需要的固件。所以的所以,这个过程将会是一个漫长的等待。如果互联网网络比较通畅,那么咱们这第一次编译的时间大约要花2~3小时。因为构建系统需要去互联网上下载各种程序库源代码,然后再逐个编译,最后集成并组建出我们需要的固件。
这段时间里,我们大可以出去湘江边溜达一圈,隔江望望毛主席,再回来咱们戴维营里看结果。
溜达回来后,编译也许结束,等结束的这个时候,我们的固件会乖乖的躺在当前目录下的bin/ramips/这个路径下.
openwrt@cheetah-desktop:~/opensource/openwrt$ ls bin/ramips/
md5sums                                                        openwrt-ramips-mt7620-rp_n53-squashfs-sysupgrade.bin
openwrt-ramips-mt7620-ai-br100-squashfs-sysupgrade.bin         openwrt-ramips-mt7620-rt-n14u-squashfs-sysupgrade.bin
openwrt-ramips-mt7620-ArcherC20i-squashfs-sysupgrade.bin       openwrt-ramips-mt7620-uImage.bin
openwrt-ramips-mt7620-dir-810l-squashfs-sysupgrade.bin         openwrt-ramips-mt7620-vmlinux.bin
openwrt-ramips-mt7620-e1700-squashfs-factory.bin               openwrt-ramips-mt7620-vmlinux.elf
openwrt-ramips-mt7620-e1700-squashfs-sysupgrade.bin            openwrt-ramips-mt7620-whr-1166d-squashfs-sysupgrade.bin
openwrt-ramips-mt7620-Lenovo-y1-squashfs-sysupgrade.bin        openwrt-ramips-mt7620-whr-300hp2-squashfs-sysupgrade.bin
openwrt-ramips-mt7620-Lenovo-y1s-squashfs-sysupgrade.bin       openwrt-ramips-mt7620-whr-600d-squashfs-sysupgrade.bin
openwrt-ramips-mt7620-mlw221-squashfs-sysupgrade.bin           openwrt-ramips-mt7620-wmr-300-squashfs-sysupgrade.bin
openwrt-ramips-mt7620-mlwg2-squashfs-sysupgrade.bin            openwrt-ramips-mt7620-wr8305rt-squashfs-sysupgrade.bin
openwrt-ramips-mt7620-mt7620a_mt7530-squashfs-sysupgrade.bin   openwrt-ramips-mt7620-wrtnode-squashfs-sysupgrade.bin
openwrt-ramips-mt7620-mt7620a_mt7610e-squashfs-sysupgrade.bin  openwrt-ramips-mt7620-wt3020-8M-squashfs-factory.bin
openwrt-ramips-mt7620-mt7620a-squashfs-sysupgrade.bin          openwrt-ramips-mt7620-wt3020-8M-squashfs-sysupgrade.bin
openwrt-ramips-mt7620-mt7620a_v22sg-squashfs-sysupgrade.bin    openwrt-ramips-mt7620-xiaomi-miwifi-mini-squashfs-sysupgrade.bin
openwrt-ramips-mt7620-mzk-750dhp-squashfs-sysupgrade.bin       openwrt-ramips-mt7620-zbt-wa05-squashfs-sysupgrade.bin
openwrt-ramips-mt7620-na930-squashfs-sysupgrade.bin            packages
openwrt-ramips-mt7620-root.squashfs
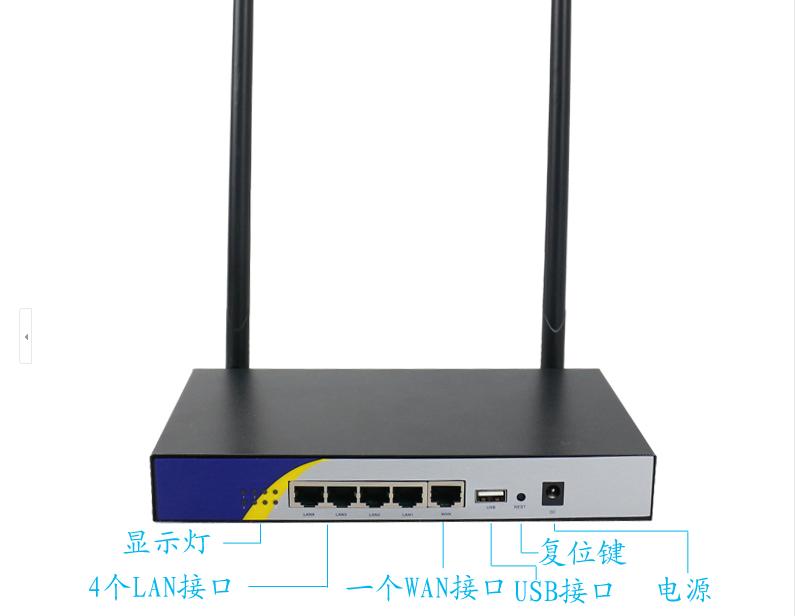
到了这一步,我们的MT7620系列芯片的路由器固件就都已经编译好了。我们可以选择我们合适型号的固件进行刷机了。 部分营员拿到的北京豌豆机器人小组的开发板WRTNode对应的固件文件是:openwrt-ramips-mt7620-wrtnode-squashfs-sysupgrade.bin 部分营员们拿到的铁盒子路由器是中性包装的工程产品,虽然和其他知名品牌的在外观上有差异,但是大可以不要在意这些区别。他们的配置都是差不多的。铁盒子型号WR8305RT对应的固件文件就是: openwrt-ramips-mt7620-wr8305rt-squashfs-sysupgrade.bin
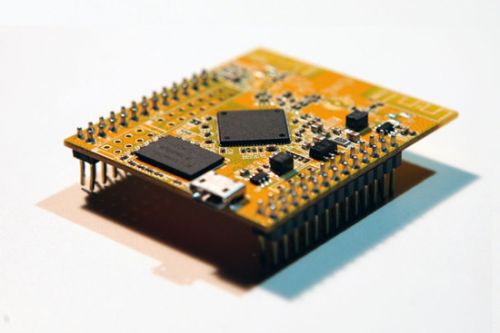
设备图片如下:
WRTNode
WR8305RT
谢谢各位,欢迎交流并指正。
---- 大茶园丁@戴维营教育
https://github.com/DiveinEdu-CN
http://www.bubuko.com/infodetail-667283.html
http://www.bubuko.com/infodetail-441039.html
http://www.bubuko.com/infodetail-504873.html
http://www.bubuko.com/infodetail-465364.html
本文的测试环境为 Ubuntu 14.0 TP-LINK WDR4320 OpenWrt Attitude Adjustment 12.09
首先在ubuntu上安装一些东西
sudo apt-get install libncurses5-dev gawk flex build-essential qemu-user
获取Openwrt的源代码
git clone git://git.openwrt.org/openwrt.git
编译源代码,默认配置即可,不需要勾选什么
    cd openwrt
    make menuconfig
编译,耗时较长,可以忙些别的事情
nice make -j16
一切无错的情况下,会在staging_dir目录下列出三个目录
hosttarget-mips_34kc_uClibc-0.9.33.2toolchain-mips_34kc_gcc-4.8-linaro_uClibc-0.9.33.2
将toolchain加到PATH里面
    export STAGING_DIR=/path/to/openwrt/staging_dir/toolchain-mips_34kc_gcc-4.8-linaro_uClibc-0.9.33.2
    export PATH=$PATH:$STAGING_DIR/bin
编译hello.c
mips-openwrt-linux-gcc hello.c -o hello -static
直接在本机运行的话会报如下错误
    shmiluyu@:~/openwrt/src$ ./hello
    bash: ./hello: cannot execute binary file: 可执行文件格式错误
因为是为MIPS指令架构编译的,所以如果想在本机上运行,可以使用之前安装的QEMU
    shmiluyu@:~/openwrt/src$ qemu-mips hello
    hello openwrt
如果要编译MIPS64架构,只需要编译的时候加个参数
mips-openwrt-linux-gcc hello.c -o hello-mips64 -static -mips64r2
使用file命令可以看下可执行文件的信息
    shmiluyu@:~/openwrt/src$ file hello
    hello: ELF 32-bit MSB  executable, MIPS, MIPS32 rel2 version 1, statically linked, not stripped
使用SCP上传到路由器,运行即可.
http://aboutchen.org/blog/compile-c-code-for-openwrt/
=========================
1. 开放端口
$ vi /etc/config/firewall
在里面添加一段
    config rule
            option target 'ACCEPT'
            option name '9000'
            option src 'wan'
            option proto 'tcpudp'
            option dest_port '9000'
2. Aria2导致硬盘无法休眠
$ vi /etc/init.d/aria2
修改aria2_conf_path到flash本身或者其他的u盘,总之不要在休眠的硬盘上
aria2_conf_path="/www/.aria2"
3. 安装软件到U盘
    $ mkdir /mnt/sda1/packages/
    $ echo dest usb /mnt/sda1/packages/ >> /etc/opkg.conf
安装的时候需要加上--dest usb
eg:
$ opkg install xxx --dest usb
最好软链接到/user/bin
$ ln -s /mnt/sda/packages/usr/bin/python
===================
1.OpenWRT项目简介
OpenWRT是一个专用于无线路由器设备的Linux发行版。支持众多的芯片方案的路由器设备,由x86到ARM,MIPS等等。
目前稳定版本是: BARRIER BREAKER (14.07)
目前开发版本是: Chaos Calmer (trunk)
详细信息参看官方网址: https://openwrt.org
2.采用OpenWRT的智能路由器
- 极路由
- 小米路由
- 优酷路由
- 迅雷路由
- 360安全路由
- 华为荣耀立方
- 联想NewWiFi
- 其他商业WiFi广告定制路由
- …… ……
3. 采用OpenWRT的开发板
- WRTNode
- VoCore
4. 获取OpenWRT的源代码
我们可以去项目的官方网站获取其源代码,通过SVN或者Git的方式,官方开发者网站:https://dev.openwrt.org/wiki/GetSource
trunk (main development tree)
- Main repository
git clone git://git.openwrt.org/openwrt.git
14.07 branch (Barrier Breaker) - Main repository
git clone git://git.openwrt.org/14.07/openwrt.git
当然,在我们正式开始编译前我们需要把前提依赖环境和源码准备好,
打开虚拟终端,执行如下命令:
openwrt@cheetah-desktop:~$ sudo apt-get install git build-essential libncurses5-dev gawk libssl-dev subversion;
openwrt@cheetah-desktop:~$ mkdir -p $HOME/opensource;
openwrt@cheetah-desktop:~$ cd  $HOME/opensource;
openwrt@cheetah-desktop:~/opensource$ git clone git://git.openwrt.org/openwrt.git
##上面命令会克隆远程仓库到本地,根据网络环境情况需要较长时间。
待源代码克隆下来之后,我们的源码和编译环境基本就OK了。
5. OpenWRT官方固件编译
进入源码目录下面进行软件包的更新与“安装”。
openwrt@cheetah-desktop:~/opensource$ cd openwrt;
openwrt@cheetah-desktop:~/opensource/openwrt$ ./scripts/feeds update -a;
openwrt@cheetah-desktop:~/opensource/openwrt$ ./scripts/feeds install -a;
执行上面的脚本之后就可以对我们中意的设备类型进行编译设置。如下命令进入终端下面的buildroot编译配置界面:
make menuconfig;
我们教程所采用的设备的CPU芯片是MT7620系列(MT7620A/N),下面就开始为MT7620系列的设备进行最基本的配置,步骤如下: 1. Target System (Atheros AR7xxx/AR9xxx) --->回车进入下翻后空格选择Ralink RT288x/RT3xxx然后再回车后退,这时编译目标就是: Target System (Ralink RT288x/RT3xxx) --->了。 2. Subtarget (RT3x5x/RT5350 based boards) --->回车进入下翻按空格选择(X) MT7620 based boards 然后回车后退,这时编译的子目标就是:Subtarget (MT7620 based boards) ---> 了。 3. LuCI ---> 回车进去 1. Collections ---> 再回车进去再空格选择第一个<*> luci(new),然后在Exit一路后退到主菜单。 4. 在主菜单Exit退出配置并保存。
That‘s All. 基本配置就是这么简单。下面开始我们人生的“第一次”路由器固件编译了,是不是很紧张阿? What Ever. 第一次总是要经历的,那就积极面对吧。
我们用下面这个命令来进行编译固件:
make V=s
就这么一个命令就会开启整个编译构建系统,全自动的去为我们编译我们需要的固件。所以的所以,这个过程将会是一个漫长的等待。如果互联网网络比较通畅,那么咱们这第一次编译的时间大约要花2~3小时。因为构建系统需要去互联网上下载各种程序库源代码,然后再逐个编译,最后集成并组建出我们需要的固件。
这段时间里,我们大可以出去湘江边溜达一圈,隔江望望毛主席,再回来咱们戴维营里看结果。
溜达回来后,编译也许结束,等结束的这个时候,我们的固件会乖乖的躺在当前目录下的bin/ramips/这个路径下.
openwrt@cheetah-desktop:~/opensource/openwrt$ ls bin/ramips/
md5sums                                                        openwrt-ramips-mt7620-rp_n53-squashfs-sysupgrade.bin
openwrt-ramips-mt7620-ai-br100-squashfs-sysupgrade.bin         openwrt-ramips-mt7620-rt-n14u-squashfs-sysupgrade.bin
openwrt-ramips-mt7620-ArcherC20i-squashfs-sysupgrade.bin       openwrt-ramips-mt7620-uImage.bin
openwrt-ramips-mt7620-dir-810l-squashfs-sysupgrade.bin         openwrt-ramips-mt7620-vmlinux.bin
openwrt-ramips-mt7620-e1700-squashfs-factory.bin               openwrt-ramips-mt7620-vmlinux.elf
openwrt-ramips-mt7620-e1700-squashfs-sysupgrade.bin            openwrt-ramips-mt7620-whr-1166d-squashfs-sysupgrade.bin
openwrt-ramips-mt7620-Lenovo-y1-squashfs-sysupgrade.bin        openwrt-ramips-mt7620-whr-300hp2-squashfs-sysupgrade.bin
openwrt-ramips-mt7620-Lenovo-y1s-squashfs-sysupgrade.bin       openwrt-ramips-mt7620-whr-600d-squashfs-sysupgrade.bin
openwrt-ramips-mt7620-mlw221-squashfs-sysupgrade.bin           openwrt-ramips-mt7620-wmr-300-squashfs-sysupgrade.bin
openwrt-ramips-mt7620-mlwg2-squashfs-sysupgrade.bin            openwrt-ramips-mt7620-wr8305rt-squashfs-sysupgrade.bin
openwrt-ramips-mt7620-mt7620a_mt7530-squashfs-sysupgrade.bin   openwrt-ramips-mt7620-wrtnode-squashfs-sysupgrade.bin
openwrt-ramips-mt7620-mt7620a_mt7610e-squashfs-sysupgrade.bin  openwrt-ramips-mt7620-wt3020-8M-squashfs-factory.bin
openwrt-ramips-mt7620-mt7620a-squashfs-sysupgrade.bin          openwrt-ramips-mt7620-wt3020-8M-squashfs-sysupgrade.bin
openwrt-ramips-mt7620-mt7620a_v22sg-squashfs-sysupgrade.bin    openwrt-ramips-mt7620-xiaomi-miwifi-mini-squashfs-sysupgrade.bin
openwrt-ramips-mt7620-mzk-750dhp-squashfs-sysupgrade.bin       openwrt-ramips-mt7620-zbt-wa05-squashfs-sysupgrade.bin
openwrt-ramips-mt7620-na930-squashfs-sysupgrade.bin            packages
openwrt-ramips-mt7620-root.squashfs
到了这一步,我们的MT7620系列芯片的路由器固件就都已经编译好了。我们可以选择我们合适型号的固件进行刷机了。 部分营员拿到的北京豌豆机器人小组的开发板WRTNode对应的固件文件是:openwrt-ramips-mt7620-wrtnode-squashfs-sysupgrade.bin 部分营员们拿到的铁盒子路由器是中性包装的工程产品,虽然和其他知名品牌的在外观上有差异,但是大可以不要在意这些区别。他们的配置都是差不多的。铁盒子型号WR8305RT对应的固件文件就是: openwrt-ramips-mt7620-wr8305rt-squashfs-sysupgrade.bin
设备图片如下:
WRTNode
WR8305RT
谢谢各位,欢迎交流并指正。
---- 大茶园丁@戴维营教育
https://github.com/DiveinEdu-CN
http://www.bubuko.com/infodetail-667283.html
http://www.bubuko.com/infodetail-441039.html
http://www.bubuko.com/infodetail-504873.html
http://www.bubuko.com/infodetail-465364.html