前言
目录
一、顶部导航
1.1 顶部导航效果图
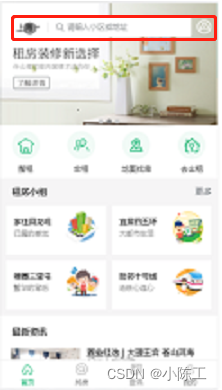
1.2 顶部导航布局和样式
在src/pages/index/index.js中添加如下代码:
<Flex className='search-box'>
    {/* 左侧白色区域 */}
    <Flex className="search">
        {/* 位置 */}
        <div className="location" >
            <span className="name">长沙</span>
            <i className="iconfont icon-arrow" />
        </div>

        {/* 搜索表单 */}
        <div className="form">
            <i className="iconfont icon-seach" />
            <span className="text">请输入小区或地址</span>
        </div>
    </Flex>
    {/* 右侧地图图标 */}
    <i className="iconfont icon-map" />
</Flex>
相关样式(index.scss):
// 顶部导航
.search-box {
    position: absolute;
    top: 25px;
    width: 100%;
    padding: 0 10px;
    // 左侧白色区域
    .search {
        flex: 1;
        height: 34px;
        margin: 0 10px;
        padding: 5px 5px 5px 8px;
        border-radius: 3px;
        background-color: #fff;
        // 位置
        .location {
            .icon-arrow {
                margin-left: 2px;
                font-size: 12px;
                color: #7f7f80;
            }
        }
        // 搜索表单
        .form {
            border-left: solid 1px #e5e5e5;
            margin-left: 12px;
            line-height: 16px;
            .icon-seach {
                vertical-align: middle;
                padding: 0 2px 0 12px;
                color: #9c9fa1;
                font-size: 15px;
            }
            .text {
                padding-left: 4px;
                font-size: 13px;
                color: #9c9fa1;
            }
        }
    }
    // 右侧地图图标
    .icon-map {
        font-size: 25px;
        color: #fff;
    }
}
1.3 百度地图API
1.3.1 申请百度账号和秘钥
1、注册百度账号,登录百度地图开放平台。
2、点击创建应用。
3、获取到密钥(ak)
1.3.2 使用步骤
1、在项目入口文件index.js中引入百度地图 API 的JS文件,替换自己申请好的密钥
2、在index.css 中设置全局样式:
html, body, #root, .App {
    height:100%
}
body{
    margin:0px;
    padding:0px
}
3、在src/pages目录下创建Map组件,配置路由,在Map组件中添加如下代码:
export default class Map extends React.Component {
  componentDidMount() {
    // 初始化地图实例
    // 注意:在 react 脚手架中全局对象需要使用 window 来访问,否则,会造成 ESLint 校验错误
    const map = new window.BMap.Map('container')
    // 设置中心点坐标
    const point = new window.BMap.Point(116.404, 39.915)
    // 初始化地图
    map.centerAndZoom(point, 15)
  }
  render() {
    return (
      <div className="map">
        {/* 地图容器元素 */}
        <div id="container" />
      </div>
    )
  }
}
1.4 获取顶部导航城市信息
1、通过 IP 定位获取到当前城市名称。
2、调用我们服务器的接口,换取项目中的城市信息(有房源的城市的名称和id)
3、将接口返回的城市信息展示在顶部导航栏中。
在src/pages/index/index.js中添加如下代码:
   componentDidMount() {


    //通过 IP 定位获取到当前城市名称。
    const curCity = new window.BMap.LocalCity()
    curCity.get(async res => {


      // console.log('当前城市信息:', res)
      const result = await axios.get(
        `http://localhost:8080/area/info?name=${

      res.name}`
      )
      // console.log(result)
      this.setState({


        curCityName: result.data.body.label
      })
    })
  }
1.5 配置顶部导航路由跳转
点击左侧城市信息时跳转到城市选择页面,点击右侧地图图标时跳转到地图页面
二、城市选择模块-处理城市列表数据
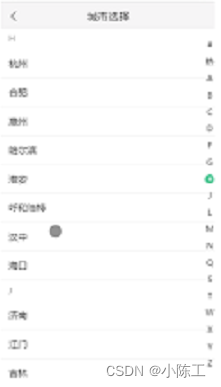
2.1 城市选择页面效果图
2.2 顶部导航栏
在src/pages/Citylist/index.js中添加如下代码:
import {

    NavBar, Icon} from 'antd-mobile'

<div>
    <NavBar
        // 模式 默认值是 dark
        mode="light"
        // 左侧小图片
        icon={

    <i className='iconfont icon-back' />}
        // 左侧按钮的点击事件
        onLeftClick={

    () => this.props.history.go(-1)}
    >城市列表</NavBar>
</div>
设置相应的样式(index.scss):
.citylist {


    .navbar {


        color: #333;
        background-color: #f6f5f6;
    }
    // navbar 标题颜色
    .am-navbar-title {


        color: #333;
    }
}
2.3 获取城市列表数据并处理
2.3.1 获取城市列表数据
在src/pages/Citylist/index.js中添加如下代码:
// 当组件被挂载的时候调用
componentDidMount() {


   this.getCityList()
}
async getCityList() {


    let {

    data:res} = await axios.get('http://localhost:8080/area/city?level=1')
}
2.3.2 处理城市列表数据格式
接口返回的数据格式:[{ “label”: “北京”, “value”: “”, “pinyin”: “beijing”, “short”: “bj” }]
渲染城市列表的数据格式为:{ a: [{}, {}], b: [{}, …] }
渲染右侧索引的数据格式:[‘a’, ‘b’]
封装一个方法来处理数据:
// 数据格式化的方法
const formatCityData = list => {


  const cityList = {

    }

  // 1 遍历list数组
  list.forEach(item => {


    // 2 获取每一个城市的首字母
    const first = item.short.substr(0, 1)
    // 3 判断 cityList 中是否有该分类
    if (cityList[first]) {


      // 4 如果有,直接往该分类中push数据
      cityList[first].push(item)
    } else {


      // 5 如果没有,就先创建一个数组,然后,把当前城市信息添加到数组中
      cityList[first] = [item]
    }
  })

  // 获取索引数据
  const cityIndex = Object.keys(cityList).sort()

  return {


    cityList,
    cityIndex
  }
}
在getCityList()方法中调用这个函数,来格式化数据:
async getCityList() {


    let {

     data: res } = await axios.get('http://localhost:8080/area/city?level=1')
    // 格式化返回的数据
    let {

     cityList, cityIndex } = formatCityData(res.body)
}
获取热门数据,并且添加到cityList和cityListIndex中,注意,对象里面的属性是无序的,可以直接插入,但是数组是有序的,我们需要添加到前面:
  // 获取城市列表数据的方法
  async getCityList() {


    const res = await axios.get('http://localhost:8080/area/city?level=1')
    // console.log('城市列表数据:', res)
    const {

     cityList, cityIndex } = formatCityData(res.data.body)

    /*
      1 获取热门城市数据
      2 将数据添加到 cityList 中
      3 将索引添加到 cityIndex 中
    */
    const hotRes = await axios.get('http://localhost:8080/area/hot')
    cityList['hot'] = hotRes.data.body
    // 将索引添加到 cityIndex 中
    cityIndex.unshift('hot')
  }
2.3.3 获取当前城市信息
我们将获取定位城市的代码封装到一个函数中,哪个页面需要获取定位城市,直接调用该方法即可
在src/utils/index.js中添加如下代码:
// 导入axios
import axios from 'axios'

// 1 在 utils 目录中,新建 index.js,在该文件中封装
// 2 创建并导出获取定位城市的函数 getCurrentCity
export const getCurrentCity = () => {


  // 3 判断 localStorage 中是否有定位城市
  const localCity = JSON.parse(localStorage.getItem('hkzf_city'))
  if (!localCity) {


    // 4 如果没有,就使用首页中获取定位城市的代码来获取,并且存储到本地存储中,然后返回该城市数据
    return new Promise((resolve, reject) => {


      const curCity = new window.BMap.LocalCity()
      curCity.get(async res => {


        try {


          const result = await axios.get(
            `http://localhost:8080/area/info?name=${

      res.name}`
          )
          // result.data.body => { label: '上海', value: '' }
          // 存储到本地存储中
          localStorage.setItem('hkzf_city', JSON.stringify(result.data.body))
          // 返回该城市数据
          resolve(result.data.body)
        } catch (e) {


          // 获取定位城市失败
          reject(e)
        }
      })
    })
  }
  // 5 如果有,直接返回本地存储中的城市数据
  // 注意:因为上面为了处理异步操作,使用了Promise,因此,为了该函数返回值的统一,此处,也应该使用Promise
  // 因为此处的 Promise 不会失败,所以,此处,只要返回一个成功的Promise即可
  return Promise.resolve(localCity)
}
在src/pages/Citylist/index.js中将定位的城市信息添加到cityList和cityIndex:
  // 获取城市列表数据的方法
  async getCityList() {


    // 获取当前定位城市
    const curCity = await getCurrentCity()
    /*
      1 将当前定位城市数据添加到 cityList 中
      2 将当前定位城市的索引添加到 cityIndex 中
    */
    cityList['#'] = [curCity]
    cityIndex.unshift('#')
  }
最后,别忘了在src/pages/index/index.js中修改获取当前城市信息的代码:
  async componentDidMount() {


    const curCity = await getCurrentCity()
    this.setState({


      curCityName: curCity.label
    })
  }