首页:
表示最外层的盒子 ,在盒子里面使用不同的组件,要在最外层调用获取数据的方法,然后再传给子组件,子组件用 props 进行接收并使用,获取数据的方法必须在 onLoad() {} 中调用
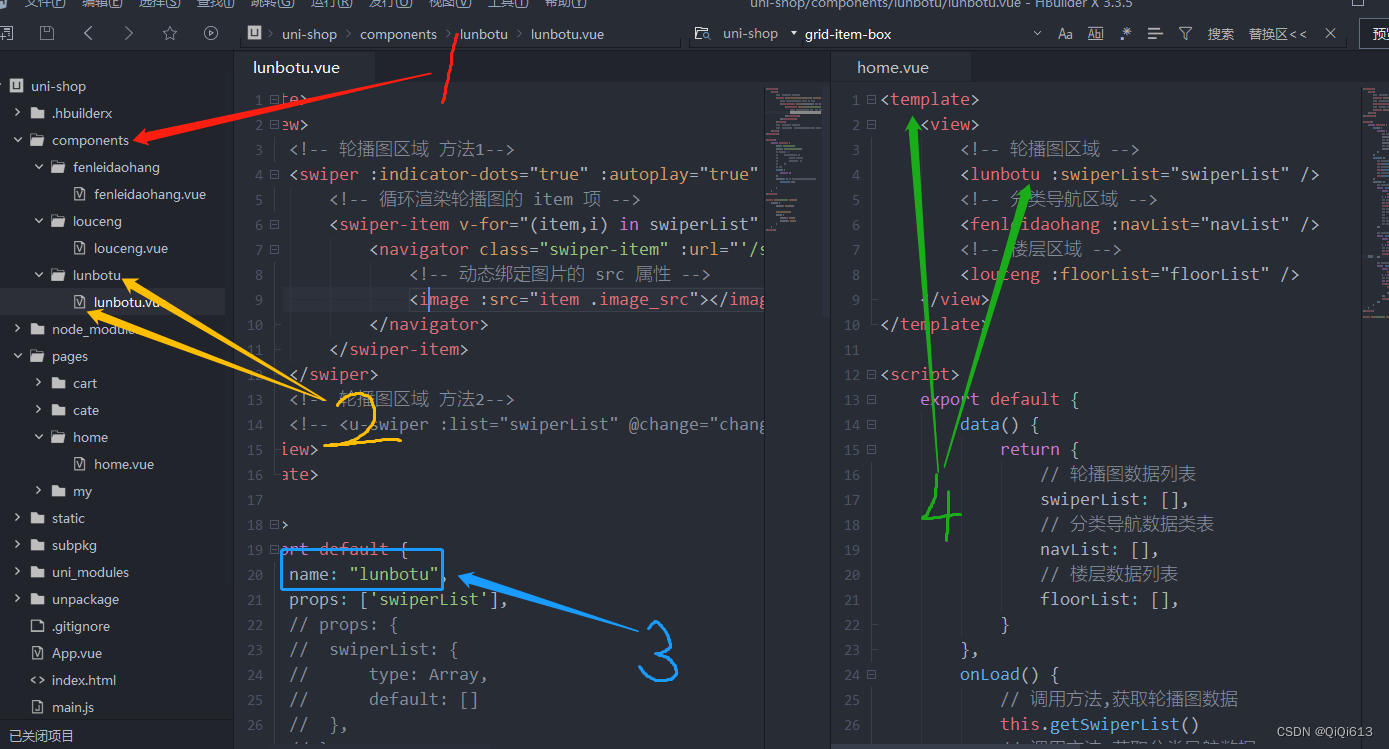
使用子组件必须将子组件放在根文件夹中的 components 中,如果项目中没有需要自己添加一个,在文件夹中存放不同的组件文件夹,在各自的组件文件夹中创建同名的vue文件,创建好后在各自组件的vue文件中写 name 属性,值为组件名(标签名),最后在父组件中使用即可
各个组件的样式要放在自己的组件之中,<style lang="scss" scoped></style>, 并且要使用scoped 表示只是作用于本文件(本组件),在别的文件中如果有同样的类名不会被影响到
<template>
	<view>
		<!-- 轮播图区域 -->
		<lunbotu :swiperList="swiperList" />
		<!-- 分类导航区域 -->
		<fenleidaohang :navList="navList" />
		<!-- 楼层区域 -->
		<louceng :floorList="floorList" />
        <!-- 其他组件类似这些方法... -->
	</view>
</template>

<script>
	export default {
		data() {
			return {
				// 轮播图数据列表
				swiperList: [],
				// 分类导航数据类表
				navList: [],
				// 楼层数据列表
				floorList: [],
			}
		},
		onLoad() {
			// 调用方法,获取轮播图数据
			this.getSwiperList()
			// 调用方法,获取分类导航数据
			this.getNavList()
			// 调用方法,获取楼层数据
			this.getFloorList()
		},
		methods: {
			// 轮播图区域,获取轮播图片数据
			async getSwiperList() {
				const {
					data: res
				} = await uni.$http.get('/api/public/v1/home/swiperdata')
				// console.log(res);
				if (res.meta.status != 200) return uni.$showMsg()
				// ------------------使用轮播图方法一-----------------------
				// this.swiperList = res.message
				//----------------使用轮播图方法一结束-----------------------
				// ------------------使用轮播图方法二-----------------------
				var lists = [];
				res.message.forEach(item => {
					lists.push(item.image_src)
				})
				this.swiperList = lists;
				//----------------使用轮播图方法二结束-----------------------
			},

			// 分类导航区域,获取对应的楼层数据
			async getNavList() {
				const {
					data: res
				} = await uni.$http.get('/api/public/v1/home/catitems')
				// console.log(res);
				if (res.meta.status != 200) return uni.$showMsg()
				this.navList = res.message
			},

			// 楼梯区域,获取对应的楼层数据
			async getFloorList() {
				const {
					data: res
				} = await uni.$http.get('/api/public/v1/home/floordata')
				// console.log(res);
				if (res.meta.status != 200) return uni.$showMsg()
				res.message.forEach(floor => {
					floor.product_list.forEach(prod => {
						prod.url = '/subpkg/goods_list/goods_list?' + prod.navigator_url.split('?')[1]
					})
				})
				this.floorList = res.message
			},
		}
	}
</script>

<style lang="scss" scoped>

</style>
封装方法 uni.$showMsg()
在main.js 文件中添加
import App from './App'
import Vue from 'vue'
import uView from '@/uni_modules/uview-ui'
Vue.use(uView);
// 导入网络请求的包
import {
	$http
} from '@escook/request-miniprogram'
uni.$http = $http
// 请求的根路径
$http.baseUrl = 'https://www.uinav.com'
// 请求拦截器
$http.beforeRequest = function(options) {
	uni.showLoading({
		title: '数据加载中'
	})
}
// 响应拦截器
$http.afterRequest = function() {
	uni.hideLoading()
}
//-----------------------------------------------------------------------------------------------------------------------------
// 封装自定义弹框的方法, 获取失败显示,title表示提示文本,duration表示在1500毫秒后自动隐藏,icon表示图标,在这里不需要图标,所以直接写none
uni.$showMsg = function(title = '数据加载失败!', duration = 1500) {
	uni.showToast({
		title,
		duration,
		icon: 'none ',
	})
}
//-------------------------------------------------------------------------------------------------------------------------------
Vue.config.productionTip = false
App.mpType = 'app'
const app = new Vue({
	...App
})
app.$mount()
import {
	createSSRApp
} from 'vue'
export function createApp() {
	const app = createSSRApp(App)
	return {
		app
	}
}
子组件使用 props 接收参数
子组件使用 props 接收参数时可以写成数组样式(props: ['swiperList']) 例如轮播图组件方法一
子组件使用 props 接收参数时也可以写成对象形式,属性就是接收的数据,值为一个对象,值中可以存放数据类型,默认值,是否必传(需要哪个写哪个),例如轮播图组件方法二
props: {
swiperList: {
type: Array, //数据类型
default: [], //默认值
required:true //必传属性,可选值:false
},
},
轮播图组件,方法一
使用 uniapp 原生的标签,我试了下,在最外层不写 view 外盒子,但是据大佬们说还是加上好,之后使用过程可能会有bug,所以我就加上了
<template>
	<view>
		<!-- 轮播图区域 方法1-->
		<swiper :indicator-dots="true" :autoplay="true" :interval="3000" :duration="1000" :circular="true">
			<!-- 循环渲染轮播图的 item 项 -->
			<swiper-item v-for="(item,i) in swiperList" :key="i ">
				<navigator class="swiper-item" :url="'/subpkg/goods_detail/goods_detail?goods_id='+item.goods_id">
					<!-- 动态绑定图片的 src 属性 -->
					<image :src="item .image_src"></image>
				</navigator>
			</swiper-item>
		</swiper>
	</view>
</template>

<script>
	export default {
		name: "lunbotu",
		props: ['swiperList'],
		data() {return {}},
		methods: {}
	}
</script>

<style lang="scss" scoped>
	swiper {
		height: 330rpx;
		.swiper-item,
		image {
			width: 100%;
			height: 100%;
		}
	}
</style>
轮播图组件,方法二
使用 uview 组件库中的的标签,在使用前需要安装插件,安装方法可以参照如下链接
<template>
	<view>
		<!-- 轮播图区域 方法2-->
		<u-swiper :list="swiperList" @change="change"  indicator></u-swiper>
	</view>
</template>

<script>
	export default {
		name: "lunbotu",
		props: {
			swiperList: {
				type: Array,
				default: [],
				required:true
			},
		},
		data() {return {}},
		methods: {
			// 轮播图方法二的change事件
			change() {},
		}
	}
</script>

<style lang="scss" scoped>
</style>
分类导航组件
<template>
		<!-- 分类导航区域 -->
		<view class="nav-list">
			<view class="nav-item" v-for="(item, i) in navList" :key="i" @click="navClickHandler(item)">
				<image :src="item.image_src" class="nav-img"></image>
			</view>
		</view>
</template>

<script>
	export default {
		name:"fenleidaohang",
		props: {
			navList: {
				type: Array,
				default: []
			},
		},
		data() {return {}},
		methods: {
			// 分类导航区域,点击对应的图片跳转到对应的页面
			navClickHandler(item) {
				if (item.name === '分类') {
					// uniapp自带的方法,跳转页面
					uni.switchTab({url: "/pages/cate/cate"})
				}
			},
		}
	}
</script>

<style lang="scss" scoped>
	.grid-item-box {
		flex: 1;
		display: flex;
		flex-direction: column;
		align-items: center;
		justify-content: center;
		padding: 30rpx 0;
		font-size: 28rpx;
		color: #666;

		.text {
			margin-top: 10rpx;
		}
	}

	.nav-list {
		display: flex;
		justify-content: space-around;
		margin: 15px 0;

		.nav-img {
			width: 128rpx;
			height: 140rpx;
		}
	}
</style>
楼层组件
<template>
	<!-- 楼层区域 -->
	<view class="floor-list">
		<!-- 楼层每一项 item 项 -->
		<view class="floor-item" v-for="(item, i) in floorList" :key="i">
			<!-- 楼层标题 -->
			<image :src="item.floor_title.image_src" class="floor-title"></image>
			<!-- 楼层图片区域 -->
			<view class="floor-img-box">
				<!-- 左侧大图片的盒子 -->
				<navigator class="left-img-box" :url="item.product_list[0].url">
					<image :src="item.product_list[0].image_src"
						:style="{width: item.product_list[0].image_width + 'rpx'}" mode="widthFix"></image>
				</navigator>
				<!-- 右侧 4 个小图片的盒子 -->
				<view class="right-img-box">
					<navigator class="right-img-item" v-for="(item2, i2) in item.product_list" :key="i2" v-if="i2 !== 0"
						:url="item2.url">
						<!-- 如果图片要自适应的话需要加 mode="widthFix" -->
						<image :src="item2.image_src" mode="widthFix" :style="{width: item2.image_width + 'rpx'}">
						</image>
					</navigator>
				</view>
			</view>
		</view>
	</view>
</template>

<script>
	export default {
		name: "louceng",
		props: {
			floorList: {
				type: Array,
				default: []
			},
		},
		data() { return {} },
		methods: { }
	}
</script>

<style lang="scss" scoped>
	.floor-title {
		height: 60rpx;
		width: 100%;
		display: flex;
	}

	.right-img-box {
		display: flex;
		flex-wrap: wrap;
		justify-content: space-around;
	}

	.floor-img-box {
		display: flex;
		padding-left: 10rpx;
	}
</style>