首先是要下载一个版本,这里我自己用的放到GitHub上了
https://github.com/dhgr1/tinymce
之前我试过官网的以及别的地方的,但都会报错,我也没搞清楚原因,你们可以自己去试试,我的这个里面是已经包括中文包以及多图片上传需要的插件axupimgs
我这里是放到项目的Content里面的Scripts里面,还有一点就是文件里面有一个tinymce.d.ts文件,我不删掉会报错,不知道是不是我的环境问题,删掉了就没有报错了,而且对我要实现的功能没有造成影响
首先是引用插件和中文包
<script src="~/Content/Scripts/tinymce/js/tinymce/tinymce.min.js"></script>
<script src="~/Content/Scripts/tinymce/js/tinymce/langs/zh-Hans.js"></script>
然后是初始化
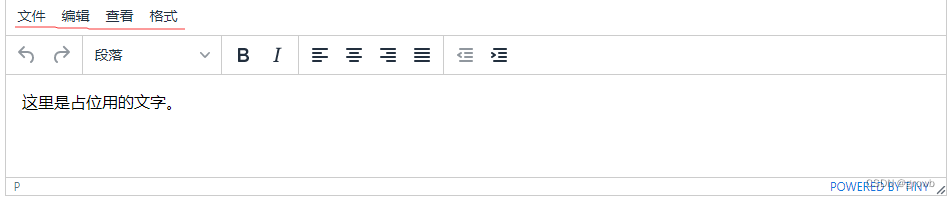
<div><textarea id="mytextarea"></textarea></div>

<script>

    tinymce.init({
        menubar: false,
        //statusbar: false,
        selector: '#mytextarea',
        language: 'zh_CN',
        height: 500,
        branding: false,
        forced_root_block: '',
        plugins: "lists advlist anchor autosave code charmap codesample directionality emoticons hr image imagetools insertdatetime link table media pagebreak wordcount preview  nonbreaking print searchreplace toc code image axupimgs", //依赖lists插件
        toolbar1: "formatselect fontselect fontsizeselect | bold italic underline strikethrough /*link*/ hr removeformat | forecolor backcolor  | alignleft aligncenter alignright alignjustify | axupimgs media table  ",
        toolbar2: "preview print| subscript superscript anchor charmap emoticons nonbreaking pagebreak |  toc  searchreplace  insertdatetime | ltr rtl undo redo wordcount",
        images_upload_url: 'http://localhost:51624/api/JSL/pc_UploadServiceImg',

        images_upload_base_path: 'http://localhost:51624/',

        imagetools_cors_hosts: ['mydomain.com', 'otherdomain.com'],
        imagetools_proxy: 'proxy.php',
        images_upload_handler: function (blobInfo, succFun, failFun) {
            var xhr, formData;
            var file = blobInfo.blob();//转化为易于理解的file对象
            xhr = new XMLHttpRequest();
            xhr.withCredentials = false;
            xhr.open('POST', 'http://localhost:51624/api/JSL/pc_UploadServiceImg');
            xhr.onload = function () {
                var json;
                if (xhr.status != 200) {
                    failFun('HTTP Error: ' + xhr.status);
                    return;
                }
                json = JSON.parse(xhr.responseText);
                if (!json || typeof json.location != 'string') {
                    failFun('Invalid JSON: ' + xhr.responseText);
                    return;
                }
                succFun(json.location);
            };
            formData = new FormData();
            formData.append('file', file, file.name);
            xhr.send(formData);
        },
        //自定义文件选择器的回调内容 此方法只有在点击上方图片按钮才会触发
        file_picker_callback: function (callback, value, meta) {
            if (meta.filetype === "media") {
                // 模拟上传本地视频
                let input = document.createElement("input");
                input.setAttribute("type", "file");
                input.setAttribute("accept", ".mp4");
                input.onchange = function () {
                    let file = this.files[0];
                    // console.log(file);
                    let fd = new FormData();
                    fd.append("img", file);
                    $axfile("/api/JSL/pc_UploadVideo", fd, true, "POST", "json", header, function (data) {
                        //debugger
                        console.log(data)
                        let rr = data.result;
                        // callback 回调的作用是将所选择的视频的url显示在输入框中
                        callback($autoCompleteUrl()+rr);

                    });
                };
                input.click();
            }
        },
        init_instance_callback: function (editor) {
              editor.setContent(item.商品步骤)
        }
    });

</script>
menubar这个属性是用来设置不显示最上面的那行文字导航的
selector是用来绑定容器的唯一标识
language是绑定语言还有其他的可以自己去官网详细了解一下,我就不多说了
1.上传图片
如果只要实现单张图片上传的话,只要配置images_upload_url和images_upload_base_path就行了,images_upload_url里面放api上传图片的接口方法,images_upload_base_path是根路径
如果要实现多图片上传则先要在plugins里面加上code image axupimgs,这个插件是与image不能分离的,只能一起使用,然后toolbar里面也要加上axupimgs,其次就是要用到images_upload_handler这个属性了,我这里的可以直接拿去用,把路径换成自己的api就行了
/// <summary>
        /// 图片上传
        /// </summary>
        [AllowAnonymous]
        [HttpPost]
        public Object pc_UploadServiceImg()
        {
            var files = HttpContext.Current.Request.Files;
            var form = HttpContext.Current.Request.Form;
            string basePath = AppDomain.CurrentDomain.BaseDirectory;
            string filePath = "Files/wttp";
            int limitFileSize = 1024 * 1024 * 20;

            string fullPath = basePath + filePath;
            string savePath = "";

            //如果目录不存在,则创建目录
            if (!Directory.Exists(fullPath))
            {
                Directory.CreateDirectory(fullPath);
            }

            if (files.Count > 0)
            {
                foreach (var key in files.AllKeys)
                {
                    var file = files[key];
                    //校验文件类型
                    string fileExtension = Path.GetExtension(file.FileName);
                    string fileMimeType = MimeMapping.GetMimeMapping(file.FileName);
                    string[] fileTypeWhiteList = new string[] { ".jpg", ".jpeg", ".png", ".gif" };
                    string[] fileMimeTypeWhiteList = new string[] { "image/jpg", "image/jpeg", "image/png", "image/gif" };
                    if (!fileTypeWhiteList.Contains(fileExtension.ToLower()) || !fileMimeTypeWhiteList.Contains(fileMimeType))
                    {
                        throw new Exception($"文件{file.FileName}是不支持的文件类型!");
                    }

                    if (file.ContentLength > limitFileSize)
                    {
                        throw new Exception($"文件{file.FileName}超出大小限制,请处理后上传!");
                    }

                    if (!string.IsNullOrEmpty(file.FileName))
                    {
                        string fileName = Guid.NewGuid().ToString("N") + Path.GetExtension(file.FileName);
                        savePath = filePath + "/" + fileName;
                        file.SaveAs(fullPath + "/" + fileName);
                    }
                }
                var obj = new { location = savePath };
                //return new Response
                //{
                //    Result = savePath  //savePath
                //};
                return obj;
            }
            else
            {
                throw new Exception("上传失败,未接收到请求文件!");
            }
        }
这是我后台的上传图片的方法,要注意返回的格式,格式不对图片是显示不出来的
2.上传视频
配置file_picker_callback
这里是我后端视频上传的接口
public object pc_UploadVideo()
        {
            StringBuilder builder = new StringBuilder();

            HttpRequest request = HttpContext.Current.Request;

            //if (request.ContentLength > 20 * 1024 * 1024)
            //{
            //    throw new Exception("上传的文件不能超过20M!");
            //}

            string sFileName = "";
            string FilePath = "";

            HttpPostedFile postedFile = null;
            int sl = HttpContext.Current.Request.Files.Count;
            if (sl > 0)
            {
                for (int i = 0; i < sl; i++)
                {
                    postedFile = HttpContext.Current.Request.Files[i];

                    string rootDictory = AppDomain.CurrentDomain.BaseDirectory;
                    string filePath = "Files/jslgoodsvideo/";
                    rootDictory += filePath;
                    if (!Directory.Exists(rootDictory))
                    {
                        Directory.CreateDirectory(rootDictory);
                    }

                    string filename = Path.GetFileName(postedFile.FileName);

                    string fileExtension = Path.GetExtension(postedFile.FileName);//文件后缀

                    string gid = Guid.NewGuid().ToString().Replace("-", "");

                    sFileName = rootDictory + gid + fileExtension; //文件地址 + 文件名

                    FilePath = filePath + gid + fileExtension;

                    postedFile.SaveAs(sFileName);


                }
                return new Response
                {
                    Result = FilePath  //savePath
                };
            }
            else
            {
                throw new Exception("上传失败,未接收到请求文件!");
            }
        }
3.我在开发中遇到过的bug以及解决方法
1.在设置富文本的内容时得到无法读取null的属性'setContent'
这个设置内容你必须要在init_instance_callback这个里面设置,就是说你必须等到代码初始化
2.你如果要循环使用多个富文本编辑器,只会有第一个效果
这个是因为你的selector绑定必须保证唯一性,同样的只能初始化一次
所以你必须动态的去改变它的值,可以用拼接的方法 var id = 'mytextarea' + item.id(动态改变的值);var domId = '#' + id;
selector绑定domId就OK了
3.当你需要循环去获取接口里面的值并赋值到富文本里面时只获取到了最后一个的值
这里之前我用的是for循环去赋值,但是会有这个问题,这里只能用到foreach循环,这就是因为for循环是一瞬间执行完的,并且只有一个变量,只会存储一个值,也就是最后的那个值;而forEach()则可以正确的找到对应的值,因为每次循环都会创建一个不同的变量去记录。
4.在你需要把富文本编辑器的内容传到后台时并保存到数据库里面,传的内容不对
这个是因为富文本里面的内容是html内容,需要前端传值的时候加上encodeURIComponent()
括号里面放你需要传的值,这样才能保证所有标签已经样式都能正确的传过去
如果需要在java里对传入的字符串进行操作,可以通过下面的方式进行解码。
java.net.URLDecoder.decode(works, "UTF-8");在数据回显的时候在js里通过decodeURIComponent()来解码,进行正确的数据展示。
以上就是我在开发里面的一些总结,希望对你有帮助!