整合SSM
参考文献
卤蛋的SSM整合完整流程讲解
一、SSM整合前概述
1. 各个框架在三层架构模式中所担任的角色
- SpringMVC:表示层(Web),处理浏览器端发送给服务器端的请求,完成业务逻辑层(Service)与持久化层(DAO)进行数据交互时得到的信息响应给浏览器。
- Spring:整合型框架,通过IOC容器去管理对象,通过AOP去实现将业务逻辑程序和其他程序(日志、事务管理等)分离。
- Mybatis:持久化层(DAO),连接数据库、操纵数据库、查询数据库数据。
SpringMVC 是 Spring 家族中的一个框架,可以选择整合,也可以选择不整合,不整合就是指 Spring 和 SpringMVC 创建了同一个 IOC 容器,整合是指 Spring 和 SpringMVC 各自创建自己的 IOC 容器,管理各自的组件。(建议整合)
- 两个 IOC 容器如何关联呢?
- SpringMVC 是子容器,Spring 是父容器,子容器可以访问父容器中的 Bean,父容器访问不了子容器(借鉴上述文章的,小编还没细看源码)。
2. 两个IOC容器的创建
SpringMVC 是管理表示层(Web)的组件,其他组件是交给 Spring 去管理,表示层依赖于Service组件,这里需要进行自动装配对该组件进行注入,即需要从IOC容器中获取,上面解释了SpringMVC这个子容器可以访问Spring这个父容器的Bean。
而对Service组件进行装配是在表示层的,应该从 SpringMVC 容器中获取,那么Spring 创建 IOC 容器要先于SpringMVC 的创建时间,才能完成自动装配。
而小编在学Spring的时候,不管是使用注解式注入,还是使用配置式注入,都得通过一行代码去将对象交给 IOC 容器管理(针对singleton范围的)。也就是说Spring创建 IOC 是有代码的。
ApplicationContext applicationContext = new ClassPathXmlApplicationContext(??);
或
ApplicationContext applicationContext = new AnnotationConfigApplicationContext(??);
- Spring的IOC容器要创建在SpringMVC的前面;
- Spring去创建IOC容器是有代码的。
1)整合时Spring中IOC容器的创建时间
Tomcat服务器提供了三大组件:监听器,过滤器,Servlet。这三大组件的执行顺序为:监听器,过滤器,Servlet。
SpringMVC 中 IOC 容器的创建是在其核心组件DispatcherServlet初始化的时候创建的,根据自下往上的排除法,可以猜测 Spring 要先创建IOC容器的话,很可能就发生在过滤器或者监听器这俩大组件中(因为是Spring提供的整合,所以也排除在DispatcherServlet生命周期中创建)。
过滤器中有俩次过滤,一次是对请求的过滤,执行doFilter方法之前,一次是响应的过滤,执行doFilter方法之后。如果把对Spring IOC容器创建的代码放在过滤器中,缺点很多:
- 与其过滤器这个组件作用不符;
- doFilter方法用不上,被浪费;
- 不利于开发者理解。
所以可以考虑使用监听器进行实现。
2)Spring提供的监听器(ContextLoaderListener)
监听器的种类挺多,但根据 Tomcat 运行Servlet的执行顺序,符合要求的只有 ServletContextListener 一个。
为什么这么说?ServletContextListener,顾名思义是去监听ServletContext对象的,它作为WebApp中的上下文对象,其中的初始化参数可以被这整个应用去使用。之所以说它符合要求,首先是一个webapp就一个ServletContext对象,还有就是和它的以下运行流程有关:
- 启动一个WEB项目的时候,容器(如:Tomcat)会去读它的配置文件web.xml.读两个节点: < listener > < /listener > 和 < context-param></ context-param>
- 然后创建ServletContext对象
- 然后就将context-param中配置的转换成键值对转交给ServletContext对象,对ServletContext对象进行初始化
- 再然后就去创建 listener 标签下的监听器,该监听器必须实现 ServletContextListener 接口
- 监听器监听到ServletContext 进行了初始化,就会执行对应重写的
contextInitialized方法,下面是ServletContextListener接口中的方法(监听器可以通过其事件参数,通过event.getServletContext()获取ServletContext对象,然后获取其初始化参数,然后进行操作)
public interface ServletContextListener extends EventListener {


    void contextInitialized(ServletContextEvent var1);

    void contextDestroyed(ServletContextEvent var1);
}
下面再看看 ContextLoaderListener 监听器的实现,一切都变得清晰起来了。
public class ContextLoaderListener extends ContextLoader implements ServletContextListener {


    public ContextLoaderListener() {


    }

    public ContextLoaderListener(WebApplicationContext context) {


        super(context);
    }

    public void contextInitialized(ServletContextEvent event) {


        this.initWebApplicationContext(event.getServletContext());
    }

    public void contextDestroyed(ServletContextEvent event) {


        this.closeWebApplicationContext(event.getServletContext());
        ContextCleanupListener.cleanupAttributes(event.getServletContext());
    }
}
当 Tomcat 去解析 web.xml ,启动项目然后创建 ServletContext 对象进行初始化后,就会去执行这个 initWebApplicationContext 方法,见方法名知其意,这就是先去创建 Spring IOC 容器的实现。
随后为什么要在web.xml 中配置以下内容也很清晰了:
	<listener>
        <listener-class>org.springframework.web.context.ContextLoaderListener</listener-class>
    </listener>

    <!--设置spring配置文件自定义的位置和名称-->
    <context-param>
        <param-name>contextConfigLocation</param-name>
        <!--这里是小编将spring配置分成了俩,一个配置mybatis的,是spring-mapper.xml,然后下面的spring-service.xml导入了上面的那个,所以...-->
        <!--名字没关系,只要对应的上就行-->
        <param-value>classpath:spring-service.xml</param-value>
    </context-param>
二、SSM整合步骤
1)建库建表(这个由于是整合练习,可以按照自己的需求进行建库建表)
2)新建maven项目,选择webapp模块
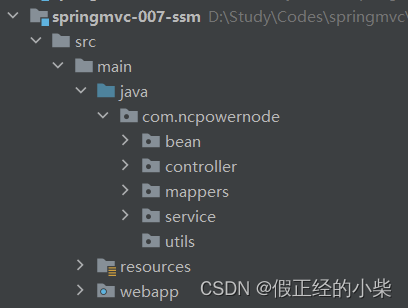
3)修改目录,新建目录,如下所示:
4)修改 pom.xml文件(添加以下依赖,下面只是提供了整合依赖,如果需要其他具体实现,比如aspects,jdbc事务,jsp依赖,分页操作…都得另外配置依赖)
<dependencies>
<!--添加spring的测试依赖-->
  <dependency>
    <groupId>junit</groupId>
    <artifactId>junit</artifactId>
    <version>4.13</version>
    <scope>test</scope>
  </dependency>
  <dependency>
    <groupId>org.springframework</groupId>
    <artifactId>spring-test</artifactId>
    <version>5.2.5.RELEASE</version>
  </dependency>

  <!--spring-context和spring-beans依赖-->
  <!--spring-context依赖本身就依赖spring-beans-->
  <!--所以只需要配置spring-context依赖即可-->
  <dependency>
    <groupId>org.springframework</groupId>
    <artifactId>spring-context</artifactId>
    <version>${spring.version}</version>
  </dependency>
  <!--springmvc依赖-->
  <dependency>
    <groupId>org.springframework</groupId>
    <artifactId>spring-webmvc</artifactId>
    <version>${spring.version}</version>
  </dependency>
  <!--mybatis核心-->
  <dependency>
    <groupId>org.mybatis</groupId>
    <artifactId>mybatis</artifactId>
    <version>3.5.11</version>
  </dependency>

  <!--数据库连接池-->
  <dependency>
    <groupId>com.alibaba</groupId>
    <artifactId>druid</artifactId>
    <version>1.2.16</version>
  </dependency>
  <!--mysql驱动-->
  <dependency>
    <groupId>mysql</groupId>
    <artifactId>mysql-connector-java</artifactId>
    <version>8.0.31</version>
  </dependency>
、<!--Tomcat10的Servlet依赖-->
  <dependency>
    <groupId>org.apache.tomcat</groupId>
    <artifactId>tomcat-servlet-api</artifactId>
    <version>10.1.0</version>
  </dependency>
  <dependency>

  <!--mybatis和spring的整合包-->
  <dependency>
    <groupId>org.mybatis</groupId>
    <artifactId>mybatis-spring</artifactId>
    <version>2.0.6</version>
  </dependency>
  <!--jackson依赖,springmvc框架默认进行JSON转换的依赖工具-->
  <dependency>
    <groupId>com.fasterxml.jackson.core</groupId>
    <artifactId>jackson-databind</artifactId>
    <version>2.14.2</version>
  </dependency>
</dependencies>
5)添加jdbc.properties
jdbc.driver=com.mysql.jdbc.Driver
jdbc.url=jdbc:mysql://localhost:3306/ssmuser?useUnicode=true&characterEncoding=utf8
jdbc.username=root
jdbc.password=123456
6)添加mybatis-config.xml文件,其他一些mybatis主要配置可以在spring配置SqlSessionFactoryBean时进行配置。
<?xml version="1.0" encoding="UTF-8" ?>
<!DOCTYPE configuration
        PUBLIC "-//mybatis.org//DTD Config 3.0//EN"
        "http://mybatis.org/dtd/mybatis-3-config.dtd">
<configuration>

    <settings>
        <!--驼峰命名自动映射,默认false-->
        <setting name="mapUnderscoreToCamelCase" value="false"/>
        <setting name="lazyLoadingEnabled" value="true"/>
        <setting name="logImpl" value="STDOUT_LOGGING"/>
    </settings>

</configuration>
7)添加spring-mapper.xml文件
<!--读取属性文件-->
<context:property-placeholder location="classpath:jdbc.properties"/>
<!--配置数据源-->
<bean id="dataSource" class="com.alibaba.druid.pool.DruidDataSource">
       <property name="driverClassName" value="${jdbc.driver}"/>
        <property name="url" value="${jdbc.url}"/>
    <property name="name" value="${jdbc.username}"/>
    <property name="password" value="${jdbc.password}"/>
</bean>
<!--配置SqlSessionFactoryBean-->
<bean class="org.mybatis.spring.SqlSessionFactoryBean">
    <!--配置数据源-->
    <property name="dataSource" ref="dataSource"/>
    <!--配置mybatis-config.xml核心配置-->
    <property name="configLocation" value="classpath:mybatis-config.xml"/>
    <!--注册实体类-->
    <property name="typeAliasesPackage" value="com.ncpowernode.bean"/>
</bean>
<!--注册mapper.xml文件-->
<bean class="org.mybatis.spring.mapper.MapperScannerConfigurer">
    <property name="basePackage" value="com.ncpowernode.controller"/>
</bean>
8)添加spring-service.xml文件,因为没有使用事务,这个不添加也没关系,但是这个包扫描就得添加到上面去。
<import resource="spring-mapper.xml"/>
<!--添加包扫描-->
<context:component-scan base-package="com.ncpowernode.service"/>
<!--添加事务管理器-->
<bean id="tx" class="org.springframework.jdbc.datasource.DataSourceTransactionManager">
    <property name="dataSource" ref="dataSource"/>
</bean>
<!--启动事务注解-->
<tx:annotation-driven transaction-manager="tx"/>
9)添加springmvc.xml文件
<!--添加包扫描-->
<context:component-scan base-package="com.ncpowernode.controller"/>
<!--添加注解驱动-->
<!--使用@ResponseBody注解需要-->
<!--添加就对了-->
<mvc:annotation-driven/>
10)在web.xml文件中注册springmvc框架(添加DispatcherServlet),注册spring框架(全局配置,监听器)
    <servlet>
        <servlet-name>dispatcherServlet</servlet-name>
        <servlet-class>org.springframework.web.servlet.DispatcherServlet</servlet-class>
        <init-param>
            <param-name>contextConfigLocation</param-name>
            <param-value>classpath:springmvc.xml</param-value>
        </init-param>
    </servlet>
    <servlet-mapping>
        <servlet-name>dispatcherServlet</servlet-name>
        <url-pattern>/</url-pattern>
    </servlet-mapping>

    <!--注册spring框架,目的就是先启动Spring容器-->
    <listener>
        <listener-class>org.springframework.web.context.ContextLoaderListener</listener-class>
    </listener>
    <context-param>
        <param-name>contextConfigLocation</param-name>
        <param-value>classpath:spring-service.xml</param-value>
    </context-param>
</web-app>
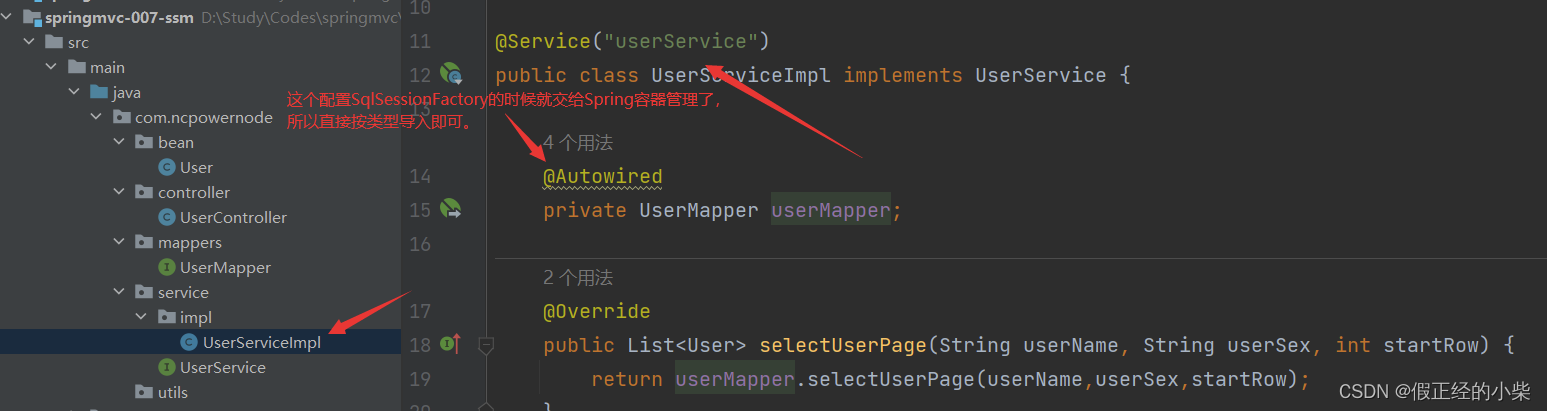
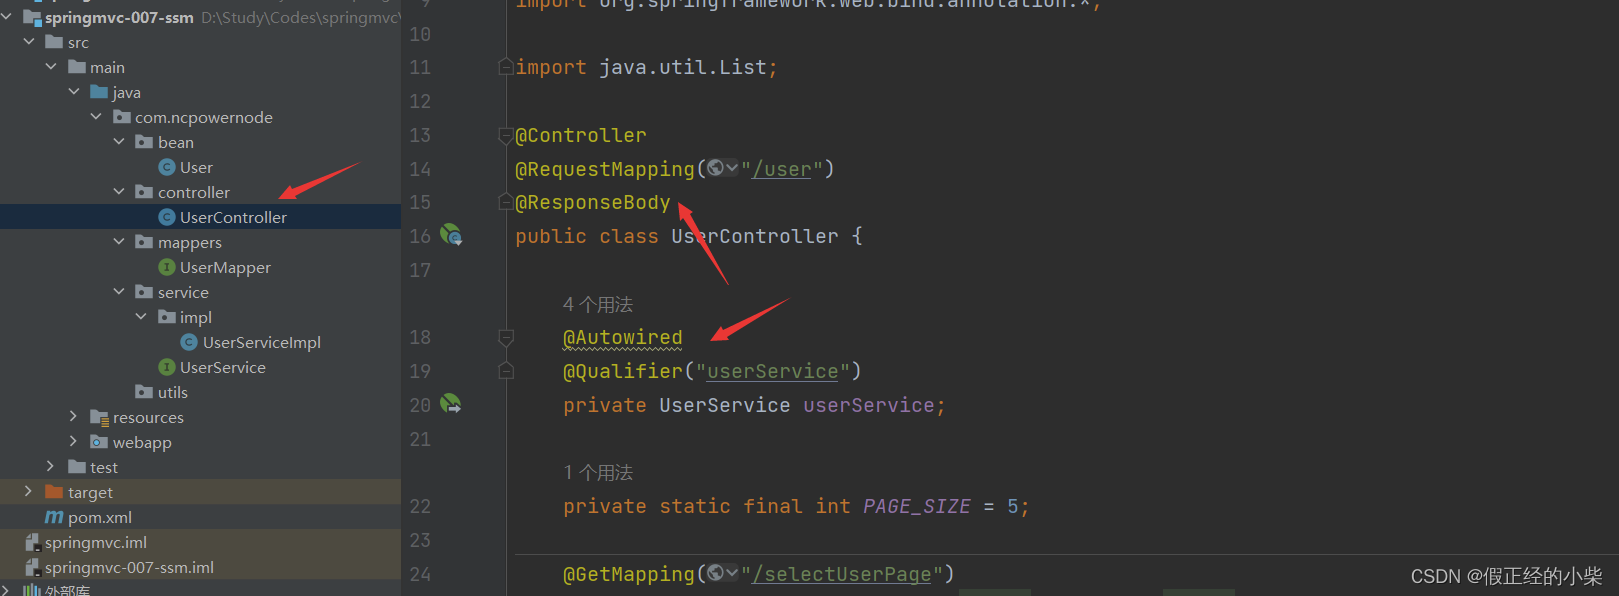
11)整合配置结束,开始写Java程序,由于所建的数据库,所建的表不一致,下面我就直接给出小编所写类,类中所用注解,测试。
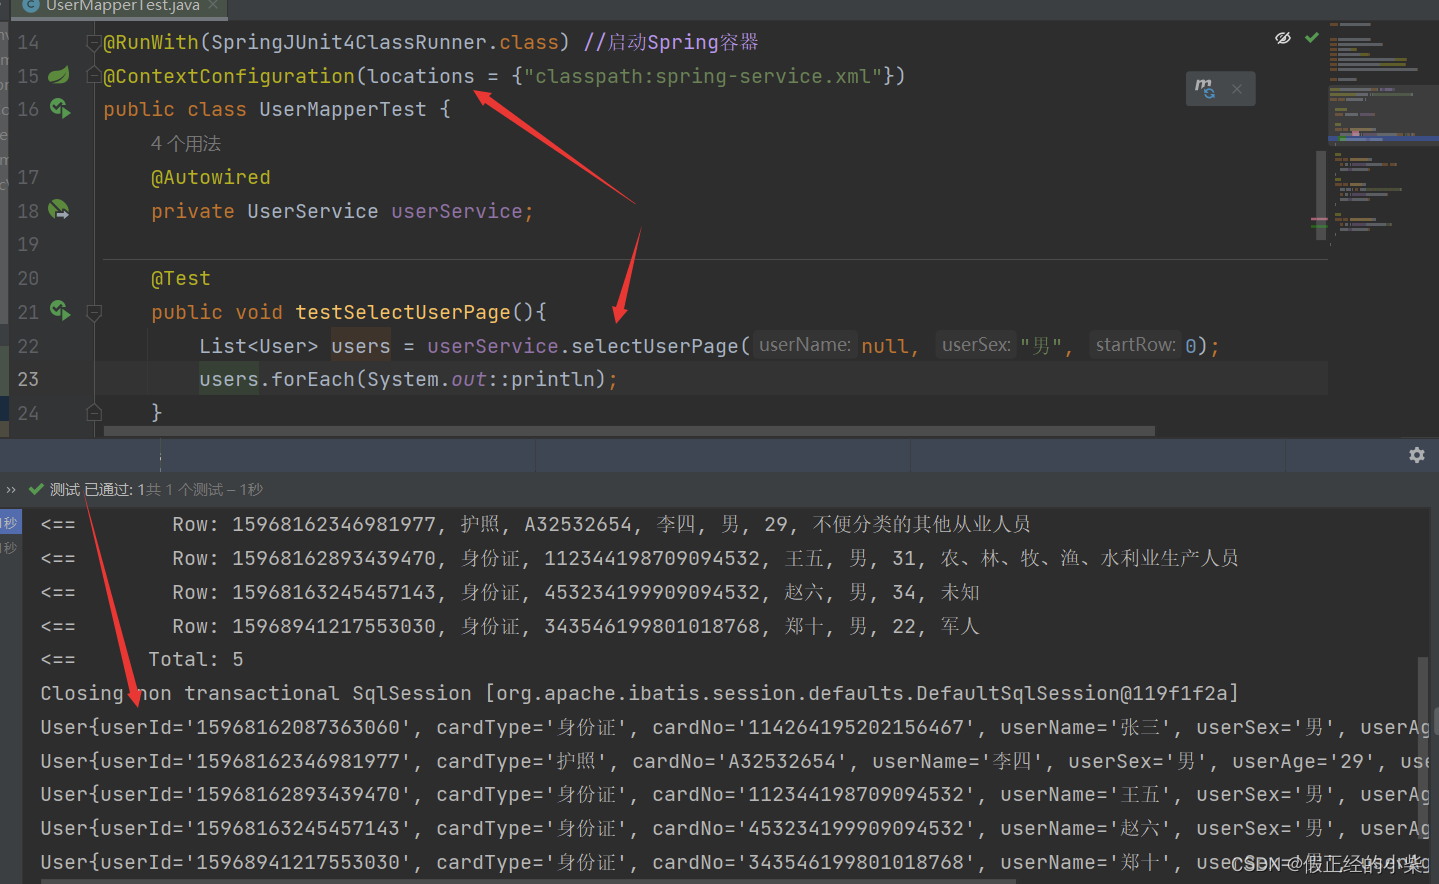 以上测试可以证明sm整合成功。
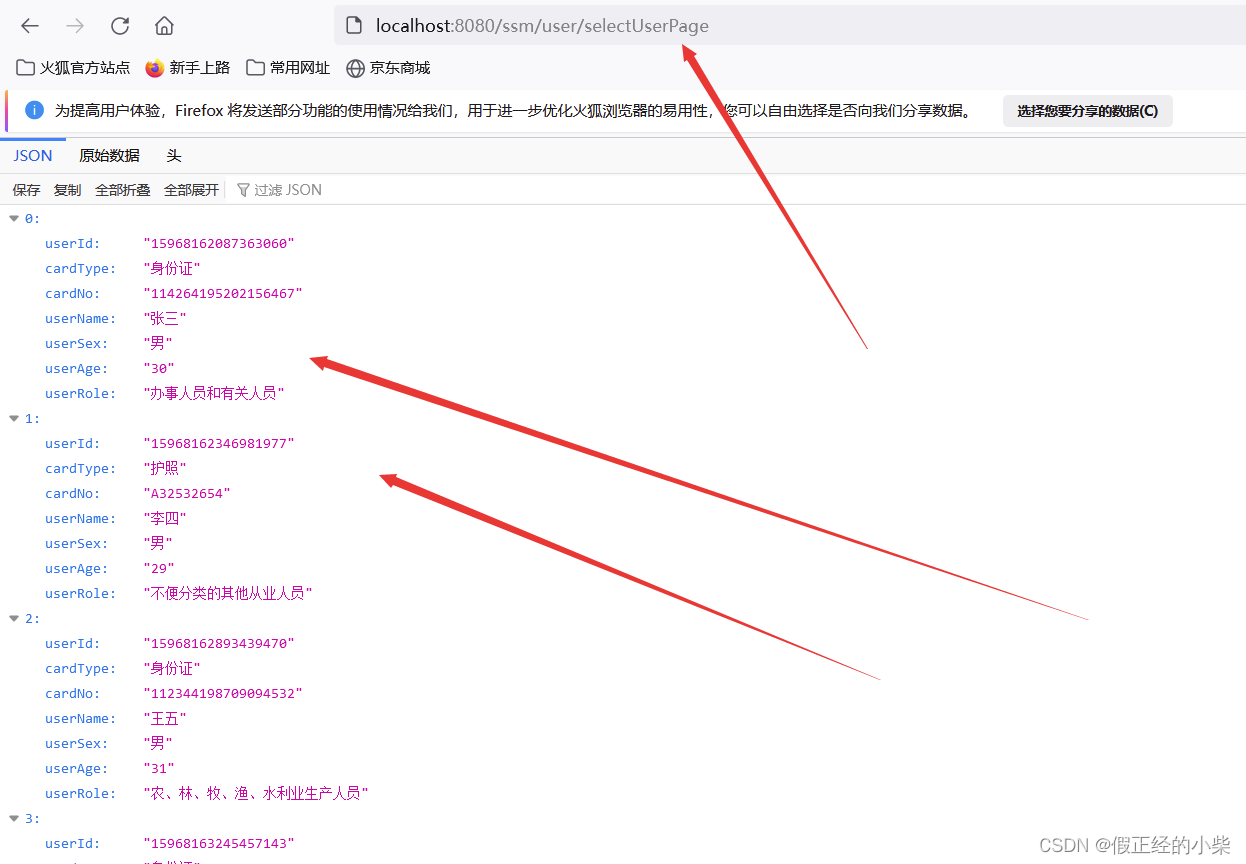
以上测试说明ss整合成功,即ssm整合成功。