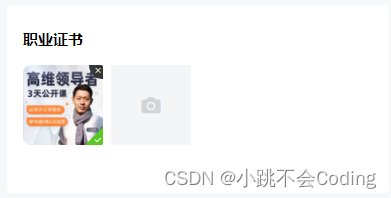
一、上传图片(并且 上传的图片可以回显)
1.实现效果:

2.具体代码:
<template>
	<view>
		<view class="imgbox">
			<view>职业证书</view>
			<!-- 上传图片 -->
			<u-upload :fileList="fileList1" @afterRead="afterRead" @delete="deletePic" name="1" multiple  :maxCount="9"></u-upload>
		</view>
	</view>
</template>

<script>
	export default {


		data() {


			return {


				hostUrl: this.$api.hostImages,    //封装的图片地址
				fileList1: [], //存放图片的ur
				url_arr: [],
			}
		},
		methods: {


			// 删除图片
			deletePic(event) {


				this[`fileList${
        event.name}`].splice(event.index, 1)
				this.url_arr.splice(event.index, 1)
			},
			// 新增图片
			async afterRead(event) {


				// console.log(event.name);
				// 当设置 mutiple 为 true 时, file 为数组格式,否则为对象格式
				let lists = [].concat(event.file)
				let fileListLen = this[`fileList${
        event.name}`].length
				lists.map((item) => {


					this[`fileList${
        event.name}`].push({


						...item,
						status: 'uploading',
						message: '上传中'
					})
				})
				for (let i = 0; i < lists.length; i++) {


					const result = await this.uploadFilePromise(lists[i].url)
					let item = this[`fileList${
        event.name}`][fileListLen]
					this[`fileList${
        event.name}`].splice(fileListLen, 1, Object.assign(item, {


						status: 'success',
						message: '',
						url: result
					}))
					fileListLen++
				}
			},
			uploadFilePromise(url) {


				var that = this
				return new Promise((resolve, reject) => {


					let a = uni.uploadFile({


						url: that.hostUrl + '/api/upload/upload', //图片接口地址
						filePath: url,
						name: 'file',
						formData: {


							user: 'test'
						},
						success: (res) => {


							// console.log('图片',res.data)
							var a = JSON.parse(res.data).initialPreview[0] //对象转数组
							var imgsUrl = a //数组转字符串
							that.url_arr.push(imgsUrl)
							// console.log('图片数组',that.url_arr)

							setTimeout(() => {


								resolve(res.data.data)
							}, 1000)
						}
					});
				})
			},

			//——————————————————————————————分割线——————————————————————————————————
			//实现图片回显功能
			//获取接口返回的信息
			comDataFun() {


				var that = this
				this.$api.appPlateForm('POST', this.$url.companyCer_data, '', function(res) {


					// console.log('企业认证资料展示', res)
					that.company_name = res.data.company_name

					// 图片回显
					var cerImg = res.data.certcompany.split(',')
					cerImg.forEach(item=>{


						var obj = {


							status: 'success',
							message: '',
							url: that.$api.hostImages+item,
							image: item,
						}
						that.fileList1.push(obj)
						that.url_arr.push(obj.image)
					})
					console.log(that.fileList1)
				})
			},

		}
	}
</script>
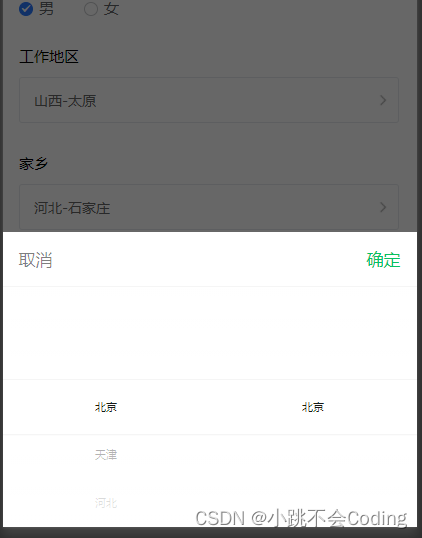
二、实现省市区的选择
1.实现效果:
2.实现代码:
<template>
	<view>
		<view class="basicdata">
			<view class="basicdata_two">
				<view class="basicdata_title">工作地区</view>
				<picker mode="multiSelector" @columnchange="workPickerColumnChange" @change="workChange" :value="workIndex" :range="workArray" range-key="name">
					<view class="basicdata_select">
						<input type="text" v-model="workAdress" placeholder="请您选择您的工作地区" placeholder-style="color: #9EA1A3;" :disabled="true">
						<image :src="localImgSrc('[email protected]')" mode=""></image>
					</view>
				</picker>
			</view>
		</view>
		<view class="submit" @click="submitFun">提交</view>
	</view>
</template>

<script>
	export default {


		data() {


			return {


				//工作地区
				workArray: [
					[],
					[]
				],
				workIndex: [],
				workAdress:'',
				work_province:'',
				work_city:'',
			}
		},
		onLoad(){


			this.initFun();
			this.getprovinceList()
		},
		methods: {


			//用户信息
			initFun(){


				var that = this
				this.$api.appPlateForm('POST', this.$url.user_info, {


					id: uni.getStorageSync('userId')
				}, function(res) {


					if(res.code == '200'){


						uni.setStorageSync('userInfo',JSON.stringify(res.data))
						that.info = res.data;
						that.needKeywordFun(res.data.need_id);
						that.workAdress = res.data.province?res.data.province.name+'-'+res.data.city.name:'';
						that.homeAdress = res.data.home_province?res.data.home_province.name+'-'+res.data.home_city.name:'';
					}
				})
			},
			//获取省-接口
			getprovinceList() {


				var that = this
				this.$api.appPlateForm('POST', this.$url.province, '', function(res) {


					that.workArray[0] = res.data;
					that.homeArray[0] = res.data;
					that.getCityList(res.data[0].id).then(arr=>{


						that.workArray[1] = arr
						that.homeArray[1] = arr
						that.$forceUpdate()
					})// 获取市
				})
			},
			//获取市-接口
			getCityList(id) {


				return new Promise((resolve, reject) => {


					var that = this;
					this.$api.appPlateForm('POST', this.$url.city, {


						province_id:id
					}, function(res) {


						console.log(res.data)
						setTimeout(()=>{


							resolve(res.data);
						},20)
					})
				})
			},
			workPickerColumnChange: function(e) {


				switch (e.detail.column) {


					case 0: //拖动第1列
						this.getCityList(this.workArray[0][e.detail.value].id).then(arr=>{


							this.workArray[1] = arr;
							this.workIndex = [e.detail.value,0];
							this.$forceUpdate()
						})
						break
				}
				this.$forceUpdate()
			},
			workChange(e){


				console.log(e)
				this.workAdress=this.workArray[0][e.detail.value[0]].name+'-'+this.workArray[1][e.detail.value[1]].name;
				this.info.work_province=this.workArray[0][e.detail.value[0]].id;
				this.info.work_city=this.workArray[1][e.detail.value[1]].id;
			},

			// 提交信息
			submitFun(){


				var that = this
				this.$api.appPlateForm('POST', this.$url.user_edit, {


					work_province:this.info.work_province,
					work_city:this.info.work_city,
				}, function(res) {


					uni.showToast({


						title:'保存成功',
						icon:'none'
					})
					that.initFun();
					setTimeout(()=>{


						uni.navigateBack()
					},500)
				})
			}
		}
	}
</script>
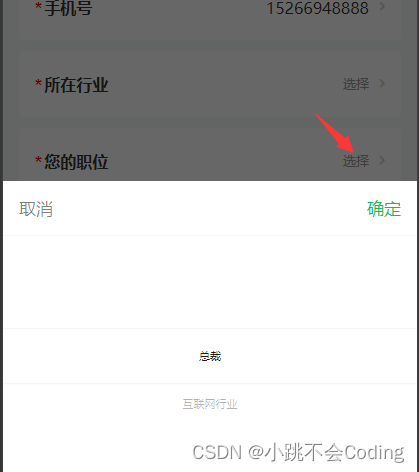
三、下拉框选择
1.实现效果:
2.代码实现:
	<!--1.html部分-->
	<view class="item">
		<view class="item_title"><text>*</text>您的职位</view>
		<picker @change="positionArrayChange($event,positionArray)" :value="positionID" :range="positionArray" range-key="name">
			<input placeholder="选择" :value="positionArray[positionIndex].name"
				placeholder-style="font-size:24rpx;color:#999;font-weight: 500;" />
		</picker>
		<image class="moreimg" :src="localImgSrc('[email protected]')"></image>
	</view>

	<!--2.JS部分-->
	<script>
		export default {


			data() {


				return {


					positionArray: [], //职位数组
					positionIndex: null, //职位id
					positionID:null
				}
			},
			methods: {


				//职位的接口
				positionFun() {


					var that = this
					this.$api.appPlateForm('POST', this.$url.position, '', function(res) {


						console.log('职位', res)
						that.positionArray = res.data
					})
				},
				//点击选择职位
				positionArrayChange: function(e,list) {


					console.log('选中的职位', e.detail.value)
					this.positionIndex = e.detail.value   //获取到选中的下标
					this.positionID = list[e.detail.value].id   //获取到选中的id
				},
			},
			}
		}
	</script>
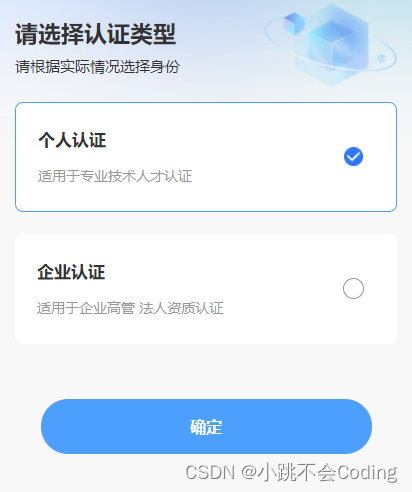
四、自定义单选框
1.实现效果
2.代码实现:
<template>
	<view class="home_content">
		<view class="itembox">
			<view class="item" :class="{

     'item_active':type==1}" @click="addClass(1)">
				<view>
					<view class="title">个人认证</view>
					<view class="">适用于专业技术人才认证</view>
				</view>
				<view class="right"></view>
				<image :src="localImgSrc('[email protected]')"></image>
			</view>

			<view class="item" :class="{

     'item_active':type==2}" @click="addClass(2)">
				<view>
					<view class="title">企业认证</view>
					<view class="">适用于企业高管 法人资质认证</view>
				</view>
				<view class="right"></view>
				<image :src="localImgSrc('[email protected]')"></image>
			</view>
		</view>
	</view>
</template>

<script>
	export default {


		data() {


			return {


				type: '',
			}
		},
		methods: {


			// 动态添加class
			addClass(index) {


				this.type = index;
				console.log(this.type)

			},

			nextFun() {


				//type:1个人认证,2企业认证
				if (this.type == 1) {


					uni.navigateTo({


						url: '/pages/attestation/personalCertification'
					})
				} else if (this.type == 2) {


					uni.navigateTo({


						url: '/pages/attestation/companyCertification'
					})
				} else {


					uni.showToast({


						title: '请选择认证类型',
						icon: 'none'
					})
				}
			},
		}
	}
</script>

<style>
	page {


		background-color: RGBA(248, 248, 248, 1);
		padding-bottom: 100rpx;
	}
	.home_content {


		width: 100%;
	}
	.selectbox {


		width: 100%;
		display: flex;
		align-items: center;
		justify-content: space-between;
		box-sizing: border-box;
		padding: 0 30rpx;
		font-size: 28rpx;
		font-weight: 400;
		color: #333333;
		margin-top: -370rpx;
		position: relative;
		margin-bottom: 20rpx;
	}
	.selectbox image {


		width: 242rpx;
		height: 161rpx;
	}
	.selectbox .tit {


		font-size: 42rpx;
		font-weight: bold;
		color: #333333;
		margin-bottom: 15rpx;
	}
	.itembox {


		width: 100%;
		box-sizing: border-box;
		padding: 0 30rpx;
		position: relative;
	}
	.itembox .item {


		width: 100%;
		height: 200rpx;
		background: #FFFFFF;
		border-radius: 15rpx;
		margin-bottom: 40rpx;
		display: flex;
		align-items: center;
		justify-content: space-between;
		box-sizing: border-box;
		padding: 0 60rpx 0 40rpx;
		font-size: 26rpx;
		font-weight: 400;
		color: #999999;
	}
	.itembox .item image {


		width: 35rpx;
		height: 35rpx;
		display: none;
	}

	.itembox .item .title {


		font-size: 32rpx;
		font-weight: bold;
		color: #333333;
		margin-bottom: 30rpx;
	}

	.itembox .item .right {


		width: 35rpx;
		height: 35rpx;
		background: #FFFFFF;
		border: 2rpx solid #999999;
		border-radius: 50%;
	}
	.item_active {


		border: 3rpx solid #4D9FFE !important;
	}
	.item_active image {


		display: block !important;
	}
	.item_active .right {


		display: none !important;
	}
</style>
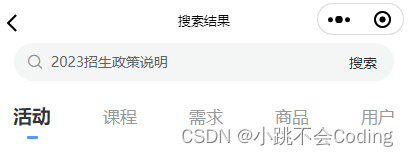
五、搜索
5.1 u-view里的搜索组件
1.实现效果:
2.具体代码:
<!--html-->
<view class="topSearch">
<!--这里需要注意一下:如果只使用 search 事件,点击搜索按钮是没有反应的,需要再加一个 custom-->
	<u-search placeholder="搜索关键词..." v-model="keyword" @search="searchHistory" :show-action="true" @custom="searchHistory"></u-search>
</view>

<!--js-->
<script>
	export default {


		data() {


			return {


				keyword: '',
			}
		},

		methods: {


			//搜索接口
			getSearch() {


				var that = this;
				var data = {


					keyword: that.keyword
				}
				this.$api.appPlateForm('POST', this.$url.index_search, data,
				 function(res) {

      })
			},
			//点击搜索
			searchHistory(value) {


				console.log('获取到搜索框的内容:',value)
				this.keyword = value
				this.page = 1
				this.activityFun()
			},

		}
	}
</script>

<style>
	.topSearch {


		width: 690rpx;
		height: 70rpx;
		background: #F4F6F5;
		border-radius: 35rpx;
		margin: auto;
		box-sizing: border-box;
		padding-right: 20rpx;
	}
	/deep/ .u-search__content {


		height: 70rpx !important;
		background-color: transparent !important;
		border-width: 0 !important;
	}
	/deep/ .u-search__content input {


		background-color: transparent !important;
	}
</style>
5.2 纯手写搜索(包括搜索、搜索记录、热门搜索)
1.实现效果
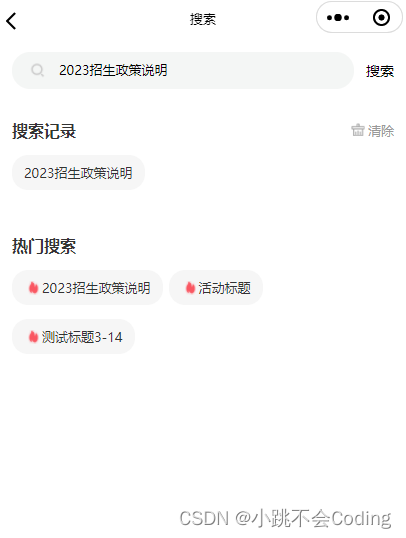
2.具体代码:
扫描二维码关注公众号,回复:
14766055 查看本文章

<template>
	<view class="uni_search">
		<view class="search">
			<view class="search_box">
				<input class="search_input" type="text" v-model.trim="keywords" placeholder="搜索关键词..."
					placeholder-style="font-size: 24rpx;color:#999999;" />
			</view>
			<view class="search_close" @click="inputFun">搜索</view>
		</view>

		<view class="history" v-if="is_searchcon == 0">
			<view class="history_top">
				<view class="history_top_row">
					<view class="history_title">
						搜索记录
					</view>
					<view  @click="clearHistory()">
						<image :src="localImgSrc('[email protected]')"></image>
						清除
					</view>
				</view>

			</view>
			<view class="history_con">
				<view class="history_con_li" v-for="(itemH,indexH) in searchHistory" :key='indexH'>
					<view class="" @tap="history_li(itemH)">
						{

   {itemH}}
					</view>
				</view>
				<view class="zanwu" v-if="searchHistory == ''">暂无搜索历史</view>
			</view>
		</view>
		<view class="hot_search">
			<view class="history_top">
				<view class="history_title">
					热门搜索
				</view>
			</view>
			<view class="history_con">
				<view class="history_con_li history_con_li_hot" v-for="(item,index) in hotsearch" :key='index'>
					<view class="" @tap="history_li(item.title)">
						<image class="hotimg" :src="localImgSrc('[email protected]')"></image>{

   {item.title}}
					</view>
				</view>
			</view>
		</view>
	</view>
</template>

<script>
	export default {


		data() {


			return {


				keywords: '', //关键词
				isSearch: false, //是否搜索
				hotsearch: [], //热门搜索内容
				is_searchcon: 0, //是否存在搜索内容  1是0否
				searchContent: [], //搜索结果内容
				searchHistory: [] ,//搜索历史
			}
		},

		onLoad() {


			this.getHotSearch()
			//在缓存里取到历史数据
			this.searchHistory = JSON.parse(uni.getStorageSync('searchLocal'));
		},
		onShow(){


			this.is_searchcon = 0
		},
		methods: {


			//点击搜索
			inputFun() {


				var that = this;
				if (that.keywords == '') {


					uni.showToast({


						title: '请输入搜索内容',
						icon: 'none'
					})
					that.is_searchcon = 0;
				} else {


					that.is_searchcon = 1;
					uni.navigateTo({


						url:'/pages/home/searchResult?keywords=' + that.keywords
					})
					//搜索历史存入缓存
					var s = 0; //判断有无重复  0无
					this.searchHistory.forEach((item, index) => {


						if (item == this.keywords) {


							s++
							this.searchHistory.splice(index, 1);
							this.searchHistory.unshift(this.keywords)
						}
					})
					if (s == 0) {


						this.searchHistory.unshift(this.keywords)
					}
					//只获取搜索历史的前20个显示
					uni.setStorageSync('searchLocal', JSON.stringify(this.searchHistory.slice(0, 20)));
				}
			},


			//点击搜索历史里的内容(点击热门搜索里的某一条)
			history_li(keyword) {


				var that = this;
				that.keywords = keyword;
				//搜索结果接口
				that.inputFun();
			},

			//清空历史搜索
			clearHistory() {


				this.searchHistory = []
				uni.setStorageSync('searchLocal', '');
			},

			//热门搜索接口
			getHotSearch() {


				var that = this;
				this.$api.appPlateForm('POST', this.$url.hot_search, '', function(res) {


					that.hotsearch = res.data
				})
			},
		}
	}
</script>

<style>
	.uni_search {


		padding: 0 30rpx;
		box-sizing: border-box;
		height: 100%;
		overflow: hidden;
	}

	.search {


		margin-top: 20rpx;
		margin-bottom: 60rpx;
		width: 100%;
		height: 68rpx;
		display: flex;
		align-items: center;
		justify-content: space-between;
	}

	.search_box {


		background-color: #F4F6F5;
		width: 620rpx;
		height: 68rpx;
		border-radius: 68rpx;
		padding-left: 86rpx;
		box-sizing: border-box;
		background-image: url(https://qqh.qqbd.vip/static/index/head/[email protected]);
		background-repeat: no-repeat;
		background-position: 30rpx center;
		background-size: 36rpx 36rpx;
	}

	.search_input {


		width: 100%;
		height: 66rpx;
		line-height: 66rpx;
		font-size: 24rpx;
	}

	.search_close {


		font-size: 26rpx;
	}


	.history {


		margin-bottom: 60rpx;
	}

	.history_top {


		display: flex;
		align-items: center;
		justify-content: space-between;
		height: 30rpx;
		margin-bottom: 32rpx;
	}


	.history_con {


		display: flex;
		flex-wrap: wrap;
	}

	.history_con_li {


		width: auto;
		height: auto;
		background: #F6F6F6;
		border-radius: 30rpx;
		padding: 18rpx 23rpx;
		font-size: 24rpx;
		font-weight: 500;
		color: #333333;
		margin-right: 12rpx;
		margin-bottom: 26rpx;
	}

	.history_con_li_hot {


		display: flex;
		align-items: center;
	}

	.history_con_li_hot image {


		width: 21rpx;
		height: 27rpx;
		margin-left: 8rpx;
	}
	.history_top_row{


		display: flex;
		align-items: center;
		justify-content: space-between;width: 100%;
		font-size: 24rpx;
		font-weight: 500;
		color: #999999;
	}
	.history_top_row image{


		width: 30rpx;
		height: 30rpx;
		margin-right: 4rpx;
	}
	.history_top_row>view{


		display: flex;
		align-items: center;
	}
	.history_title {


		font-size: 30rpx;
		font-weight: bold;
		color: #333333;
	}
	.hotimg{


		width: 30rpx;
		height: 30rpx;
		margin-right: 6rpx;
	}
	.history_con_li_hot>view{


		display: flex;
		align-items: center;
	}
	.zanwu {


		color: #333333;
		font-size: 24rpx;
		text-align: center;
		width: 100%;
	}
</style>
六、滚动加载
1.实现效果:
2.实现代码:
<template>
	<view class="home_content">
		<!--从接口获取到数据列表-->
		<view class="solutionList">
			<view class="item" v-for="(item,index) in classList" :key="index" @click="todetail(item.id)">
				<view class="titbox">
					<view class="tit">{

   {item.title}}</view>
					<view class="join">{

   {item.create_time}}</view>
				</view>
				<image :src="hostUrl+item.image"></image>
			</view>
		</view>
		<!--滚动加载-->
		<u-loadmore :status="status" v-if="classList.length>=limit" />
	</view>
</template>

<script>
	export default {


		data() {


			return {


				page: 1,
				limit: 5,//滚动加载需要传递page和limit
				classList: [],   //数据列表
				status: 'loading',   //滚动加载的状态
			}
		},
		mounted() {


			this.getListFun()
		},
		//滚动加载时-触发
		onReachBottom() {


			this.lower()
		},
		methods: {


			// 获取接口的列表数据
			getListFun() {


				var that = this
				var data = {


					page: that.page, //	1	是	string	页数
					limit: that.limit, //	10	是	string	条数
				}
				this.$api.appPlateForm('POST', this.$url.class_index, data, function(res) {


					that.classList = res.data;
					that.page++
					if (that.classList.length < that.limit) {


						that.status = 'nomore'
					}
				})
			},
			//滚动加载时触发
			lower() {


				var that = this;
				this.$api.appPlateForm('POST', this.$url.class_index, {


					page: that.page, //	1	是	string	页数
					limit: that.limit, //	10	是	string	条数
				}, function(res) {


					if (res.data instanceof Array && res.data.length > 0) {


						that.page++
						setTimeout(() => {


							that.classList = that.classList.concat(res.data)
							that.status = 'loading';
						}, 1000)
					} else {


						setTimeout(() => {


							that.status = 'nomore'
						}, 1000)
					}
				})
			},
		}
	}
</script>
七、一键导航
1.效果
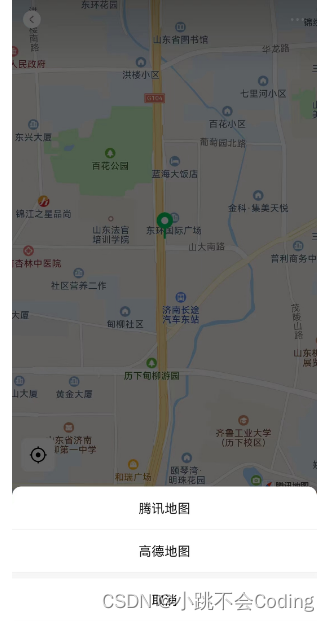
2.具体代码:
<view class="item" @click="addressFun">【一键导航】</view>
<script>
	// 导航
	addressFun(){


		var that = this;
		uni.openLocation({


			//注意   这里的经纬度必须是浮点数,所以如果没换起地图(如果是字符串 请转成 浮点数再使用)
			// 浮点数转字符串  parseFloat()
			latitude: parseFloat(that.info.latitude),
			longitude: parseFloat(that.info.longitude),
			success: function () {


				console.log('success');
			}
		});
	},
</script>
八、解决uniapp input 被键盘遮挡、将键盘右下角按钮设置为 “发送” 键
1.问题:

2.解决方式:
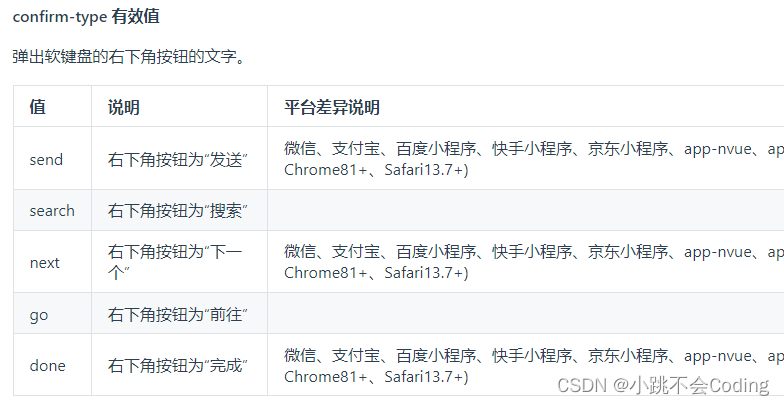
①confirm-type=“send” ——弹出软键盘的右下角按钮的文字
② 解决input 被键盘遮挡:
在输入框加上class=“uni-input” 和cursor-spacing=“0”(一定要两个一起加上,不然还是会挡住部分的)
cursor-spacing指定光标与键盘的距离,单位 px 。
3.具体代码:
<input type="text"
placeholder="说点什么吧"
@confirm="doSearch"
v-model="bottomInputvalue"

confirm-type="send"
class="uni-input"  cursor-spacing="15"
/>
九、循环渲染接口返回的图片数组
1.实现效果
(将右侧接口返回的图片字符串,循环渲染到左侧区域)
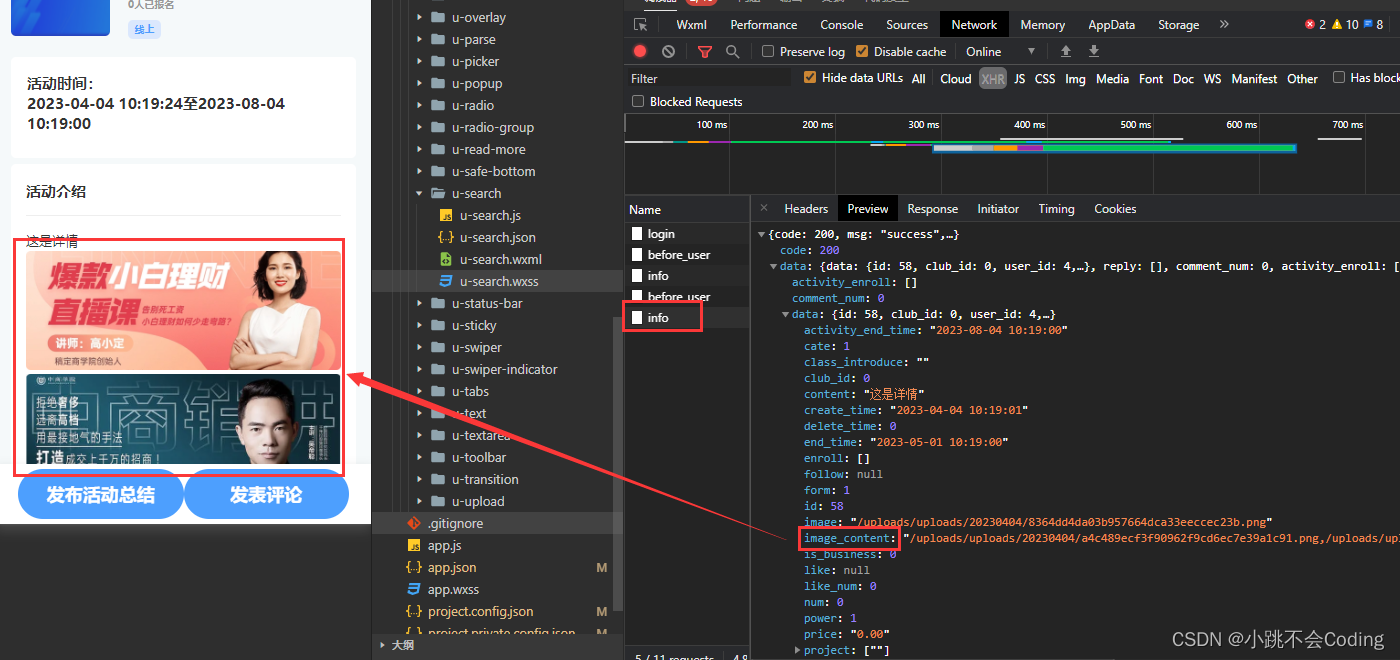
2.实现代码:
<view v-if="info.data.image_content">
	<image :src="baseUrl+item" v-for="(item,index) in info.data.image_content.split(',')"
			mode="widthFix" style="max-width: 100%;max-height: 100%;">
	</image>
</view>

<script>
	//js部分-- 获取详情内容
	initFun() {


		var that = this;
		this.$api.appPlateForm('POST', this.$url.activityinfo, {


			id: this.id
		}, function(res) {


			that.info = res.data;
		})
	},
</script>