Unity 进阶 之 AR/VR 3D场景中Laser镭射线拖拽UI实现问题的简单整理
目录
Unity 进阶 之 AR/VR 3D场景中Laser镭射线拖拽UI实现问题的简单整理
一、简单介绍
Unity中的一些知识点整理。
本节简单介绍在Unity开发中的,在AR/VR 开发中,有时候需要在 3D 空间进行 UI 元素的拖拽功能,或者即把UI元素从一个面板位置拖拽到另一个面板位置,有时候Laser 镭射线拖拽 UI 元素,不小心拖出屏幕的时候,常规的拖拽操作就会出现位置错误,如果您也遇到了类似情况,这里提供一个简单思路方法,提供参考,如果你有新的方式也可以留言,多谢。
二、实现原理
1、常规的 UI 拖拽功能,一般使用 RectTransformUtility.ScreenPointToWorldPointInRectangle 或者 RectTransformUtility.ScreenPointToLocalPointInRectangle 进行位置的计算
1、RectTransformUtility.ScreenPointToWorldPointInRectangle(this.gameObject.GetComponent<RectTransform>(), eventData.position, eventData.enterEventCamera, out pos);

2、RectTransformUtility.ScreenPointToLocalPointInRectangle(m_canvsGo.GetComponent<RectTransform>(), eventData.position, eventData.enterEventCamera, out pos);
2、3D 空间场景(AR/VR)中的 UI 拖拽,一般常规功能也可以适用,这里介绍使用 Laser 镭射线交互得到的 eventData.position 转为世界坐标的位置赋值给 UI 使用,来实现 3D 空间场景(AR/VR)中的 UI 拖拽
        Vector3 pos = eventData.position;
        pos.z = 1080;
        this.transform.position = Camera.main.ScreenToWorldPoint(pos) + m_OffsetPos;
三、注意事项
1、拖拽 UI 的 时候,为了避免移动的突兀,在开始移动的时候注意添加一个移动偏差值,在正式移动的时候做位置赋值的时候注意添加上偏移量,其中 pos.z 的数值是, Canvas 位置 z 相对Camera 位置的 z (默认camera 位置 Vector.zero 方向朝前z,Canvas 在 z 向位置)
1、移动开始时计算出移动偏差值
        Vector3 pos = eventData.position;
        pos.z = 1080;
        m_OffsetPos = this.transform.position - Camera.main.ScreenToWorldPoint(pos);
2、移动的时候添加上移动的偏差值
        Vector3 pos = eventData.position;
        pos.z = 1080;
        this.transform.position = Camera.main.ScreenToWorldPoint(pos) + m_OffsetPos;
四、效果预览


五、简单实现步骤
常规拖拽
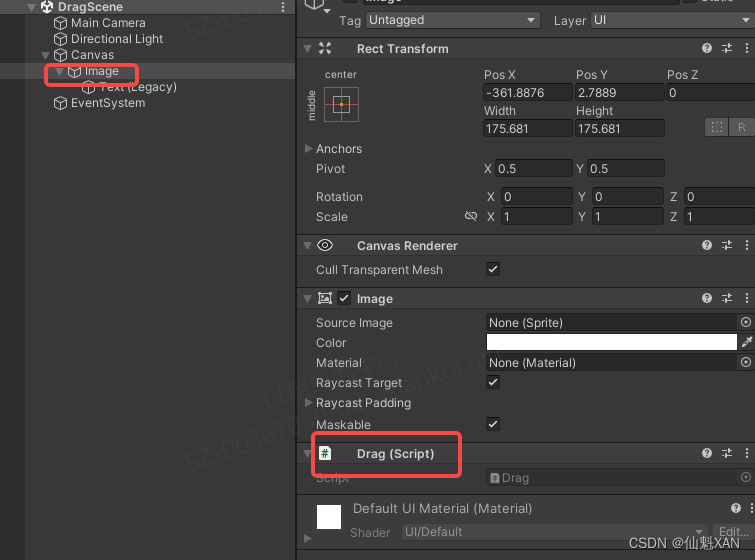
1、打开 Unity 创建场景,在 场景中添加移动的 UI -Image
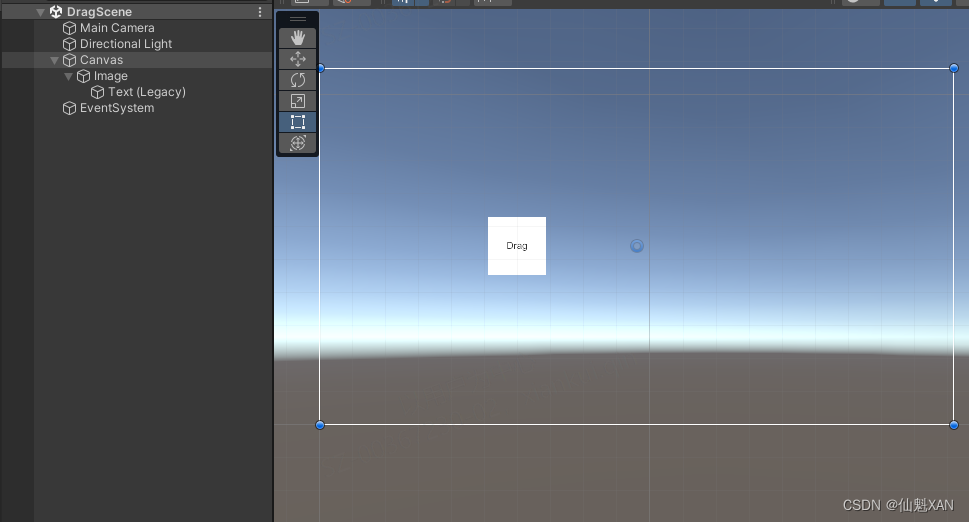
2、创建脚本,实现 Image 常规的拖拽功能
3、把脚本挂载到场景 Image 上
4、运行场景,效果如图

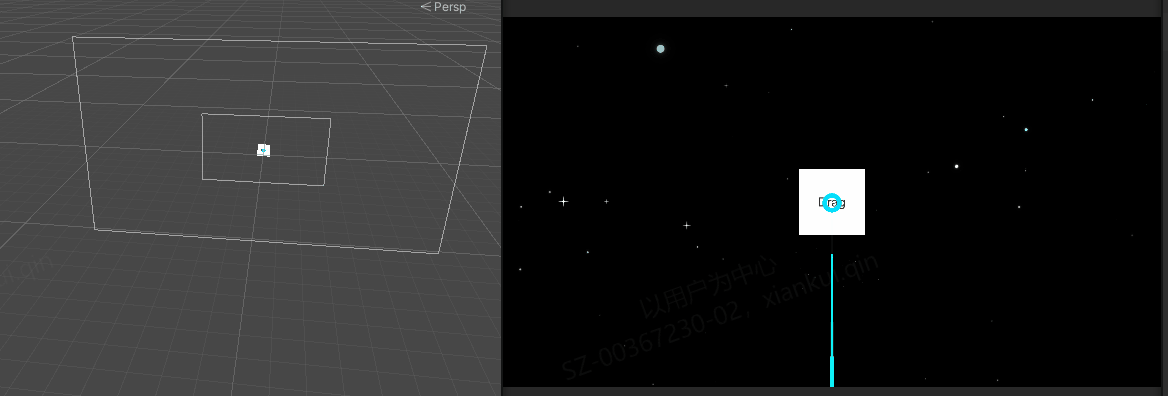
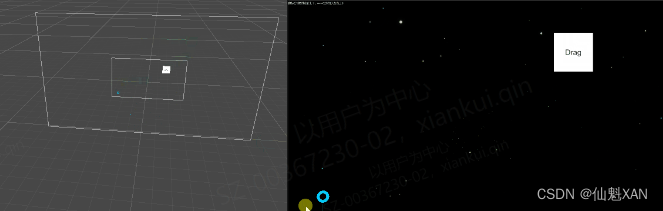
常规拖拽在3D空间拖拽位置跳动问题
5、切换到 3D 空间场景中,使用Laser镭射线,代替鼠标交互移动 UI Image,效果如图
(Laser镭射线交互当,不小心移动到屏幕外,常规的拖拽移动UI的方法会出现位置跳动)
解决常规拖拽在3D空间拖拽位置跳动问题的简单方法
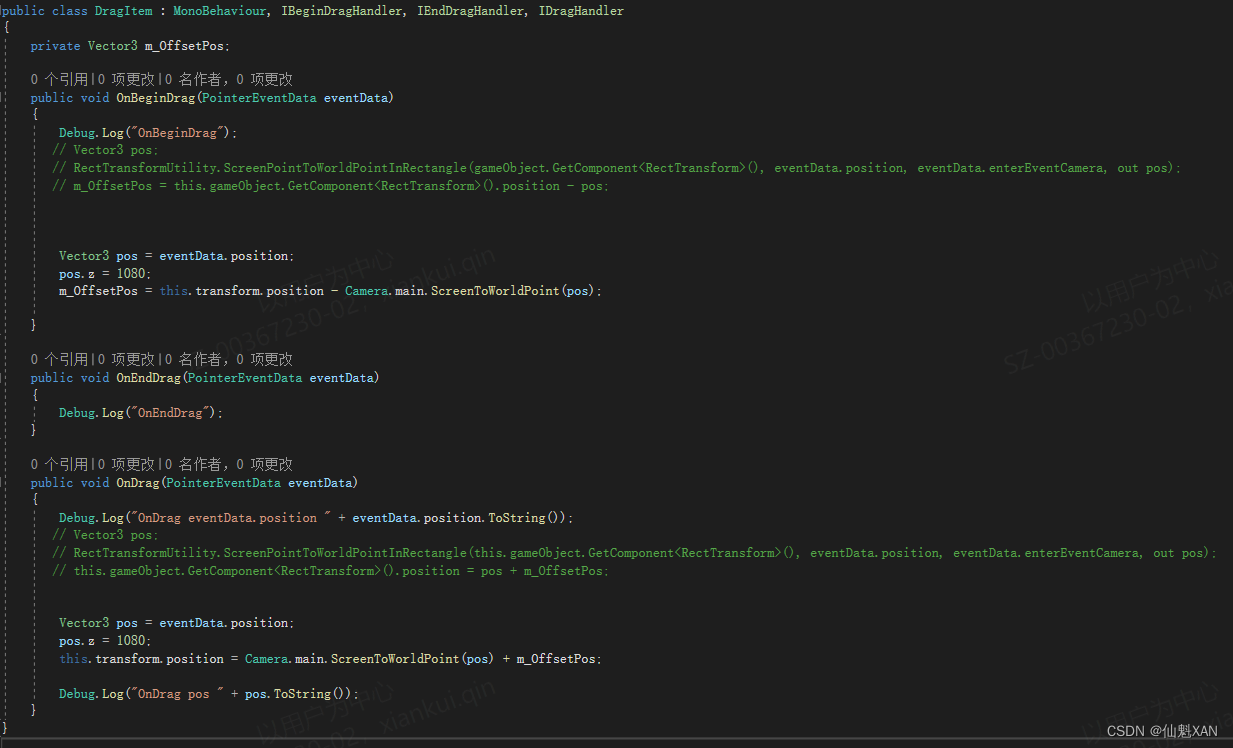
6、根据常规拖拽出现的位置跳动问题,这里使用把获取到的 eventData.position 转为 世界坐标赋值给移动 UI - Image ,代码如下
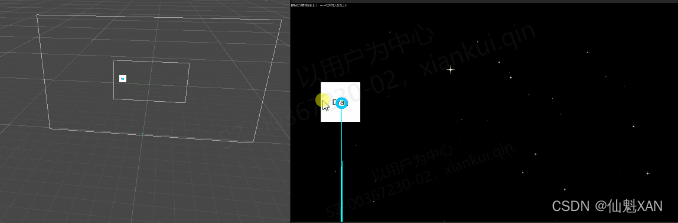
7、在 3D 空间场景中,使用Laser镭射线交互,效果如下
六、关键代码
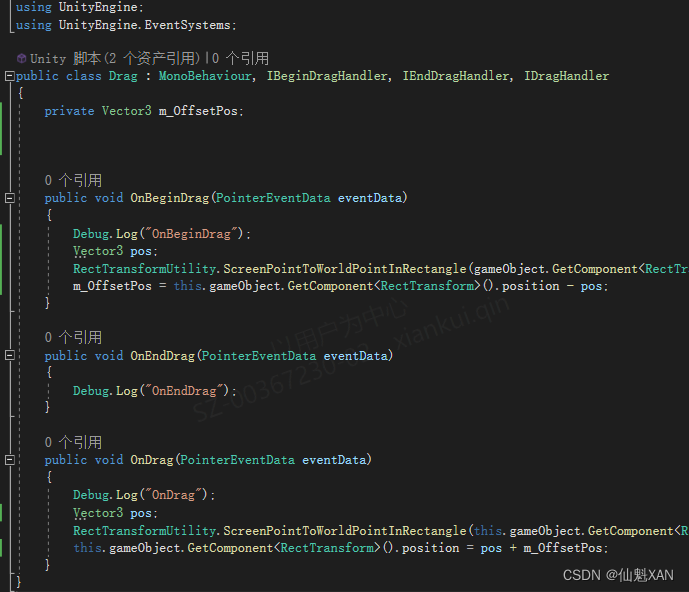
1、Drag.cs
using UnityEngine;
using UnityEngine.EventSystems;

public class Drag : MonoBehaviour, IBeginDragHandler, IEndDragHandler, IDragHandler
{
    private Vector3 m_OffsetPos;


    public void OnBeginDrag(PointerEventData eventData)
    {
        Debug.Log("OnBeginDrag");
        Vector3 pos;
        RectTransformUtility.ScreenPointToWorldPointInRectangle(gameObject.GetComponent<RectTransform>(), eventData.position, eventData.enterEventCamera, out pos);
        m_OffsetPos = this.gameObject.GetComponent<RectTransform>().position - pos;
    }

    public void OnEndDrag(PointerEventData eventData)
    {
        Debug.Log("OnEndDrag");
    }

    public void OnDrag(PointerEventData eventData)
    {
        Debug.Log("OnDrag");
        Vector3 pos;
        RectTransformUtility.ScreenPointToWorldPointInRectangle(this.gameObject.GetComponent<RectTransform>(), eventData.position, eventData.enterEventCamera, out pos);
        this.gameObject.GetComponent<RectTransform>().position = pos + m_OffsetPos;
    }
}
2、DragItem
using UnityEngine;
using UnityEngine.EventSystems;

public class DragItem : MonoBehaviour, IBeginDragHandler, IEndDragHandler, IDragHandler
{
    private Vector3 m_OffsetPos;

    public void OnBeginDrag(PointerEventData eventData)
    {
        Debug.Log("OnBeginDrag");
        // 方法一:
        //Vector3 pos;
        //RectTransformUtility.ScreenPointToWorldPointInRectangle(gameObject.GetComponent<RectTransform>(), eventData.position, eventData.enterEventCamera, out pos);
        //m_OffsetPos = this.gameObject.GetComponent<RectTransform>().position - pos;

        // 方法二:略有问题,暂时不用
        //Vector2 pos;
        //RectTransformUtility.ScreenPointToLocalPointInRectangle(gameObject.GetComponent<RectTransform>(), eventData.position, eventData.enterEventCamera, out pos);
        //Vector3 tmp = this.gameObject.GetComponent<RectTransform>().position;
        //m_OffsetPos.x = tmp.x - pos.x;
        //m_OffsetPos.y = tmp.y - pos.y;
        //m_OffsetPos.z = tmp.z;

        // 方法三:
        Vector3 pos = eventData.position;
        pos.z = 1080; // 根据 Canvas 与 Camera 实际距离赋值
        m_OffsetPos = this.transform.position - Camera.main.ScreenToWorldPoint(pos);

    }

    public void OnEndDrag(PointerEventData eventData)
    {
        Debug.Log("OnEndDrag");
    }

    public void OnDrag(PointerEventData eventData)
    {
        // 方法一:
        //Debug.Log("OnDrag eventData.position " + eventData.position.ToString());
        //Vector3 pos;
        //RectTransformUtility.ScreenPointToWorldPointInRectangle(this.gameObject.GetComponent<RectTransform>(), eventData.position, eventData.enterEventCamera, out pos);
        //this.gameObject.GetComponent<RectTransform>().position = pos + m_OffsetPos;

        // 方法二:略有问题,暂时不用
        //Vector2 pos;
        //RectTransformUtility.ScreenPointToLocalPointInRectangle(gameObject.GetComponent<RectTransform>(), eventData.position, eventData.enterEventCamera, out pos);
        //this.gameObject.GetComponent<RectTransform>().position = new Vector3(pos.x+m_OffsetPos.x,pos.y+m_OffsetPos.y,m_OffsetPos.z);

        // 方法三:
        Vector3 pos = eventData.position;
        pos.z = 1080;// 根据 Canvas 与 Camera 实际距离赋值
        this.transform.position = Camera.main.ScreenToWorldPoint(pos) + m_OffsetPos;

        Debug.Log("OnDrag pos " + pos.ToString());
    }
}