一、PyTorch生态简介
- Python package极大的方便了PyTorch在特定领域的使用;
- 计算机视觉:
TorchVision、TorchVideo等用于图片和视频处理; - 自然语言处理:
torchtext; - 图卷积网络:
PyTorch Geometric;等等。 - 特定领域使用PyTorch生态中的工具包,能够极大地降低入门门槛,方便复现已有的工作
1. 图像 - torchvision
(1)简介
包含了在计算机视觉中常常用到的数据集,模型和图像处理的方式,具体包括:
torchvision.datasets*torchvision.models*torchvision.tramsforms*torchvision.iotorchvision.opstorchvision.utils
以下对常用库进行简单介绍(标 “*” 的库)
(2)torchvision.datasets
主要包含了计算机视觉中常见的数据集:
# 在终端或者jupyter notebook中查看数据集
from torchvision import datasets
dir(datasets)
如下:
['CIFAR10', 'CIFAR100', 'CLEVRClassification', 'Caltech101', 'Caltech256', 'CelebA', 'Cityscapes', 'CocoCaptions',
'CocoDetection', 'Country211', 'DTD', 'DatasetFolder', 'EMNIST', 'EuroSAT', 'FER2013', 'FGVCAircraft',
'FakeData', 'FashionMNIST', 'Flickr30k', 'Flickr8k', 'Flowers102', 'FlyingChairs', 'FlyingThings3D', 'Food101',
'GTSRB', 'HD1K', 'HMDB51', 'INaturalist', 'ImageFolder', 'ImageNet', 'KMNIST', 'Kinetics',
'Kinetics400', 'Kitti', 'KittiFlow', 'LFWPairs', 'LFWPeople', 'LSUN', 'LSUNClass', 'MNIST',
'Omniglot', 'OxfordIIITPet', 'PCAM', 'PhotoTour', 'Places365', 'QMNIST', 'RenderedSST2', 'SBDataset',
'SBU', 'SEMEION', 'STL10', 'SUN397', 'SVHN', 'Sintel', 'StanfordCars', 'UCF101',
'USPS', 'VOCDetection', 'VOCSegmentation', 'VisionDataset', 'WIDERFace', '__all__', '__builtins__', '__cached__',
'__doc__', '__file__', '__loader__', '__name__', '__package__', '__path__', '__spec__', '_optical_flow',
'caltech', 'celeba', 'cifar', 'cityscapes', 'clevr', 'coco', 'country211', 'dtd',
'eurosat', 'fakedata', 'fer2013', 'fgvc_aircraft', 'flickr', 'flowers102', 'folder', 'food101',
'gtsrb', 'hmdb51', 'imagenet', 'inaturalist', 'kinetics', 'kitti', 'lfw', 'lsun',
'mnist', 'omniglot', 'oxford_iiit_pet', 'pcam', 'phototour', 'places365', 'rendered_sst2', 'sbd',
'sbu', 'semeion', 'stanford_cars', 'stl10', 'sun397', 'svhn', 'ucf101', 'usps',
'utils', 'video_utils', 'vision', 'voc', 'widerface']
(2)torchvision.tramsforms
包含了许多数据预处理和数据增强的方法。
# 第(二)部分 Fashion-MNIST 实战对数据预处理时用到的:
from torchvision import transforms
data_transform = transforms.Compose([
    transforms.ToPILImage(),   # 这一步取决于后续的数据读取方式,如果使用内置数据集则不需要
    transforms.Resize(image_size),
    transforms.ToTensor()
])
(3)torchvision.models
PyTorch官方提供的一些预训练好的模型
查看这些模型:
from torchvision import models
dir(models)
如下:
['AlexNet', 'AlexNet_Weights', 'ConvNeXt', 'ConvNeXt_Base_Weights', 'ConvNeXt_Large_Weights',
'ConvNeXt_Small_Weights', 'ConvNeXt_Tiny_Weights', 'DenseNet', 'DenseNet121_Weights',
'DenseNet161_Weights', 'DenseNet169_Weights', 'DenseNet201_Weights', 'EfficientNet', 'EfficientNet_B0_Weights',
'EfficientNet_B1_Weights', 'EfficientNet_B2_Weights', 'EfficientNet_B3_Weights', 'EfficientNet_B4_Weights',
'EfficientNet_B5_Weights', 'EfficientNet_B6_Weights', 'EfficientNet_B7_Weights', 'EfficientNet_V2_L_Weights',
'EfficientNet_V2_M_Weights', 'EfficientNet_V2_S_Weights', 'GoogLeNet', 'GoogLeNetOutputs',
'GoogLeNet_Weights', 'Inception3', 'InceptionOutputs', 'Inception_V3_Weights', 'MNASNet', 'MNASNet0_5_Weights',
'MNASNet0_75_Weights', 'MNASNet1_0_Weights', 'MNASNet1_3_Weights', 'MobileNetV2', 'MobileNetV3',
'MobileNet_V2_Weights', 'MobileNet_V3_Large_Weights', 'MobileNet_V3_Small_Weights', 'RegNet',
'RegNet_X_16GF_Weights', 'RegNet_X_1_6GF_Weights', 'RegNet_X_32GF_Weights',
'RegNet_X_3_2GF_Weights', 'RegNet_X_400MF_Weights', 'RegNet_X_800MF_Weights', 'RegNet_X_8GF_Weights',
'RegNet_Y_128GF_Weights', 'RegNet_Y_16GF_Weights', 'RegNet_Y_1_6GF_Weights', 'RegNet_Y_32GF_Weights',
'RegNet_Y_3_2GF_Weights', 'RegNet_Y_400MF_Weights', 'RegNet_Y_800MF_Weights', 'RegNet_Y_8GF_Weights',
'ResNeXt101_32X8D_Weights', 'ResNeXt101_64X4D_Weights', 'ResNeXt50_32X4D_Weights', 'ResNet', 'ResNet101_Weights',
'ResNet152_Weights', 'ResNet18_Weights', 'ResNet34_Weights', 'ResNet50_Weights', 'ShuffleNetV2',
'ShuffleNet_V2_X0_5_Weights', 'ShuffleNet_V2_X1_0_Weights', 'ShuffleNet_V2_X1_5_Weights',
'ShuffleNet_V2_X2_0_Weights', 'SqueezeNet', 'SqueezeNet1_0_Weights', 'SqueezeNet1_1_Weights',
'SwinTransformer', 'Swin_B_Weights', 'Swin_S_Weights', 'Swin_T_Weights', 'VGG', 'VGG11_BN_Weights',
'VGG11_Weights', 'VGG13_BN_Weights', 'VGG13_Weights', 'VGG16_BN_Weights', 'VGG16_Weights',
'VGG19_BN_Weights', 'VGG19_Weights', 'ViT_B_16_Weights', 'ViT_B_32_Weights', 'ViT_H_14_Weights',
'ViT_L_16_Weights', 'ViT_L_32_Weights', 'VisionTransformer', 'Wide_ResNet101_2_Weights',
'Wide_ResNet50_2_Weights', '_GoogLeNetOutputs', '_InceptionOutputs', '__builtins__', '__cached__', '__doc__',
'__file__', '__loader__', '__name__', '__package__', '__path__', '__spec__', '_api', '_meta', '_utils',
'alexnet', 'convnext', 'convnext_base', 'convnext_large', 'convnext_small', 'convnext_tiny',
'densenet', 'densenet121', 'densenet161', 'densenet169', 'densenet201', 'detection', 'efficientnet',
'efficientnet_b0', 'efficientnet_b1', 'efficientnet_b2', 'efficientnet_b3', 'efficientnet_b4',
'efficientnet_b5', 'efficientnet_b6', 'efficientnet_b7', 'efficientnet_v2_l', 'efficientnet_v2_m',
'efficientnet_v2_s', 'get_weight', 'googlenet', 'inception', 'inception_v3', 'mnasnet', 'mnasnet0_5',
'mnasnet0_75', 'mnasnet1_0', 'mnasnet1_3', 'mobilenet', 'mobilenet_v2', 'mobilenet_v3_large',
'mobilenet_v3_small', 'mobilenetv2', 'mobilenetv3', 'optical_flow', 'quantization', 'regnet', 'regnet_x_16gf',
'regnet_x_1_6gf', 'regnet_x_32gf', 'regnet_x_3_2gf', 'regnet_x_400mf', 'regnet_x_800mf',
'regnet_x_8gf', 'regnet_y_128gf', 'regnet_y_16gf', 'regnet_y_1_6gf', 'regnet_y_32gf',
'regnet_y_3_2gf', 'regnet_y_400mf', 'regnet_y_800mf', 'regnet_y_8gf', 'resnet', 'resnet101', 'resnet152',
'resnet18', 'resnet34', 'resnet50', 'resnext101_32x8d', 'resnext101_64x4d', 'resnext50_32x4d',
'segmentation', 'shufflenet_v2_x0_5', 'shufflenet_v2_x1_0', 'shufflenet_v2_x1_5', 'shufflenet_v2_x2_0',
'shufflenetv2', 'squeezenet', 'squeezenet1_0', 'squeezenet1_1', 'swin_b', 'swin_s', 'swin_t', 'swin_transformer',
'vgg', 'vgg11', 'vgg11_bn', 'vgg13', 'vgg13_bn', 'vgg16', 'vgg16_bn', 'vgg19', 'vgg19_bn', 'video',
'vision_transformer', 'vit_b_16', 'vit_b_32', 'vit_h_14', 'vit_l_16', 'vit_l_32', 'wide_resnet101_2',
'wide_resnet50_2']
注:
- 模型主要分为4类:
- Classification
- Semantic Segmentation
- Object Detection,Imstance Segmentation and Person Keypoint Detection
- Video Classification
- Classification类中模型的预训练数据集都是
ImageNet数据集,输入图片都是3通道的,并且要求输入图片的宽高不小于224像素,并且要求输入图片像素值的范围在0到1之间,然后做一个normalization标准化[2]
(4)torchvision.io
- 提供了视频、图片和文件的 IO 操作的功能,包括读取、写入、编解码处理操作
- 不同版本之间,
torchvision.io有着较大变化 - 除了
read_video()等方法,torchvision.io还提供了一个细粒度的视频APItorchvision.io.VideoReader(),它具有更高的效率并且更加接近底层处理。使用时,需要先安装ffmpeg然后从源码重新编译torchvision才能使用这些方法 - 使用Video相关API时,提前安装好
PyAV库
(5)torchvision.ops
- 提供了许多计算机视觉的特定操作,包括但不限于
NMS,RoIAlign(MASK R-CNN中应用的一种方法),RoIPool(Fast R-CNN中用到的一种方法)
(6)torchvision.utils
- 提供了一些可视化的方法,可以查看将若干张图片拼接在一起、可视化检测和分割的效果
2. 视频 - PyTorchVideo

PyTorchVideo是一个专注于视频理解工作的深度学习库PytorchVideo提供了加速视频理解研究所需的可重用、模块化和高效的组件PytorchVideo提供了model zoo,使得人们可以使用各种先进的预训练视频模型及其评判基准- 基于 PyTorch:使用 PyTorch 构建。使所有 PyTorch 生态系统组件的使用变得容易
Model Zoo:PyTorchVideo提供了包含I3D、R(2+1)D、SlowFast、X3D、MViT等SOTA模型的高质量model zoo,并且PyTorchVideo的model zoo调用与PyTorch Hub做了整合,大大简化模型调用- 数据预处理和常见数据,
PyTorchVideo支持Kinetics-400, Something-Something V2, Charades, Ava (v2.2), Epic Kitchen, HMDB51, UCF101, Domsev等主流数据集和相应的数据预处理,同时还支持randaug, augmix等数据增强trick - 模块化设计:
PyTorchVideo的设计类似于torchvision,也是提供许多模块方便用户调用修改,在PyTorchVideo中具体来说包括data, transforms, layer, model, accelerator等模块,方便用户进行调用和读取 - 支持多模态:
PyTorchVideo现在对多模态的支持包括了visual和audio,未来会支持更多模态,为多模态模型的发展提供支持 - 移动端部署优化:
PyTorchVideo支持针对移动端模型的部署优化(使用前述的PyTorchVideo/accelerator模块),模型经过PyTorchVideo优化了最高达7倍的提速,并实现了第一个能实时跑在手机端的X3D模型
(1)安装
pip install pytorchvideo

注:
- 安装的虚拟环境的python版本 >= 3.7(我的是3.7版本)
- PyTorch >= 1.8.0,安装的torchvision也需要匹配(我的pytorch版本1.12)
- CUDA >= 10.2(我的CUDA是11.6版本)
(2)使用
PyTorchVideo提供了三种使用方法,并且给每一种都配备了tutorial:
TorchHub,模型都已经在TorchHub存在PySlowFast,使用PySlowFast workflow去训练或测试PyTorchVideo models/datasetsPyTorch Lightning建立一个工作流进行处理
3. 文本 - torchtext
torchtext:PyTorch官方用于自然语言处理(NLP)的工具包torchtext和torchvision等CV相关工具包的一些功能上的差异:- 数据集(dataset)定义方式不同
- 数据预处理工具
- 没有琳琅满目的
model zoo
torchtext可以方便的对文本进行预处理,如截断补长、构建词表等。主要包含以下组成部分:- 数据处理工具
torchtext.data.functional、torchtext.data.utils - 数据集
torchtext.data.datasets - 词表工具
torchtext.vocab - 评测指标
torchtext.metrics
- 数据处理工具
- NLP常用的网络结构比较固定,
torchtext并不像torchvision那样提供一系列常用的网络结构。模型主要通过torch.nn中的模块来实现,如torch.nn.LSTM、torch.nn.RNN等。
(1)安装
pip install torchtext

(2)构建数据集
1)Field及其使用
Field是torchtext中定义数据类型以及转换为张量的指令- 定义
Field对象是为了明确如何处理不同类型的数据,但具体的处理则是在Dataset中完成
# 构建Field
tokenize = lambda x: x.split()
TEXT = data.Field(sequential=True, tokenize=tokenize, lower=True, fix_length=200)
LABEL = data.Field(sequential=False, use_vocab=False)
注:
-
sequential设置数据是否是顺序表示的 tokenize用于设置将字符串标记为顺序实例的函数lower设置是否将字符串全部转为小写fix_length设置此字段所有实例都将填充到一个固定的长度,方便后续处理use_vocab设置是否引入Vocab object,如果为False,则需要保证之后输入field中的data都是numerical的
# 构建dataset
from torchtext import data
def get_dataset(csv_data, text_field, label_field, test=False):
    fields = [("id", None), # we won't be needing the id, so we pass in None as the field
                 ("comment_text", text_field), ("toxic", label_field)]
    examples = []

    if test:
        # 如果为测试集,则不加载label
        for text in tqdm(csv_data['comment_text']):
            examples.append(data.Example.fromlist([None, text, None], fields))
    else:
        for text, label in tqdm(zip(csv_data['comment_text'], csv_data['toxic'])):
            examples.append(data.Example.fromlist([None, text, label], fields))
    return examples, fields
csv_data中有comment_text和toxic两列,分别对应text和label。
train_data = pd.read_csv('train_toxic_comments.csv')
valid_data = pd.read_csv('valid_toxic_comments.csv')
test_data = pd.read_csv("test_toxic_comments.csv")
TEXT = data.Field(sequential=True, tokenize=tokenize, lower=True)
LABEL = data.Field(sequential=False, use_vocab=False)

# 得到构建Dataset所需的examples和fields
train_examples, train_fields = get_dataset(train_data, TEXT, LABEL)
valid_examples, valid_fields = get_dataset(valid_data, TEXT, LABEL)
test_examples, test_fields = get_dataset(test_data, TEXT, None, test=True)
# 构建Dataset数据集
train = data.Dataset(train_examples, train_fields)
valid = data.Dataset(valid_examples, valid_fields)
test = data.Dataset(test_examples, test_fields)
定义Field对象完成后,通过get_dataset函数可以读入数据的文本和标签,将二者连同field一起送到torchtext.data.Dataset类中,即可完成数据集的构建
# 检查keys是否正确
print(train[0].__dict__.keys())
print(test[0].__dict__.keys())
# 抽查内容是否正确
print(train[0].comment_text)
2)词汇表(vocab)
- NLP中,将字符串形式的词语(word)转变为数字形式的向量表示(embedding)是非常重要的一步,被称为Word Embedding
- Word Embedding 的基本思想是收集一个比较大的语料库(尽量与所做的任务相关),在语料库中使用
word2vec之类的方法构建词语到向量(或数字)的映射关系,之后将这一映射关系应用于当前的任务,将句子中的词语转为向量表示 torchtext中可以使用Field自带的build_vocab函数完成词汇表构建:
TEXT.build_vocab(train)
3)数据迭代器
torchtext支持只对一个dataset和同时对多个dataset构建数据迭代器。相当于torchtext中的DataLoader:
from torchtext.data import Iterator, BucketIterator
# 若只针对训练集构造迭代器
# train_iter = data.BucketIterator(dataset=train, batch_size=8, shuffle=True, sort_within_batch=False, repeat=False)

# 同时对训练集和验证集进行迭代器的构建
train_iter, val_iter = BucketIterator.splits(
        (train, valid), # 构建数据集所需的数据集
        batch_sizes=(8, 8),
        device=-1, # 如果使用gpu,此处将-1更换为GPU的编号
        sort_key=lambda x: len(x.comment_text), # the BucketIterator needs to be told what function it should use to group the data.
        sort_within_batch=False
)

test_iter = Iterator(test, batch_size=8, device=-1, sort=False, sort_within_batch=False)
4)使用自带数据集
与torchvision类似,torchtext也提供若干常用的数据集方便快速进行算法测试
(3)评测指标(metric)
- NLP中部分任务的评测不是通过准确率等指标完成的,比如机器翻译任务常用
BLEU (bilingual evaluation understudy) score来评价预测文本和标签文本之间的相似程度 torchtext中可以直接调用torchtext.data.metrics.bleu_score来快速实现BLEU:
from torchtext.data.metrics import bleu_score
candidate_corpus = [['My', 'full', 'pytorch', 'test'], ['Another', 'Sentence']]
references_corpus = [[['My', 'full', 'pytorch', 'test'], ['Completely', 'Different']], [['No', 'Match']]]
bleu_score(candidate_corpus, references_corpus)

4. transforms实操
from PIL import Image
from torchvision import transforms
import matplotlib.pyplot as plt
%matplotlib inline
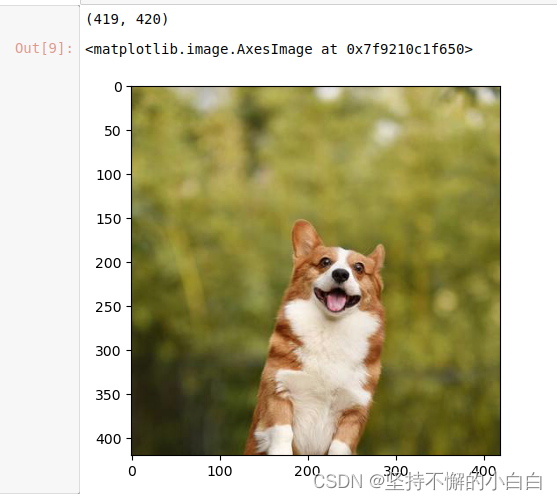
# 加载原始图片
img = Image.open("/home/cloris/Downloads/dog.png")
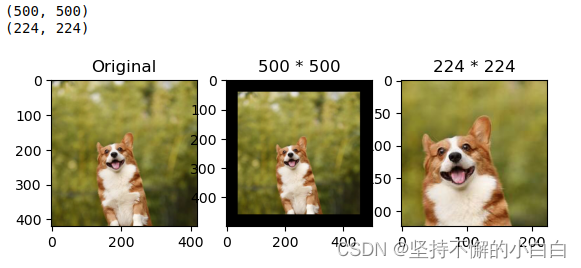
print(img.size)
plt.imshow(img)

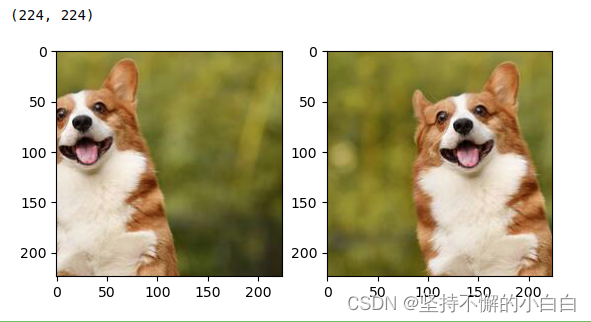
# 对给定图片进行沿中心切割
# 对图片沿中心放大切割,超出图片大小的部分填0
img_centercrop1 = transforms.CenterCrop((500,500))(img)
print(img_centercrop1.size)
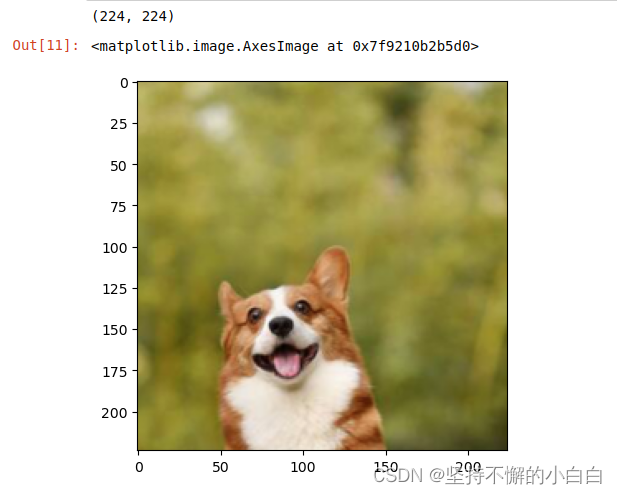
# 对图片沿中心缩小切割,超出期望大小的部分剔除
img_centercrop2 = transforms.CenterCrop((224,224))(img)
print(img_centercrop2.size)
plt.subplot(1,3,1),plt.imshow(img),plt.title("Original") # 原图
plt.subplot(1,3,2),plt.imshow(img_centercrop1),plt.title("500 * 500") # 放大切割的图
plt.subplot(1,3,3),plt.imshow(img_centercrop2),plt.title("224 * 224") # 缩小切割的图
plt.show()
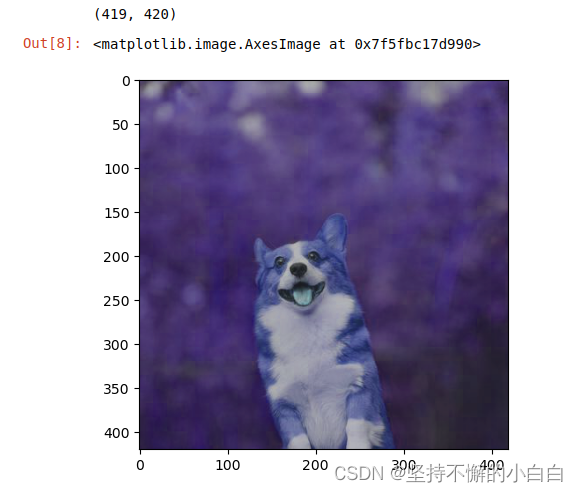
# 对图片的亮度,对比度,饱和度,色调进行改变
img_CJ = transforms.ColorJitter(brightness=1,contrast=0.5,saturation=0.5,hue=0.5)(img)
print(img_CJ.size)
plt.imshow(img_CJ)
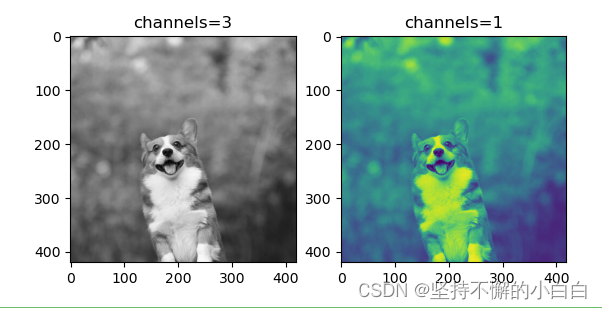
# 输出单通道图片
img_grey_c3 = transforms.Grayscale(num_output_channels=3)(img)
img_grey_c1 = transforms.Grayscale(num_output_channels=1)(img)
plt.subplot(1,2,1),plt.imshow(img_grey_c3),plt.title("channels=3")
plt.subplot(1,2,2),plt.imshow(img_grey_c1),plt.title("channels=1")
plt.show()
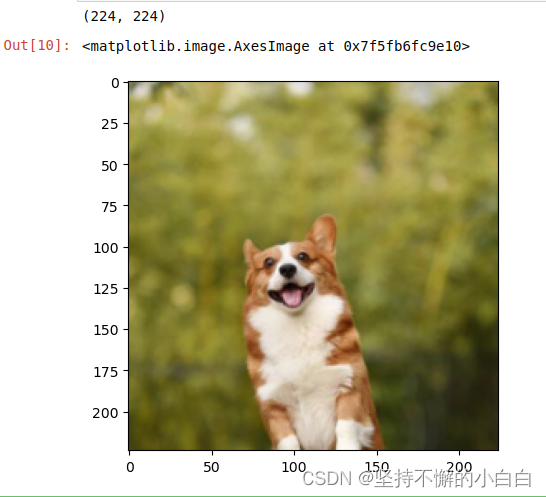
# 等比缩放
img_resize = transforms.Resize(224)(img)
print(img_resize.size)
plt.imshow(img_resize)
# 等比缩放 不推荐使用此转换以支持调整大小
img_scale = transforms.Scale(224)(img)
print(img_scale.size)
plt.imshow(img_scale)
出现报错:

问题解决:
主要是版本问题,新版本的torchvision中的transforms没有Scale属性,改成Resize就好[3]
# 随机裁剪成指定大小
# 设立随机种子
import torch
torch.manual_seed(31)
# 随机裁剪
img_randowm_crop1 = transforms.RandomCrop(224)(img)
img_randowm_crop2 = transforms.RandomCrop(224)(img)
print(img_randowm_crop1.size)
plt.subplot(1,2,1),plt.imshow(img_randowm_crop1)
plt.subplot(1,2,2),plt.imshow(img_randowm_crop2)
plt.show()
# 随机左右旋转
# 设立随机种子,可能不旋转
import torch
torch.manual_seed(31)

img_random_H = transforms.RandomHorizontalFlip()(img)
print(img_random_H.size)
plt.imshow(img_random_H)
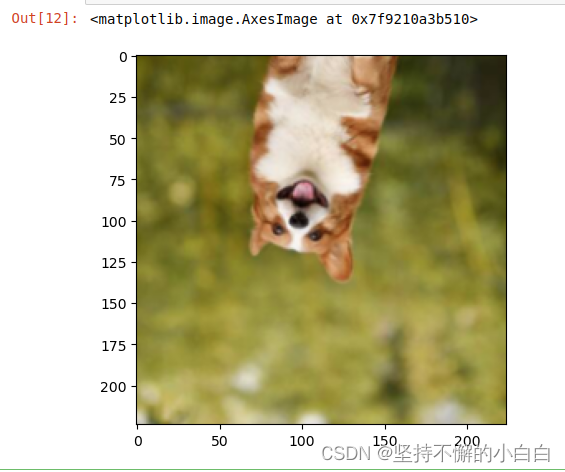
# 随机垂直方向旋转
img_random_V = transforms.RandomVerticalFlip()(img)
print(img_random_V.size)
plt.imshow(img_random_V)

# 随机裁剪成指定大小
img_random_resizecrop = transforms.RandomResizedCrop(224,scale=(0.5,0.5))(img)
print(img_random_resizecrop.size)
plt.imshow(img_random_resizecrop)
# 对一张图片的操作可能是多种的,我们使用transforms.Compose()将他们组装起来
transformer = transforms.Compose([
    transforms.Resize(256),
    transforms.transforms.RandomResizedCrop((224), scale = (0.5,1.0)),
    transforms.RandomVerticalFlip(),
])
img_transform = transformer(img)
plt.imshow(img_transform)
二、PyTorch的模型部署
- 深度学习的最终目的是要实现模型的部署以方便我们的生活和解决传统方法不能解决的问题。通常会将模型部署在手机端、开发板,嵌入式设备上,需要将得到的权重进行变换才能使模型可以成功部署在上述设备上
- 经过工业界和学术界多年的探索,出现了以下的模型部署pipeline:
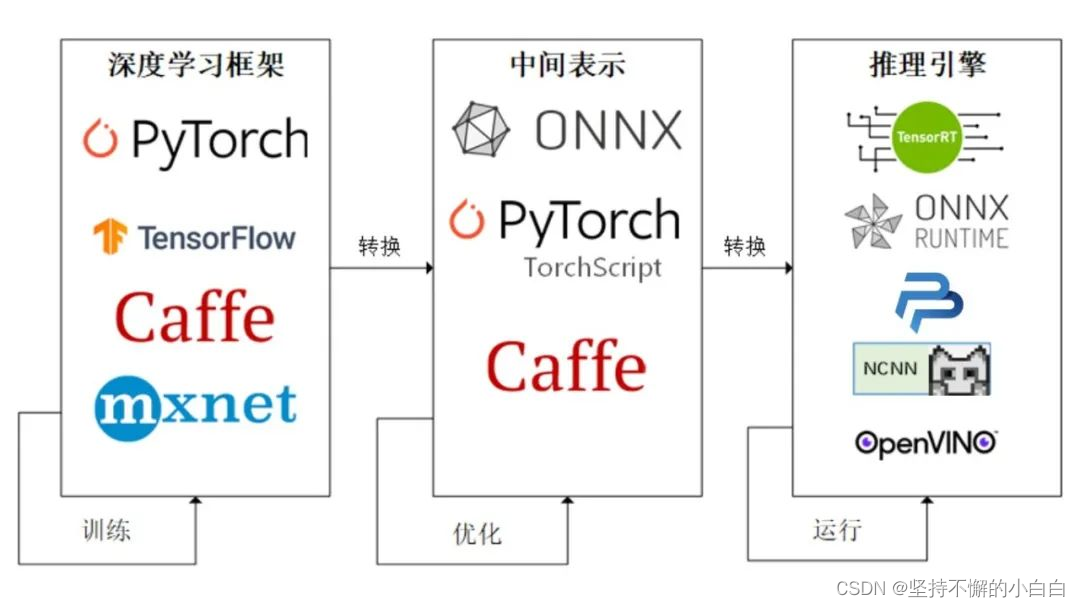
- ONNX( Open Neural Network Exchange) 是 用于标准描述计算图的一种格式
- ONNX通过定义一组与环境和平台无关的标准格式,使AI模型可以在不同框架和环境下交互使用,可以看作深度学习框架和部署端的桥梁
- 目前,ONNX 已经对接了多种深度学习框架和多种推理引擎
ONNX Runtime是由微软维护的一个跨平台机器学习推理加速器,直接对接ONNX,可直接读取.onnx文件并实现推理,不需要再把.onnx格式的文件转换成其他格式的文件- PyTorch只需要将模型转换为
.onnx文件,并在ONNX Runtime上运行模型即可
1. 使用ONNX进行部署并推理
(1) ONNX和ONNX Runtime的安装
# 终端激活虚拟环境
conda activate env_name # env_name换成环境名称
# 安装onnx
pip install onnx
# 安装onnx runtime
pip install onnxruntime # 使用CPU进行推理
# pip install onnxruntime-gpu # 使用GPU进行推理
# 当想使用GPU进行推理时,需要先将安装的onnxruntime卸载,再安装onnxruntime-gpu,同时还需考虑ONNX Runtime与CUDA之间的适配关系
(2) 模型导出为ONNX
# 得到.onnx文件
import torch.onnx
# 转换的onnx格式的名称,文件后缀需为.onnx
onnx_file_name = "xxxxxx.onnx"
# 需要转换的模型,将torch_model设置为自己的模型
model = torch_model
# 加载权重,将model.pth转换为自己的模型权重
# 如果模型的权重是使用多卡训练出来,需要去除权重中多的module.
model = model.load_state_dict(torch.load("model.pth"))
# 导出模型前,必须调用model.eval()或者model.train(False)
model.eval()
# dummy_input就是一个输入的实例,仅提供输入shape、type等信息
batch_size = 1 # 随机的取值,当设置dynamic_axes后影响不大
dummy_input = torch.randn(batch_size, 1, 224, 224, requires_grad=True)
# 这组输入对应的模型输出
output = model(dummy_input)
# 导出模型
torch.onnx.export(model,        # 模型的名称
                  dummy_input,   # 一组实例化输入
                  onnx_file_name,   # 文件保存路径/名称
                  export_params=True,        #  如果指定为True或默认, 参数也会被导出. 如果你要导出一个没训练过的就设为 False.
                  opset_version=10,          # ONNX 算子集的版本,当前已更新到15
                  do_constant_folding=True,  # 是否执行常量折叠优化
                  input_names = ['input'],   # 输入模型的张量的名称
                  output_names = ['output'], # 输出模型的张量的名称
                  # dynamic_axes将batch_size的维度指定为动态,
                  # 后续进行推理的数据可以与导出的dummy_input的batch_size不同
                  dynamic_axes={

    'input' : {

    0 : 'batch_size'},
                                'output' : {

    0 : 'batch_size'}})
# 检验上面得到的.onnx文件是否可用
import onnx
# 我们可以使用异常处理的方法进行检验
try:
    # 当我们的模型不可用时,将会报出异常
    onnx.checker.check_model(self.onnx_model)
except onnx.checker.ValidationError as e:
    print("The model is invalid: %s"%e)
else:
    # 模型可用时,将不会报出异常,并会输出“The model is valid!”
    print("The model is valid!")
注:Netron可以像tensorboard一样实现onnx的模型的可视化
# 使用 onnxruntime 运行转化后的模型,看一下推理后的结果
import onnxruntime
# 需要进行推理的onnx模型文件名称
onnx_file_name = "xxxxxx.onnx"

# onnxruntime.InferenceSession用于获取一个 ONNX Runtime 推理器
ort_session = onnxruntime.InferenceSession(onnx_file_name)

# 构建字典的输入数据,字典的key需要与我们构建onnx模型时的input_names相同
# 输入的input_img 也需要改变为ndarray格式
ort_inputs = {

    'input': input_img}
# 更建议使用下面这种方法,因为避免了手动输入key
# ort_inputs = {ort_session.get_inputs()[0].name:input_img}

# run是进行模型的推理,第一个参数为输出张量名的列表,一般情况可以设置为None
# 第二个参数为构建的输入值的字典
# 由于返回的结果被列表嵌套,因此需要进行[0]的索引
ort_output = ort_session.run(None,ort_inputs)[0]
# output = {ort_session.get_outputs()[0].name}
# ort_output = ort_session.run([output], ort_inputs)[0]
注:
- PyTorch模型的输入为tensor,而ONNX的输入为array,因此需要对张量进行变换或者直接将数据读取为array格式,如下进行张量到array的转化:
def to_numpy(tensor):
    return tensor.detach().cpu().numpy() if tensor.requires_grad else tensor.cpu().numpy()
- 输入的array的
shape应该和导出模型的dummy_input的shape相同,如果图片大小不一样,先进行resize操作 run的结果是一个列表,需要进行索引操作才能获得array格式的结果- 在构建输入的字典时,需要注意字典的
key应与导出ONNX格式设置的input_name相同,因此建议使用上述的第二种方法构建输入的字典
[1] datawhalechina/thorough-pytorch: https://github.com/datawhalechina/thorough-pytorch
[2] torchvision预训练模型与数据集全览: https://www.cnblogs.com/PythonLearner/p/13593925.html
[3] AttributeError: module ‘torchvision.transforms‘ has no attribute ‘Scale‘: https://blog.csdn.net/weixin_45887062/article/details/124174280