服务器部署项目
文章目录
我是在腾讯云上购买了一个服务器,这是官网链接— 腾讯云官网。
1.远程连接服务器
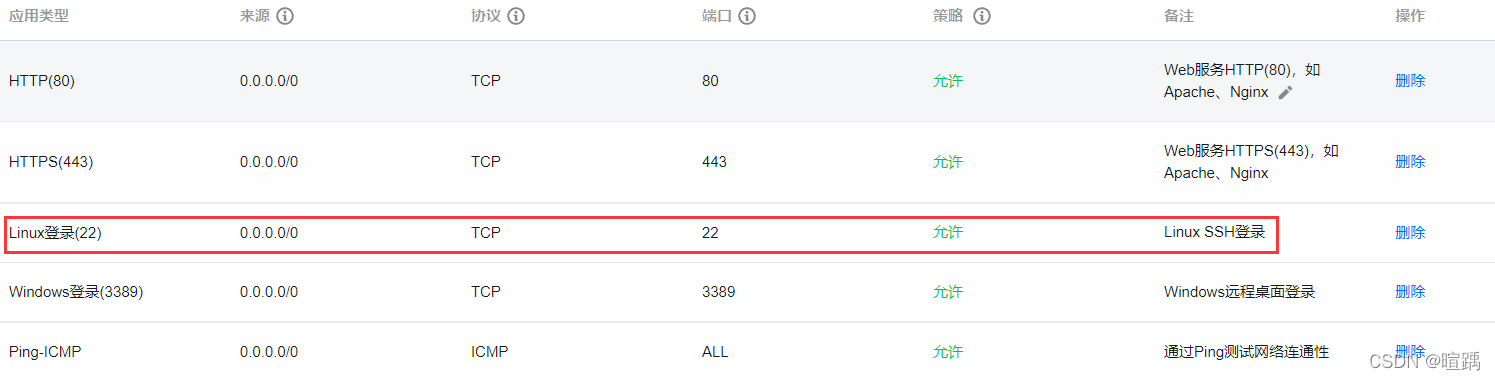
首先在已购买服务器的详情页中重置密码,然后要将服务器的22端口开放。
完成以上操作后,打开XShelll,将公网IP和端口填写,选择SSH协议。点击连接后填写用户名和密码即可成功连接云服务器。
2. 在Linux系统上安装Docker
Docker 可以安装在 64 位的 x86 平台或 ARM 平台上。Ubuntu 发行版中,LTS(Long-Term-Support)长期支持版本,会获得 5 年的升级维护支持,这样的版本会更稳定,因此在生产环境中推荐使用 LTS 版本。
2.1 卸载旧版本
旧版本的 Docker 称为 docker 或者 docker-engine,使用以下命令卸载旧版本:
$ sudo apt-get remove docker docker-engine docker.io
2.2 使用 APT 安装
由于 apt 源使用 HTTPS 以确保软件下载过程中不被篡改。因此,我们首先需要添加使用 HTTPS 传输的软件包以及 CA 证书。
$ sudo apt-get update

$ sudo apt-get install \
    apt-transport-https \
    ca-certificates \
    curl \
    gnupg \
    lsb-release
鉴于国内网络问题,强烈建议使用国内源,官方源请在注释中查看。
为了确认所下载软件包的合法性,需要添加软件源的 GPG 密钥。
$ curl -fsSL https://mirrors.aliyun.com/docker-ce/linux/ubuntu/gpg | sudo gpg --dearmor -o /usr/share/keyrings/docker-archive-keyring.gpg

# 官方源
# $ curl -fsSL https://download.docker.com/linux/ubuntu/gpg | sudo gpg --dearmor -o /usr/share/keyrings/docker-archive-keyring.gpg
然后,我们需要向 sources.list 中添加 Docker 软件源。
$ echo \
  "deb [arch=amd64 signed-by=/usr/share/keyrings/docker-archive-keyring.gpg] https://mirrors.aliyun.com/docker-ce/linux/ubuntu \
  $(lsb_release -cs) stable" | sudo tee /etc/apt/sources.list.d/docker.list > /dev/null

# 官方源
# $ echo \
#   "deb [arch=amd64 signed-by=/usr/share/keyrings/docker-archive-keyring.gpg] https://download.docker.com/linux/ubuntu \
#   $(lsb_release -cs) stable" | sudo tee /etc/apt/sources.list.d/docker.list > /dev/null
2.3 安装Docker
更新 apt 软件包缓存,并安装 docker-ce:
$ sudo apt-get update

$ sudo apt-get install docker-ce docker-ce-cli containerd.io
2.4 使用脚本自动安装
在测试或开发环境中 Docker 官方为了简化安装流程,提供了一套便捷的安装脚本,Ubuntu 系统上可以使用这套脚本安装,另外可以通过 --mirror 选项使用国内源进行安装(若想安装测试版的 Docker, 需要从 test.docker.com 获取脚本):
# $ curl -fsSL test.docker.com -o get-docker.sh
$ curl -fsSL get.docker.com -o get-docker.sh
$ sudo sh get-docker.sh --mirror Aliyun
# $ sudo sh get-docker.sh --mirror AzureChinaCloud
执行这个命令后,脚本就会自动的将一切准备工作做好,并且把 Docker 的稳定(stable)版本安装在系统中。
2.5 启动Docker
$ sudo systemctl enable docker
$ sudo systemctl start docker
2.6 测试 Docker 是否安装正确
通过hello-world镜像验证Docker是否成功安装。
$ sudo docker run --rm hello-world
Unable to find image 'hello-world:latest' locally
latest: Pulling from library/hello-world
2db29710123e: Pull complete
Digest: sha256:6d60b42fdd5a0aa8a718b5f2eab139868bb4fa9a03c9fe1a59ed4946317c4318
Status: Downloaded newer image for hello-world:latest

Hello from Docker!
This message shows that your installation appears to be working correctly.

To generate this message, Docker took the following steps:
 1. The Docker client contacted the Docker daemon.
 2. The Docker daemon pulled the "hello-world" image from the Docker Hub.
    (amd64)
 3. The Docker daemon created a new container from that image which runs the
    executable that produces the output you are currently reading.
 4. The Docker daemon streamed that output to the Docker client, which sent it
    to your terminal.

To try something more ambitious, you can run an Ubuntu container with:
 $ docker run -it ubuntu bash

Share images, automate workflows, and more with a free Docker ID:
 https://hub.docker.com/

For more examples and ideas, visit:
 https://docs.docker.com/get-started/
若能正常输出以上信息,则说明安装成功。
2.7 使用镜像加速器
安装 Docker 软件后,可以直接通过 docker pull 命令拉取镜像。如果未配置镜像加速源,直接拉取 DockerHub 中的镜像,通常下载速度会比较慢。
执行以下命令,修改 /etc/docker/daemon.json 配置文件。
$ sudo vim /etc/docker/daemon.json
添加以下内容,一定要保证该文件符合 json 规范,否则 Docker 将不能启动。
{


   "registry-mirrors": [
       "https://mirror.ccs.tencentyun.com"
  ]
}
之后重新启动服务。
$ sudo systemctl daemon-reload
$ sudo systemctl restart docker
2.8 卸载Docekr
卸载 Docker 引擎、CLI 和 Containerd 软件包:
$ sudo apt-get purge docker-ce docker-ce-cli containerd.io
主机上的映像、容器、卷或自定义配置文件不会自动删除。要删除所有映像、容器和卷执行下面的指令:
$ sudo rm -rf /var/lib/docker
$ sudo rm -rf /var/lib/containerd
3. 拉取项目镜像
3.1 登录账号
如果还没有账号,可以到Docker Hub上注册一个。使用下面的指令进行登录:
$ sudo docker login
通过config.json文件可以查看登录状态。
$ sudo cat /root/.docker/config.json
登出的指令如下。
$ sudo docker logout
3.2 拉取镜像
通过以下指令拉取个人仓库的项目镜像。
$ sudo docker pull username/image:tag
4. 使用服务
首先根据拉取的项目镜像用docker run指令生成对应的容器(注意设置端口映射),在容器中打开项目服务,并在服务器的防火墙设置打开相应的端口号,就可以使用相应的服务了。
下面是我在服务器上部署的两个项目:
明火烟雾目标检测项目:http://121.4.107.27:5001/
医疗问答助手项目【仍在完善中】:http://121.4.107.27:5002/