需要下载:pip install tflearn
一些理论知识在前一篇文章中:可以一起阅读学习
https://blog.csdn.net/m0_64596200/article/details/126918240?spm=1001.2014.3001.5501
已经处理好的.npy文件:
https://download.csdn.net/download/m0_64596200/86720092
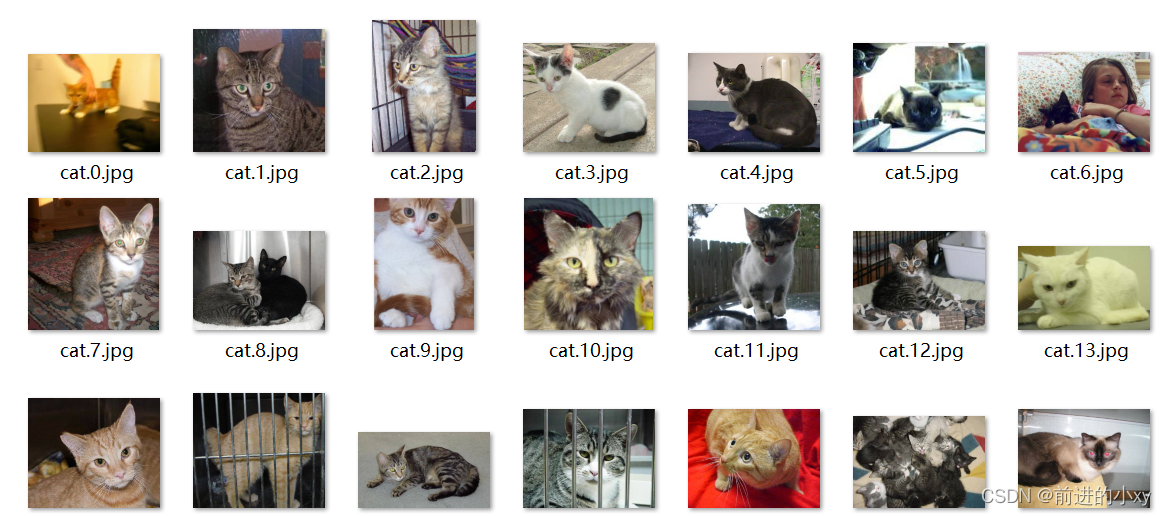
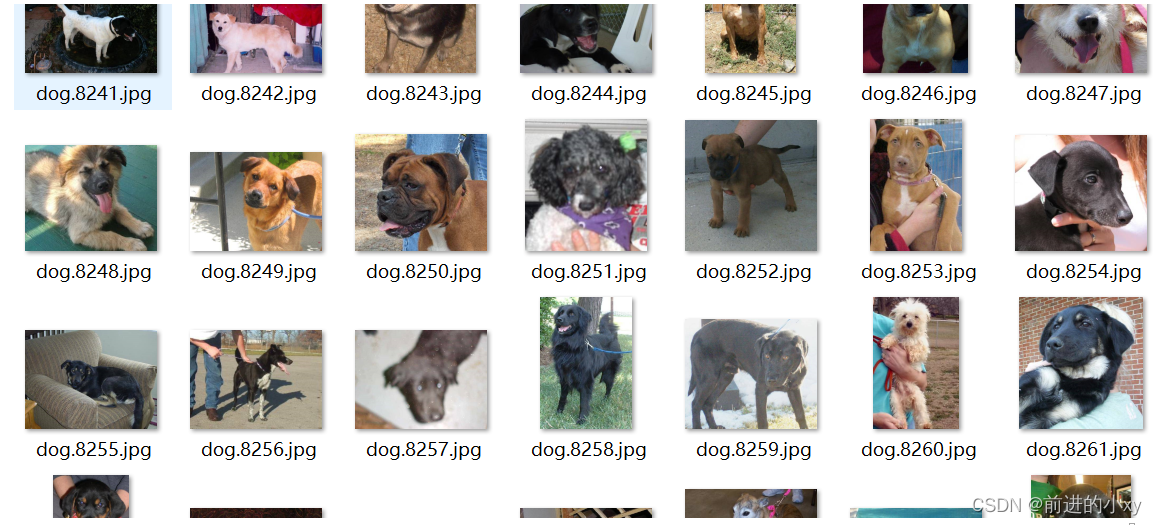
本模型爬取猫和狗的图片各一万多张
1、进行数据预处理
图片灰度处理
(代码中有注释,帮助理解)
这里的:
IMAGE_SIZE=50
def label_img(img_name):
    # 图片分类
    label_name = img_name.split(".")[0]
    if label_name == "cat":
        return [1, 0]
    elif label_name == "dog":
        return [0, 1]
    else:
        return []
"""
图片处理:变单通道(灰度处理)
"""
def create_train_data(dir_path):
    training_data = []
    # 进度条
    for img_path in tqdm(os.listdir(dir_path)):
        label = label_img(img_path)
        if len(label) != 0:
            # 路径拼接
            img_path = os.path.join(dir_path, img_path)
            # 变单通道
            img = cv2.imread(img_path, cv2.IMREAD_GRAYSCALE)
            if img is not None:
                # 重置大小
                img = cv2.resize(img, (IMAGE_SIZE, IMAGE_SIZE))
                training_data.append([np.array(img), np.array(label)])
    # 打乱顺序
    shuffle(training_data)
    # 存储处理后的数据,之后模型训练可以直接使用.npy
    np.save('train_data.npy', training_data)
    print(training_data)


create_train_data("./train")

这里结束后将最后一句
create_train_data(“./train”)
注释掉
进行网络搭建
IMAGE_SIZE = 50
# 搭建网络
# 输入层
input = input_data(shape=[None, IMAGE_SIZE, IMAGE_SIZE, 1], name="input")
# 输入数据
# 第一层神经网络
# 参数:输入,输出维度,卷积核大小,激活函数
conv1 = conv_2d(input, 32, 5, activation="relu")
# 池化
conv1 = max_pool_2d(conv1, 2)

# 第二层 输出也可以是32
conv2 = conv_2d(conv1, 64, 5, activation="relu")
conv2 = max_pool_2d(conv2, 2)
# 第三层
conv3 = conv_2d(conv2, 128, 5, activation="relu")
conv3 = max_pool_2d(conv3, 2)
# 第四层
conv4 = conv_2d(conv3, 256, 5, activation="relu")
conv4 = max_pool_2d(conv4, 2)

# 拍平 全连层1
fully1 = fully_connected(conv4, 1024, activation="relu")
# 太多层的话会导致全连节点过多,导致太依赖,结果过拟合
# 防过拟合:丢弃部分神经元
fully1 = dropout(fully1, 0.5)
# 全连2:产生分类器
fully2 = fully_connected(fully1, 2, activation="softmax")
# 损失函数和优化器
model_net = regression(fully2, optimizer="adam", learning_rate=0.0001, loss="categorical_crossentropy",
                       name='model_net')
# 模型的创建
model = tflearn.DNN(model_net, tensorboard_dir='log')
# 模型训练
# 加载数据 前面处理好的数据
train_data = np.load('train_data.npy', allow_pickle=True)
# 数据分割留30条训练后30测试
train = train_data[:-30]
test = train_data[-30:]
# i[0]是feature i[1]是label进行配对
X = np.array([i[0] for i in train]).reshape((-1, IMAGE_SIZE, IMAGE_SIZE, 1))
Y = [i[1] for i in train]
# 训练集
test_x = np.array([i[0] for i in test]).reshape((-1, IMAGE_SIZE, IMAGE_SIZE, 1))
test_y = [i[1] for i in test]
# 模型训练 n_epoch将数据使用几遍
model.fit({

    'input': X}, {

    'model_net': Y}, n_epoch=3, validation_set=({

    'input': test_x}, {

    'model_net': test_y}), snapshot_step=10, show_metric=True, run_id="model_classs")
# 保存模型
model.save("model/catVSdog.model")
这里卷积和池化用了四层,层数并非越多越好,以及 n_epoch。
结果:

1:第几步
2:总损失率
3:所用时间
4:优化器
5:训练第几轮
6:损失率
7:成功率
8:该轮迭代到的数据
模型使用:
上面内容是在同一个py文件中
以下的是在新的py文件
搭建网络过程需要与创建是一致
IMAGE_SIZE = 50
input = input_data(shape=[None, IMAGE_SIZE, IMAGE_SIZE, 1], name="input")
# 输入数据
# 第一层神经网络
# 参数:输入,输出维度,卷积核大小,激活函数
conv1 = conv_2d(input, 32, 5, activation="relu")
# 池化
conv1 = max_pool_2d(conv1, 2)
# 第二层 输出也可以是32
conv2 = conv_2d(conv1, 64, 5, activation="relu")
conv2 = max_pool_2d(conv2, 2)
# 第三层
conv3 = conv_2d(conv2, 128, 5, activation="relu")
conv3 = max_pool_2d(conv3, 2)
# 第四层
conv4 = conv_2d(conv3, 256, 5, activation="relu")
conv4 = max_pool_2d(conv4, 2)
# 拍平 全连层1
fully1 = fully_connected(conv4, 1024, activation="relu")
# 太多层的话会导致全连节点过多,导致太依赖,结果过拟合
# 防过拟合:丢弃部分神经元
fully1 = dropout(fully1, 0.5)
# 全连2:产生分类器
fully2 = fully_connected(fully1, 2, activation="softmax")
# 损失函数和优化器
model_net = regression(fully2, optimizer="adam", learning_rate=0.0001, loss="categorical_crossentropy",
name='model_net')
# 模型的创建
model = tflearn.DNN(model_net, tensorboard_dir='log')
# 加载模型
model.load("./model/catVSdog.model")
# 将检测的图片变成np array
def classify(img_path):
# 灰度读取
img = cv2.imread(img_path,cv2.IMREAD_GRAYSCALE)
if img is not None:
img = cv2.resize(img,(IMAGE_SIZE,IMAGE_SIZE))
data = img.reshape(-1,IMAGE_SIZE,IMAGE_SIZE,1)
return data
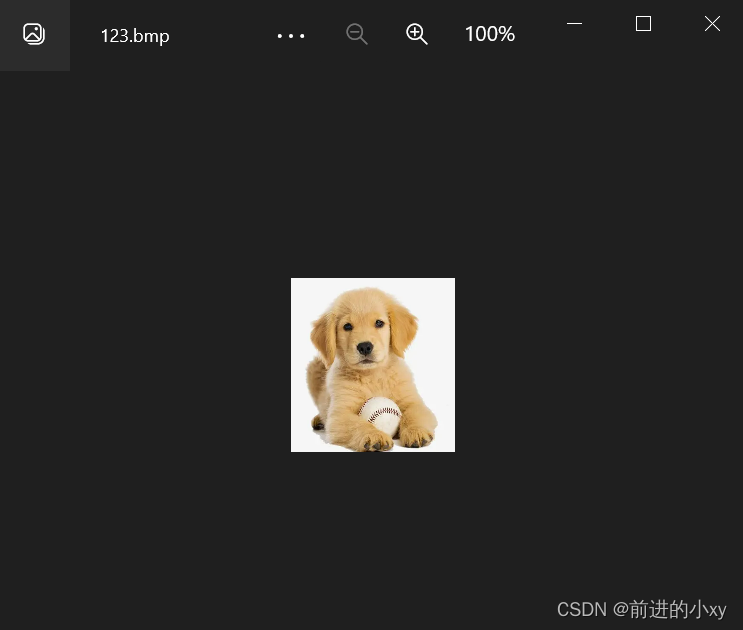
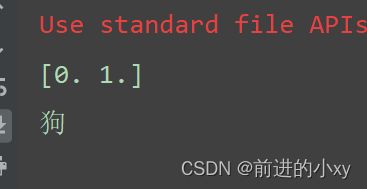
predict = model.predict(classify('123.bmp'))[0]
print(predict)
max_index = np.argmax(predict)
if max_index ==0:
print("猫")
elif max_index ==1:
print("狗")
使用的图片:
运行结果:
更改准确率的方法:
1、适当增加层数
2、适当增加数据使用次数
3、增加图片数量