前言:先来了解下vue-router就是为了进行页面的跳转,与a标签作用相同,却比a标签牛,对比<a>标签router-link 组件避免了不必要的重渲染,它只更新变化的部分从而减少DOM性能消耗。根据第三天学习的vuecli文件夹的作用下,我们来具体学习vue-router路由的运用。
简述:vue-router是vue.js官网的路由管理器。它和vue.js的核心深度集成,让构建单页面应用变得简单。
一.文件夹作用的回顾加深及路由挑转的使用
首先我们已经知道了正常的开发只需要在src文件里面写东西
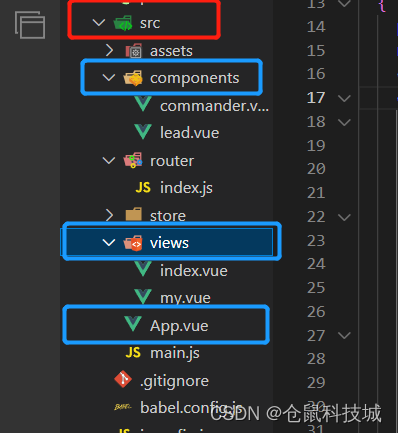
1.components是存放一些组件或者子页面的(好比文章阅读页面,我们总不能换一篇文章又要挑转到另外一个页面去),但是这些页面并非一定要放在components文件下,其实放到view一样是可以的,但是为了日后的规范开发还是要养成良好的习惯。
2.views文件里面是正常的存放主页面的地方,当然主页面也不一定要放到这里面来才可以,也是为了规范开发。
3.App.vue页面(该页面不在views里面,而是在src里面),正常情况下该页面保持如下配置即可,在App.vue下一般只写<router-view />即可,不然APP.vue上面写的东西就会显示到每一个主页面上面,可以把他称为全局页面配置。
<template>
  <div id="app">
    <router-view />   //占位使用,用来承载当前级别下的子路由的一个视图标签,此标签的作用是显示当前路由级别下一级页面
  </div>
</template>

<style>
#app {
  font-family: Avenir, Helvetica, Arial, sans-serif;
  -webkit-font-smoothing: antialiased;
  -moz-osx-font-smoothing: grayscale;
  text-align: center;
  color: #2c3e50;
}

nav {
  padding: 30px;
}

nav a {
  font-weight: bold;
  color: #2c3e50;
}

nav a.router-link-exact-active {
  color: #42b983;
}
</style>
4.main.js导入router文件

5.在 router文件夹里面的index.js配置路由
import Vue from "vue";
import VueRouter from "vue-router"; //按照搭建的时候勾选了router是自动就有的
Vue.use(VueRouter); //安装路由
const routes = [
{
path:"/", // path:"/"为将该页设置为网站主页
name: "my", //name其实不要也不影响但是path和component必须有
component: () => import("../views/my.vue"),
},
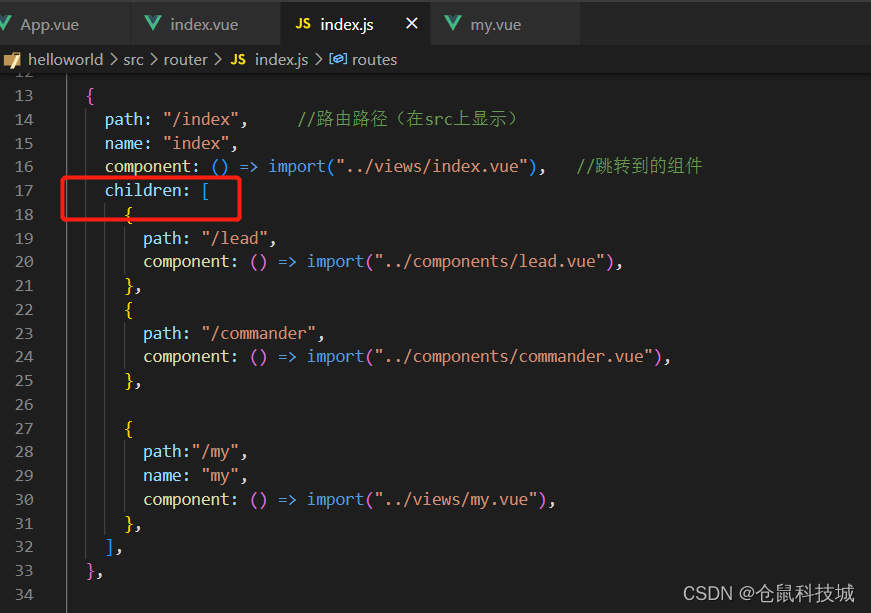
{
path: "/index", //路由路径(在src上显示)
name: "index",
component: () => import("../views/index.vue"), //跳转到的组件
children: [
{
path: "/lead",
component: () => import("../components/lead.vue"),
},
{
path: "/commander",
component: () => import("../components/commander.vue"),
},
{
path:"/my",
name: "my",
component: () => import("../views/my.vue"),
},
],
},
];
const router = new VueRouter({
mode: "history",
base: process.env.BASE_URL,
routes,
});
export default router; //导出路由配置
6.当路由定义好了之后去引用路由
<template>
  <div id="app">
     <nav>
      <router-link to="/">Home | </router-link>   //点击home去到/路径,也就是主页面
      <router-link to="/my">MY</router-link>    //点击my去到/my路径,也就是my页面
    </nav>
    <h1>仓鼠科技</h1>
    <router-view />
  </div>
</template>

好了一个简单的路由挑转就已经成功了
二.子页面的使用
1.在router文件夹下的index.js配置
2.在拥有子页面的index.vue下引用子页面的配置
<template>
  <div class="home">
    <div class="container_fluid bg_c">
      <div class="row py-3" id="menu">
        <div class="col-7 logo" onclick="nava()">怀先网</div>
        <ul class="col-4 row ml-5 text-white text-decoration-none">
          <li class="col-3" v-for="item in ulList" :key="item.id">
            <div
              class="font_sty"
              @click="moveTo(item.id)"
              :class="item.id == cur_index ? 'act' : ''"
            >
              {

   { item.text }}
            </div>
          </li>
        </ul>
      </div>
    </div>
    <router-view></router-view>   //显示当前路由级别的下一级的页面
  </div>
</template>
<script>
export default {
  name: "Home",
  data() {
    return {
      ulList: [
        {
          id: 0,
          text: "功勋领袖",
          route: "/lead",    //去到子页面的路径,引用路由
        },
        {
          id: 1,
          text: "开国将帅",
          route: "/commander",
        },
        {
          id: 2,
          text: "抗日烈士",
          route: "/my",
        },
        {
          id: 3,
          text: "屠杀只恨",
          route: "/commander",
        },
      ],
      cur_index: 0,
    };
  },
  components: {},
  methods: {
    moveTo(index) {
      this.cur_index = index;
      this.ulList.forEach((element) => {
        if (element.id == index) {
          this.$router.push(element.route);
        }
      });
    },
  },
};
</script>
<style lang="scss" scoped>
@import "@/assets/index.scss";
</style>
3.页面展示
当点击功袖领袖时下面的子页面到了lead子页面
当点击开国将领时下面的子页面到了commander子页面

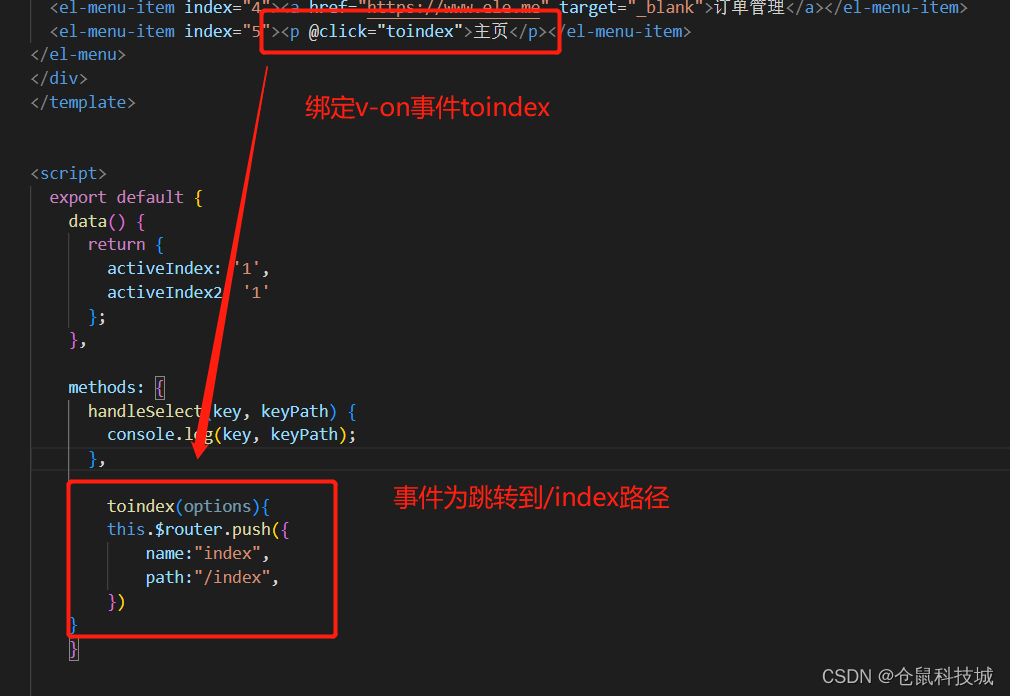
三.vue页面跳转常用的方式(没发现吧!上面说了这么多竟然不是常用的跳转)
上面的跳转用法其实就是为a超链接跳转,只用运用了子页面的方式会整体的优化一点,在正常的情况下,我们更多的是使用事件绑定的用法去跳转页面。
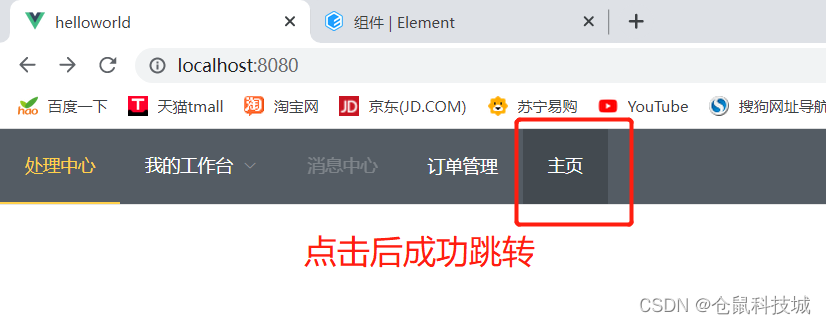
今天的学习到此结束!