文章目录
1. ubuntu系统
1.1 分区
- 磁盘管理中查看分区形式,若为GUID分区表(GPT),可选择 UEFI模式
- 使用EFI启动,不需要单独创建EFI系统分区,也不需要创建/boot分区
只需分配三个区:
| 分区 | 空间 |
|---|---|
| / | 300G |
| /home | 600G |
| swap | 32G |
注意:选择启动引导分区时,要选择win10的EFI boot分区,不要怀疑!!!
1.2 开机直接进入win
首先确认启动项menu中有Ubuntu和Windows,然后在BIOS中修改Ubuntu和Windows的顺序即可
1.3 默认win
sudo gedit /etc/default/grub
将‘GRUB-DEFAULT=0’中的0修改为2,再更新配置
sudo update-grub
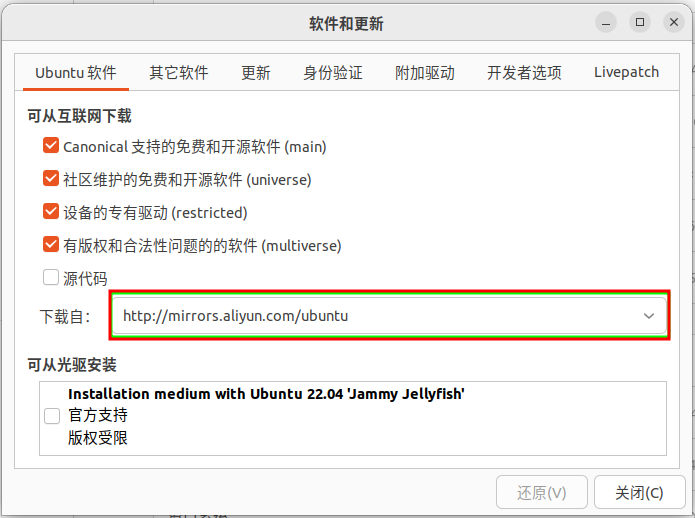
1.4 镜像源
更换为aliyun源:
2. nvidia驱动
按照以下顺序输入命令:
sudo apt-get remove --purge nvidia*
sudo apt-get update
sudo ubuntu-drivers devices         # 选择一个驱动
sudo apt install nvidia-driver-xxx
reboot
nvidia-smi
3. Anaconda
3.1 安装
Anaconda官网https://www.anaconda.com/,复制链接地址,然后用wget下载,该方式速度极快

wget https://repo.anaconda.com/archive/Anaconda3-2022.05-Linux-x86_64.sh
3.2 镜像源配置
# conda
conda config --add channels https://mirrors.tuna.tsinghua.edu.cn/anaconda/pkgs/free/
conda config --add channels https://mirrors.tuna.tsinghua.edu.cn/anaconda/pkgs/main/
conda config --add channels https://mirrors.tuna.tsinghua.edu.cn/anaconda/cloud/pytorch/
conda config --set show_channel_urls yes
# pip
pip config set global.index-url https://pypi.tuna.tsinghua.edu.cn/simple
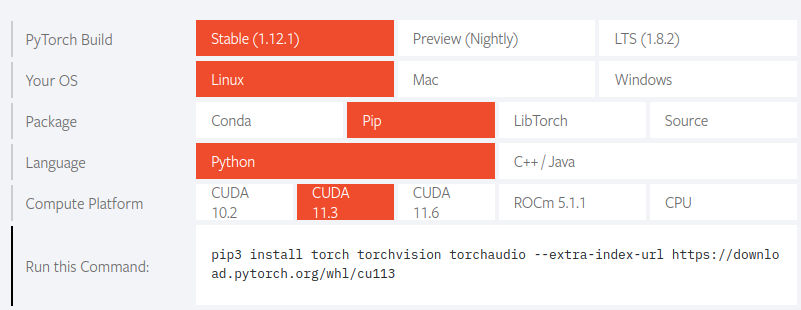
4. pytorch
https://pytorch.org/,进pytorch官网使用pip下载即可(conda太慢)
5. pycharm
5.0 官网下载安装 https://www.jetbrains.com/pycharm/
tar -zxvf pycharm-community-2022.2.2.tar.gz
5.1 输入以下命令创建快捷方式:
sudo gedit /usr/share/applications/Pycharm.desktop
5.2 在打开的文档中写入以下内容,注意Exec和Icon要替换为自己的路径
[Desktop Entry]
Type=Application
Name=Pycharm
GenericName=Pycharm3
Comment=Pycharm3:The Python IDE
Exec=sh /home/xdzhang/pycharm-community-2022.2.2/bin/pycharm.sh
Icon=/home/xdzhang/pycharm-community-2022.2.2/bin/pycharm.png
Terminal=pycharm
Categories=Pycharm;
5.3 按下win键,搜索pycharm,右击即可添加到收藏夹