总目录
图像处理总目录 ← 点击这里
二十六、人脸关键点定位
26.1、 模型选定
本项目中选的68点人脸定位
26.2、定义脸上部位
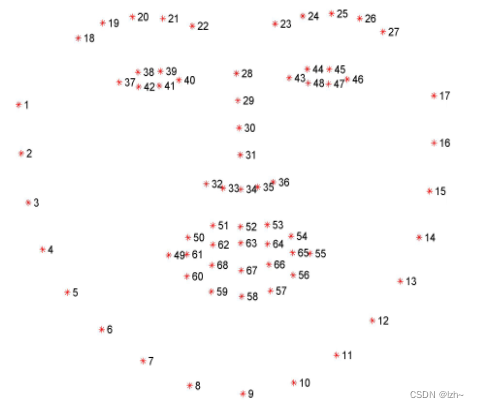
- 第1个点到第17个点:脸颊;
- 第18个点到第22个点:右边眉毛;
- 第23个点到第27个点:左边眉毛;
- 第28个点到第36个点:鼻子;
- 第37个点到第42个点:右眼;
- 第43个点到第48个点:左眼;
- 第49个点到第68个点:嘴巴。
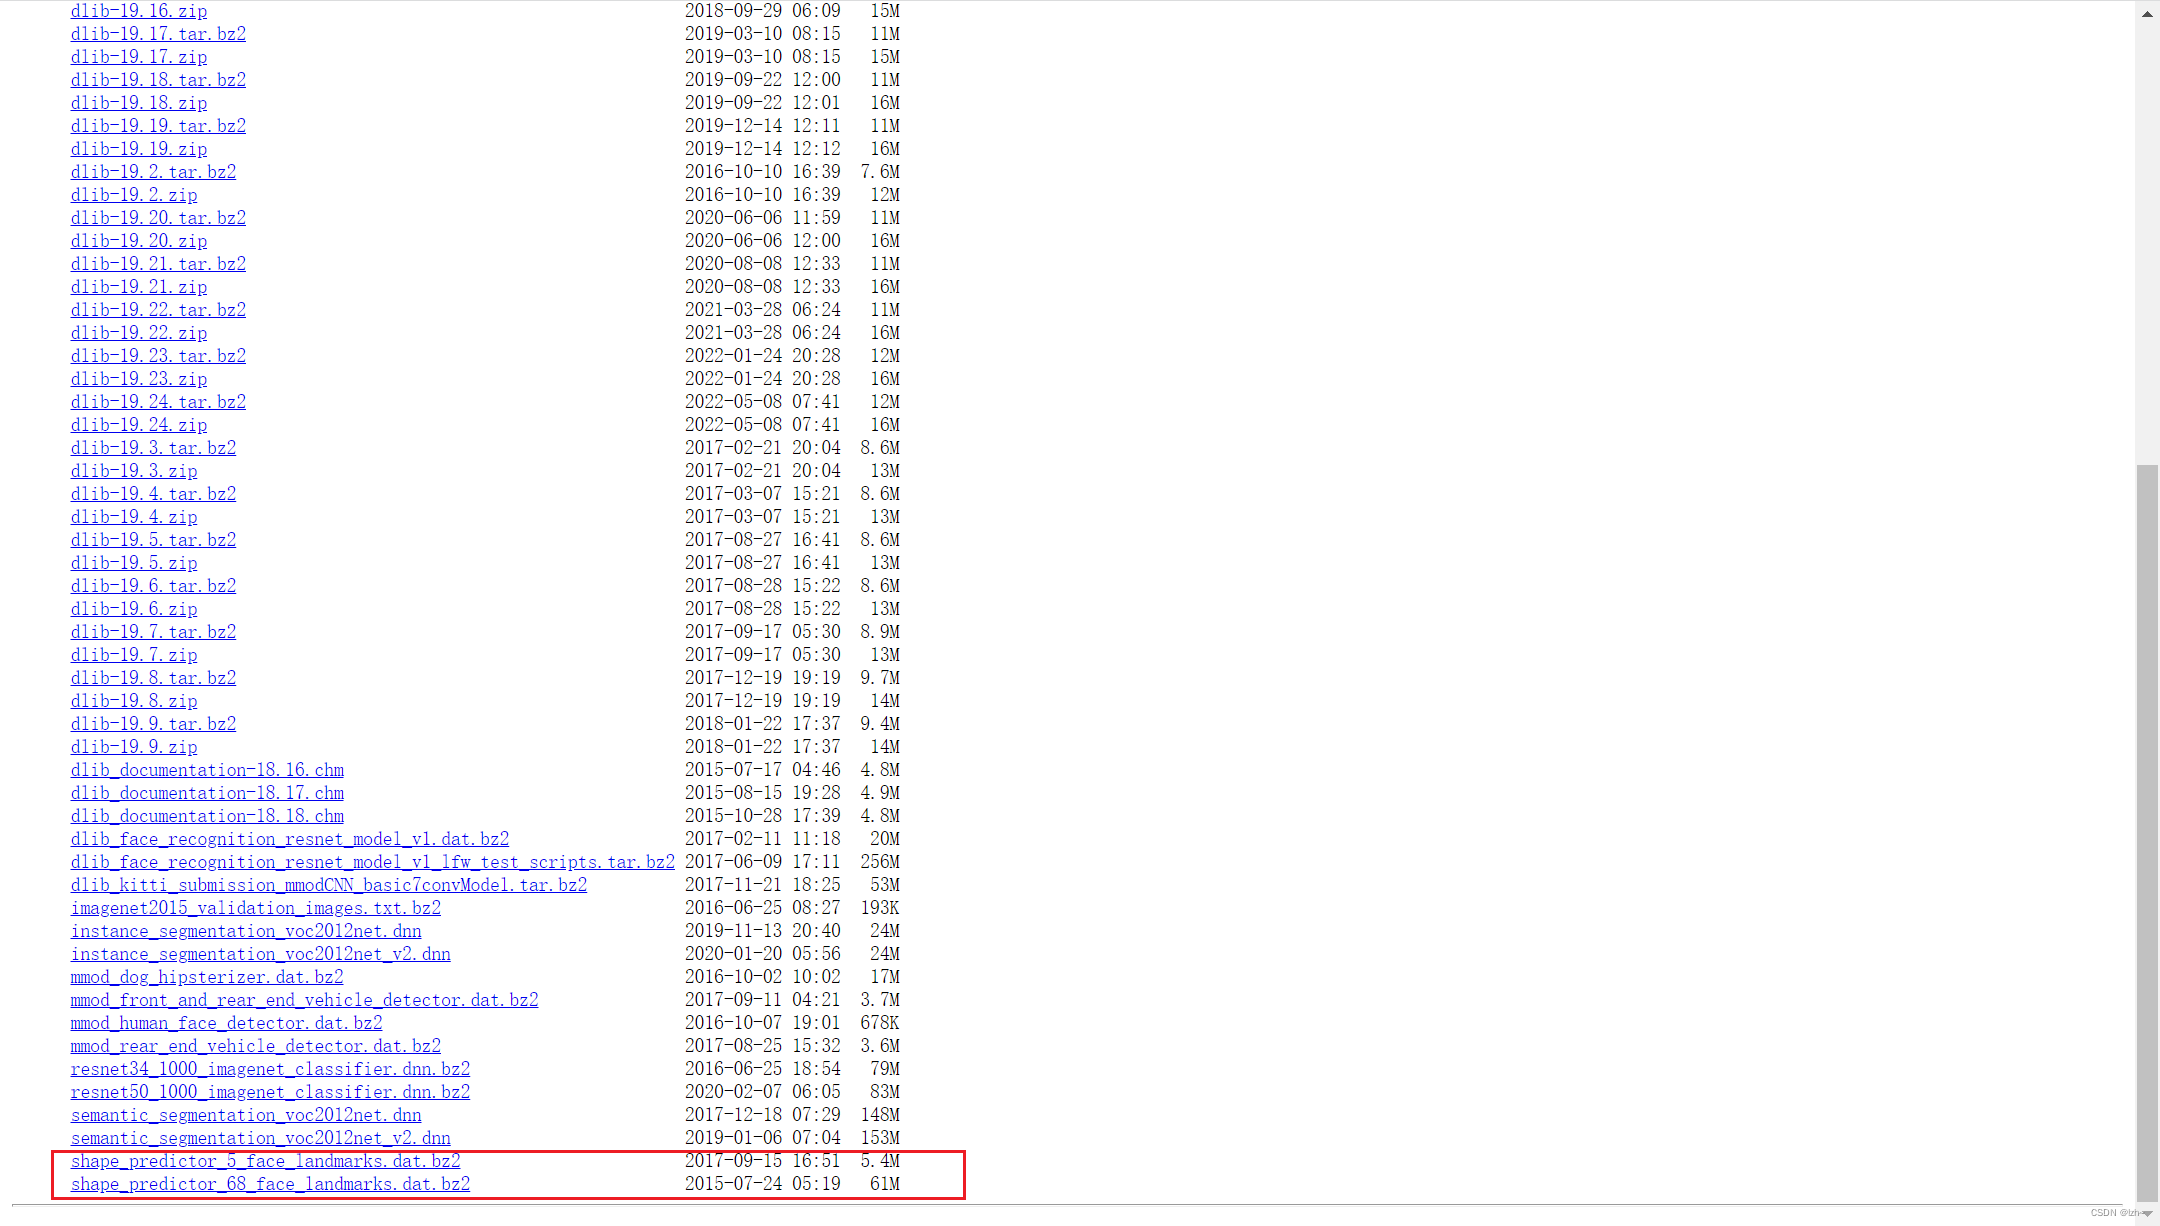
文档介绍:https://ibug.doc.ic.ac.uk/resources/facial-point-annotations/
# 选取68个特征点模型定义(本项目中使用)
FACIAL_LANDMARKS_68_IDXS = OrderedDict([
	("mouth", (48, 68)),
	("right_eyebrow", (17, 22)),
	("left_eyebrow", (22, 27)),
	("right_eye", (36, 42)),
	("left_eye", (42, 48)),
	("nose", (27, 36)),
	("jaw", (0, 17))
])

# 选取5个特征点模型定义
FACIAL_LANDMARKS_5_IDXS = OrderedDict([
	("right_eye", (2, 3)),
	("left_eye", (0, 1)),
	("nose", (4))
])
26.3、图片预处理
# 读取输入数据,预处理
image = cv2.imread(args["image"])
(h, w) = image.shape[:2]
width=500
r = width / float(w)
dim = (width, int(h * r))
image = cv2.resize(image, dim, interpolation=cv2.INTER_AREA)
gray = cv2.cvtColor(image, cv2.COLOR_BGR2GRAY)
26.4、人脸检测
dlib函数:http://dlib.net/python/
detector = dlib.get_frontal_face_detector()
rects = detector(gray, 1)
26.5、关键点定位
# 关键点定位
predictor = dlib.shape_predictor(args["shape_predictor"])
# 遍历检测到的框
for (i, rect) in enumerate(rects):
	# 对人脸框进行关键点定位
	# 转换成ndarray
	shape = predictor(gray, rect)
	shape = shape_to_np(shape)

	# 遍历每一个部分
	for (name, (i, j)) in FACIAL_LANDMARKS_68_IDXS.items():
		# ...
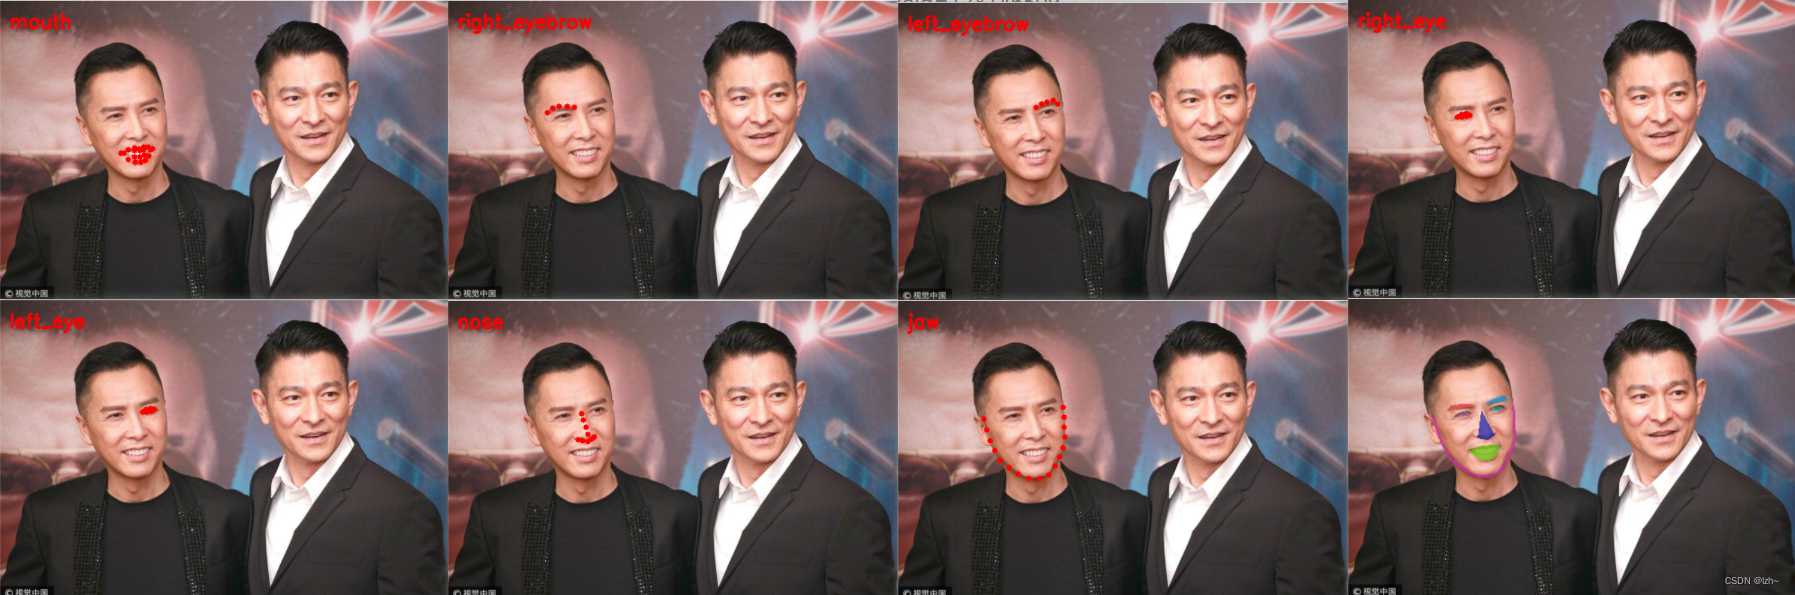
26.6、效果图

26.7、源码
#导入工具包
from collections import OrderedDict
import numpy as np
import argparse
import dlib
import cv2

# https://ibug.doc.ic.ac.uk/resources/facial-point-annotations/
# http://dlib.net/files/


# --shape-predictor shape_predictor_68_face_landmarks.dat
# --image ./images/liudehua2.jpg
# 参数
ap = argparse.ArgumentParser()
ap.add_argument("-p", "--shape-predictor", required=True,
	help="path to facial landmark predictor")
ap.add_argument("-i", "--image", required=True,
	help="path to input image")
args = vars(ap.parse_args())

FACIAL_LANDMARKS_68_IDXS = OrderedDict([
	("mouth", (48, 68)),
	("right_eyebrow", (17, 22)),
	("left_eyebrow", (22, 27)),
	("right_eye", (36, 42)),
	("left_eye", (42, 48)),
	("nose", (27, 36)),
	("jaw", (0, 17))
])


FACIAL_LANDMARKS_5_IDXS = OrderedDict([
	("right_eye", (2, 3)),
	("left_eye", (0, 1)),
	("nose", (4))
])


def shape_to_np(shape, dtype="int"):
	# 创建68*2
	coords = np.zeros((shape.num_parts, 2), dtype=dtype)
	# 遍历每一个关键点
	# 得到坐标
	for i in range(0, shape.num_parts):
		coords[i] = (shape.part(i).x, shape.part(i).y)
	return coords


def visualize_facial_landmarks(image, shape, colors=None, alpha=0.75):
	# 创建两个copy
	# overlay and one for the final output image
	overlay = image.copy()
	output = image.copy()
	# 设置一些颜色区域
	if colors is None:
		colors = [(19, 199, 109), (79, 76, 240), (230, 159, 23),
			(168, 100, 168), (158, 163, 32),
			(163, 38, 32), (180, 42, 220)]
	# 遍历每一个区域
	for (i, name) in enumerate(FACIAL_LANDMARKS_68_IDXS.keys()):
		# 得到每一个点的坐标
		(j, k) = FACIAL_LANDMARKS_68_IDXS[name]
		pts = shape[j:k]
		# 检查位置
		if name == "jaw":
			# 用线条连起来
			for l in range(1, len(pts)):
				ptA = tuple(pts[l - 1])
				ptB = tuple(pts[l])
				cv2.line(overlay, ptA, ptB, colors[i], 2)
		# 计算凸包
		else:
			hull = cv2.convexHull(pts)
			cv2.drawContours(overlay, [hull], -1, colors[i], -1)
	# 叠加在原图上,可以指定比例
	cv2.addWeighted(overlay, alpha, output, 1 - alpha, 0, output)
	return output

# 加载人脸检测与关键点定位
detector = dlib.get_frontal_face_detector()
predictor = dlib.shape_predictor(args["shape_predictor"])

# 读取输入数据,预处理
image = cv2.imread(args["image"])
(h, w) = image.shape[:2]
width=500
r = width / float(w)
dim = (width, int(h * r))
image = cv2.resize(image, dim, interpolation=cv2.INTER_AREA)
gray = cv2.cvtColor(image, cv2.COLOR_BGR2GRAY)

# 人脸检测
rects = detector(gray, 1)

# 遍历检测到的框
for (i, rect) in enumerate(rects):
	# 对人脸框进行关键点定位
	# 转换成ndarray
	shape = predictor(gray, rect)
	shape = shape_to_np(shape)

	# 遍历每一个部分
	for (name, (i, j)) in FACIAL_LANDMARKS_68_IDXS.items():
		clone = image.copy()
		cv2.putText(clone, name, (10, 30), cv2.FONT_HERSHEY_SIMPLEX,
			0.7, (0, 0, 255), 2)

		# 根据位置画点
		for (x, y) in shape[i:j]:
			cv2.circle(clone, (x, y), 3, (0, 0, 255), -1)

		# 提取ROI区域
		(x, y, w, h) = cv2.boundingRect(np.array([shape[i:j]]))

		roi = image[y:y + h, x:x + w]
		(h, w) = roi.shape[:2]
		width=250
		r = width / float(w)
		dim = (width, int(h * r))
		roi = cv2.resize(roi, dim, interpolation=cv2.INTER_AREA)

		# 显示每一部分
		# cv2.imshow("ROI", roi)
		cv2.imshow("Image", clone)
		cv2.waitKey(0)

	# 展示所有区域
	output = visualize_facial_landmarks(image, shape)
	cv2.imshow("Image", output)
	cv2.waitKey(0)
26.8、原图