使用Tensorflow2.0执行视觉显著性检测(Visual Saliency Detection)
上一篇博客介绍了如何使用Python,OpenCV执行视觉显著性检测(Visual Saliency Detection)。这篇博客将介绍如何使用Tensorflow2.0执行显著性检测,这是一个应用图像处理和计算机视觉算法来自动定位图像中最“显著”区域的过程。
通常显著性检测器分为三类算法:
- 静态显著性
- 运动显著性
- 对象显著性
OpenCV为提供了四种带有Python绑定的显著性检测器实现,包括: - cv2.saliency.ObjectnessBING_create()
- cv2.saliency.StaticSaliencySpectralResidual_create()
- cv2.saliency.StaticSaliencyFineGrained_create()
- cv2.saliency.MotionSaliencyBinWangApr2014_create()
1. 效果图
原始图1:

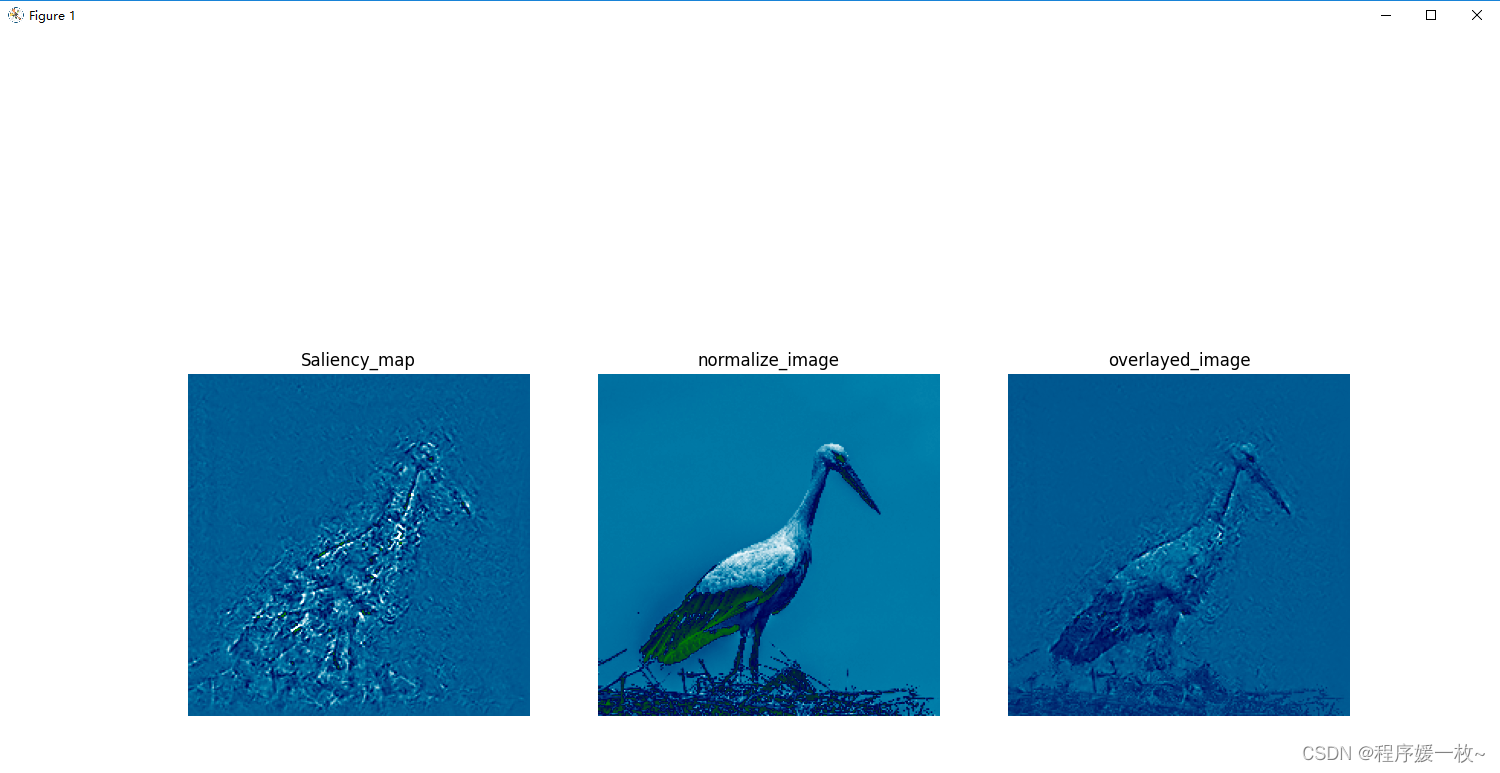
显著性map图 VS 归一化图 VS 叠加图效果图1如下:
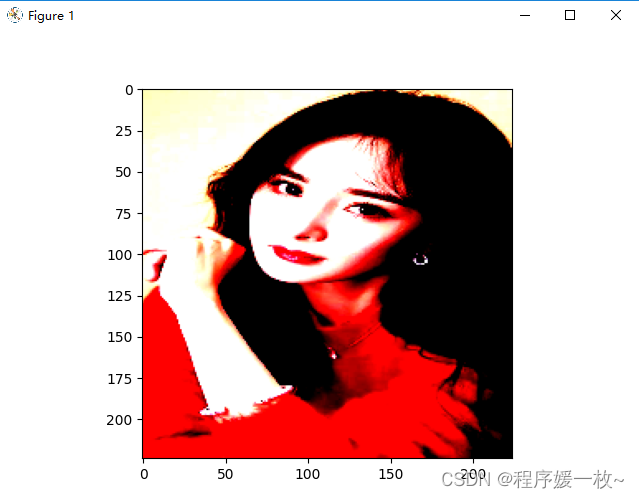
原始图2如下:
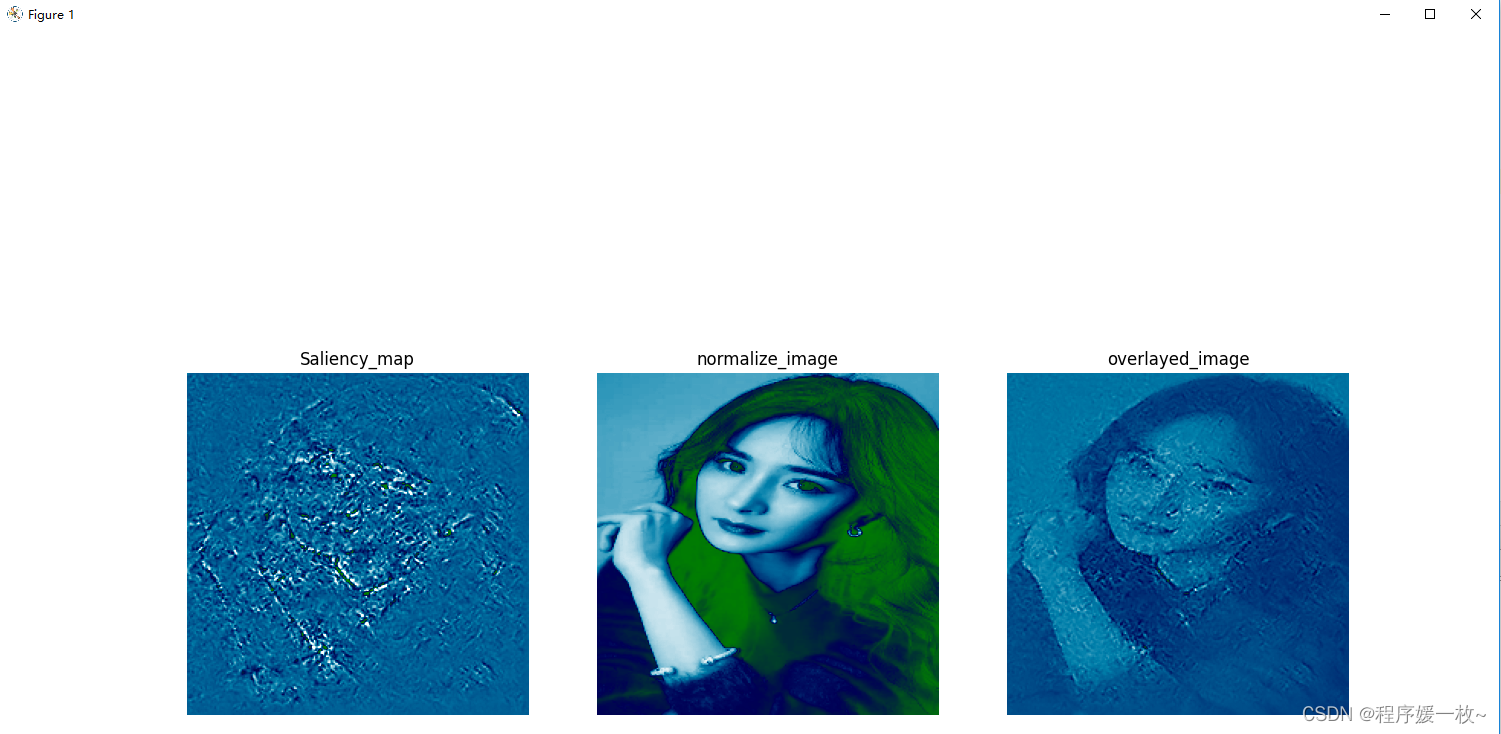
显著性map图 VS 归一化图 VS 叠加图效果图2如下:
2. 源代码
# 使用tensorflow2.0计算显著性图,bi

# 导入必要的包
import matplotlib.pyplot as plt
import tensorflow as tf


def input_img(path):
    image = tf.image.decode_png(tf.io.read_file(path))
    image = tf.expand_dims(image, axis=0)
    image = tf.cast(image, tf.float32)
    image = tf.image.resize(image, [224, 224])
    return image


def normalize_image(img):
    grads_norm = img[:, :, 0] + img[:, :, 1] + img[:, :, 2]
    grads_norm = (grads_norm - tf.reduce_min(grads_norm)) / (tf.reduce_max(grads_norm) - tf.reduce_min(grads_norm))
    return grads_norm


def get_image():
    import urllib.request
    filename = 'image.jpg'
    img_url = r"https://upload.wikimedia.org/wikipedia/commons/d/d7/White_stork_%28Ciconia_ciconia%29_on_nest.jpg"
    urllib.request.urlretrieve(img_url, filename)


def plot_maps(img1, img2, vmin=0.3, vmax=0.7, mix_val=2):
    f = plt.figure(figsize=(15, 45))
    plt.subplot(1, 3, 1)
    plt.imshow(img1, vmin=vmin, vmax=vmax, cmap="ocean")
    plt.title('Saliency_map')
    plt.axis("off")
    plt.subplot(1, 3, 2)
    plt.imshow(img2, cmap="ocean")
    plt.title('normalize_image')
    plt.axis("off")
    plt.subplot(1, 3, 3)
    plt.imshow(img1 * mix_val + img2 / mix_val, cmap="ocean")
    plt.axis("off")
    plt.title('overlayed_image')
    plt.show()


test_model = tf.keras.applications.resnet50.ResNet50()
# 打印模型
test_model.summary()

get_image()
# img_path = "image.jpg"
img_path = 'images/ym.jpg'
input_img = input_img(img_path)
input_img = tf.keras.applications.densenet.preprocess_input(input_img)
plt.imshow(input_img[0], cmap="ocean")
plt.show()
plt.imshow(normalize_image(input_img[0]), cmap="ocean")
plt.show()

result = test_model(input_img)
max_idx = tf.argmax(result, axis=1)
tf.keras.applications.imagenet_utils.decode_predictions(result.numpy())

# TensorFlow 2.x 上提供了 GradientTape 函数,该函数能够处理反向传播相关操作。在这里将利用 GradientTape 的优势来计算给定图像的显着性图。
with tf.GradientTape() as tape:
    tape.watch(input_img)
    result = test_model(input_img)
    max_score = result[0, max_idx[0]]
grads = tape.gradient(max_score, input_img)
plot_maps(normalize_image(grads[0]), normalize_image(input_img[0]))