1. 创建 Spring 项目
前面所学习的 Spring 就是⼀个包含了众多⼯具⽅法的 IoC 容器。
就具备两个最核心的功能:
将对象(Bean)存储到容器(Spring)中;
从容器(Spring)中将对象(Bean)取出来。
总体三步:
1: 创建⼀个普通 Maven 项⽬。
2: 添加 Spring 框架⽀持(spring-context、spring-beans)。
3: 添加启动类
1.1 创建一个 Maven 项目
这里创建好需要注意一下,我们要配置一下国内源(就是常说的镜像Maven),他不会到国外仓库去下载依赖,他会在国内下载,这样的好处就是下载更快,不容易出错,因为如果我们是在国外仓库下载的话网不好就会很慢,而且还很容易出错(你有一次没下好,后面在下的时候他就会以为你下过这个依赖了,就不下了,其实你下的依赖是残缺的,根本运行不了,这个时候就很尴尬了…)

在文件夹中打开:
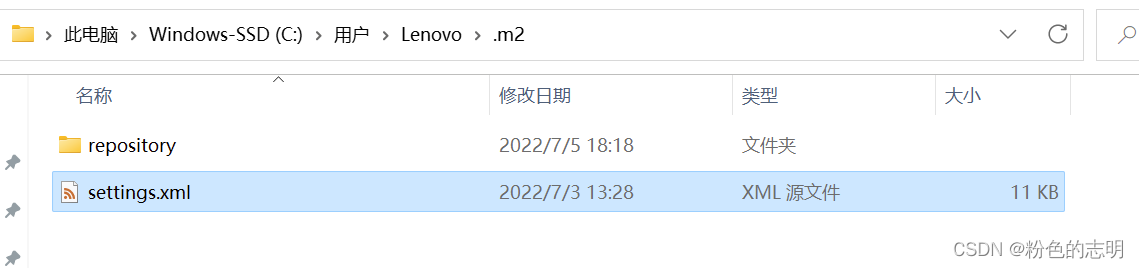
settings.xml里面的内容,我用的阿里云:
<?xml version="1.0" encoding="UTF-8"?>

<!--
Licensed to the Apache Software Foundation (ASF) under one
or more contributor license agreements.  See the NOTICE file
distributed with this work for additional information
regarding copyright ownership.  The ASF licenses this file
to you under the Apache License, Version 2.0 (the
"License"); you may not use this file except in compliance
with the License.  You may obtain a copy of the License at

    http://www.apache.org/licenses/LICENSE-2.0

Unless required by applicable law or agreed to in writing,
software distributed under the License is distributed on an
"AS IS" BASIS, WITHOUT WARRANTIES OR CONDITIONS OF ANY
KIND, either express or implied.  See the License for the
specific language governing permissions and limitations
under the License.
-->

<!--
 | This is the configuration file for Maven. It can be specified at two levels:
 |
 |  1. User Level. This settings.xml file provides configuration for a single user,
 |                 and is normally provided in ${

    user.home}/.m2/settings.xml.
 |
 |                 NOTE: This location can be overridden with the CLI option:
 |
 |                 -s /path/to/user/settings.xml
 |
 |  2. Global Level. This settings.xml file provides configuration for all Maven
 |                 users on a machine (assuming they're all using the same Maven
 |                 installation). It's normally provided in
 |                 ${

    maven.conf}/settings.xml.
 |
 |                 NOTE: This location can be overridden with the CLI option:
 |
 |                 -gs /path/to/global/settings.xml
 |
 | The sections in this sample file are intended to give you a running start at
 | getting the most out of your Maven installation. Where appropriate, the default
 | values (values used when the setting is not specified) are provided.
 |
 |-->
<settings xmlns="http://maven.apache.org/SETTINGS/1.0.0"
          xmlns:xsi="http://www.w3.org/2001/XMLSchema-instance"
          xsi:schemaLocation="http://maven.apache.org/SETTINGS/1.0.0 http://maven.apache.org/xsd/settings-1.0.0.xsd">
  <!-- localRepository
   | The path to the local repository maven will use to store artifacts.
   |
   | Default: ${

    user.home}/.m2/repository
  <localRepository>/path/to/local/repo</localRepository>
  -->

  <!-- interactiveMode
   | This will determine whether maven prompts you when it needs input. If set to false,
   | maven will use a sensible default value, perhaps based on some other setting, for
   | the parameter in question.
   |
   | Default: true
  <interactiveMode>true</interactiveMode>
  -->

  <!-- offline
   | Determines whether maven should attempt to connect to the network when executing a build.
   | This will have an effect on artifact downloads, artifact deployment, and others.
   |
   | Default: false
  <offline>false</offline>
  -->

  <!-- pluginGroups
   | This is a list of additional group identifiers that will be searched when resolving plugins by their prefix, i.e.
   | when invoking a command line like "mvn prefix:goal". Maven will automatically add the group identifiers
   | "org.apache.maven.plugins" and "org.codehaus.mojo" if these are not already contained in the list.
   |-->
  <pluginGroups>
    <!-- pluginGroup
     | Specifies a further group identifier to use for plugin lookup.
    <pluginGroup>com.your.plugins</pluginGroup>
    -->
  </pluginGroups>

  <!-- proxies
   | This is a list of proxies which can be used on this machine to connect to the network.
   | Unless otherwise specified (by system property or command-line switch), the first proxy
   | specification in this list marked as active will be used.
   |-->
  <proxies>
    <!-- proxy
     | Specification for one proxy, to be used in connecting to the network.
     |
    <proxy>
      <id>optional</id>
      <active>true</active>
      <protocol>http</protocol>
      <username>proxyuser</username>
      <password>proxypass</password>
      <host>proxy.host.net</host>
      <port>80</port>
      <nonProxyHosts>local.net|some.host.com</nonProxyHosts>
    </proxy>
    -->
  </proxies>

  <!-- servers
   | This is a list of authentication profiles, keyed by the server-id used within the system.
   | Authentication profiles can be used whenever maven must make a connection to a remote server.
   |-->
  <servers>
    <!-- server
     | Specifies the authentication information to use when connecting to a particular server, identified by
     | a unique name within the system (referred to by the 'id' attribute below).
     |
     | NOTE: You should either specify username/password OR privateKey/passphrase, since these pairings are
     |       used together.
     |
    <server>
      <id>deploymentRepo</id>
      <username>repouser</username>
      <password>repopwd</password>
    </server>
    -->

    <!-- Another sample, using keys to authenticate.
    <server>
      <id>siteServer</id>
      <privateKey>/path/to/private/key</privateKey>
      <passphrase>optional; leave empty if not used.</passphrase>
    </server>
    -->
  </servers>

  <!-- mirrors
   | This is a list of mirrors to be used in downloading artifacts from remote repositories.
   |
   | It works like this: a POM may declare a repository to use in resolving certain artifacts.
   | However, this repository may have problems with heavy traffic at times, so people have mirrored
   | it to several places.
   |
   | That repository definition will have a unique id, so we can create a mirror reference for that
   | repository, to be used as an alternate download site. The mirror site will be the preferred
   | server for that repository.
   |-->
  <mirrors>
   <mirror>
        <id>alimaven</id>
        <name>aliyun maven</name>
        <url>http://maven.aliyun.com/nexus/content/groups/public/</url>
        <mirrorOf>central</mirrorOf>
      </mirror>
    <!-- mirror
     | Specifies a repository mirror site to use instead of a given repository. The repository that
     | this mirror serves has an ID that matches the mirrorOf element of this mirror. IDs are used
     | for inheritance and direct lookup purposes, and must be unique across the set of mirrors.
     |
    <mirror>
      <id>mirrorId</id>
      <mirrorOf>repositoryId</mirrorOf>
      <name>Human Readable Name for this Mirror.</name>
      <url>http://my.repository.com/repo/path</url>
    </mirror>
     -->
  </mirrors>

  <!-- profiles
   | This is a list of profiles which can be activated in a variety of ways, and which can modify
   | the build process. Profiles provided in the settings.xml are intended to provide local machine-
   | specific paths and repository locations which allow the build to work in the local environment.
   |
   | For example, if you have an integration testing plugin - like cactus - that needs to know where
   | your Tomcat instance is installed, you can provide a variable here such that the variable is
   | dereferenced during the build process to configure the cactus plugin.
   |
   | As noted above, profiles can be activated in a variety of ways. One way - the activeProfiles
   | section of this document (settings.xml) - will be discussed later. Another way essentially
   | relies on the detection of a system property, either matching a particular value for the property,
   | or merely testing its existence. Profiles can also be activated by JDK version prefix, where a
   | value of '1.4' might activate a profile when the build is executed on a JDK version of '1.4.2_07'.
   | Finally, the list of active profiles can be specified directly from the command line.
   |
   | NOTE: For profiles defined in the settings.xml, you are restricted to specifying only artifact
   |       repositories, plugin repositories, and free-form properties to be used as configuration
   |       variables for plugins in the POM.
   |
   |-->
  <profiles>
    <!-- profile
     | Specifies a set of introductions to the build process, to be activated using one or more of the
     | mechanisms described above. For inheritance purposes, and to activate profiles via <activatedProfiles/>
     | or the command line, profiles have to have an ID that is unique.
     |
     | An encouraged best practice for profile identification is to use a consistent naming convention
     | for profiles, such as 'env-dev', 'env-test', 'env-production', 'user-jdcasey', 'user-brett', etc.
     | This will make it more intuitive to understand what the set of introduced profiles is attempting
     | to accomplish, particularly when you only have a list of profile id's for debug.
     |
     | This profile example uses the JDK version to trigger activation, and provides a JDK-specific repo.
    <profile>
      <id>jdk-1.4</id>

      <activation>
        <jdk>1.4</jdk>
      </activation>

      <repositories>
        <repository>
          <id>jdk14</id>
          <name>Repository for JDK 1.4 builds</name>
          <url>http://www.myhost.com/maven/jdk14</url>
          <layout>default</layout>
          <snapshotPolicy>always</snapshotPolicy>
        </repository>
      </repositories>
    </profile>
    -->

    <!--
     | Here is another profile, activated by the system property 'target-env' with a value of 'dev',
     | which provides a specific path to the Tomcat instance. To use this, your plugin configuration
     | might hypothetically look like:
     |
     | ...
     | <plugin>
     |   <groupId>org.myco.myplugins</groupId>
     |   <artifactId>myplugin</artifactId>
     |
     |   <configuration>
     |     <tomcatLocation>${

    tomcatPath}</tomcatLocation>
     |   </configuration>
     | </plugin>
     | ...
     |
     | NOTE: If you just wanted to inject this configuration whenever someone set 'target-env' to
     |       anything, you could just leave off the <value/> inside the activation-property.
     |
    <profile>
      <id>env-dev</id>

      <activation>
        <property>
          <name>target-env</name>
          <value>dev</value>
        </property>
      </activation>

      <properties>
        <tomcatPath>/path/to/tomcat/instance</tomcatPath>
      </properties>
    </profile>
    -->
  </profiles>

  <!-- activeProfiles
   | List of profiles that are active for all builds.
   |
  <activeProfiles>
    <activeProfile>alwaysActiveProfile</activeProfile>
    <activeProfile>anotherAlwaysActiveProfile</activeProfile>
  </activeProfiles>
  -->
</settings>
复制创建进去,注意格式
注意:
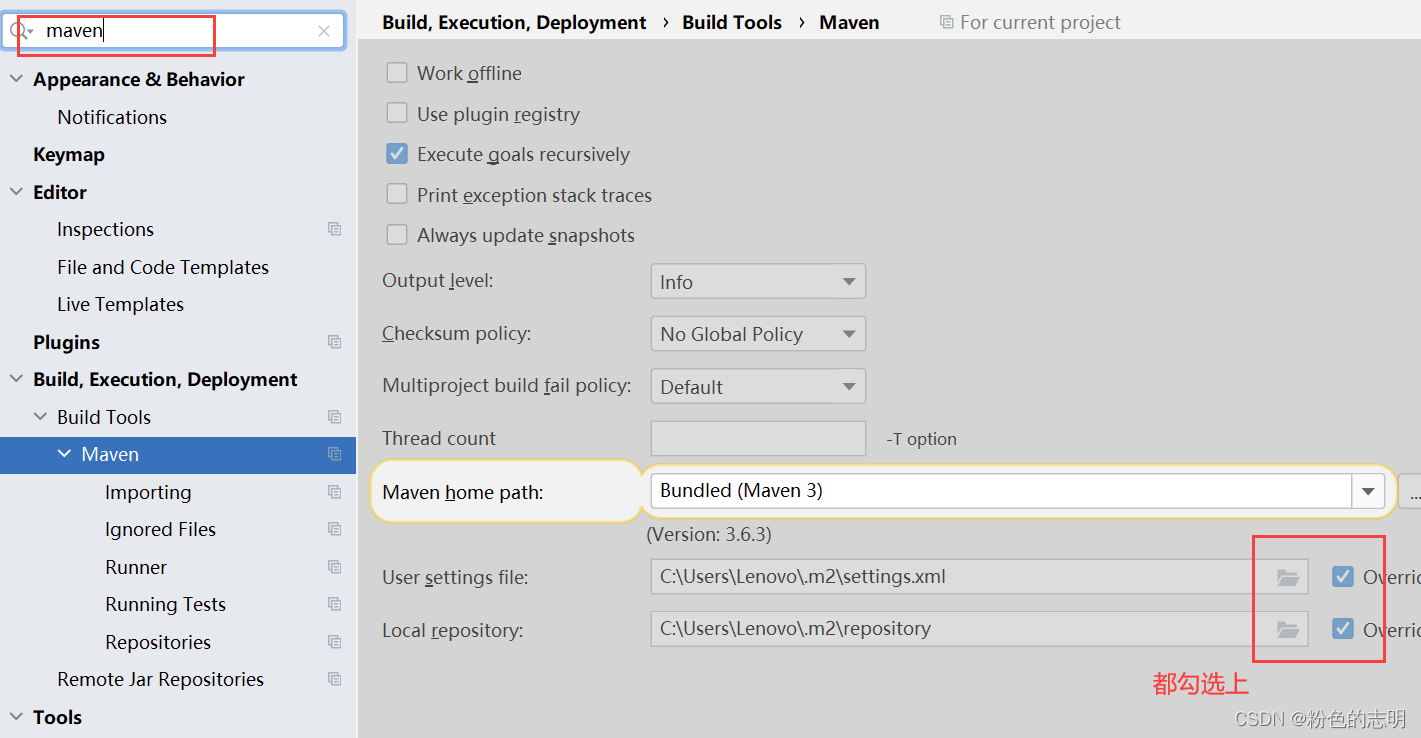
1:需要检查那两个选项是否勾选
2:检查 settings.xml这个目录是否存在,如果不存在,创建进去,如果存在,检查是否配置了国内源
3:如果添加依赖还是运行不了,就需要把 repository 目录下的内容都删了,因为之前可能下过只是没下完整,在下的时候默认在本地仓库是下完整的就不下了,需要删除重新下
4:新项目配置国内源


1.2 添加 Spring 依赖包
<dependencies>
	<dependency>
		<groupId>org.springframework</groupId>
		<artifactId>spring-context</artifactId>
		<version>5.2.3.RELEASE</version>
	</dependency>

	<dependency>
		<groupId>org.springframework</groupId>
		<artifactId>spring-beans</artifactId>
		<version>5.2.3.RELEASE</version>
	</dependency>
</dependencies>
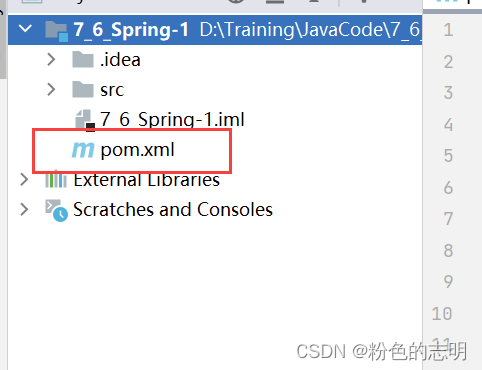
粘贴到 pom.xml里:

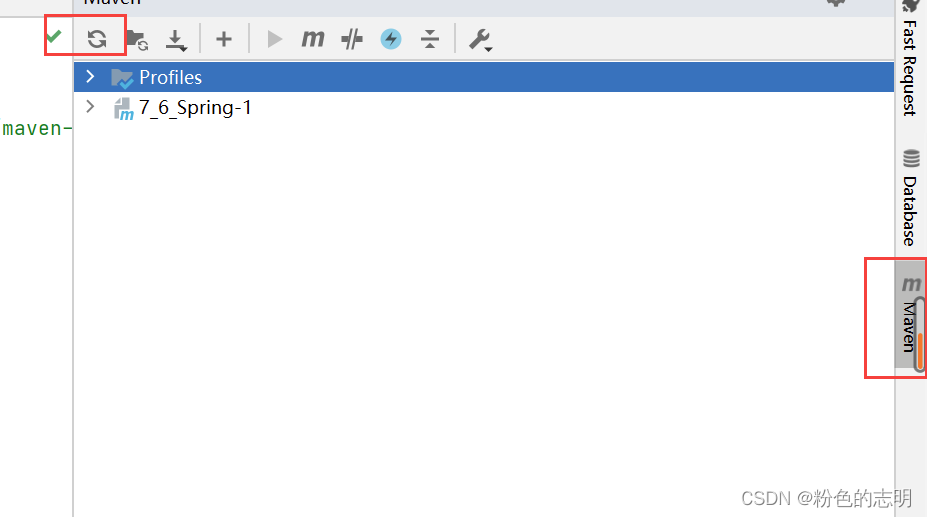
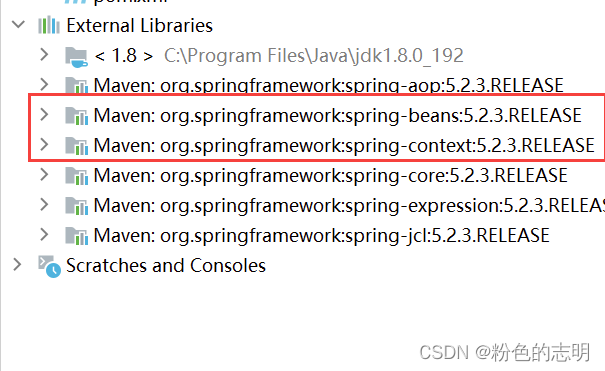
记得刷新一下:
1.3 创建启动类
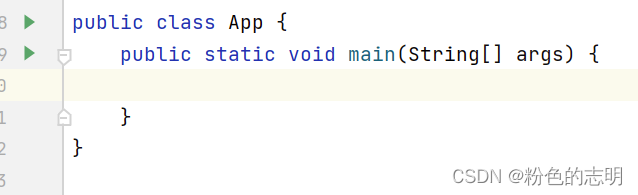
最后在创建好的项⽬ java ⽂件夹下创建⼀个启动类,包含 main ⽅法即可:


2. 存储 Bean 对象
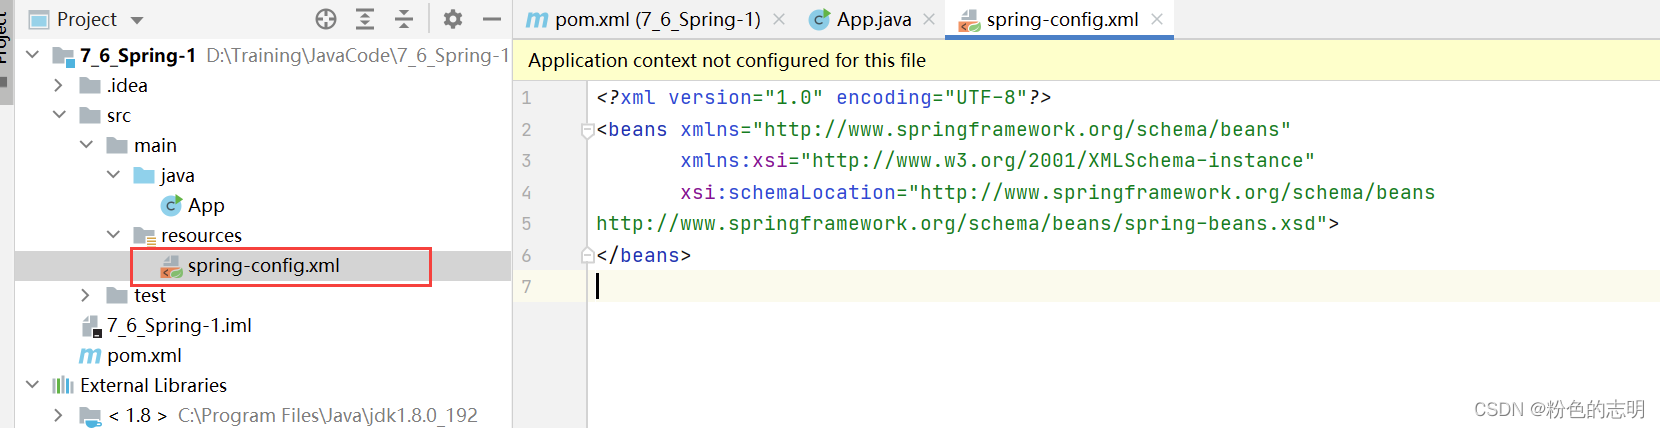
2.1 在 Spring 项目中添加配置文件(第一次)
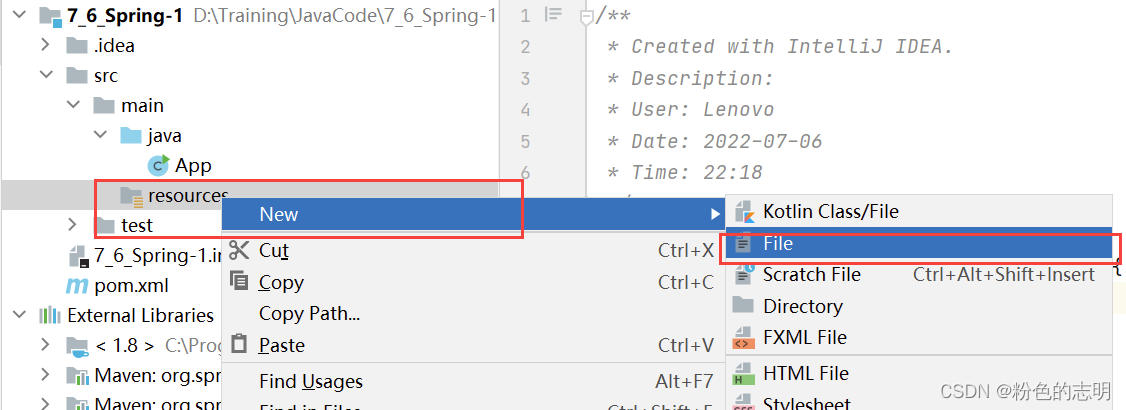
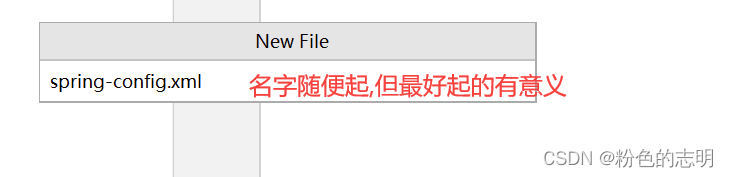
将下面内容复制进去:
<?xml version="1.0" encoding="UTF-8"?>
<beans xmlns="http://www.springframework.org/schema/beans"
xmlns:xsi="http://www.w3.org/2001/XMLSchema-instance"
xsi:schemaLocation="http://www.springframework.org/schema/beans
http://www.springframework.org/schema/beans/spring-beans.xsd">
</beans>
2.2 创建 Bean 对象
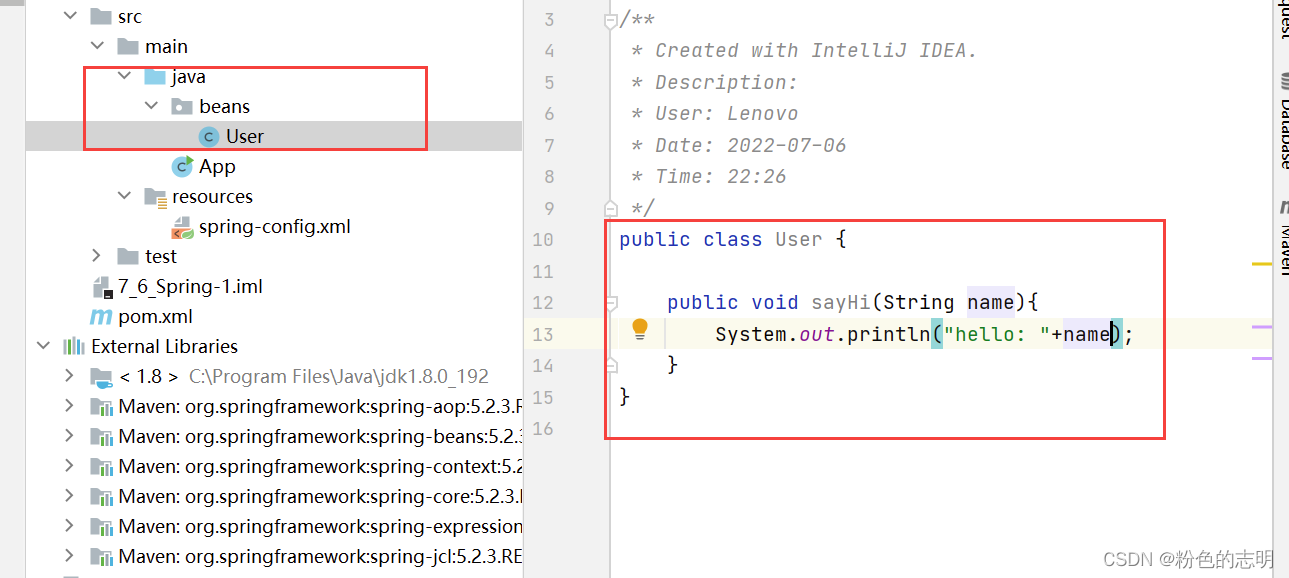
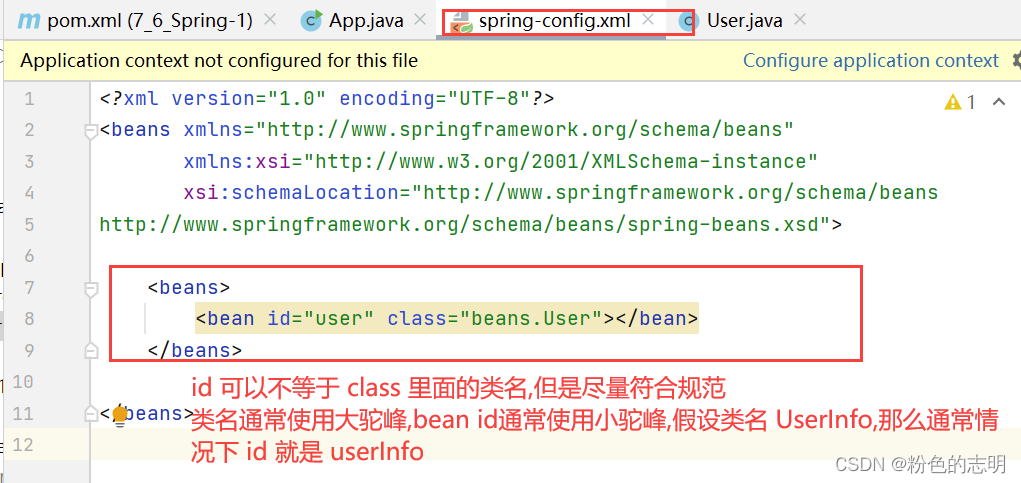
2.3 将 Bean 通过配置文件注册到 Spring 中
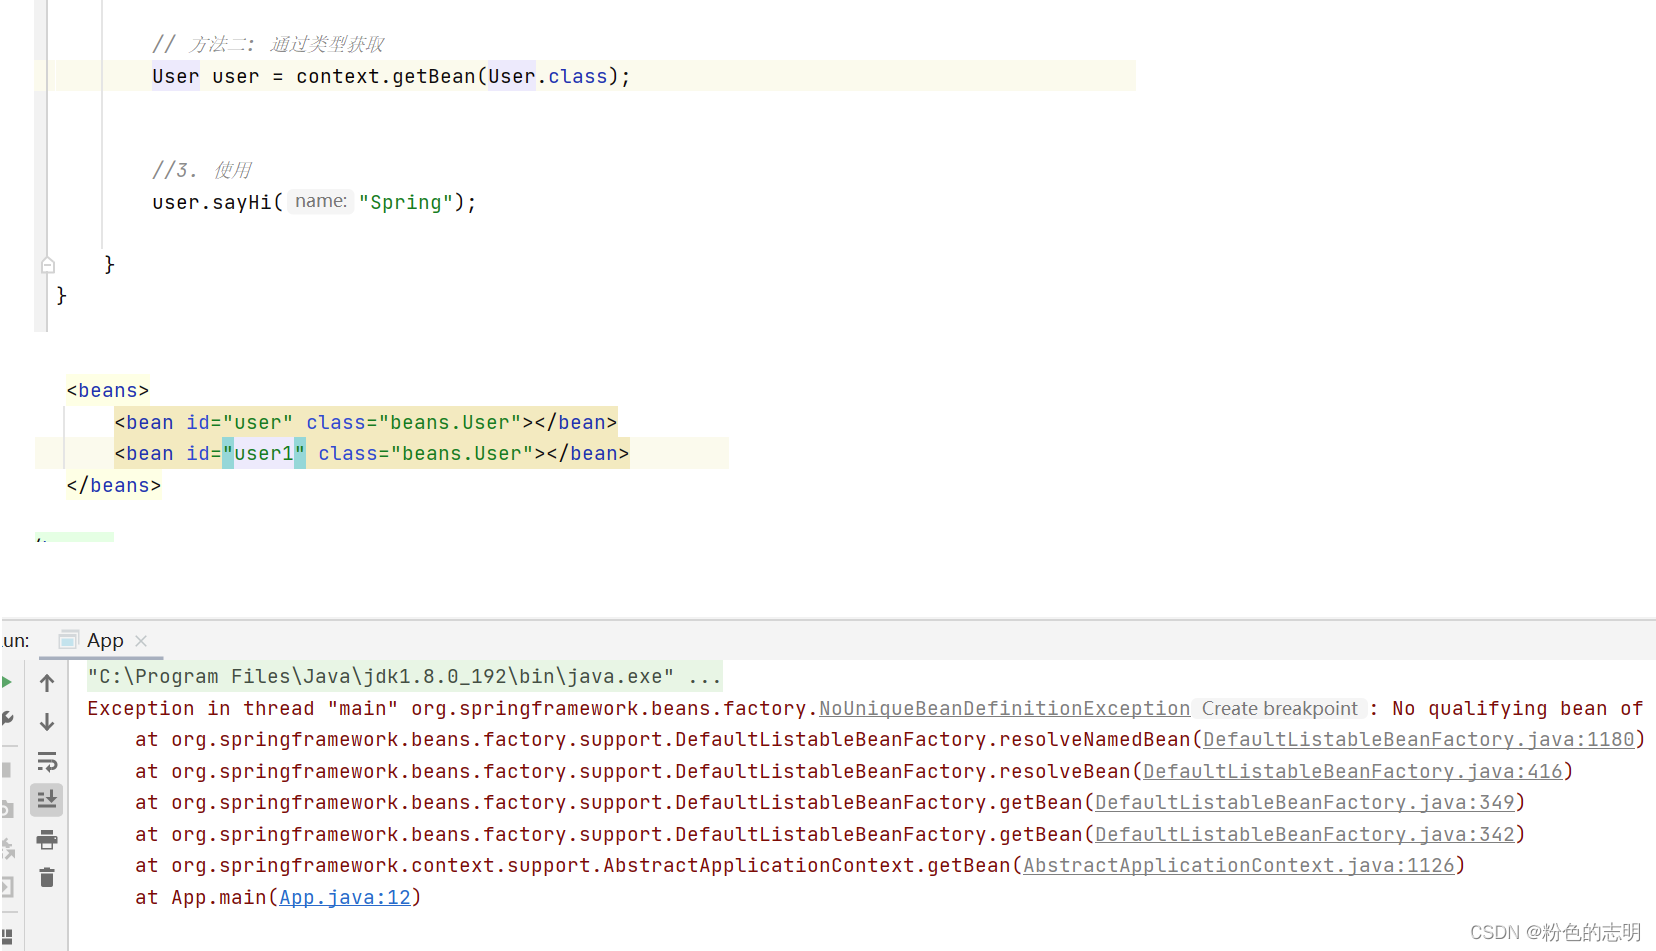
<beans>
        <bean id="user" class="beans.User"></bean>
    </beans>
3. 从 Spring 中将 Bean 读取出来
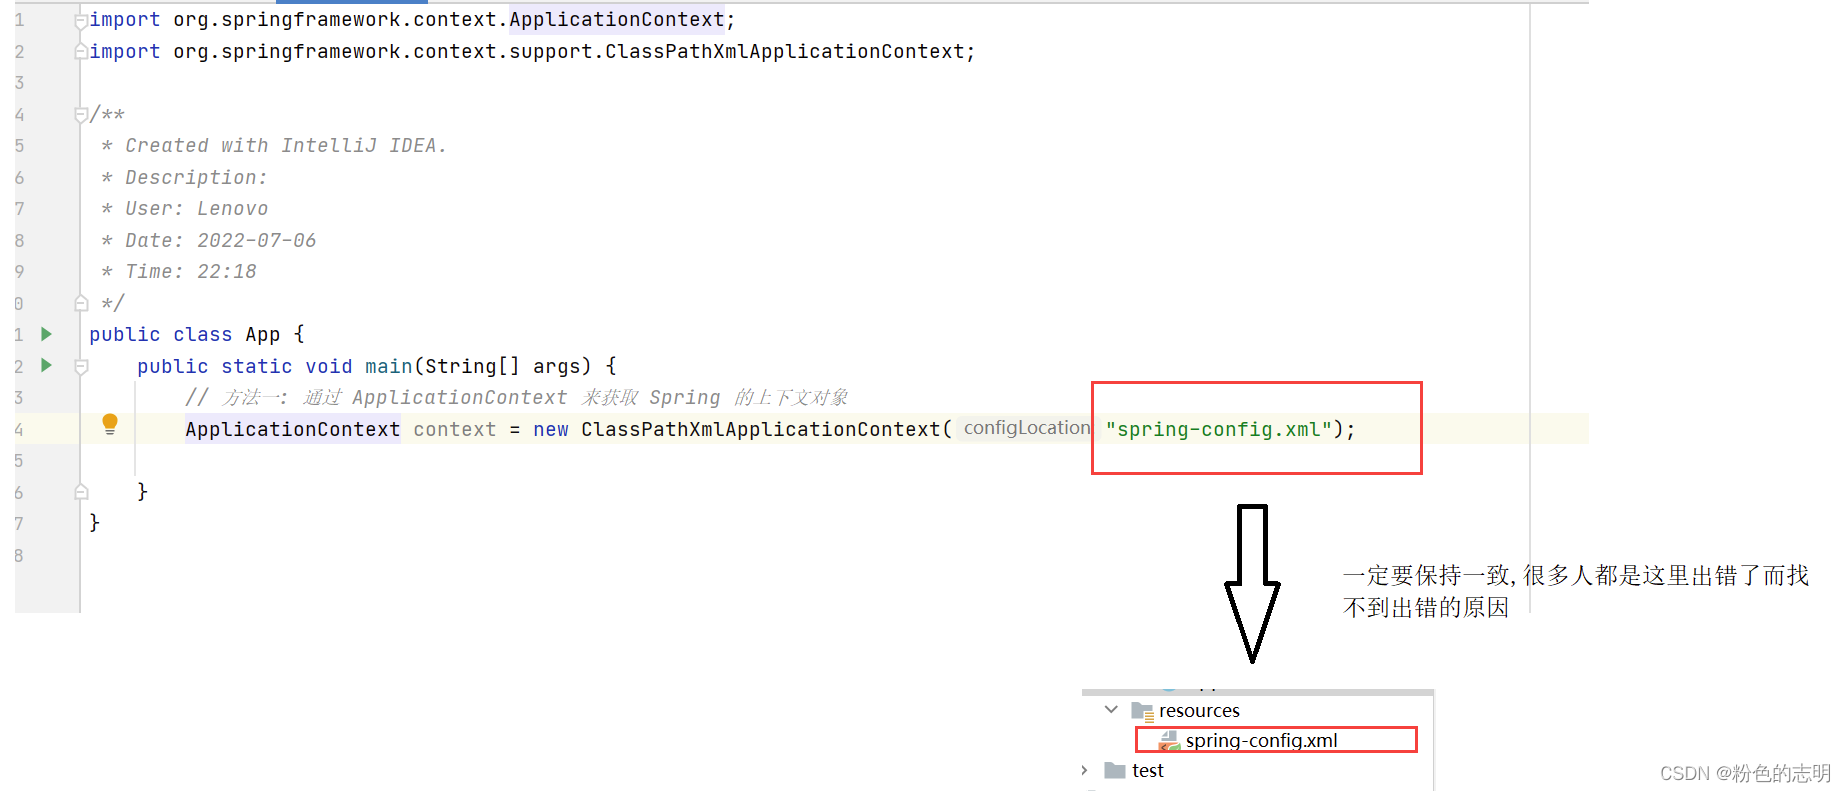
3.1 先得到 Spring 上下文
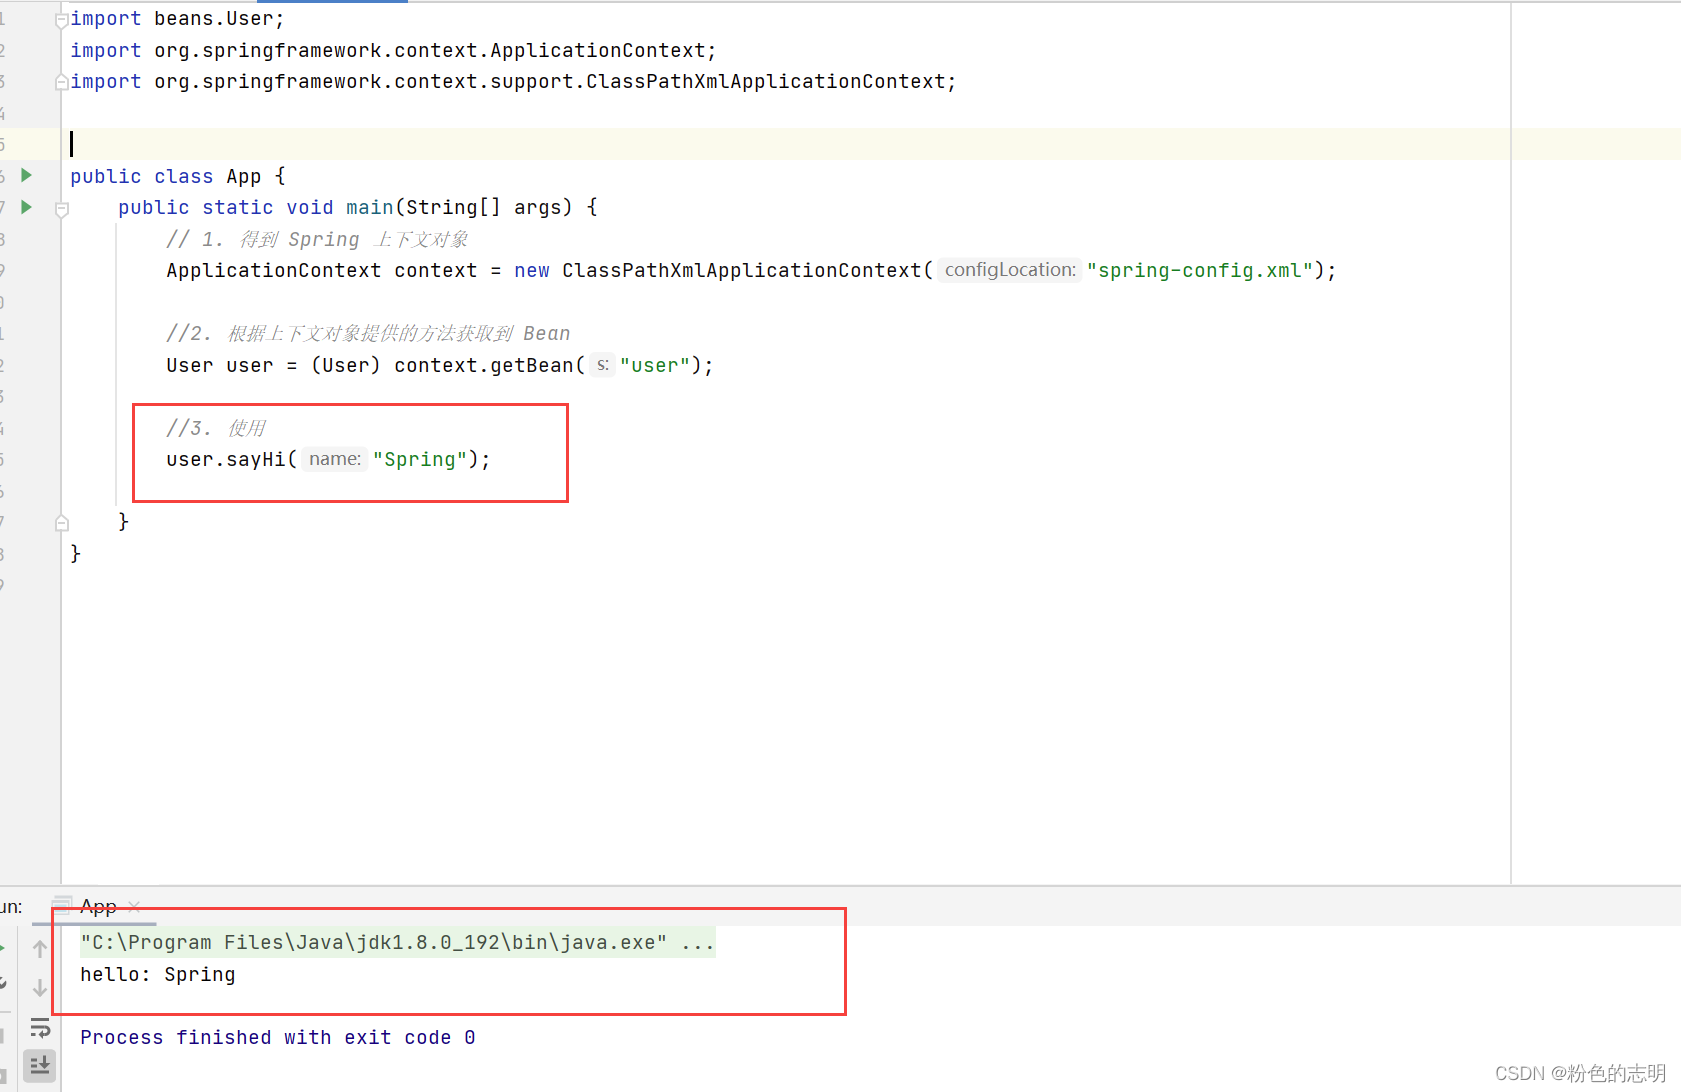
3.1.1 可以是 ApplicationContext 来获取
	// 方法一: 通过 ApplicationContext 来获取 Spring 的上下文对象
    ApplicationContext context = new ClassPathXmlApplicationContext("spring-config.xml");
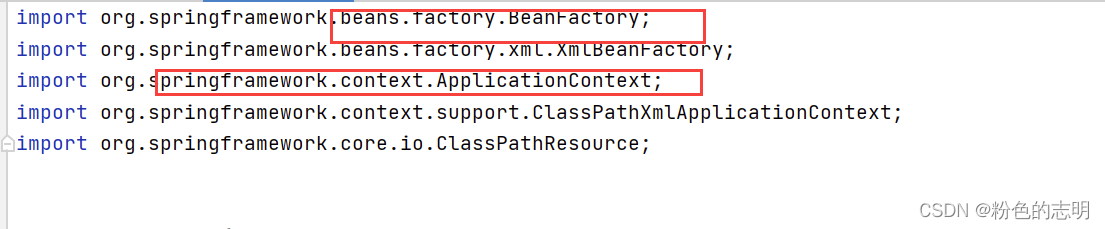
3.1.2 也可以 BeanFactory 来获取
    // 方法二: 通过  BeanFactory 来获取 Spring 的上下文对象
    BeanFactory beanFactory = new XmlBeanFactory(new ClassPathResource("spring-config.xml"));
3.1.3 经典面试: ApplicationContext 和 BeanFactory 有什么区别?
相同点:都可以实现从容器中获取 Bean,都提供了 getBean 的方法
不同点:
1: 二者来自的 jar 包不同
BeanFactory 来自spring.beans.jar下,ApplicationContext 来自spring.context.jar下:
2:
ApplicationContext属于BeanFactory的子类.BeanFactory只提供了基础访问Bean的方法,
而ApplicationContext除了拥有BeanFactory的所有功能外,还提供了更多的方法实现,比如对国际化的支持,资源访问的支持,以及事件和传播等方面的支持.
3: 从性能方面来说二者也是不同的,
BeanFactory 是按需加载 Bean(懒汉式),ApplicationContext是饿汉式的加载,在创建时会将所有的 Bean 都加载起来,以备后续使用
3.2 获取 Bean,根据上下文对象提供的 getBean 方法
3.2.1. 可以通过 Bean id 来获取
//2. 根据上下文对象提供的方法获取到 Bean
        User user = (User) context.getBean("user");
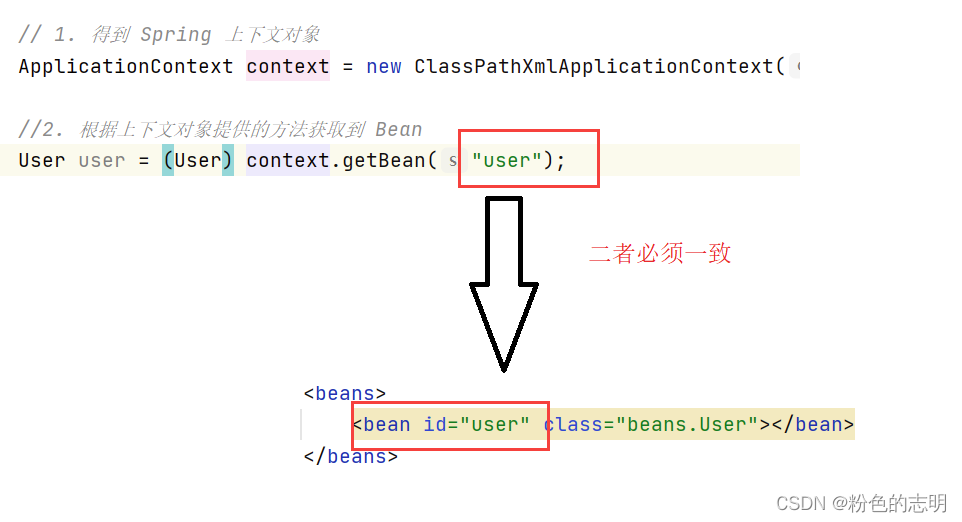
需要强制类型转换
3.2.2. 可以通过类型来获取
    // 方法二: 通过类型获取
    UserBean user = context.getBean(User.class);
写法简单,但容易出问题.当同一个类型被注入 Spring 中多次(多个)的时候,就会报错
3.2.3. 通过 id + 类型来获取
    // 方法三: 通过 id+类型 来获取
    UserBean user = context.getBean("user",User.class);
这个就不存在第二种情况了,但是 id 要对应上
3.3 使用 Bean 对象