本篇文章主要讲讲分布式爬虫的实现,一个是基于主从模式的方法,另一个则是基于Scrapy_redis分布式实现的方法。
分布式进程:
分布式进程是指将Process进程分布到多台机器上,充分利用多台机器的性能完成复杂的任务。在Python的通过multiprocessing库来完成,该模块不仅支持多进程且还支持将多进程分布到多台机器上。分布式进程就是将把Queue暴露到网络中让其他机器进程可以访问的过程进行了封装,这个过程也称为本地队列的网络化。
创建分布式进程的服务进程(taskManager.py)主要为6个步骤:
1、建立队列Queue,用来进行进程间的通信;
2、把第一步中建立的队列在网络上注册,暴露给其他主机的进程,注册后获得网络队列,相当于本地队列的映像;
3、建立一个对象实例manager,绑定端口和验证口令;
4、启动第三步中建立的实例,即启动管理manager,监管信息通道;
5、通过管理实例的方法获得通过网络访问的Queue对象,即再把网络队列实体化成可以使用的本地队列;
6、创建任务到“本地”队列中,自动上传任务到网络队列中,分配给任务进程进行处理。
Linux版本:
#coding=utf-8
import Queue
from multiprocessing.managers import BaseManager
# 第一步,建立task_queue和result_queue来存放任务和结果
task_queue = Queue.Queue()
result_queue = Queue.Queue()
# 第二步,把创建的两个队列注册在网络上,利用register方法,callable参数关联了Queue对象,将Queue对象在网络中暴露
BaseManager.register('get_task_queue', callable=lambda:task_queue)
BaseManager.register('get_result_queue', callable=lambda:result_queue)
# 第三步,绑定端口8001,设置验证口令,相当于对象初始化
manager = BaseManager(address=('', 8001), authkey='ski12')
# 第四步,启动管理,监听信息通道
manager.start()
# 第五步,通过管理实例的方法获得通过网络访问的Queue对象
task = manager.get_task_queue()
result = manager.get_result_queue()
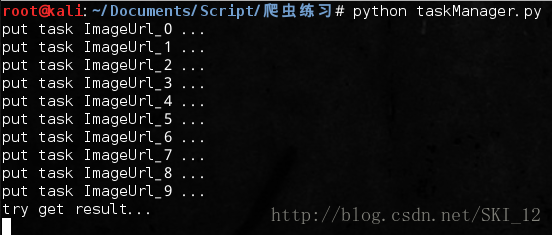
# 第六步,添加任务
for url in ["ImageUrl_" + str(i) for i in range(10)]:
print "put task %s ..." % url
task.put(url)
# 获取返回结果
print "try get result..."
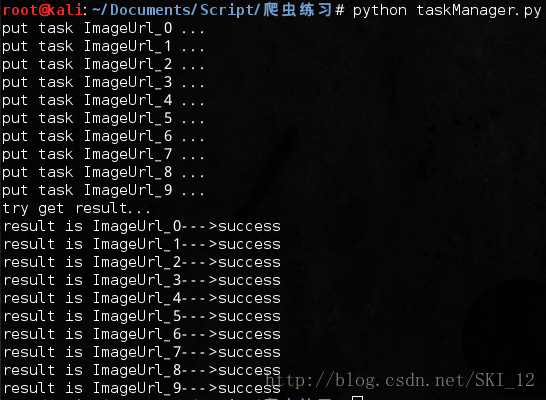
for i in range(10):
print "result is %s" % result.get(timeout=10)
# 关闭管理
manager.shutdown()
Windows版本:
#coding=utf-8
import Queue
from multiprocessing.managers import BaseManager
from multiprocessing import freeze_support

# 任务个数
task_number = 10

# 第一步,建立task_queue和result_queue来存放任务和结果
task_queue = Queue.Queue(task_number)
result_queue = Queue.Queue(task_number)

def get_task():
	return task_queue

def get_result():
	return result_queue

def win_run():
	# 第二步,把创建的两个队列注册在网络上,利用register方法,callable参数关联了Queue对象,将Queue对象在网络中暴露
	# Windows下绑定调用接口不能使用lambda,所以只能先定义函数再绑定
	BaseManager.register('get_task_queue', callable=get_task)
	BaseManager.register('get_result_queue', callable=get_result)

	# 第三步,绑定端口8001,设置验证口令,相当于对象初始化,Windows下需要填写IP地址
	manager = BaseManager(address=('127.0.0.1', 8001), authkey='ski12')

	# 第四步,启动管理,监听信息通道
	manager.start()

	try:
		# 第五步,通过管理实例的方法获得通过网络访问的Queue对象
		task = manager.get_task_queue()
		result = manager.get_result_queue()

		# 第六步,添加任务
		for url in ["ImageUrl_" + str(i) for i in range(10)]:
			print "put task %s ..." % url
			task.put(url)

		# 获取返回结果
		print "try get result..."
		for i in range(10):
			print "result is %s" % result.get(timeout=10)
	except:
		print "Manager error"
	finally:
		# 一定要关闭管理,否则会报管道未关闭错误
		manager.shutdown()

if __name__ == '__main__':
	# Windows下多进程可能会有问题,添加这句可以缓解
	freeze_support()
	win_run()
而任务进程(taskWorker.py)则分为4个步骤:
1、使用QueueManager注册用于获取Queue的方法名称,任务进程只能通过名称来在网络上获取Queue;
2、连接服务器,端口和验证口令注意保持与服务进程中完全一致;
3、从网络上获取Queue,进行本地化;
4、从task队列获取任务,并把结果写入result队列。
#coding=utf-8
import time
from multiprocessing.managers import BaseManager
# 第一步,使用QueueManager注册用于获取Queue的方法名称
BaseManager.register('get_task_queue')
BaseManager.register('get_result_queue')
# 第二步,连接到服务器
server_addr = '127.0.0.1'
print "Connect to server %s..." % server_addr
# 端口和验证口令注意保持与服务进程完全一致
m = BaseManager(address=(server_addr, 8001), authkey='ski12')
# 从网络连接
m.connect()
# 第三步,获取Queue对象
task = m.get_task_queue()
result = m.get_result_queue()
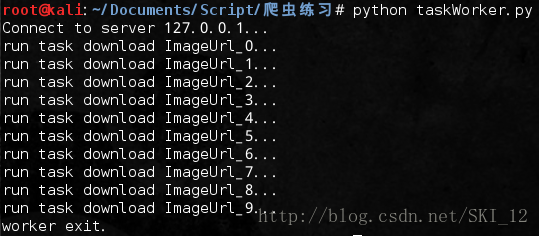
# 第四步,从task队列获取任务,并把结果写入result队列
while(not task.empty()):
image_url = task.get(True, timeout=5)
print "run task download %s..." % image_url
time.sleep(1)
result.put("%s--->success" % image_url)
# 处理结束
print "worker exit."
先运行服务进程:
然后运行任务进程:
在服务进程可以查看到任务进程返回的情况:
主从模式的分布式爬虫:
采用主从模式,由一台主机作为控制节点来负责管理所有运行爬虫的主机,爬虫只需从控制节点中接收任务并把新生成的任务提交给控制节点即可。缺点是容易导致整个分布式爬虫系统的性能下降。
控制节点分为URL管理器、数据存储器和控制调度器。
爬虫节点分为HTML下载器、HTML解析器和爬虫调度器。
其实和之前的基础爬虫框架类似,只不过添加了控制调度器来实现分布式的控制管理而已。
ControlNode控制节点:
NodeManager.py:
#coding=utf-8
import time
import sys
from multiprocessing import Queue, Process
from multiprocessing.managers import BaseManager

from DataOutput import DataOutput
from URLManager import UrlManager

class NodeManager(object):
    # 创建一个分布式管理器
    def start_Manager(self, url_q, result_q):
        # 把创建的两个队列注册在网络上,利用register方法,callable参数关联了Queue对象,将Queue对象在网络中暴露
        BaseManager.register('get_task_queue', callable=lambda:url_q)
        BaseManager.register('get_result_queue', callable=lambda:result_q)
        # 绑定端口8001,设置验证口令,相当于对象初始化
        manager = BaseManager(address=('', 8001), authkey='ski12')
        # 返回manager对象
        return manager

    def url_manager_proc(self, url_q, conn_q, root_url):
        url_manager = UrlManager()
        url_manager.add_new_url(root_url)
        while True:
            while(url_manager.has_new_url()):
                # 从URL管理器获取新的url
                new_url = url_manager.get_new_url()
                # 将新的URL发给工作节点
                url_q.put(new_url)
                # print "[*]The number of crawled url is: ", url_manager.old_url_size()
                # 显示进度条
                percentage = u"[*]已爬取的URL数量为:%s" % url_manager.old_url_size()
                sys.stdout.write('\r' + percentage)
                # 加一个判断条件,当爬去2000个链接后就关闭,并保存进度
                if(url_manager.old_url_size()>20):
                    # 通知爬行节点工作结束,添加标识符end
                    url_q.put('end')
                    print u"\n[*]控制节点通知爬行结点结束工作..."
                    # 关闭管理节点,同时存储set状态
                    url_manager.save_progress('new_urls.txt', url_manager.new_urls)
                    url_manager.save_progress('old_urls.txt', url_manager.old_urls)
                    return
            # 将从result_solve_proc获取到的urls添加到URL管理器
            try:
                if not conn_q.empty():
                    urls = conn_q.get()
                    url_manager.add_new_urls(urls)
            except BaseException, e:
                # 延时休息
                time.sleep(0.1)

    def result_solve_proc(self, result_q, conn_q, store_q):
        while True:
            try:
                if not result_q.empty():
                    content = result_q.get(True)
                    if content['new_urls'] == 'end':
                        # 结果分析进程接受通知然后结束
                        print u"[*]关闭数据提取进程"
                        store_q.put('end')
                        return
                    # url为set类型
                    conn_q.put(content['new_urls'])
                    # 解析出来的数据为dict类型
                    store_q.put(content['data'])
                else:
                    # 延时休息
                    time.sleep(0.1)
            except BaseException, e:
                # 延时休息
                time.sleep(0.1)

    def store_proc(self, store_q):
        output = DataOutput()
        while True:
            if not store_q.empty():
                data = store_q.get()
                if data == 'end':
                    print u"[*]关闭数据存储进程"
                    output.output_end(output.filepath)
                    return
                output.store_data(data)
            else:
                time.sleep(0.1)

if __name__ == '__main__':
    if len(sys.argv) == 2:
        url = 'https://baike.baidu.com/item/' + sys.argv[1]
        # 初始化4个队列
        url_q = Queue()
        result_q = Queue()
        conn_q = Queue()
        store_q = Queue()
        # 创建分布式管理器
        node = NodeManager()
        manager = node.start_Manager(url_q, result_q)
        # 创建URL管理进程、 数据提取进程和数据存储进程
        url_manager_proc = Process(target=node.url_manager_proc, args=(url_q, conn_q, url))
        result_solve_proc = Process(target=node.result_solve_proc, args=(result_q, conn_q, store_q))
        store_proc = Process(target=node.store_proc, args=(store_q, ))
        # 启动3个进程和分布式管理器
        url_manager_proc.start()
        result_solve_proc.start()
        store_proc.start()
        manager.get_server().serve_forever()
    else:
        print "[*]Usage: python NodeManager.py [Crawl Keyword]"
UrlManager.py:
#coding=utf-8
import cPickle
import hashlib

class UrlManager(object):
    def __init__(self):
        # 未爬取的URL集合
        self.new_urls = self.load_progress('new_urls.txt')
        # 已爬取的URL集合
        self.old_urls = self.load_progress('old_urls.txt')

    def has_new_url(self):
        return self.new_url_size() != 0

    def get_new_url(self):
        new_url = self.new_urls.pop()
        # 对爬取过的URL进行MD5处理,对获取的信息摘要取中间的128位保存到set(),以减少内存消耗
        m = hashlib.md5()
        m.update(new_url)
        self.old_urls.add(m.hexdigest()[8:-8])
        return new_url

    def add_new_url(self, url):
        if url is None:
            return
        m = hashlib.md5()
        m.update(url)
        url_md5 = m.hexdigest()[8:-8]
        if url not in self.new_urls and url_md5 not in self.old_urls:
            self.new_urls.add(url)

    def add_new_urls(self, urls):
        if urls is None or len(urls) == 0:
            return
        for url in urls:
            self.add_new_url(url)

    def new_url_size(self):
        return len(self.new_urls)

    def old_url_size(self):
        return len(self.old_urls)

    # 将未爬取的URL集合和已爬取的URL集合序列化到本地,保存当前进度,以便下次恢复状态
    def save_progress(self, path, data):
        with open(path, 'wb') as f:
            cPickle.dump(data, f)

    # 加载进度
    def load_progress(self, path):
        print "[+]从文件加载进度:%s" % path
        try:
            with open(path, 'rb') as f:
                tmp = cPickle.load(f)
                return tmp
        except:
            print "[!]无进度文件,创建:%s" % path
        return set()
DataOutput.py:
#coding=utf-8
import codecs
import time

class DataOutput(object):
    def __init__(self):
        # 生成的文件按照当前时间来命名以区分文件
        self.filepath = 'baike_%s.html' % (time.strftime("%Y_%m_%d_%H_%M_%S", time.localtime()))
        self.output_head(self.filepath)
        self.datas = []

    def store_data(self, data):
        if data is None:
            return
        self.datas.append(data)
        # 对文件进行缓存写入,当大于10条数据时就保存
        if len(self.datas) > 10:
            self.output_html(self.filepath)

    def output_head(self, path):
        fout = codecs.open(path, 'w', encoding='utf-8')
        fout.write("<html>")
        fout.write("<body>")
        fout.write("<table>")
        fout.close()

    def output_html(self, path):
        fout = codecs.open(path, 'a', encoding='utf-8')
        for data in self.datas:
            fout.write("<tr>")
            fout.write("<td>%s</td>" % data['url'])
            fout.write("<td>%s</td>" % data['title'])
            fout.write("<td>%s</td>" % data['summary'])
            fout.write("</tr>")
            self.datas.remove(data)
        fout.close()

    def output_end(self, path):
        fout = codecs.open(path, 'a', encoding='utf-8')
        fout.write("</table>")
        fout.write("</body>")
        fout.write("</html>")
        fout.close()
SpiderNode爬虫结点:
SpiderWorker.py:
#coding=utf-8
from multiprocessing.managers import BaseManager

from HtmlDownloader import HtmlDownloader
from HtmlParser import HtmlParser

class SpiderWorker(object):
    def __init__(self):
        # 初始化分布式进程中的工作节点的连接工作
        # 实现第一步:使用BaseManager注册获取Queue的方法名称
        BaseManager.register('get_task_queue')
        BaseManager.register('get_result_queue')
        # 实现第二步:连接到服务器:
        server_addr = '127.0.0.1'
        print "[*]Connect to server %s..." % server_addr
        # 端口和验证口令注意保持与服务进程设置的完全一致:
        self.m = BaseManager(address=(server_addr, 8001), authkey='ski12')
        # 从网络连接:
        self.m.connect()
        # 实现第三步:获取Queue的对象
        self.task = self.m.get_task_queue()
        self.result = self.m.get_result_queue()
        # 初始化网页下载器和解析器
        self.downloader = HtmlDownloader()
        self.parser = HtmlParser()
        print "[*]Init finished."

    def crawl(self):
        while True:
            try:
                if not self.task.empty():
                    url = self.task.get()

                    if url == 'end':
                        print "[*]Control Node informs all the Spider Nodes stop working."
                        # 接着通知其它节点停止工作
                        self.result.put({'new_urls':'end', 'data':'end'})
                        return
                    print "[*]The Spider Node is parsing: %s" % url.encode('utf-8')
                    content = self.downloader.download(url)
                    new_urls, data = self.parser.parser(url, content)
                    self.result.put({'new_urls':new_urls, 'data':data})
            except EOFError, e:
                print "[-]Fail to connect to the Worker Node."
                return
            except Exception, e:
                print e
                print "[-]Crawl failed."

if __name__ == '__main__':
    spider = SpiderWorker()
    spider.crawl()
HtmlDownloader.py:
#coding=utf-8
import requests

class HtmlDownloader(object):
    def download(self, url):
        if url is None:
            return None
        user_agent = "Mozilla/4.0 (compatible; MSIE 5.5; Windows NT)"
        headers = {'User-Agent':user_agent}
        r = requests.get(url, headers=headers)
        if r.status_code == 200:
            r.encoding = 'utf-8'
            return r.text
        return None
HtmlParser.py:
#coding=utf-8
import re
import urlparse
from bs4 import BeautifulSoup as BS

class HtmlParser(object):
    def parser(self, page_url, html_cont):
        if page_url is None or html_cont is None:
            return
        soup = BS(html_cont, 'html.parser', from_encoding='utf-8')
        new_urls = self._get_new_urls(page_url, soup)
        new_data = self._get_new_data(page_url, soup)
        return new_urls, new_data

    def _get_new_urls(self, page_url, soup):
        new_urls = set()
        # 抽取符合要求的a标签
        links = soup.find_all('a', href=re.compile(r'/item/.*'))
        for link in links:
            # 提取href属性
            new_url = link['href']
            # 拼接成完整网址
            new_full_url = urlparse.urljoin(page_url, new_url)
            new_urls.add(new_full_url)
        return new_urls

    def _get_new_data(self, page_url, soup):
        data = {}
        data['url'] = page_url
        title = soup.find('dd', class_='lemmaWgt-lemmaTitle-title').find('h1')
        data['title'] = title.get_text()
        summary = soup.find('div', class_='lemma-summary')
        # 获取到tag中包含的所有文版内容包括子孙tag中的内容,并将结果作为Unicode字符串返回
        data['summary'] = summary.get_text()
        return data
为了更方便查看结果,就直接设置爬取超过20条URL信息后就停止爬虫任务:


Redis:
Redis是一个开源的使用ANSI C语言编写、支持网络、可基于内存亦可持久化的日志型、Key-Value数据库,并提供多种语言的API。
Redis服务默认连接端口是6379,在Linux中配置文件为redis.conf。
在Kali中是默认安装启动了的:

连接Redis服务的命令:redis-cli -h host -p port -a password
由于该Redis是在Kali本机安装且没有设置密码,则直接使用redis-cli命令即可。
Redis的5种数据类型:
1、string类型:
可以包含任何数据,一个key对应一个value。

2、hash类型:
是一个string类型的field和value的映射表,适合用于存储对象。

hmset较hset相比可设置多个field值。
3、list类型:
一个双向键表,每个元素都是string类型,可以使用push、pull等操作从链表的头部或尾部添加或删除元素。

lrange从指定位置起取出元素。
4、set类型:
是string类型的无序集合,通过hash table实现。

5、sorted set类型:
在set类型的基础上添加了一个顺序属性,会关联一个double类型的score。

Python与Redis交互:
安装Redis库:pip install redis
直接指定主机和端口建立连接:

也可以使用连接池管理Redis的连接,避免每次建立和释放连接的开销:

Scrapy_redis:
安装好Scrapy后,直接安装Scrapy_redis即可:pip install scrapy_redis
然后再到Scrapy项目的settings.py中配置Redis即可:

Scrapy_redis分布式爬虫:
Scrapy继承Redis,通过安装scrapy-redis组件实现,主要是将Request队列放到了Redis中,使得多台单机可以通过Redis获取Request来实现分布式,同时将要存储的结构化数据存到Redis队列中。
安装scrapy-redis:pip install scrapy_redis
安装完成之后还需要到settings.py中配置:

这里以爬取云起书院的书库http://yunqi.qq.com/bk作为示例,包括每本小说的名称、作者、分类、状态、更新时间、字数、点击量、人气和推荐等数据:


首先创建爬虫:

scrapy genspider [-t template] <name> <domain>命令可以在当前项目中创建spider,是一种快捷创建spider的方法。
接着定义Item,因为访问时是分为两部分的,因而主要定义两个,一个是文章列表中小说的基本信息,另一个是具体的小说的热度等信息:
items.py:
# -*- coding: utf-8 -*-

# Define here the models for your scraped items
#
# See documentation in:
# http://doc.scrapy.org/en/latest/topics/items.html

import scrapy


class YunqiBookListItem(scrapy.Item):
	# define the fields for your item here like:
	# 小说ID
	novelId = scrapy.Field()
	# 小说名
	novelName = scrapy.Field()
	# 链接
	novelLink = scrapy.Field()
	# 作者
	novelAuthor = scrapy.Field()
	# 类型
	novelType = scrapy.Field()
	# 小说状态
	novelStatus = scrapy.Field()
	# 更新时间
	novelUpdateTime = scrapy.Field()
	# 字数
	novelWords = scrapy.Field()
	# 小说封面
	novelImageUrl = scrapy.Field()

class YunqiBookDetailItem(scrapy.Item):
	# define the fields for your item here like:
	# 小说ID
	novelId = scrapy.Field()
	# 小说标签
	novelLabel = scrapy.Field()
	# 总点击量
	novelAllClick = scrapy.Field()
	# 月点击量
	novelMonthClick = scrapy.Field()
	# 周点击量
	novelWeekClick = scrapy.Field()
	# 总人气
	novelAllPopular = scrapy.Field()
	# 月人气
	novelMonthPopular = scrapy.Field()
	# 周人气
	novelWeekPopular = scrapy.Field()
	# 评论数
	novelCommentNum = scrapy.Field()
	# 总推荐
	novelAllComm = scrapy.Field()
	# 月推荐
	novelMonthComm = scrapy.Field()
	# 周推荐
	novelWeekComm = scrapy.Field()
解析页面编写爬虫模块:

可以看到翻页链接的正则表达式可以写为:“/bk/so2/n10p\d+”,并在rules中定义该规则。
每页小说数量:.//div[@class="book"]
在每一页的books的xpath节点的基础上再进行选择:

得出各个元素的xpath表达式:
小说封面:./a/img/@src
小说ID:./div[@class='book_info']/h3/a/@id
小说名:./div[@class='book_info']/h3/a/text()
链接:./div[@class='book_info']/h3/a/@href

先找当前小说简介框内的所有结点:./div[@class='book_info']/dl/dd[@class='w_auth']
然后判断该结点的数量是否等于5,有则从当前xpath结点出发逐个寻找对应的元素值:
作者:./a/text()
类别:./a/text()
状态:./text()
更新时间:./text()
字数:./text()
接着分析具体小说页面的内容:


得到各元素的xpath表达式:
标签:.//div[@class='tages']/text()
总点击:.//div[@id='novelInfo']/table/tr[2]/td[1]/text()
总人气:.//div[@id='novelInfo']/table/tr[2]/td[2]/text()
总推荐:.//div[@id='novelInfo']/table/tr[2]/td[3]/text()
月点击:.//div[@id='novelInfo']/table/tr[3]/td[1]/text()
月人气:.//div[@id='novelInfo']/table/tr[3]/td[2]/text()
月推荐:.//div[@id='novelInfo']/table/tr[3]/td[3]/text()
周点击:.//div[@id='novelInfo']/table/tr[4]/td[1]/text()
周人气:.//div[@id='novelInfo']/table/tr[4]/td[2]/text()
周推荐:.//div[@id='novelInfo']/table/tr[4]/td[3]/text()
评论数:.//*[@id='novelInfo_commentCount']/text()
期间爬取评论数时会爬取到0,查看源代码也是0,但页面显示以及查看元素显示的都是160,可以推测该值是经过JS渲染生成的:

可以使用webdriver来加载页面再解析的,这里为了方便就直接将评论数为0当成是正常数据来获取吧。
yunqi_qq_com.py:
# -*- coding: utf-8 -*-
import scrapy
from scrapy.linkextractors import LinkExtractor
from scrapy.spiders import CrawlSpider, Rule

from yunqiCrawl.items import YunqiBookListItem, YunqiBookDetailItem

class YunqiQqComSpider(CrawlSpider):
    name = 'yunqi.qq.com'
    allowed_domains = ['yunqi.qq.com']
    start_urls = ['http://yunqi.qq.com/bk/so2/n10p1']

    #
    rules = (
        Rule(LinkExtractor(allow=r'/bk/so2/n10p\d+'), callback='parse_book_list', follow=True),
    )

    def parse_book_list(self, response):
        books = response.xpath(".//div[@class='book']")
        for book in books:
            novelImageUrl = book.xpath("./a/img/@src").extract_first()
            novelId = book.xpath("./div[@class='book_info']/h3/a/@id").extract_first()
            novelName = book.xpath("./div[@class='book_info']/h3/a/text()").extract_first()
            novelLink = book.xpath("./div[@class='book_info']/h3/a/@href").extract_first()
            novelInfo = book.xpath("./div[@class='book_info']/dl/dd[@class='w_auth']")
            if len(novelInfo) == 5:
                novelAuthor = novelInfo[0].xpath("./a/text()").extract_first()
                novelType = novelInfo[1].xpath("./a/text()").extract_first()
                novelStatus = novelInfo[2].xpath("./text()").extract_first()
                novelUpdateTime = novelInfo[3].xpath("./text()").extract_first()
                novelWords = novelInfo[4].xpath("./text()").extract_first()
            else:
                novelAuthor = ''
                novelType = ''
                novelStatus = ''
                novelUpdateTime = ''
                novelWords = 0

            bookListItem = YunqiBookListItem(novelId=novelId, novelName=novelName,
                novelLink=novelLink, novelType=novelType,
                novelStatus=novelStatus, novelAuthor=novelAuthor,
                novelWords=novelWords, novelUpdateTime=novelUpdateTime, novelImageUrl=novelImageUrl)
            yield bookListItem

            request = scrapy.Request(url=novelLink, callback=self.parse_book_detail)
            request.meta['novelId'] = novelId
            yield request


    def parse_book_detail(self, response):
        novelId = response.meta['novelId']
        novelLabel = response.xpath(".//div[@class='tags']/text()").extract_first()

        novelAllClick = response.xpath(".//div[@id='novelInfo']/table/tr[2]/td[1]/text()").extract_first()
        novelMonthClick = response.xpath(".//div[@id='novelInfo']/table/tr[3]/td[1]/text()").extract_first()
        novelWeekClick = response.xpath(".//div[@id='novelInfo']/table/tr[4]/td[1]/text()").extract_first()

        novelAllPopular = response.xpath(".//div[@id='novelInfo']/table/tr[2]/td[2]/text()").extract_first()
        novelMonthPopular = response.xpath(".//div[@id='novelInfo']/table/tr[3]/td[2]/text()").extract_first()
        novelWeekPopular = response.xpath(".//div[@id='novelInfo']/table/tr[4]/td[2]/text()").extract_first()

        novelAllComm = response.xpath(".//div[@id='novelInfo']/table/tr[2]/td[3]/text()").extract_first()
        novelMonthComm = response.xpath(".//div[@id='novelInfo']/table/tr[3]/td[3]/text()").extract_first()
        novelWeekComm = response.xpath(".//div[@id='novelInfo']/table/tr[4]/td[3]/text()").extract_first()

        novelCommentNum = response.xpath(".//*[@id='novelInfo_commentCount']/text()").extract_first()

        bookDetailItem = YunqiBookDetailItem(novelId=novelId, novelLabel=novelLabel,
            novelAllClick=novelAllClick, novelAllPopular=novelAllPopular,
            novelAllComm=novelAllComm, novelMonthClick=novelMonthClick,
            novelMonthPopular=novelMonthPopular, novelMonthComm=novelMonthComm,
            novelWeekClick=novelWeekClick, novelWeekPopular=novelWeekPopular,
            novelWeekComm=novelWeekComm, novelCommentNum=novelCommentNum)
        yield bookDetailItem
接着编写pipelines.py,分成两个集合实现Item到MongoDB集群的存储,并加入数据清洗操作:
# -*- coding: utf-8 -*-

# Define your item pipelines here
#
# Don't forget to add your pipeline to the ITEM_PIPELINES setting
# See: http://doc.scrapy.org/en/latest/topics/item-pipeline.html
import pymongo
import re

from yunqiCrawl.items import YunqiBookListItem

class YunqicrawlPipeline(object):
    def __init__(self, mongo_uri, mongo_db, replicaset):
        self.mongo_uri = mongo_uri
        self.mongo_db = mongo_db
        self.replicaset = replicaset

    @classmethod
    def from_crawler(cls, crawler):
        return cls(
            mongo_uri = crawler.settings.get('MONGO_URI'),
            mongo_db = crawler.settings.get('MONGO_DATABASE', 'yunqi'),
            replicaset = crawler.settings.get('REPLICASET')
            )

    def open_spider(self, spider):
        self.client = pymongo.MongoClient(self.mongo_uri, replicaset=self.replicaset)
        self.db = self.client[self.mongo_db]

    def close_spider(self, spider):
        self.client.close()

    def process_item(self, item, spider):
        if isinstance(item, YunqiBookListItem):
            self._process_bookList_item(item)
        else:
            self._process_bookDetail_item(item)
        return item

    def _process_bookList_item(self, item):
        self.db.bookInfo.insert(dict(item))

    def _process_bookDetail_item(self, item):
        # 需要对数据进行一下清洗,类似:总字数:10120,提取其中的数字
        pattern = re.compile('\d+')
        # 去掉空格和换行
        item['novelLabel'] = item['novelLabel'].strip().replace('\n', '')

        match = pattern.search(item['novelAllClick'])
        item['novelAllClick'] = match.group() if match else item['novelAllClick']

        match = pattern.search(item['novelMonthClick'])
        item['novelMonthClick'] = match.group() if match else item['novelMonthClick']

        match = pattern.search(item['novelWeekClick'])
        item['novelWeekClick'] = match.group() if match else item['novelWeekClick']

        match = pattern.search(item['novelAllPopular'])
        item['novelAllPopular'] = match.group() if match else item['novelAllPopular']

        match = pattern.search(item['novelMonthPopular'])
        item['novelMonthPopular'] = match.group() if match else item['novelMonthPopular']

        match = pattern.search(item['novelWeekPopular'])
        item['novelWeekPopular'] = match.group() if match else item['novelWeekPopular']

        match = pattern.search(item['novelAllComm'])
        item['novelAllComm'] = match.group() if match else item['novelAllComm']

        match = pattern.search(item['novelMonthComm'])
        item['novelMonthComm'] = match.group() if match else item['novelMonthComm']

        match = pattern.search(item['novelWeekComm'])
        item['novelWeekComm'] = match.group() if match else item['novelWeekComm']

        self.db.bookhot.insert(dict(item))
然后再settings.py中去掉该段注释即可:

接着在settings.py中添加绕过反爬虫的一些机制,如随机选取伪造的User-Agent、禁用cookie以及自动限速等:
RandomUserAgent.py:
#coding=utf-8
import random

class RandomUserAgent(object):
	def __init__(self, agents):
		self.agents = agents

	@classmethod
	def from_crawler(cls, crawler):
		return cls(crawler.settings.getlist('USER_AGENTS'))

	def process_request(self, request, spider):
		request.headers.setdefault('User-Agent', random.choice(self.agents))
激活RandomUserAgent下载器中间件:

禁用cookie,将settings.py中改行注释去掉即可:

自动限速的配置,同样是将相应位置的注释去掉即可:


再在settings.py中添加MongoDB集群的配置以及配置scrapy_redis:


最后运行Redis和MongoDB集群,确保环境配置好后运行爬虫:


可以看到,爬虫运行时是调用了Redis调度的,同时爬取的数据也保存到了MongoDB集群中。
参考自《Python爬虫开发与项目实战》