前言
不知道大家在工作无聊时,有没有一种冲动:总想掏出手机,看看微博热搜在讨论什么有趣的话题,但又不方便直接打开微博浏
览,今天就和大家分享一个有趣的小爬虫,定时采集微博热搜榜&热评,下面让我们来看看具体的实现方法。
页面分析
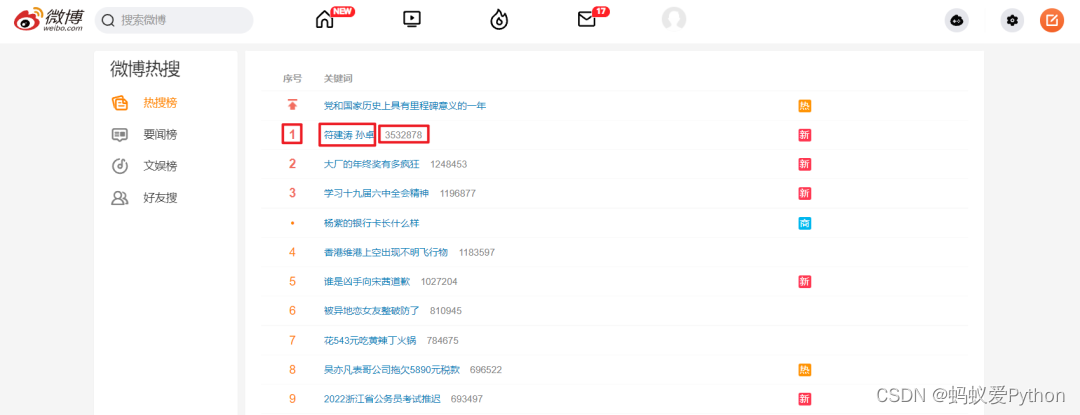
热搜页
热榜首页:https://s.weibo.com/top/summary?cate=realtimehot
热榜首页的榜单中共五十条数据,在这个页面,我们需要获取排行、热度、标题,以及详情页的链接。
我们打开页面后要先 登录,之后使用 F12 打开开发者工具,Ctrl + R 刷新页面后找到第一条数据包。这里需要记录一下自己的
Cookie 与 User-Agent。
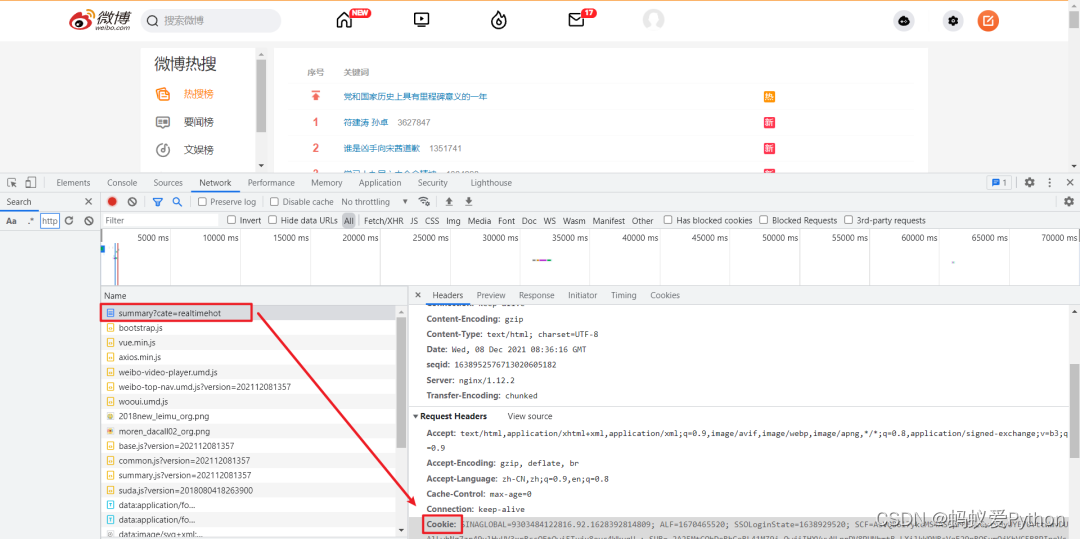
对于标签的定位,直接使用 Google 工具获取标签的 xpath 表达式即可。
详情页
对于详情页,我们需要获取评论时间、用户名称、转发次数、评论次数、点赞次数、评论内容这部分信息。

方法与热搜页采集方式基本相同,下面看看如何用代码实现!
采集代码
首先导入所需要的模块。
python插件/素材/源码加Q群:903971231####
import requests
from time import sleep
import pandas as pd
import numpy as np
from lxml import etree
import re
定义全局变量。
•headers:请求头
•all_df:DataFrame,保存采集的数据
headers = {


    'User-Agent': 'Mozilla/5.0 (Windows NT 10.0; Win64; x64) AppleWebKit/537.36 (KHTML, like Gecko) Chrome/94.0.4606.54 Safari/537.36',
    'Cookie': '''你的Cookie'''
}
all_df = pd.DataFrame(columns=['排行', '热度', '标题', '评论时间', '用户名称', '转发次数', '评论次数', '点赞次数', '评论内容'])


热搜榜采集代码,通过 requests 发起请求,获取详情页链接后,跳转进入详情页采集 get_detail_page。
def get_hot_list(url):
    '''
    微博热搜页面采集,获取详情页链接后,跳转进入详情页采集
    :param url: 微博热搜页链接
    :return: None
    '''
    page_text = requests.get(url=url, headers=headers).text
    tree = etree.HTML(page_text)
    tr_list = tree.xpath('//*[@id="pl_top_realtimehot"]/table/tbody/tr')
    for tr in tr_list:
        parse_url = tr.xpath('./td[2]/a/@href')[0]
        detail_url = 'https://s.weibo.com' + parse_url
        title = tr.xpath('./td[2]/a/text()')[0]
        try:
            rank = tr.xpath('./td[1]/text()')[0]
            hot = tr.xpath('./td[2]/span/text()')[0]
        except:
            rank = '置顶'
            hot = '置顶'
        get_detail_page(detail_url, title, rank, hot)
根据详情页链接,解析所需页面数据,并保存到全局变量 all_df 中,对于每个热搜只采集热评前三条,热评不够则跳过。
def get_detail_page(detail_url, title, rank, hot):
    '''
    根据详情页链接,解析所需页面数据,并保存到全局变量 all_df
    :param detail_url: 详情页链接
    :param title: 标题
    :param rank: 排名
    :param hot: 热度
    :return: None
    '''
    global all_df
    try:
        page_text = requests.get(url=detail_url, headers=headers).text
    except:
        return None
    tree = etree.HTML(page_text)
    result_df = pd.DataFrame(columns=np.array(all_df.columns))
    # 爬取3条热门评论信息
    for i in range(1, 4):
        try:
            comment_time = tree.xpath(f'//*[@id="pl_feedlist_index"]/div[4]/div[{

      i}]/div[2]/div[1]/div[2]/p[1]/a/text()')[0]
            comment_time = re.sub('\s','',comment_time)
            user_name = tree.xpath(f'//*[@id="pl_feedlist_index"]/div[4]/div[{

      i}]/div[2]/div[1]/div[2]/p[2]/@nick-name')[0]
            forward_count = tree.xpath(f'//*[@id="pl_feedlist_index"]/div[4]/div[{

      i}]/div[2]/div[2]/ul/li[1]/a/text()')[1]
            forward_count = forward_count.strip()
            comment_count = tree.xpath(f'//*[@id="pl_feedlist_index"]/div[4]/div[{

      i}]/div[2]/div[2]/ul/li[2]/a/text()')[0]
            comment_count = comment_count.strip()
            like_count = tree.xpath(f'//*[@id="pl_feedlist_index"]/div[4]/div[{

      i}]/div[2]/div[2]/ul/li[3]/a/button/span[2]/text()')[0]
            comment = tree.xpath(f'//*[@id="pl_feedlist_index"]/div[4]/div[{

      i}]/div[2]/div[1]/div[2]/p[2]//text()')
            comment = ' '.join(comment).strip()
            result_df.loc[len(result_df), :] = [rank, hot, title, comment_time, user_name, forward_count, comment_count, like_count, comment]
        except Exception as e:
            print(e)
            continue
    print(detail_url, title)
    all_df = all_df.append(result_df, ignore_index=True)


调度代码,向 get_hot_list 中传入热搜页的 url ,最后进行保存即可。
if __name__ == '__main__':
    url = 'https://s.weibo.com/top/summary?cate=realtimehot'
    get_hot_list(url)
    all_df.to_excel('工作文档.xlsx', index=False)
   python插件/素材/源码Q群:903971231####
对于采集过程中对于一些可能发生报错的地方,为保证程序的正常运行,都通过异常处理给忽略掉了,整体影响不大!
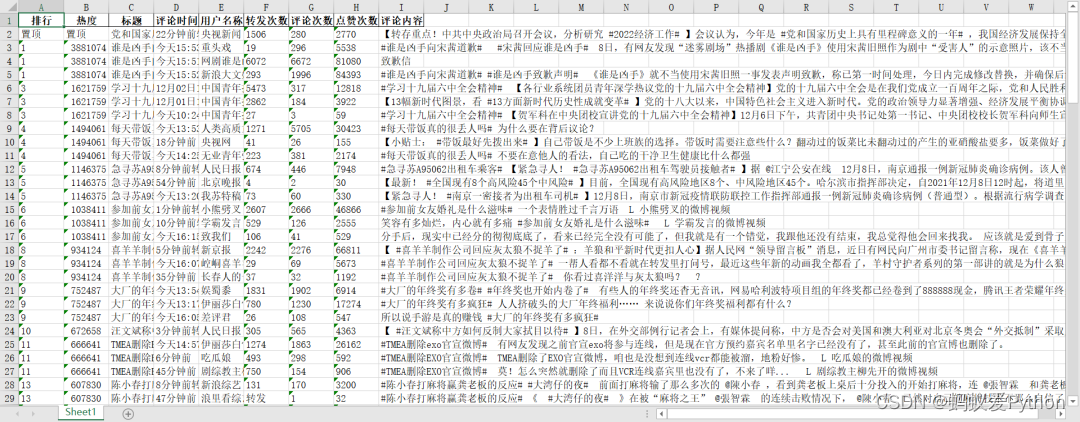
工作文档.xlsx
设置定时运行
至此,采集代码已经完成,想要实现每小时自动运行代码,可以使用「任务计划程序」。
在此之前需要我们简单修改一下上面代码中的Cookie与最后文件的保存路径(建议使用绝对路径),如果在 Jupyter notebook 中运行的需要导出一个 .py 文件
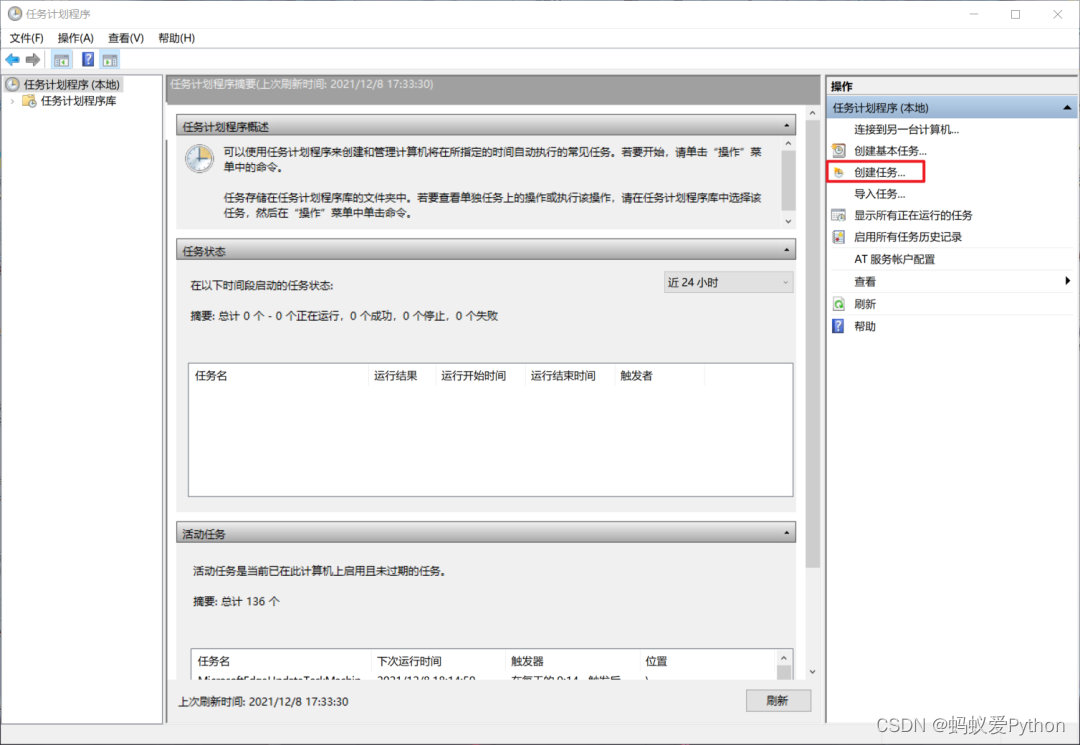
打开任务计划程序,【创建任务】
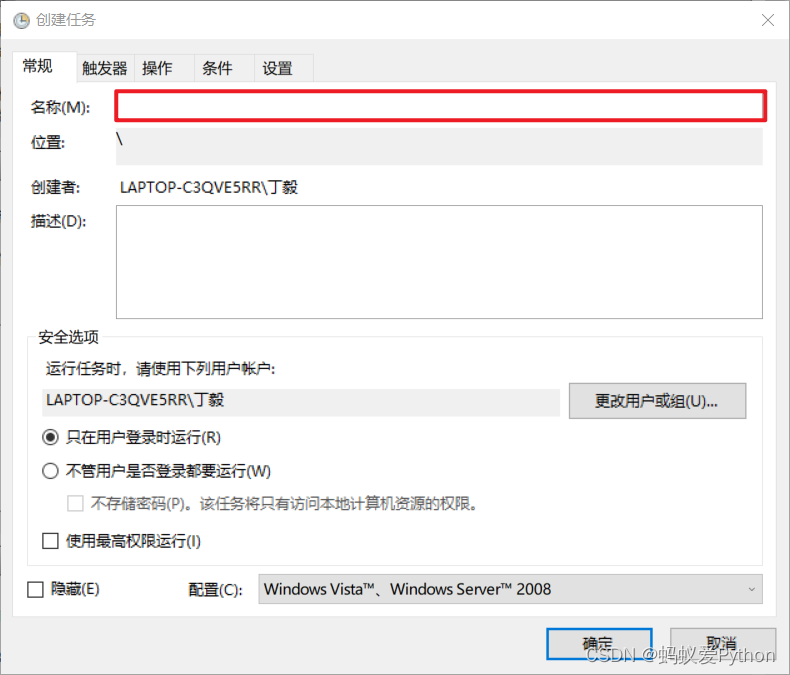
输入名称,名称随便起就好。
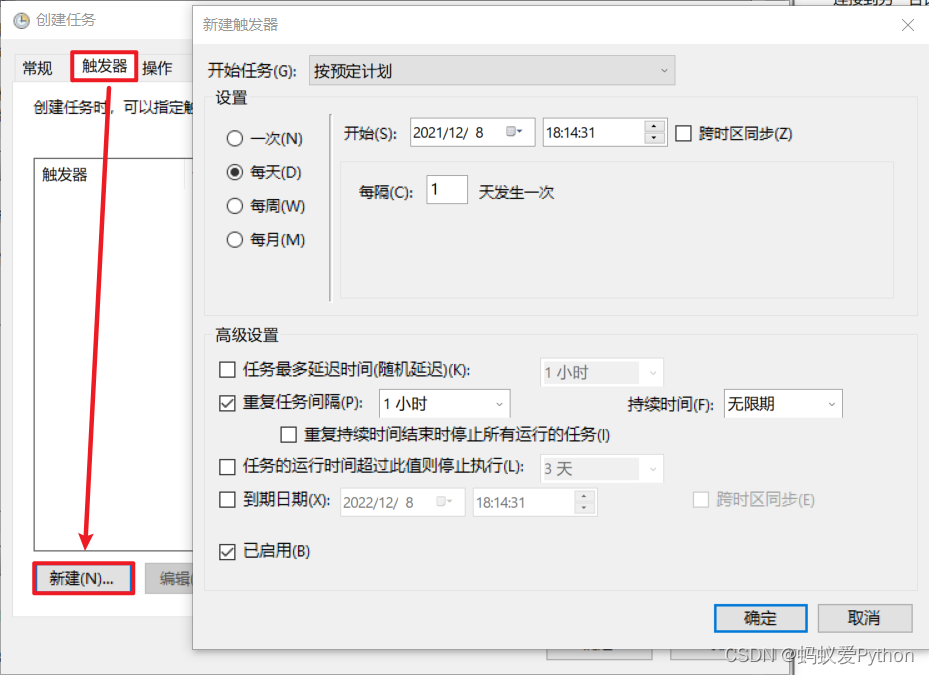
选择【触发器】>>【新建】>>【设置触发时间】
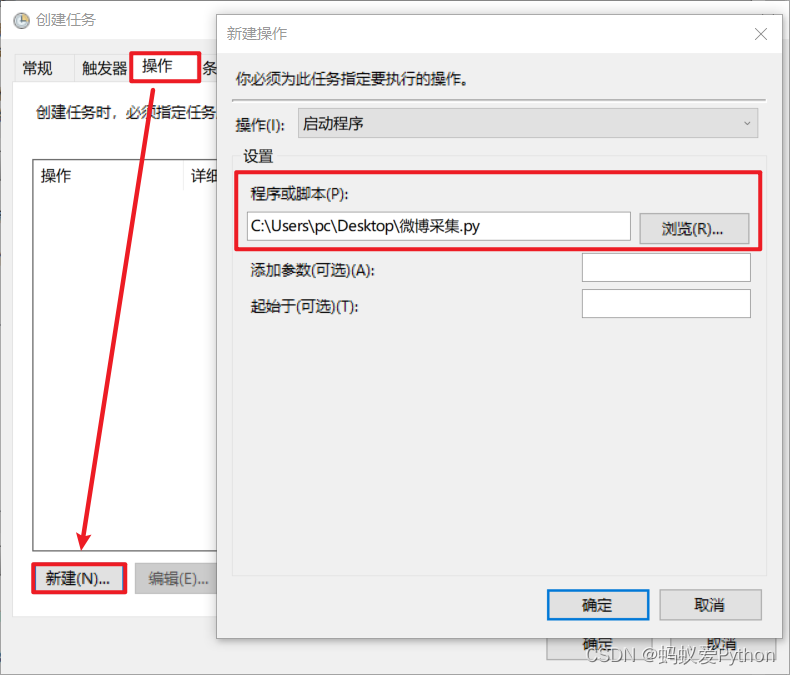
选择【操作】>>【新建】>>【选择程序】
最后确认即可。到时间就会自动运行,或者右键任务手动运行。
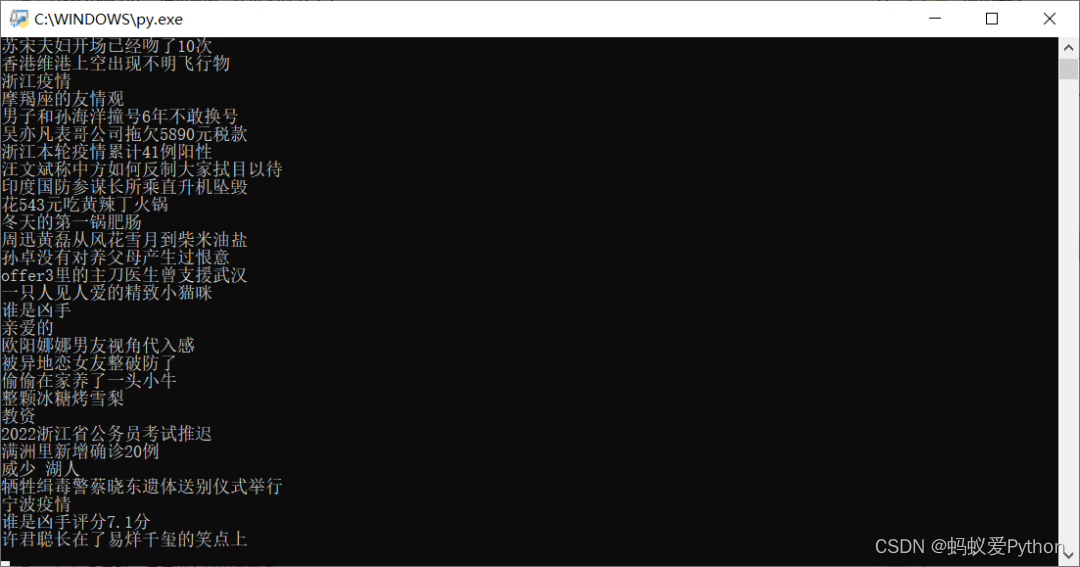
「运行效果」
这就是今天要分享的内容,整体难度不大,希望大家能够有所收获,文章中的代码拼接起来就可以运行,如果有什么问题可以联
系我哦!