本文源码地址
https://download.yutao.co/mydocker/nginx/
创建制作文件夹nginx
mkdir /root/nginx
cd /root/nginx
一键安装nginx脚本
vim one-key-nginx-install.sh
#一键安装nginx的脚本
#!/bin/bash

#解决软件的依赖关系,需要安装的软件包
yum -y install zlib zlib-devel openssl openssl-devel pcre pcre-devel gcc gcc-c++ autoconf automake make psmisc net-tools lsof vim geoip geoip-devel wget -y

#新建luogan用户和组
id  nginx || useradd nginx -s /sbin/nologin

#下载nginx软件
mkdir  /nginx -p
cd /nginx
wget  https://nginx.org/download/nginx-1.21.4.tar.gz

#解压软件
tar xf nginx-1.21.4.tar.gz
#进入解压后的文件夹
cd nginx-1.21.4

#编译前的配置
./configure --prefix=/usr/local/nginx  --user=nginx --group=nginx  --with-http_ssl_module   --with-threads  --with-http_v2_module  --with-http_stub_status_module  --with-stream  --with-http_geoip_module --with-http_gunzip_module --with-http_realip_module --with-http_stub_status_module --with-http_ssl_module

#如果上面的编译前的配置失败,直接退出脚本
if (( $? != 0));then
	exit
fi
#编译
make -j 2
#编译安装
make  install

#修改PATH变量
echo  "PATH=$PATH:/usr/local/nginx/sbin" >>/root/.bashrc
#执行修改了环境变量的脚本
source /root/.bashrc


#firewalld and selinux

#stop firewall和设置下次开机不启动firewalld
service firewalld stop
systemctl disable firewalld

#临时停止selinux和永久停止selinux
#setenforce 0
#sed  -i '/^SELINUX=/ s/enforcing/disabled/' /etc/selinux/config

#开机启动
chmod +x /etc/rc.d/rc.local
echo  "/usr/local/nginx/sbin/nginx" >>/etc/rc.local

#修改nginx.conf的配置,例如:端口号,worker进程数,线程数,服务域名

sed  -i '/worker_processes/ s/1/2/' /usr/local/nginx/conf/nginx.conf
sed  -i  '/worker_connections/ s/1024/2048/' /usr/local/nginx/conf/nginx.conf
sed  -i -r '36c \\tlisten  80;' /usr/local/nginx/conf/nginx.conf
sed  -i -r '37c \\tserver_name www.yutao.co;' /usr/local/nginx/conf/nginx.conf

#killall nginx进程
killall -9 nginx
su
#启动nginx
/usr/local/nginx/sbin/nginx
创建Dockerfile
vim Dockerfile
FROM centos:7
ENV NGINX_VERSION 1.21.4
ENV AUTHOR wangyutao
LABEL maintainer="wangyutao<[email protected]>"
RUN mkdir /wyt_nginx
WORKDIR /wyt_nginx
COPY . /wyt_nginx
RUN set -ex; \
    bash one-key-nginx-install.sh \
    yum install vim -y \
    yum install iputils -y \
    yum install net-tools -y \
ENV PATH=/usr/local/nginx/sbin:$PATH
EXPOSE 80
STOPSIGNAL SIGQUIT
CMD ["nginx","-g","daemon off;"]
创建挂载页面
mkdir web
cd web
vim index.html
>wangyutao
>666
这是我们的三个文件

 docker build -t wyt-nginx:1.0 .
 #制造镜像
docker run -it -dp 8090:80 -v /root/nginx/web:/usr/local/nginx/html --name wyt_nginx_1 wyt-nginx:1.0
#启动容器,使用挂载页面web
浏览器访问192.168.2.248:8090

使用数据卷的方式
docker volume create wyt
#创建数据卷wyt
cd /var/lib/docker/volumes/wyt/_data
#进入数据卷存放目录
cp /root/nginx/web/index.html .
#复制网页到wyt数据卷目录下
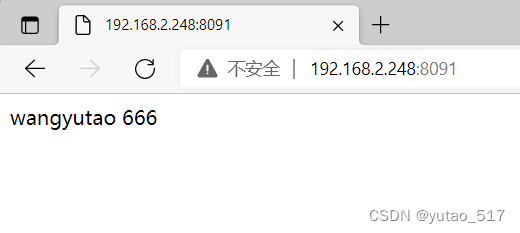
docker run -it -dp 8091:80 --mount source=wyt,target=/usr/local/nginx/html --name wyt_nginx_2 wyt-nginx:1.0
#以挂载数据卷的方式启动
浏览器访问192.168.2.248:8091
进入容器终端
docker exec -it wyt_nginx_2 /bin/bash
可以看到基础命令已安装
